Check Point ClusterXL
A Check Point HA (High Availability) Cluster is a configuration that combines multiple Check Point firewalls to ensure redundancy and improve reliability. In a Check Point HA Cluster, there are two main modes: Active/Standby mode, where one firewall actively handles traffic while the other is on standby to take over if the active unit fails, and Active/Active mode, where both firewalls actively handle traffic, sharing the load to enhance performance and availability.
Active-Standby (High Availability)
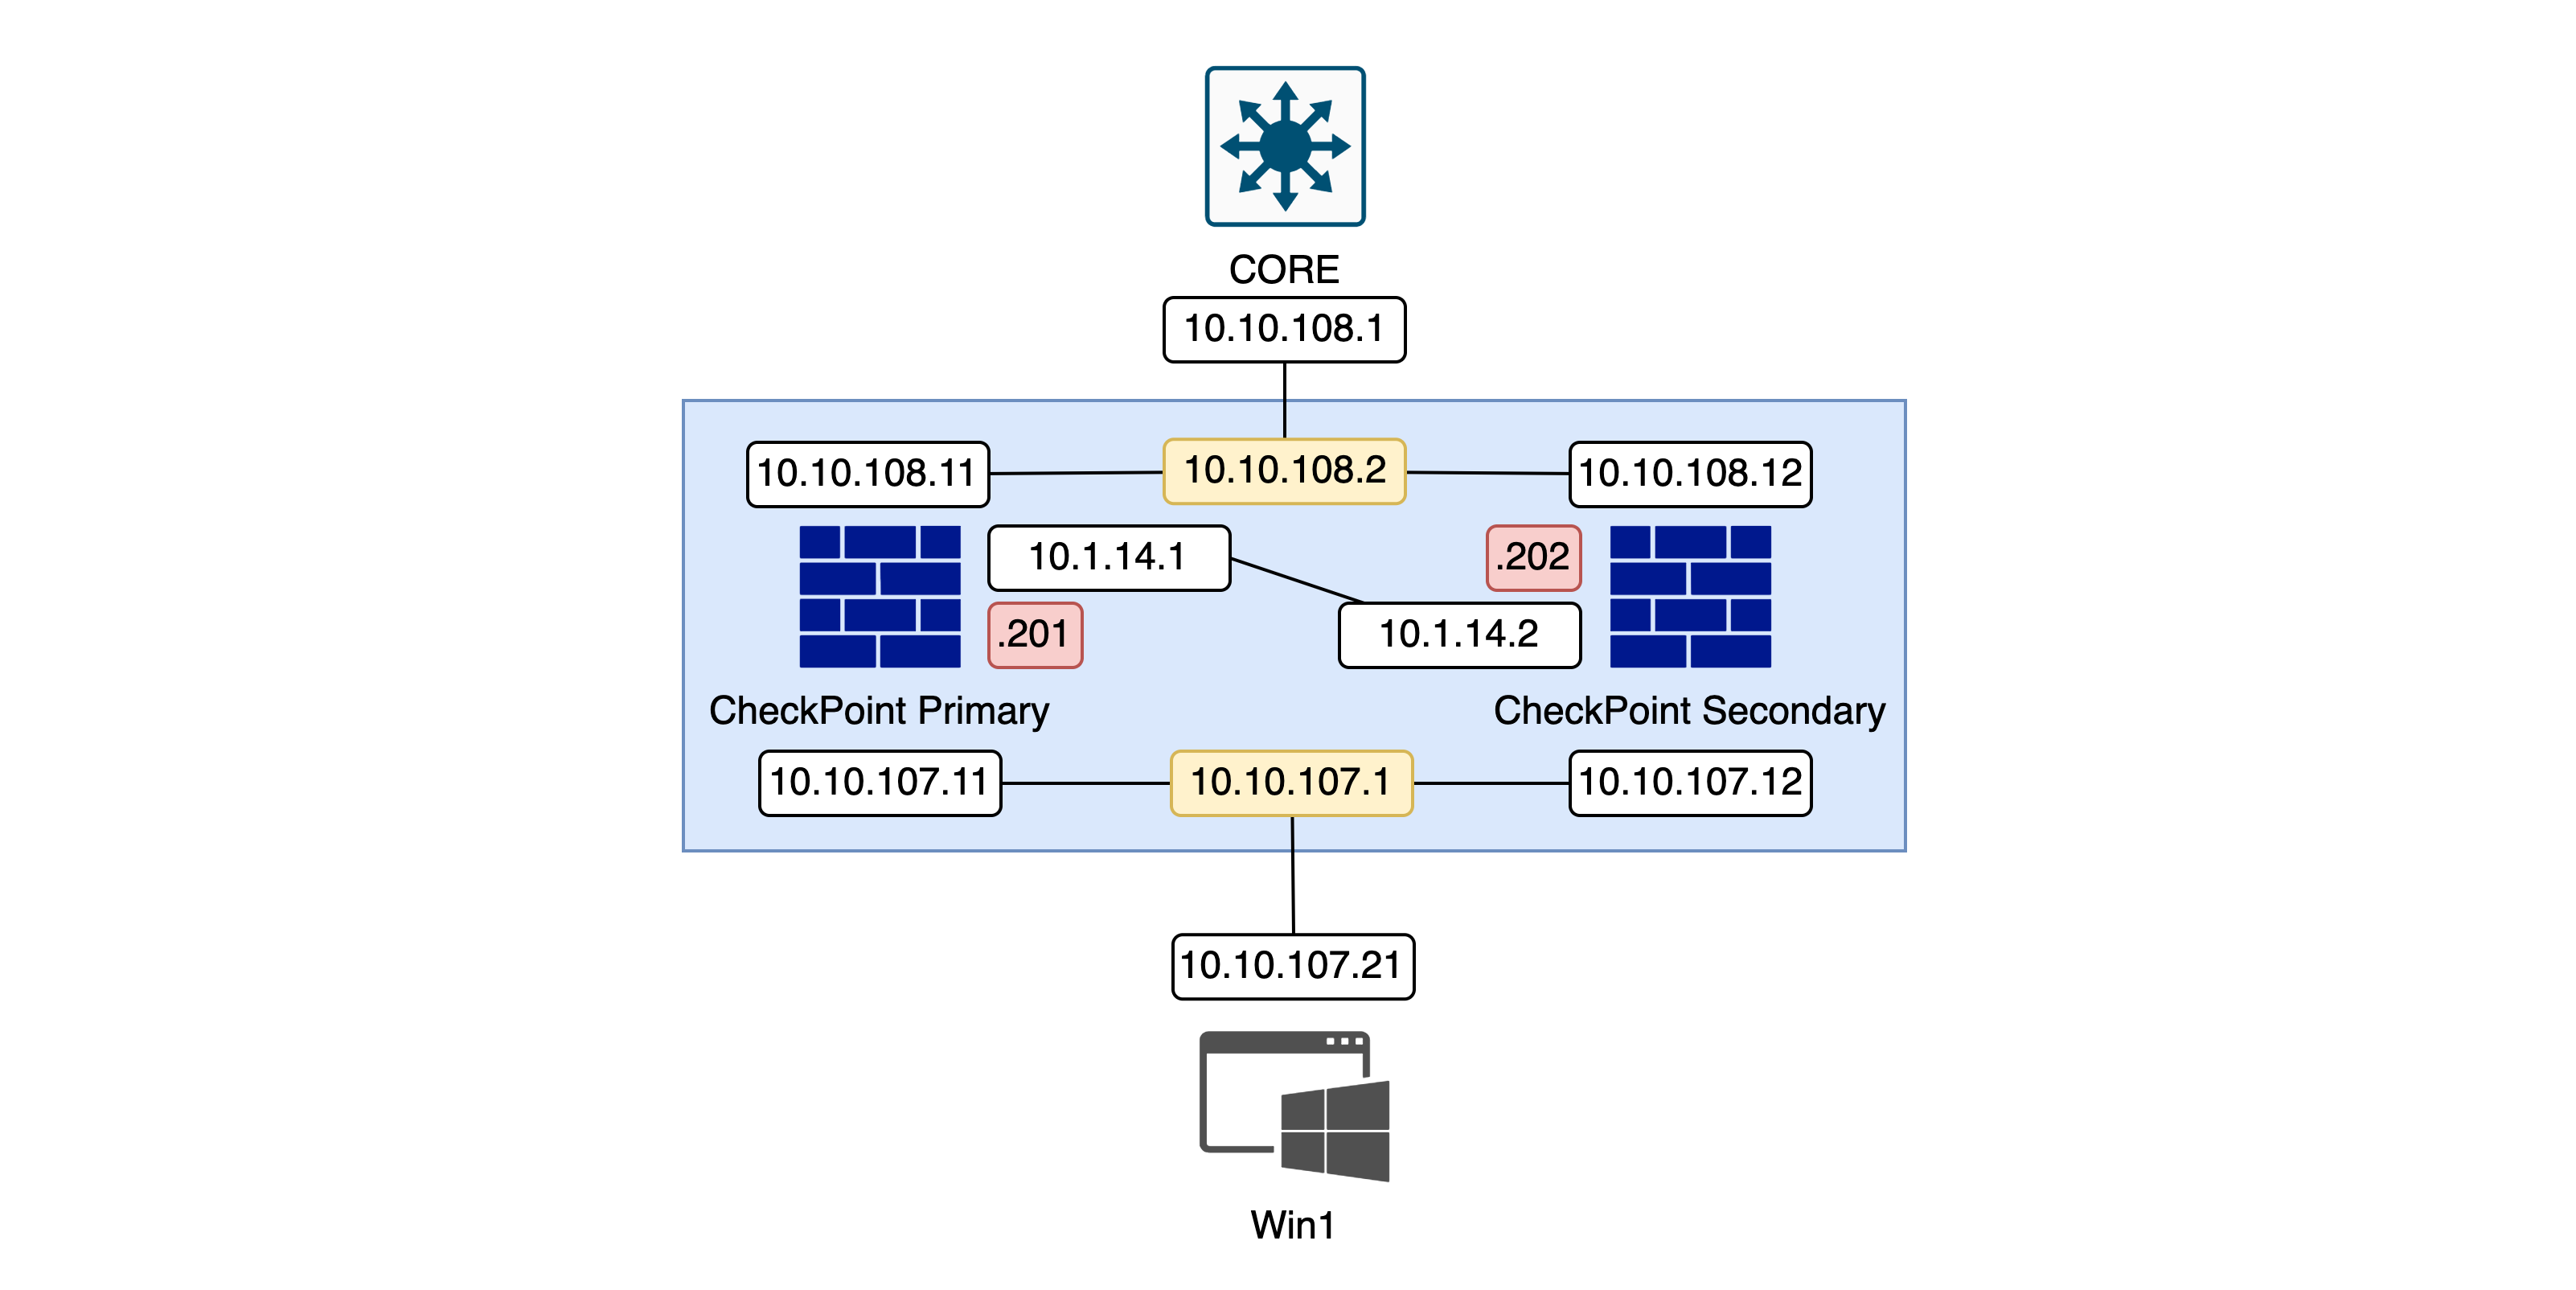
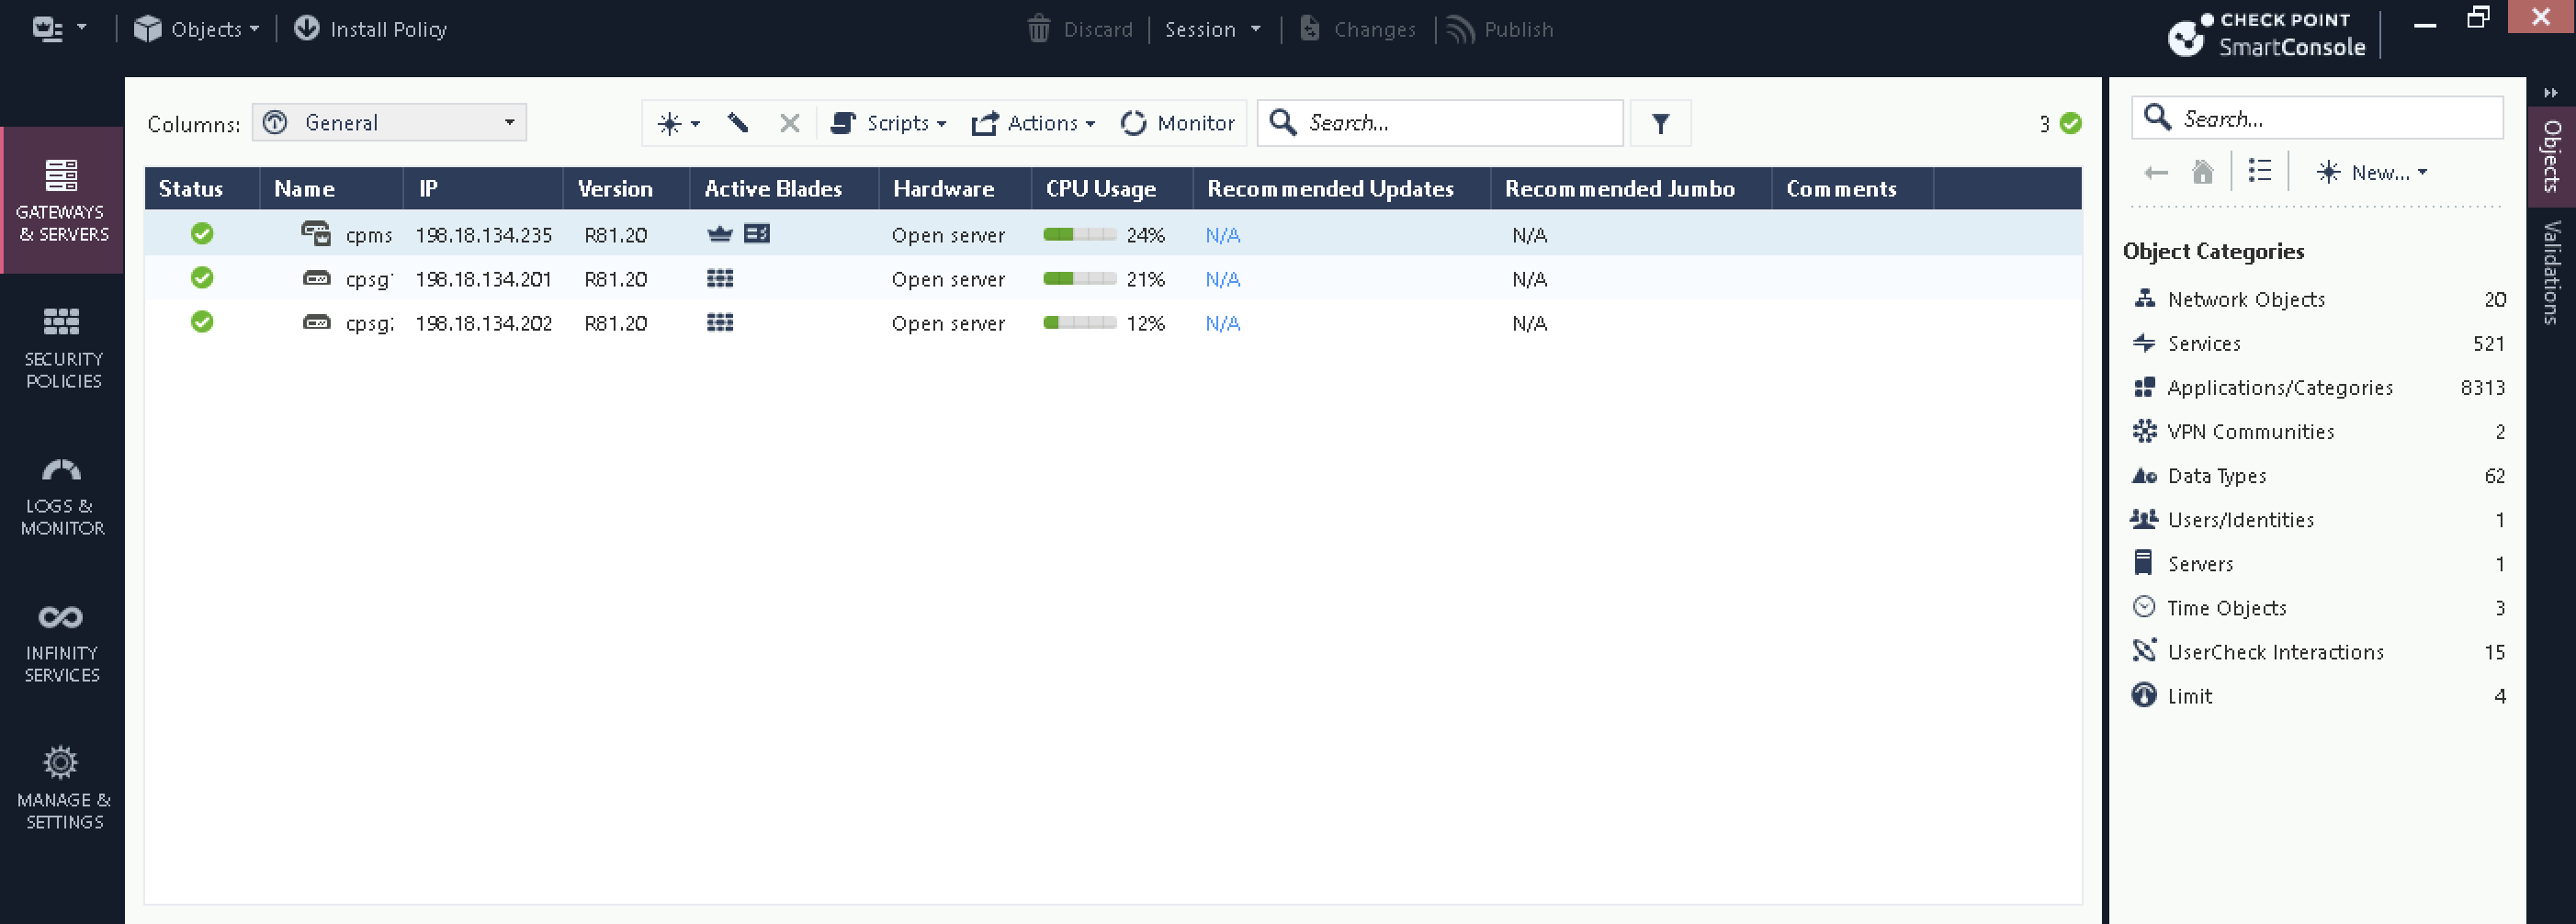
Here we have 2 Checkpoint Firewalls all registered and configured


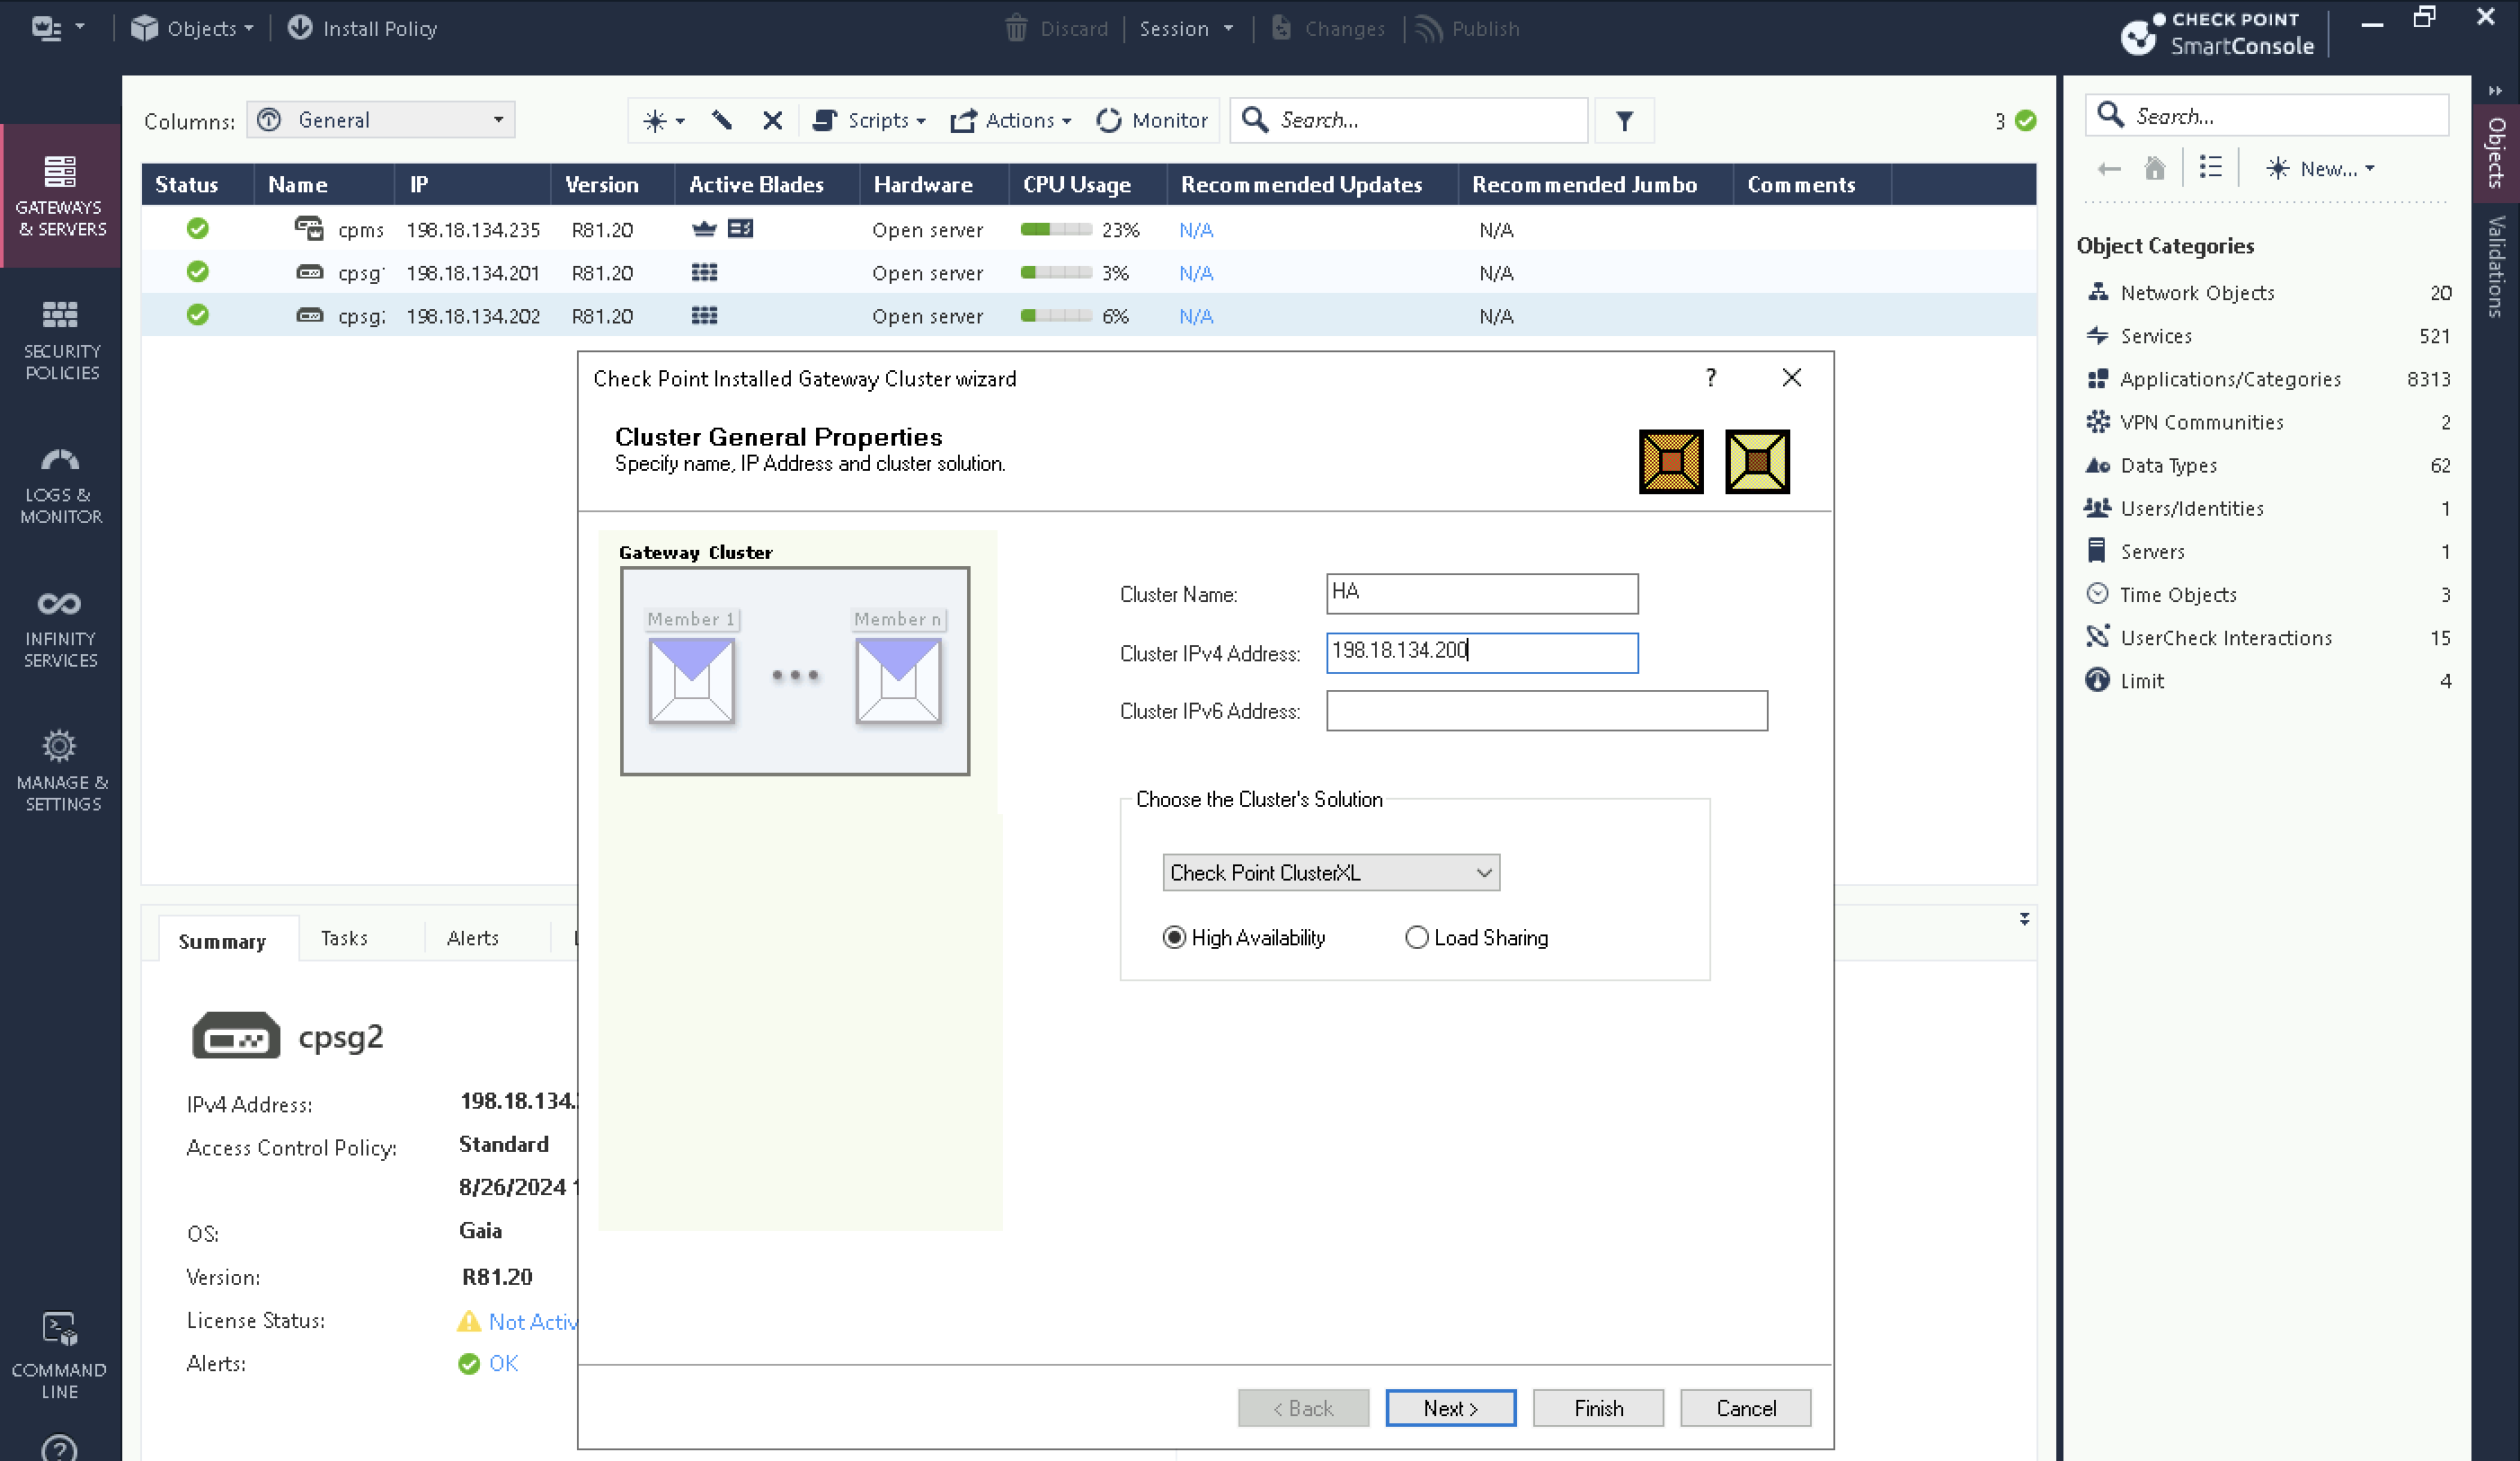
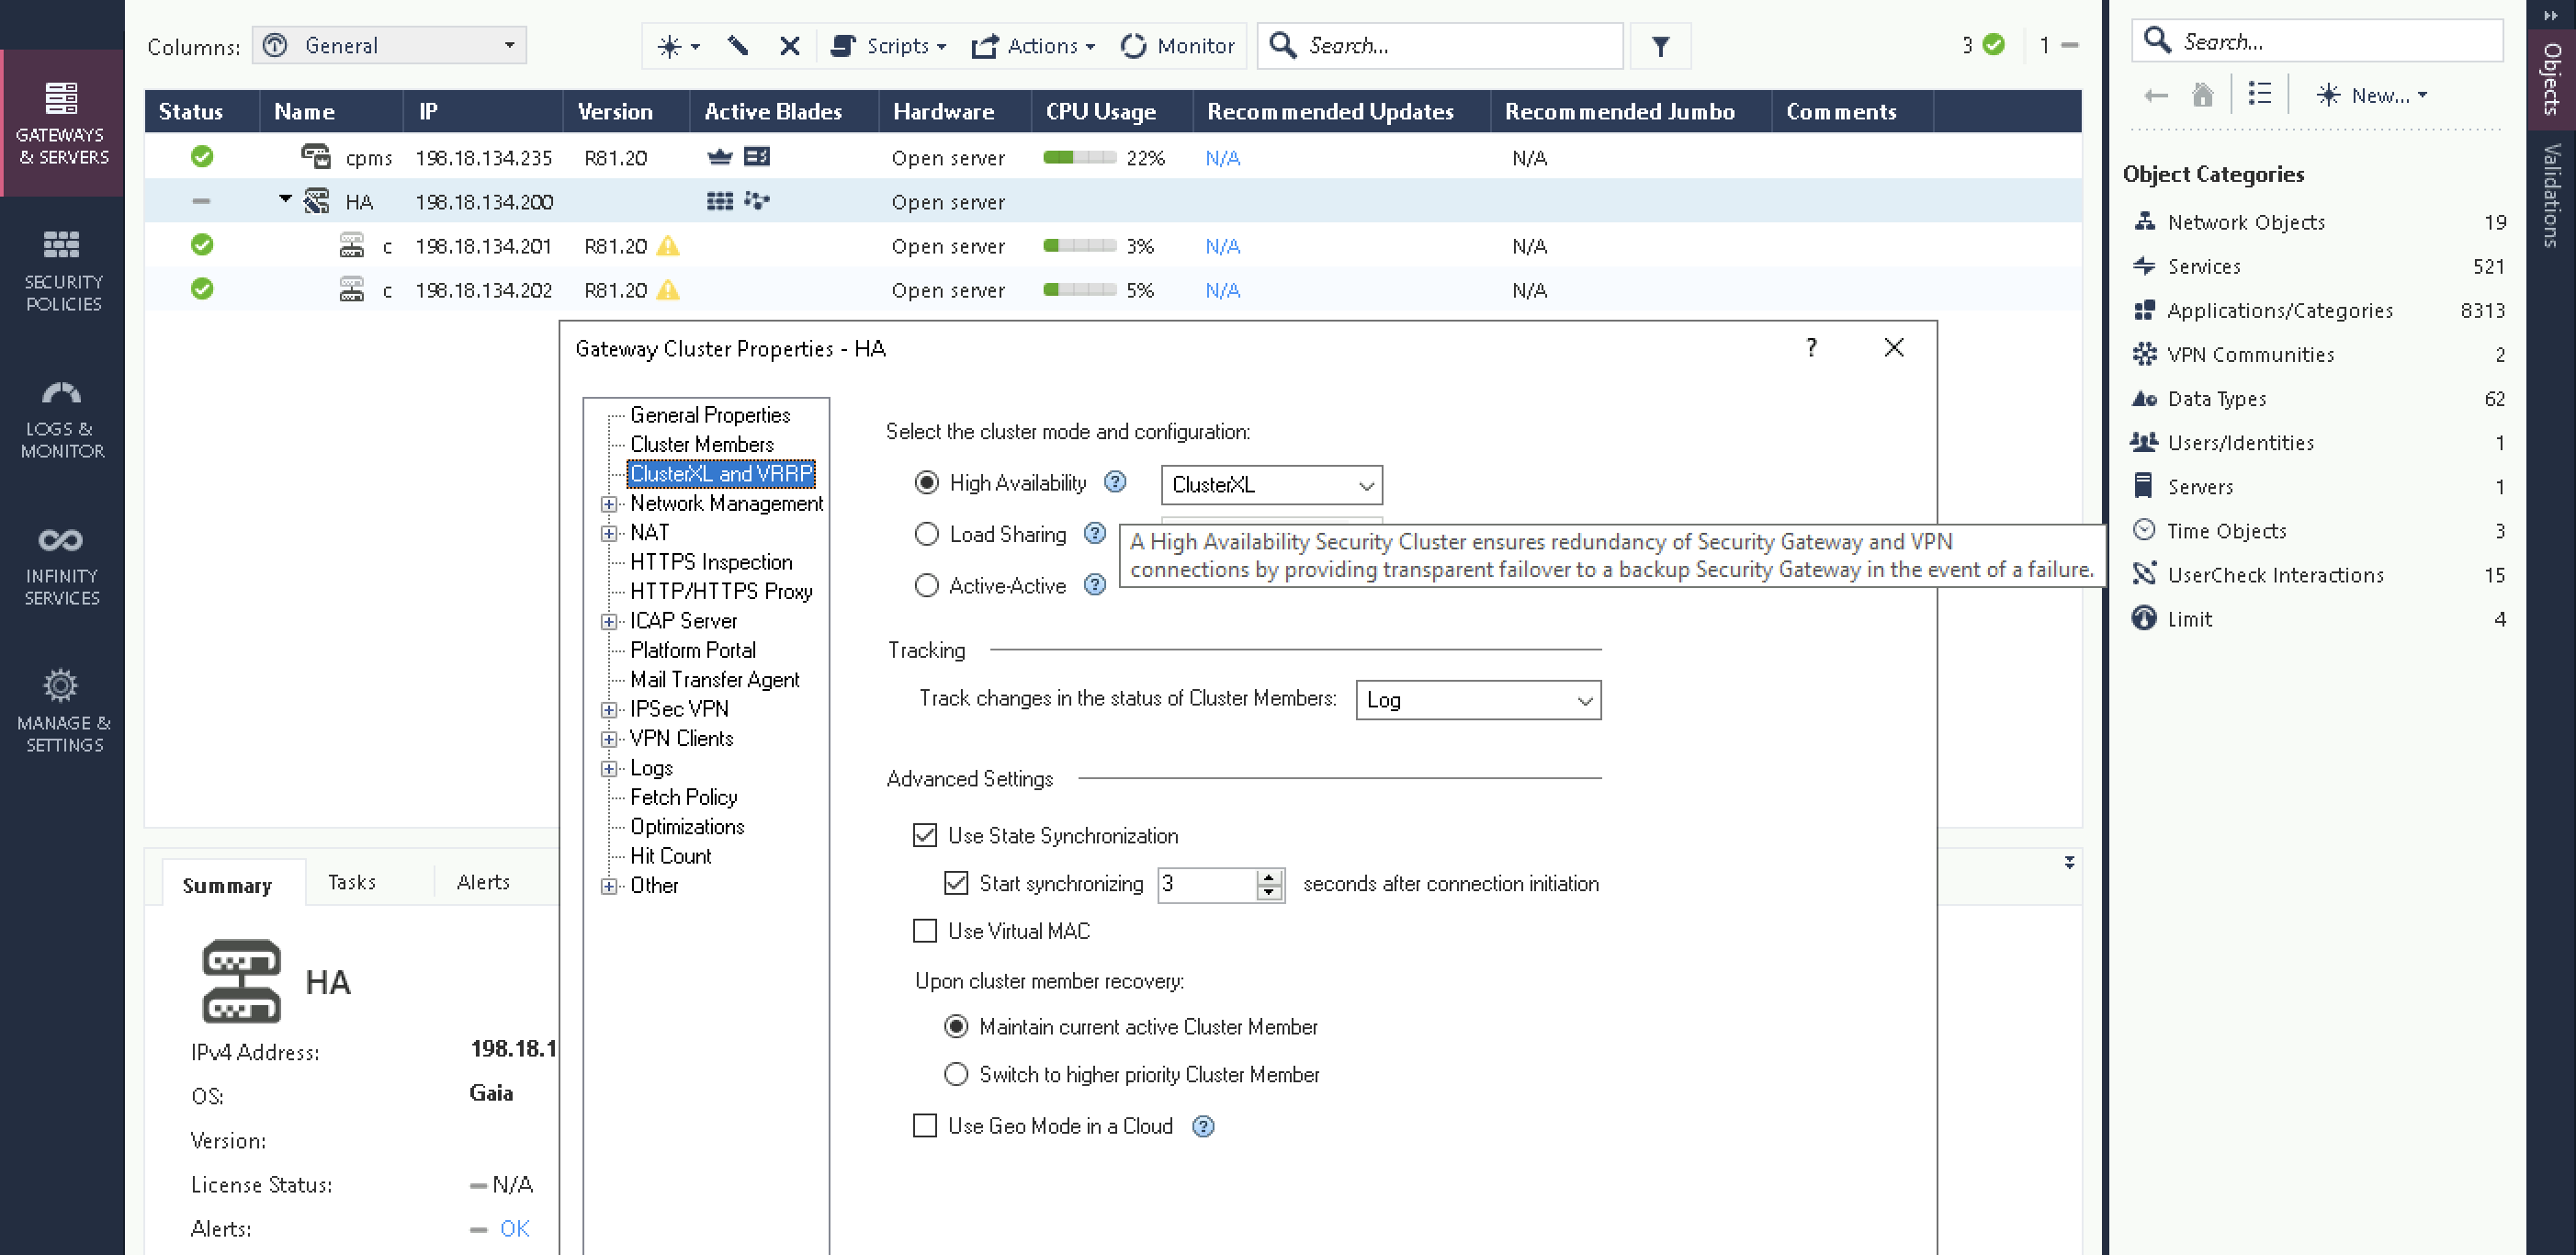
Select New » Cluster, give it cluster name and virtual management address, then select the cluster type which in this case is ClusterXL High Availability
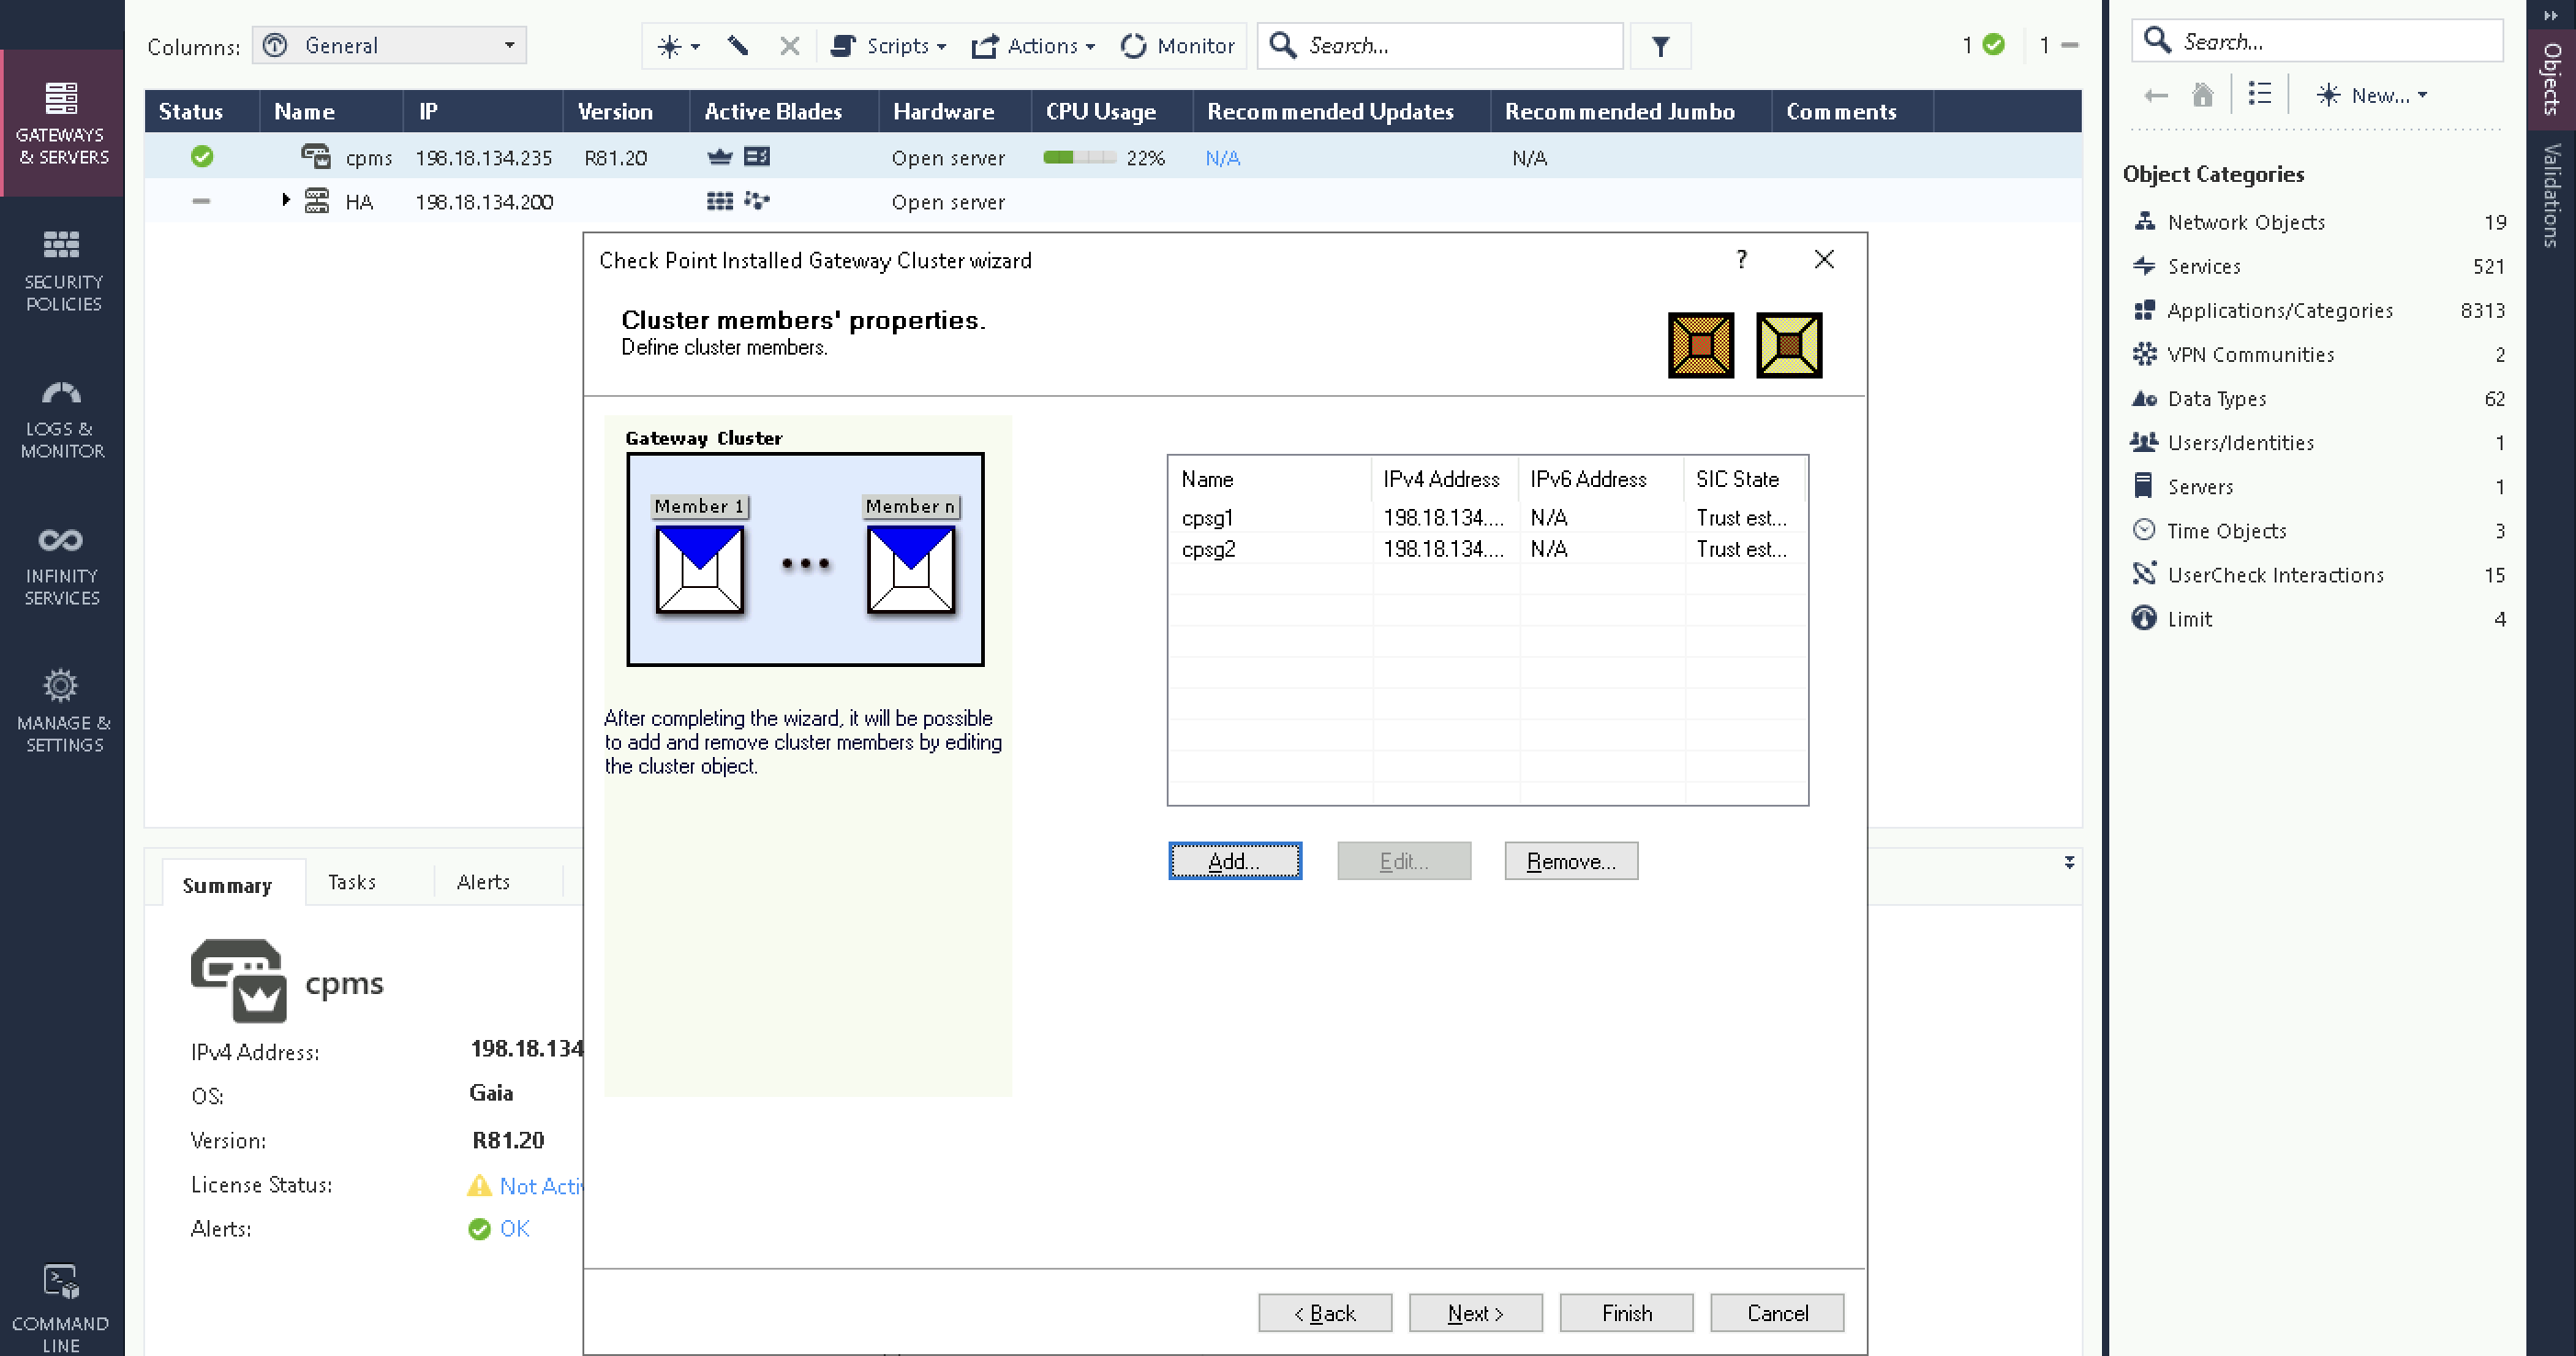
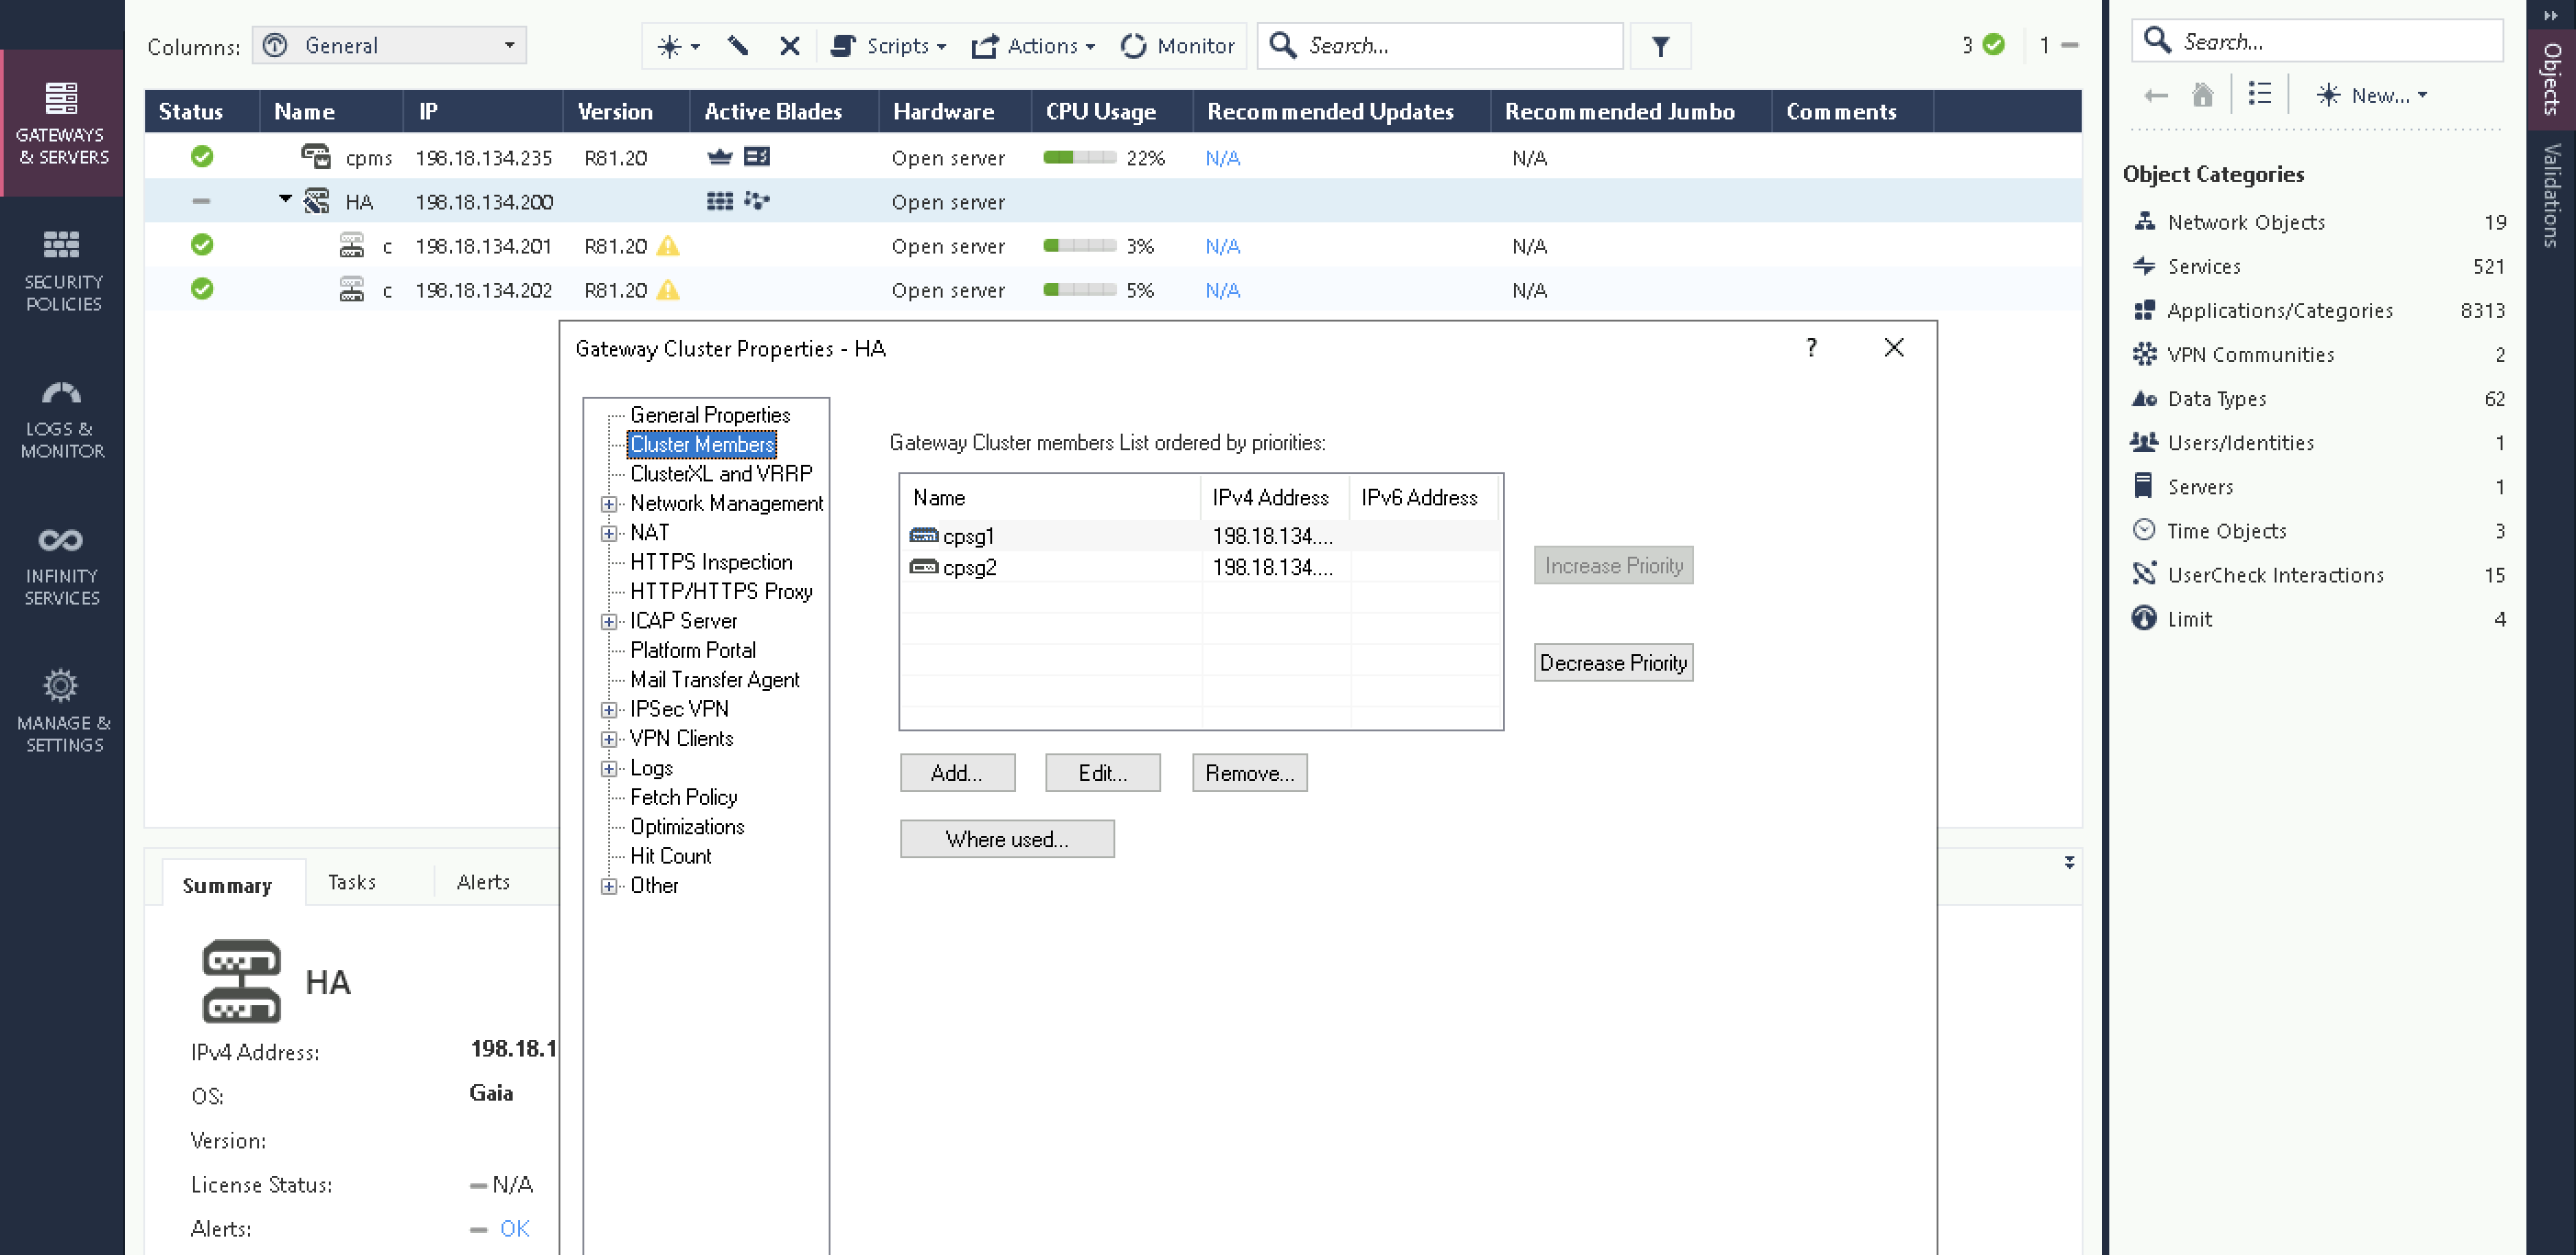
Add both firewalls as members
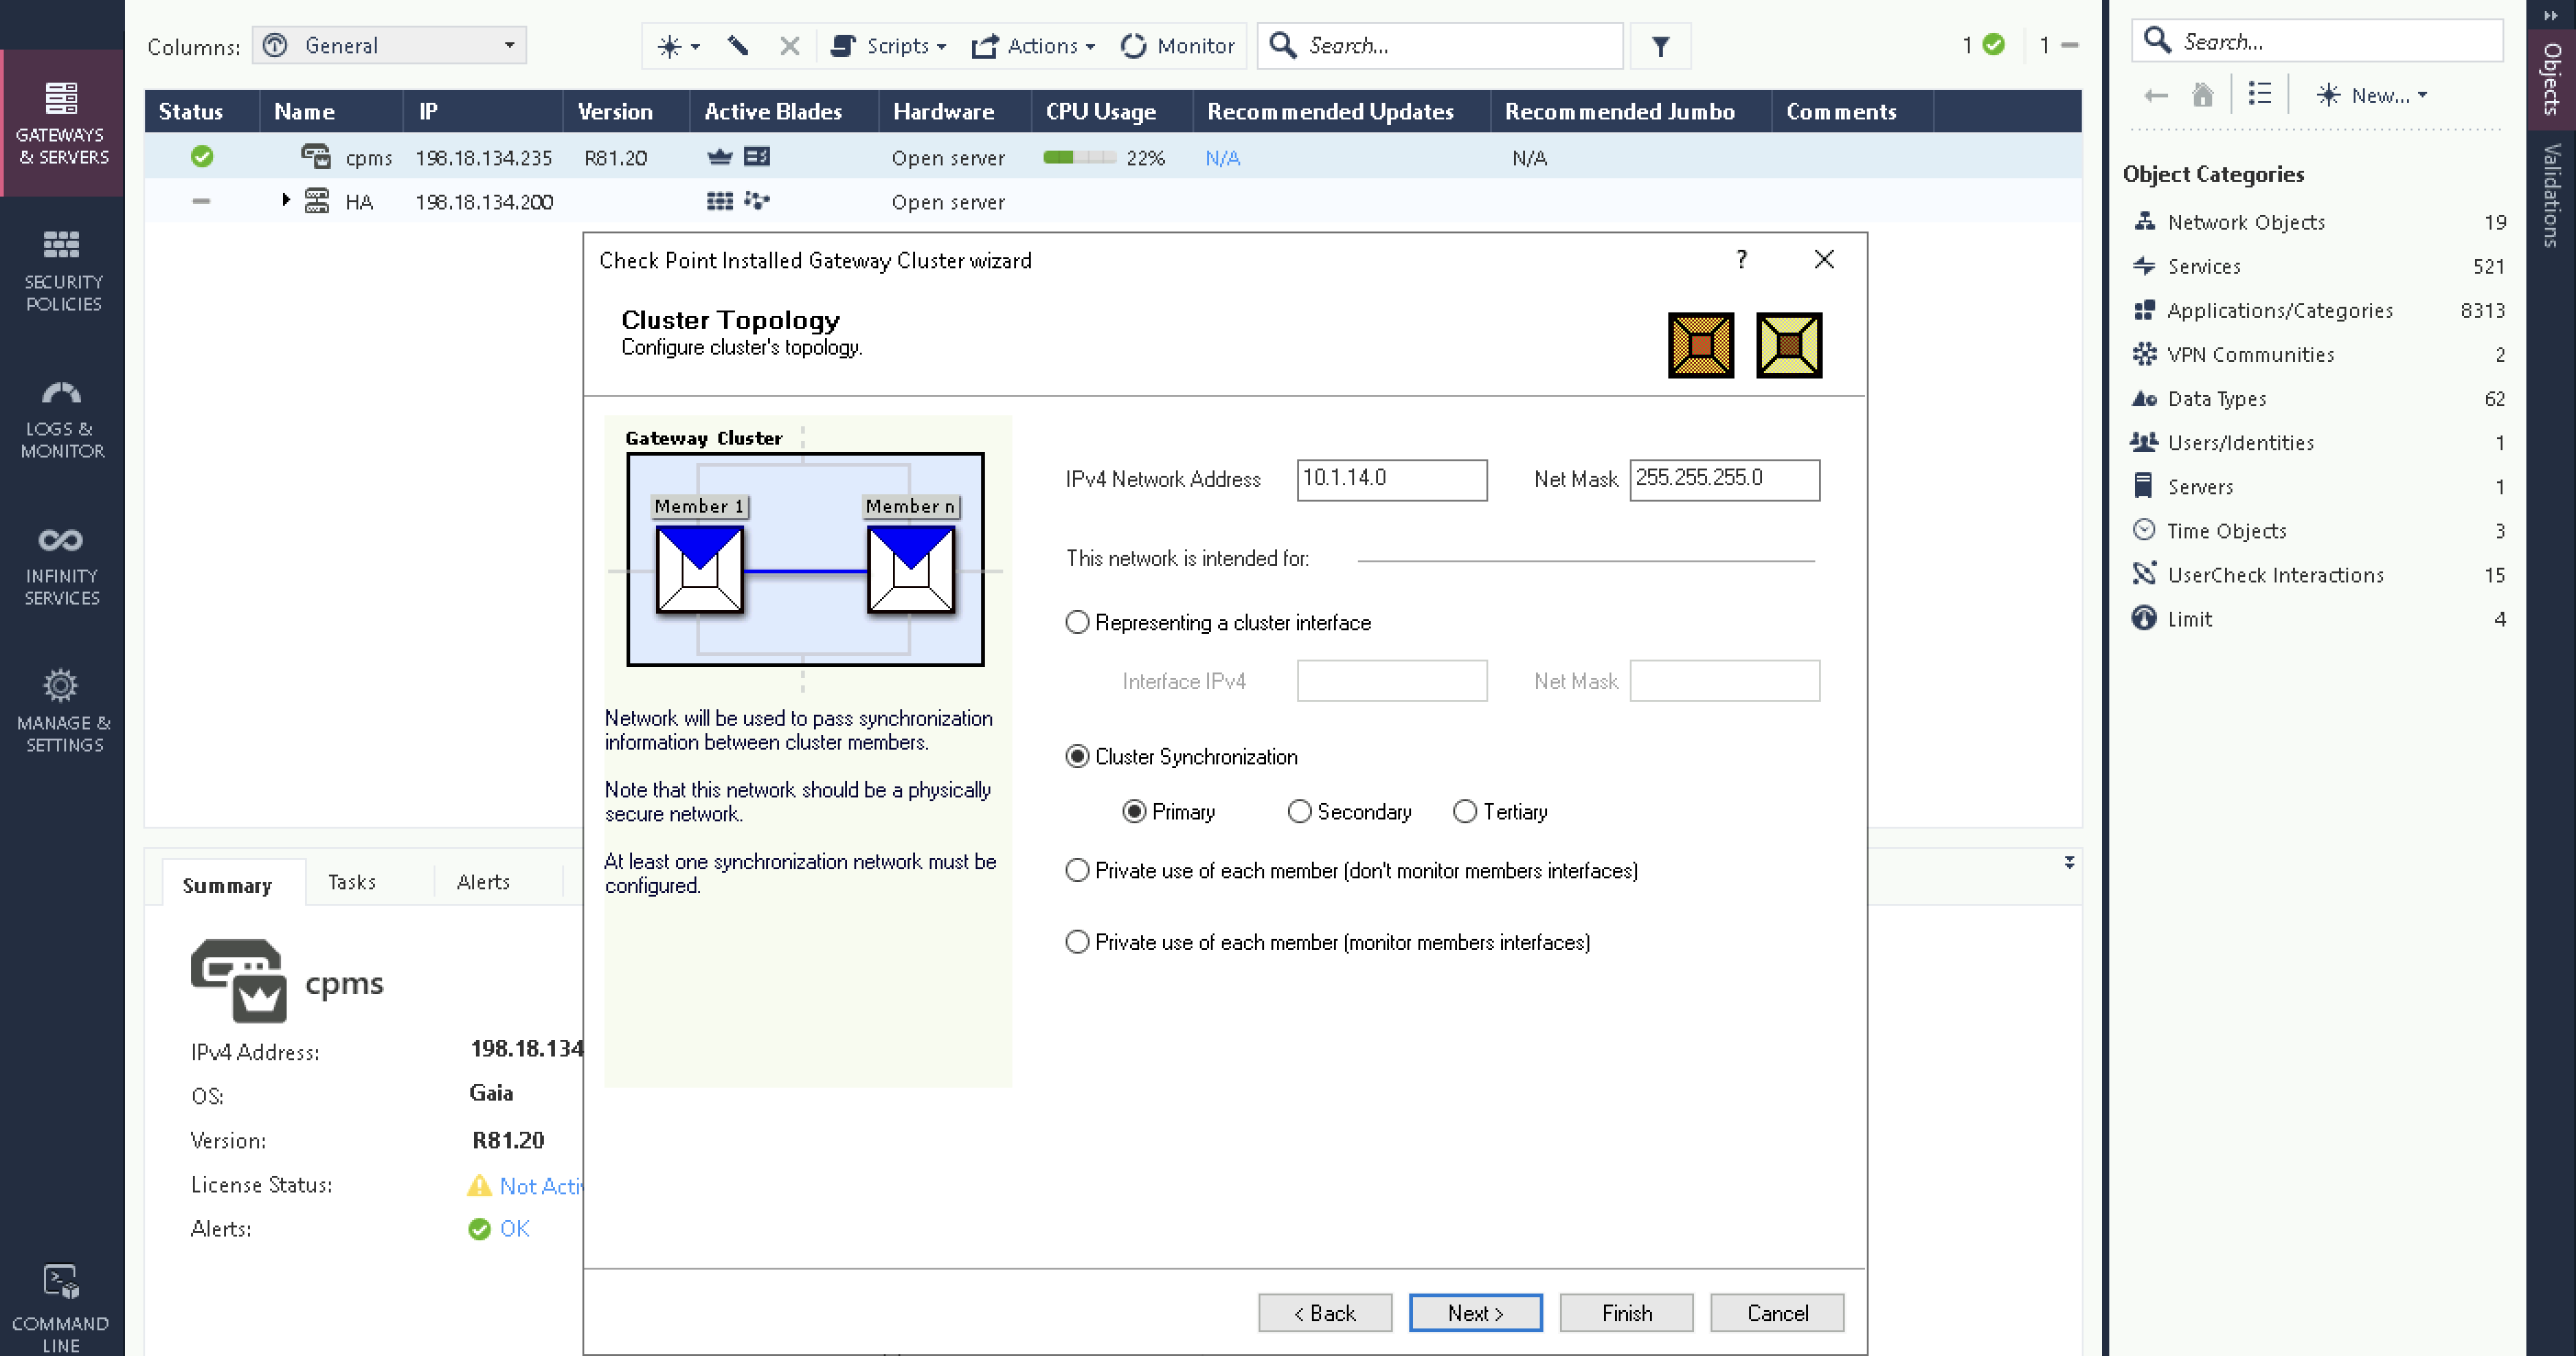
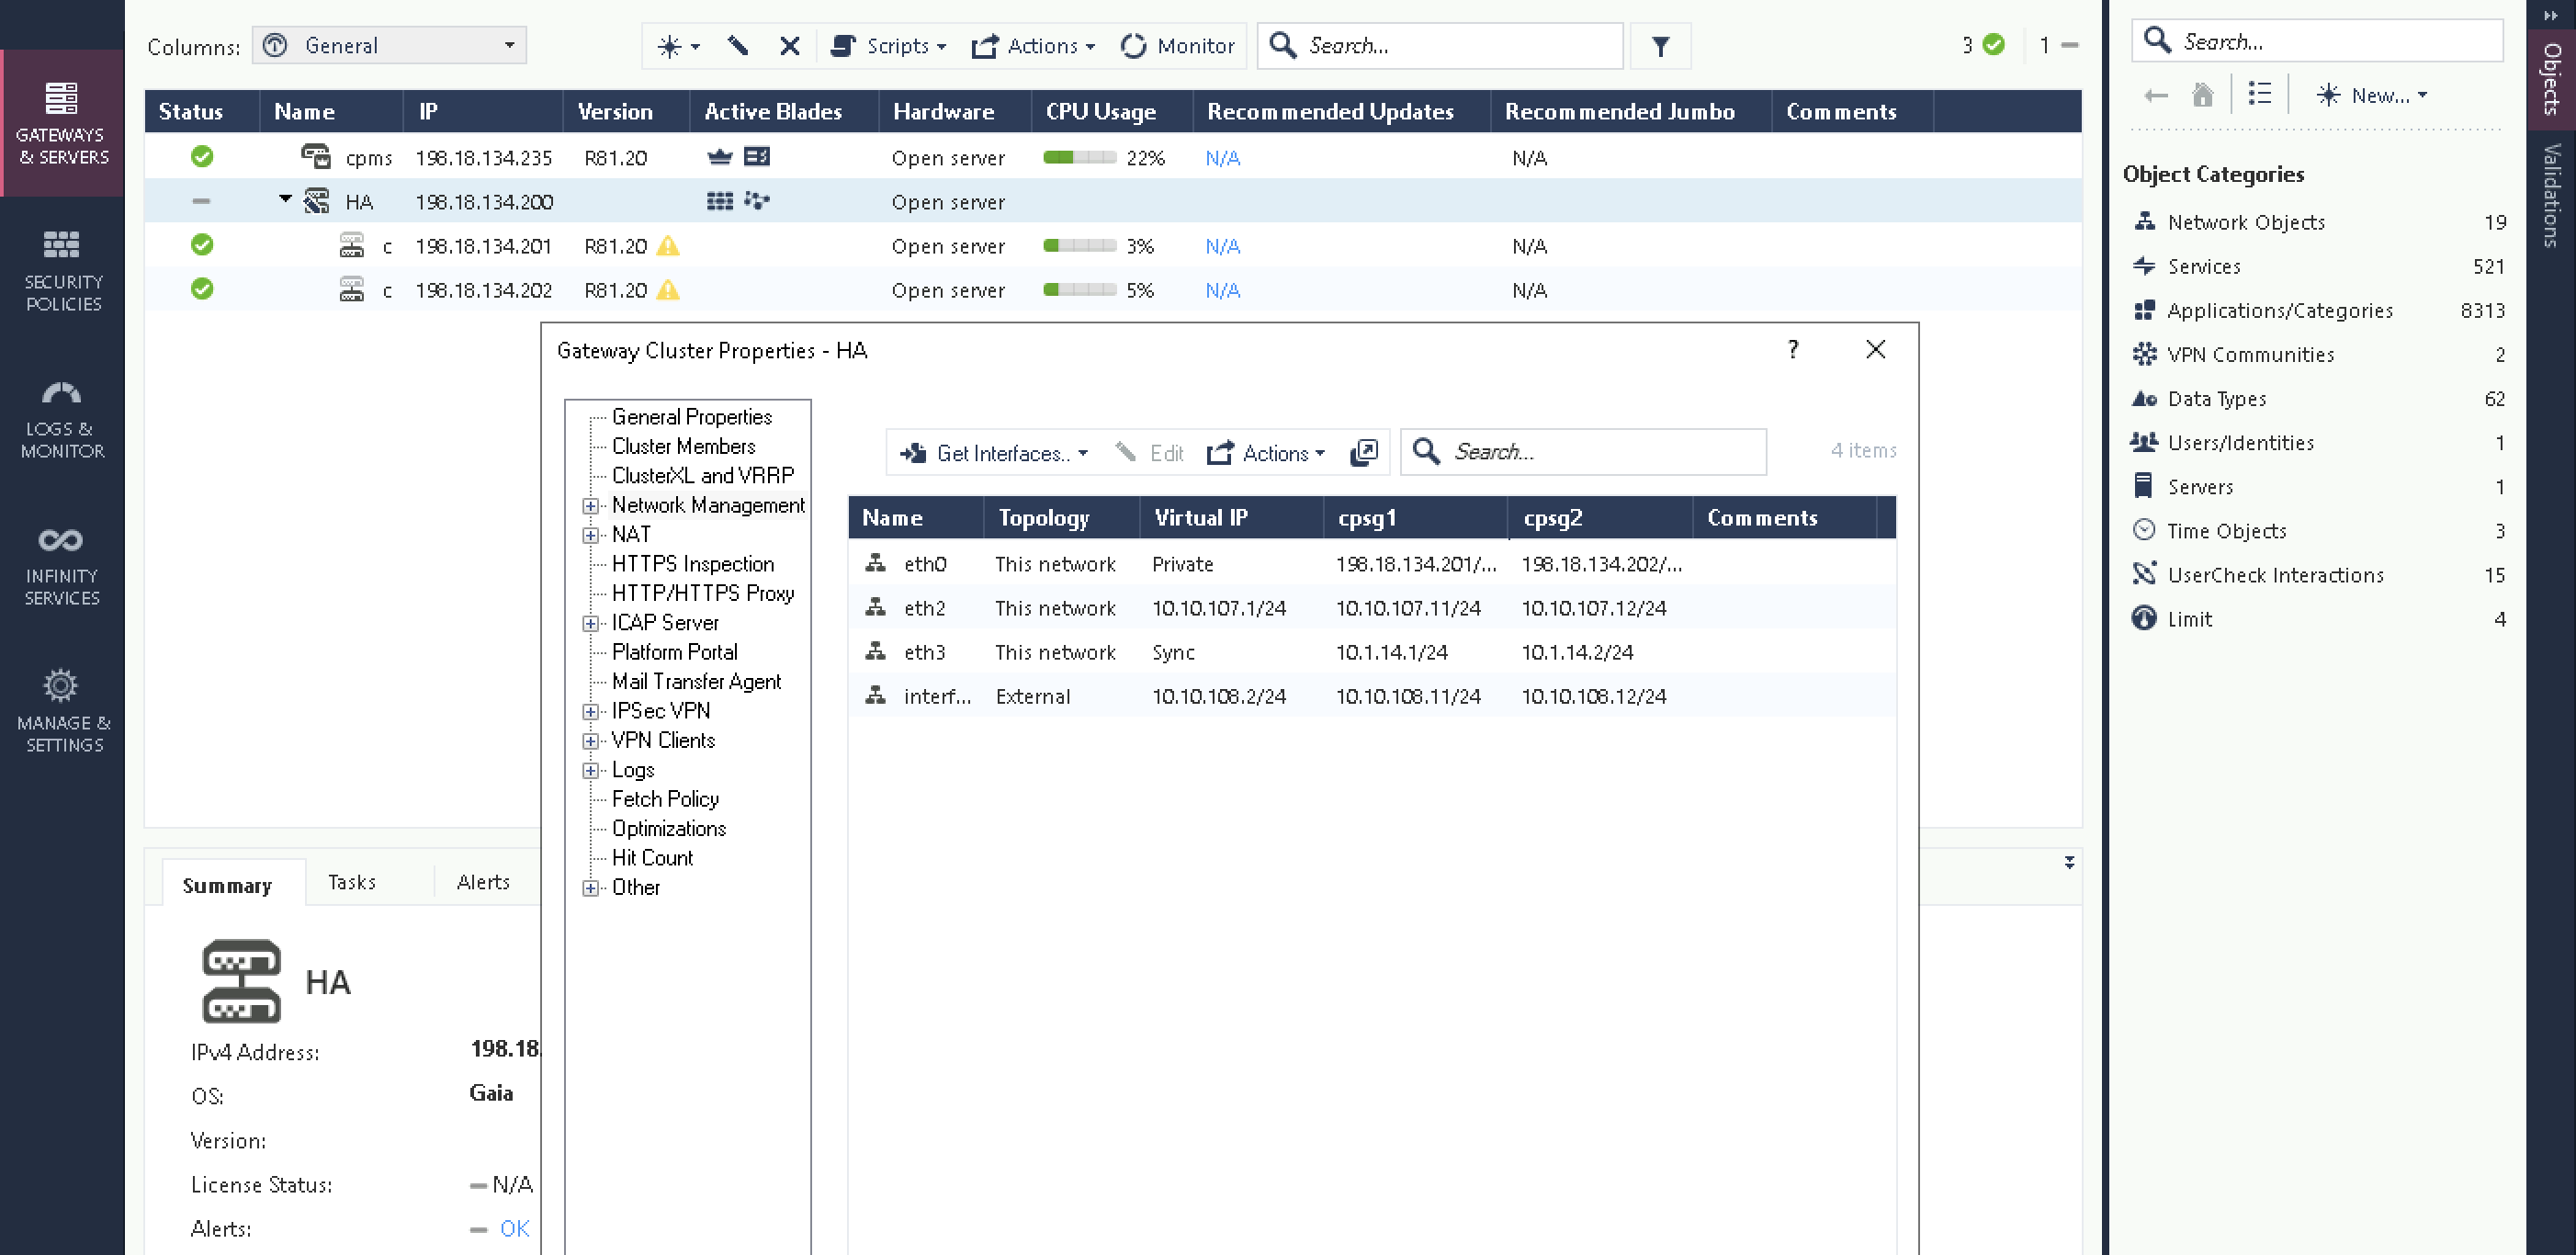
Then configure the Cluster Sync interface
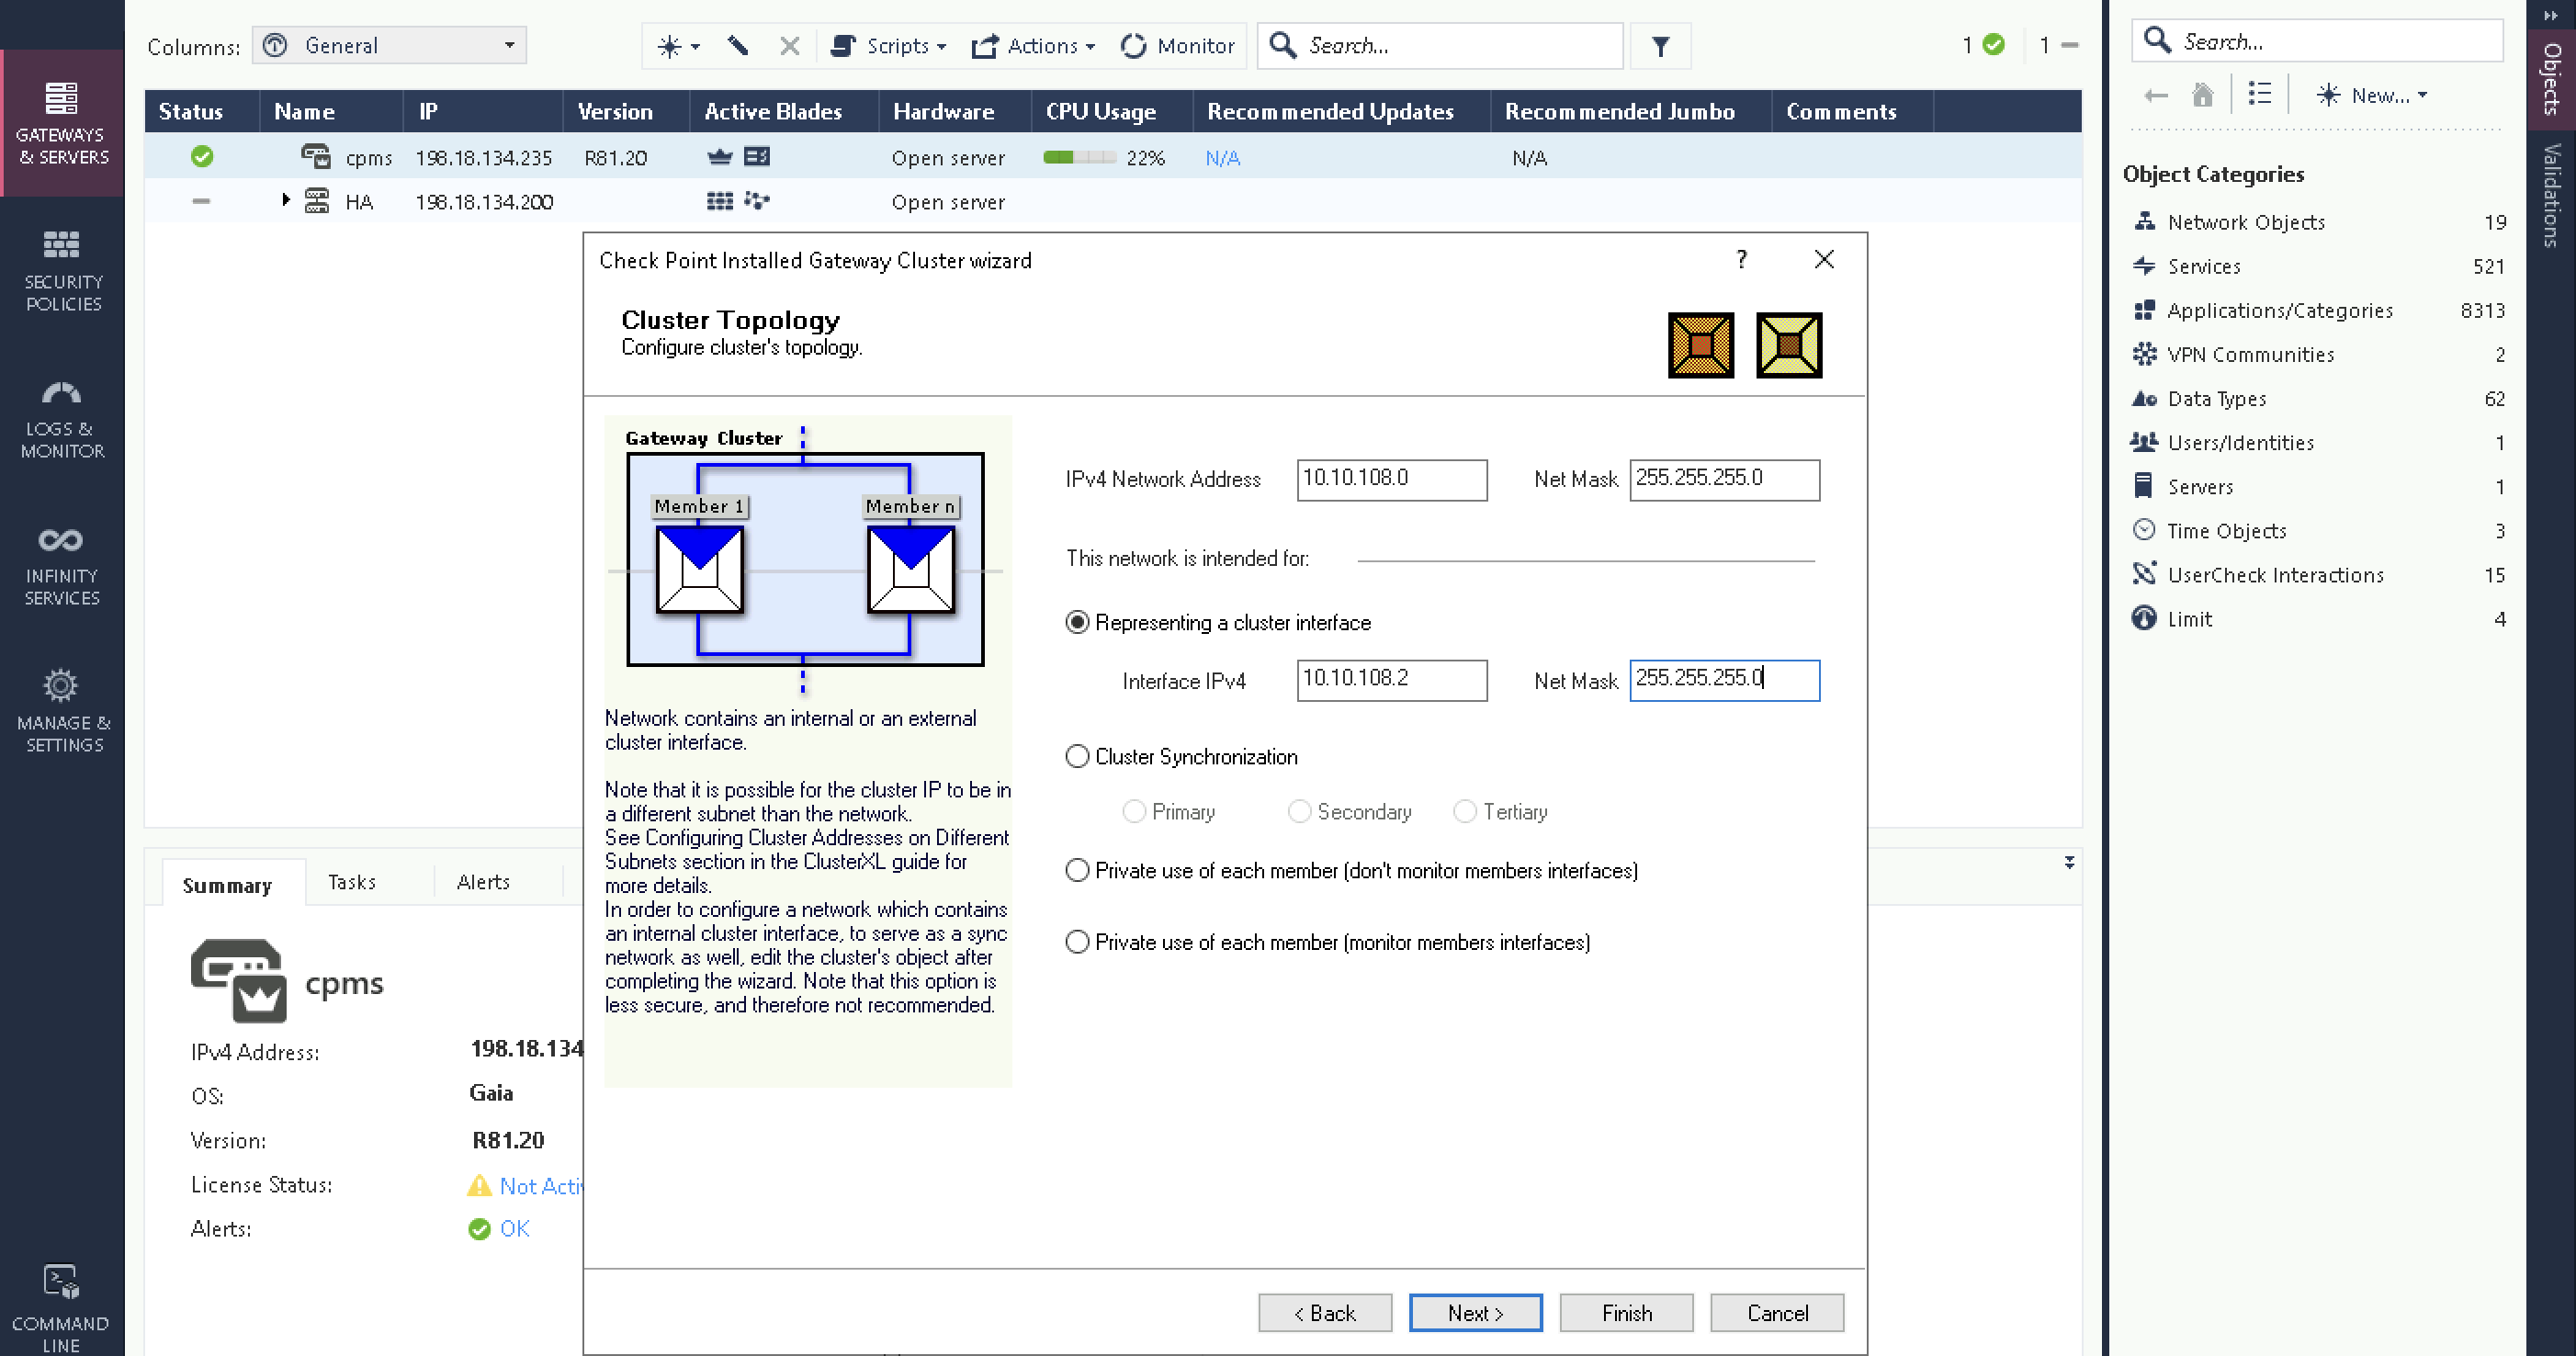
Next the Virtual IP for the downlink interface

And the Virtual IP for the uplink interface
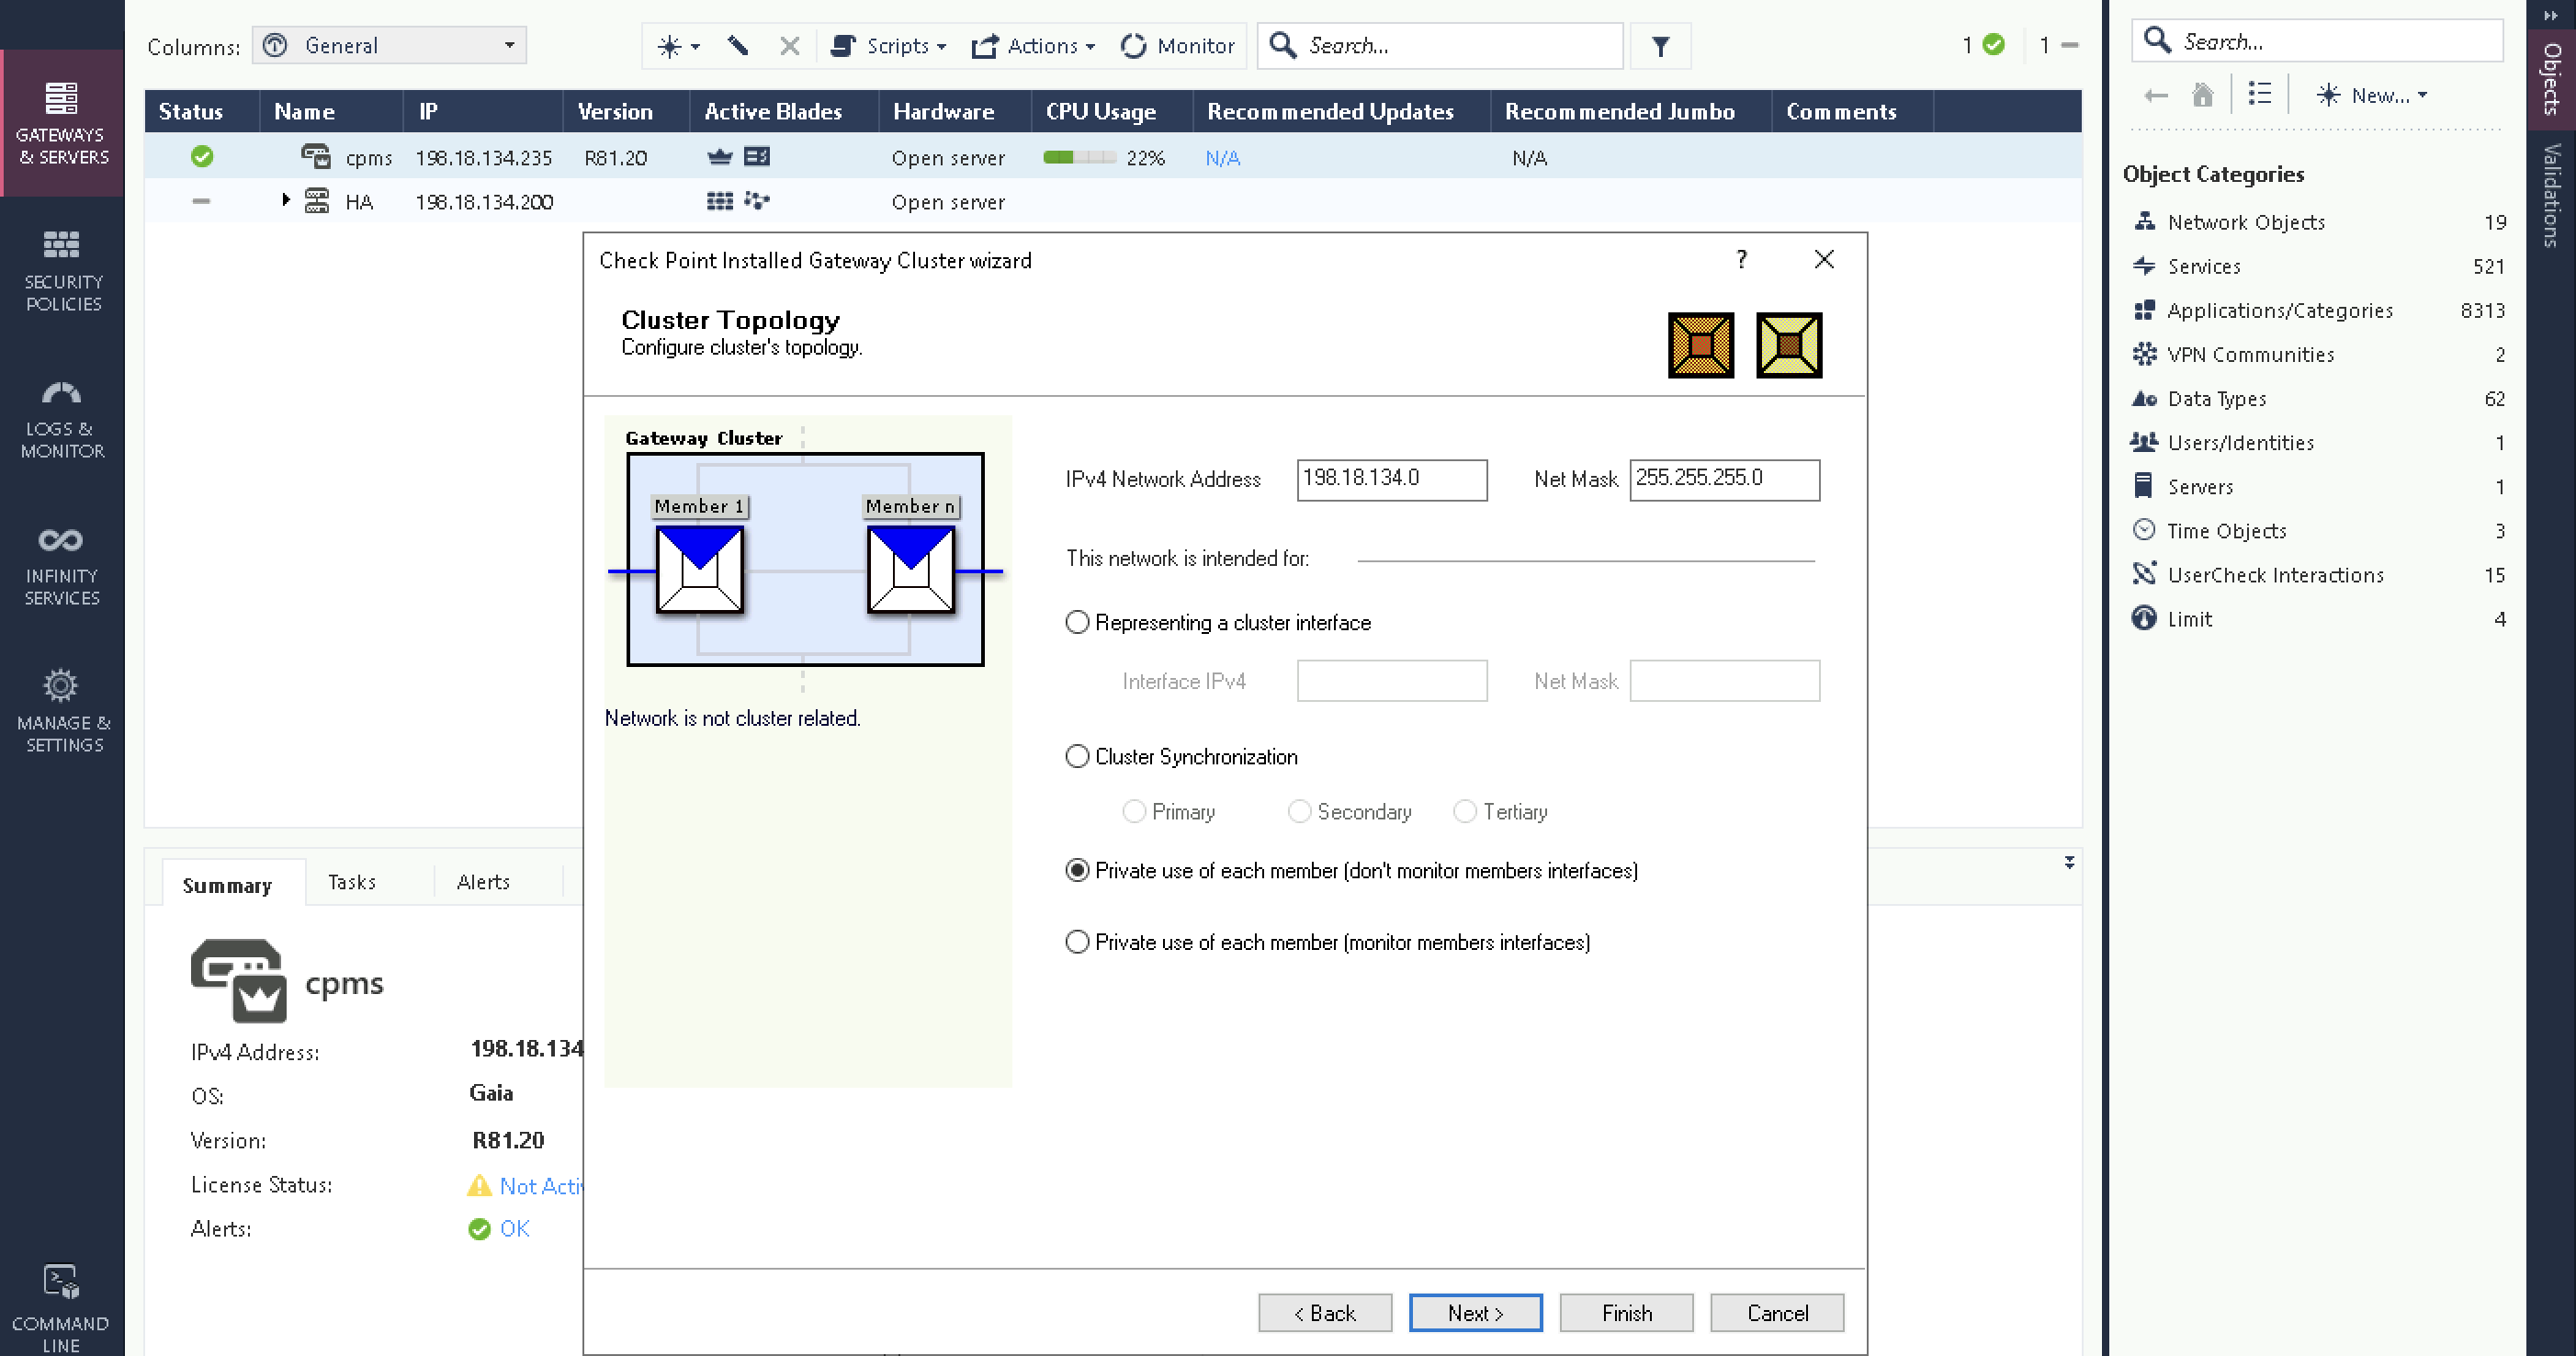
After that, the management interface which we will keep private and stand on their own
Finally finish the wizard
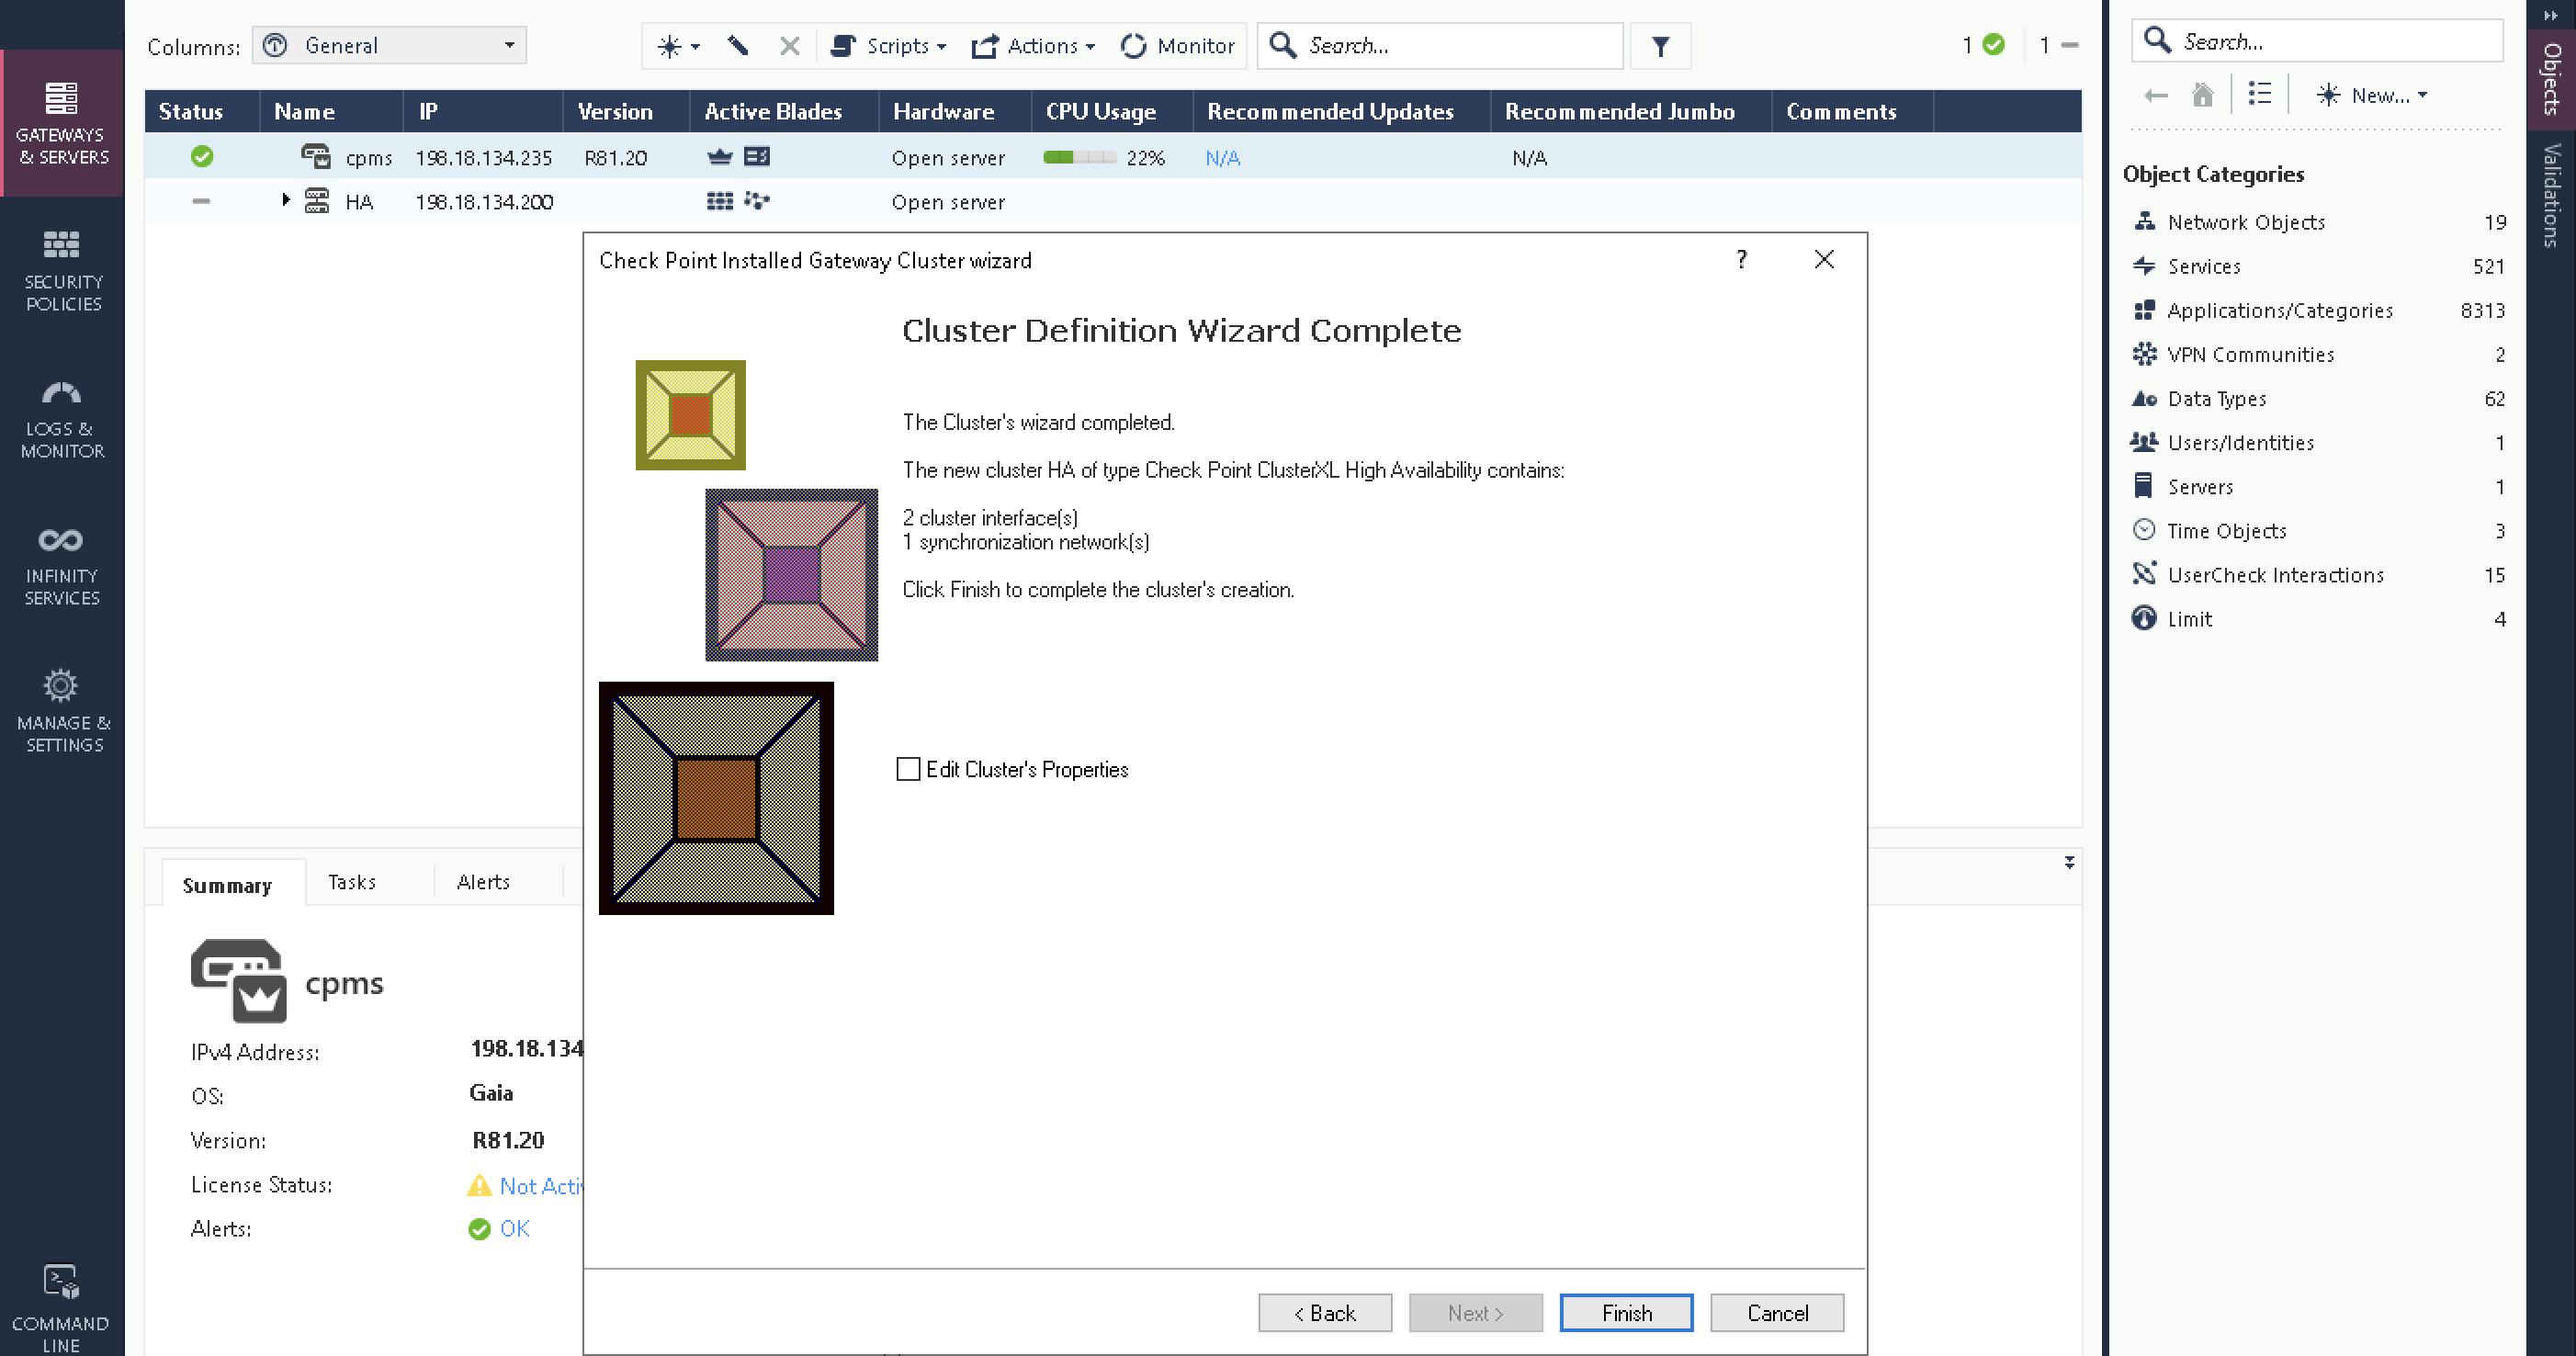
The HA has been configured, hit publish and install to management’s database
If for some reason the firewall fails to join cluster, enter the CLI and run “cpconfig” and select “Enable cluster membership”

Now the HA is fully configured
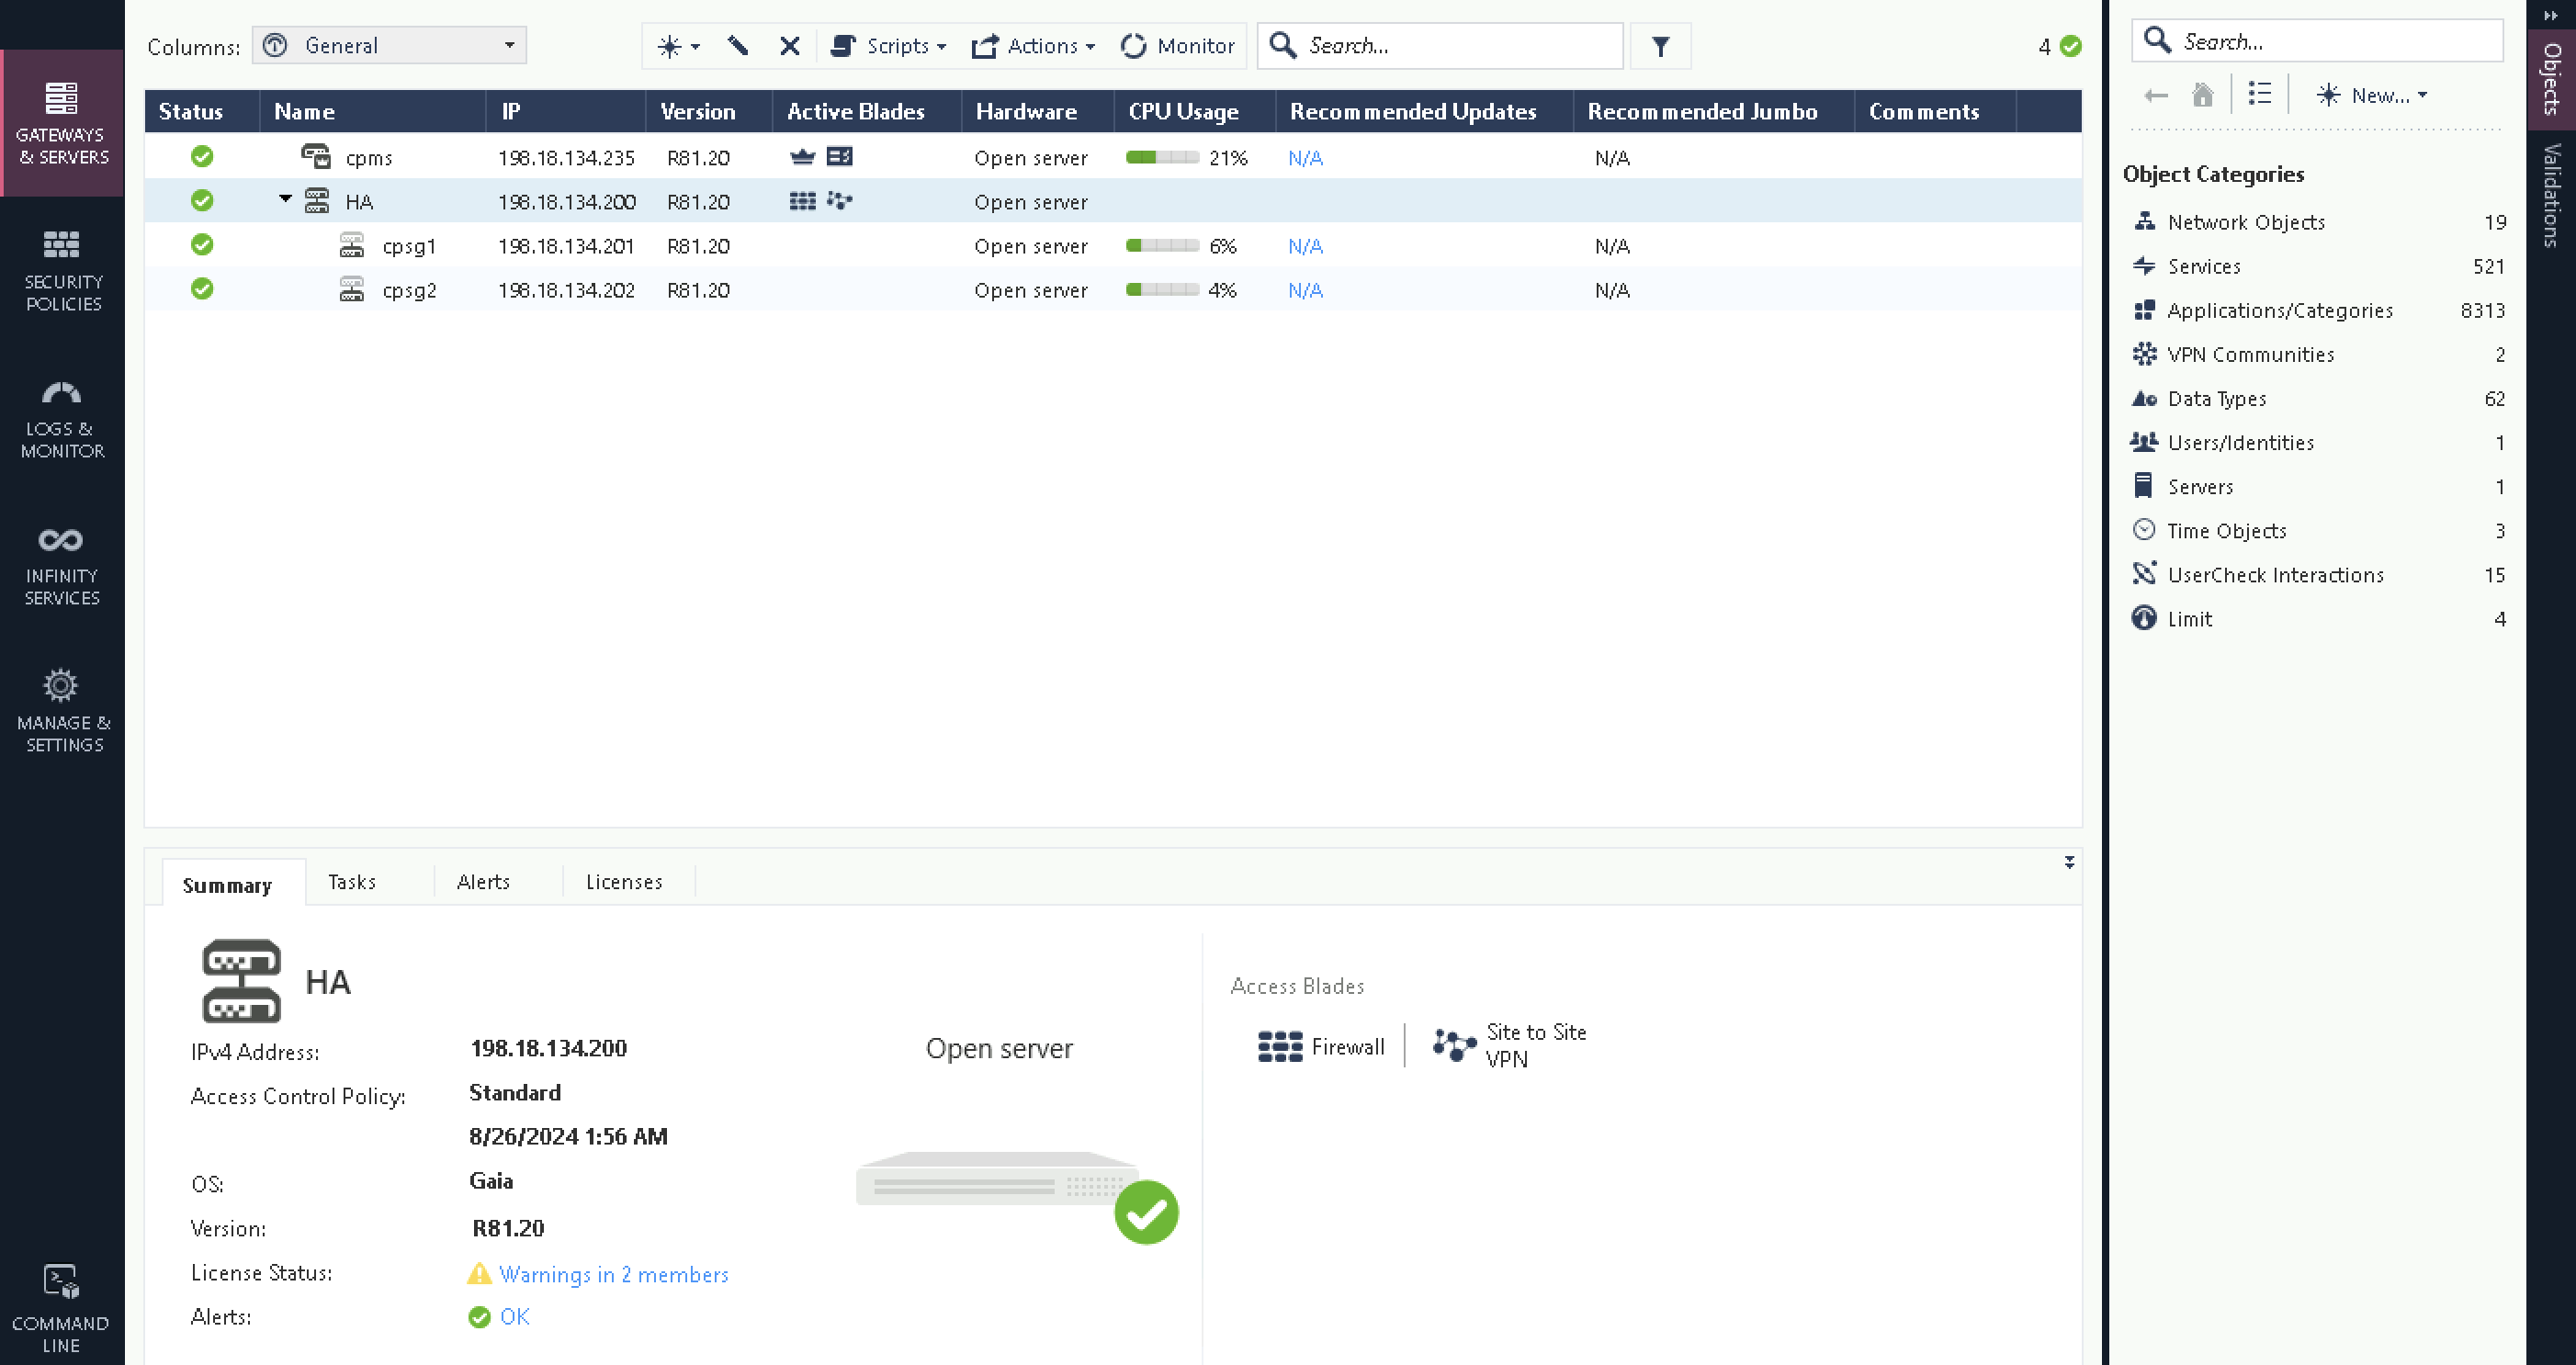
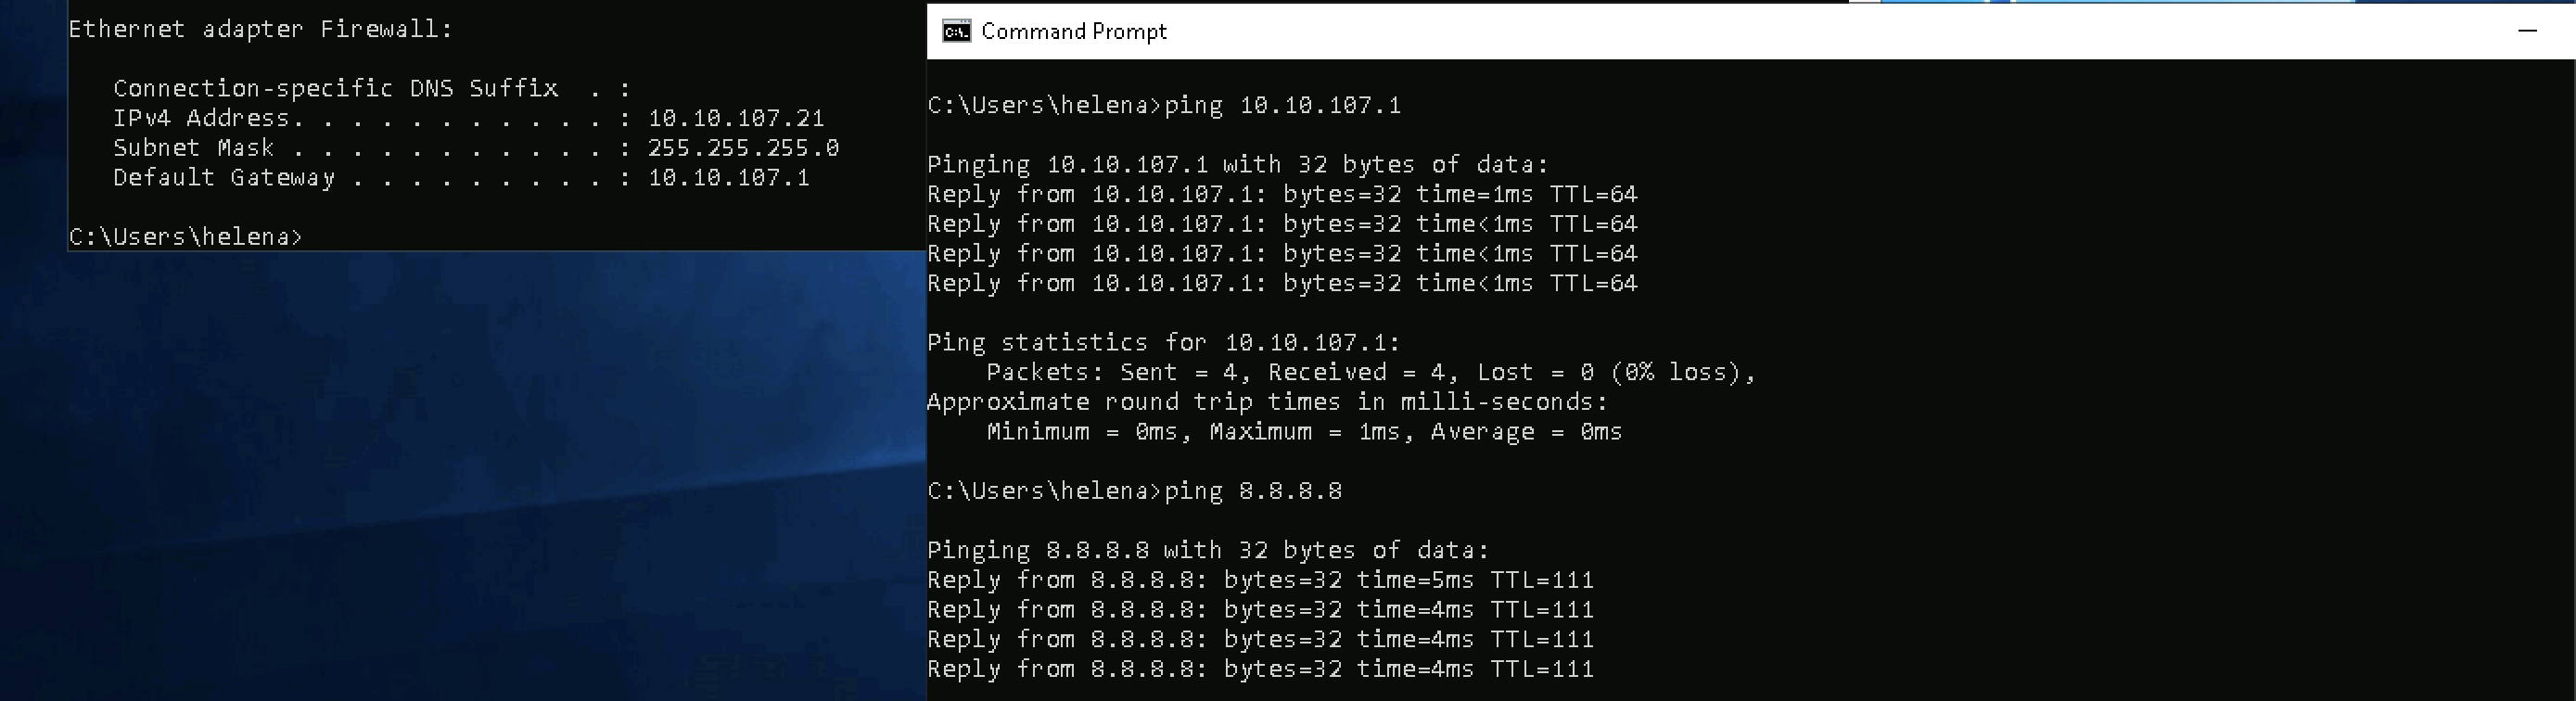
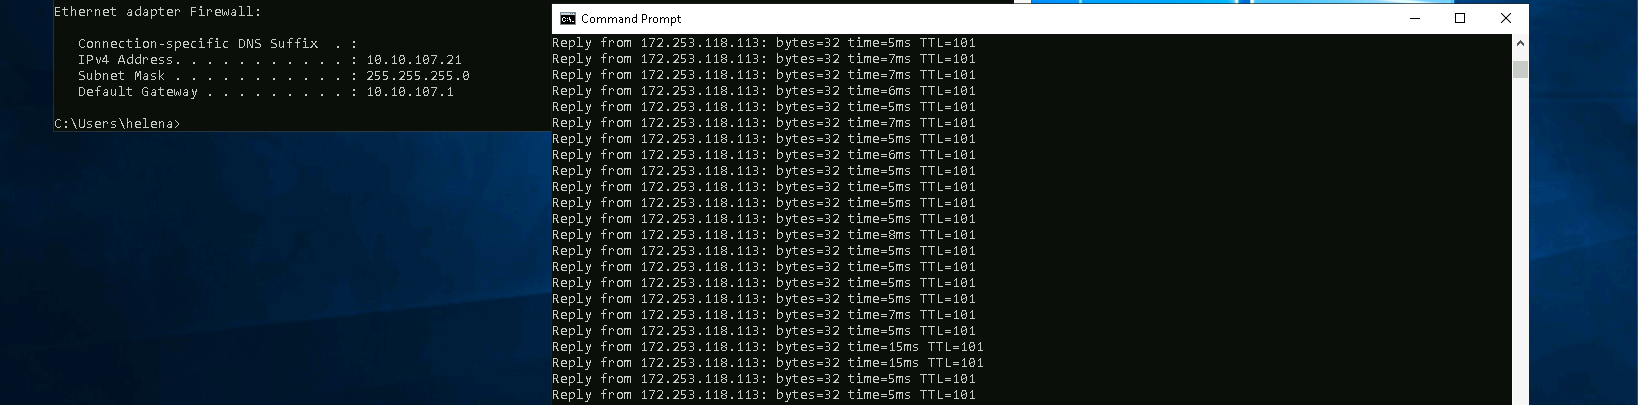
Checking the virtual IP is also accessible and the downlink nodes can access the internet
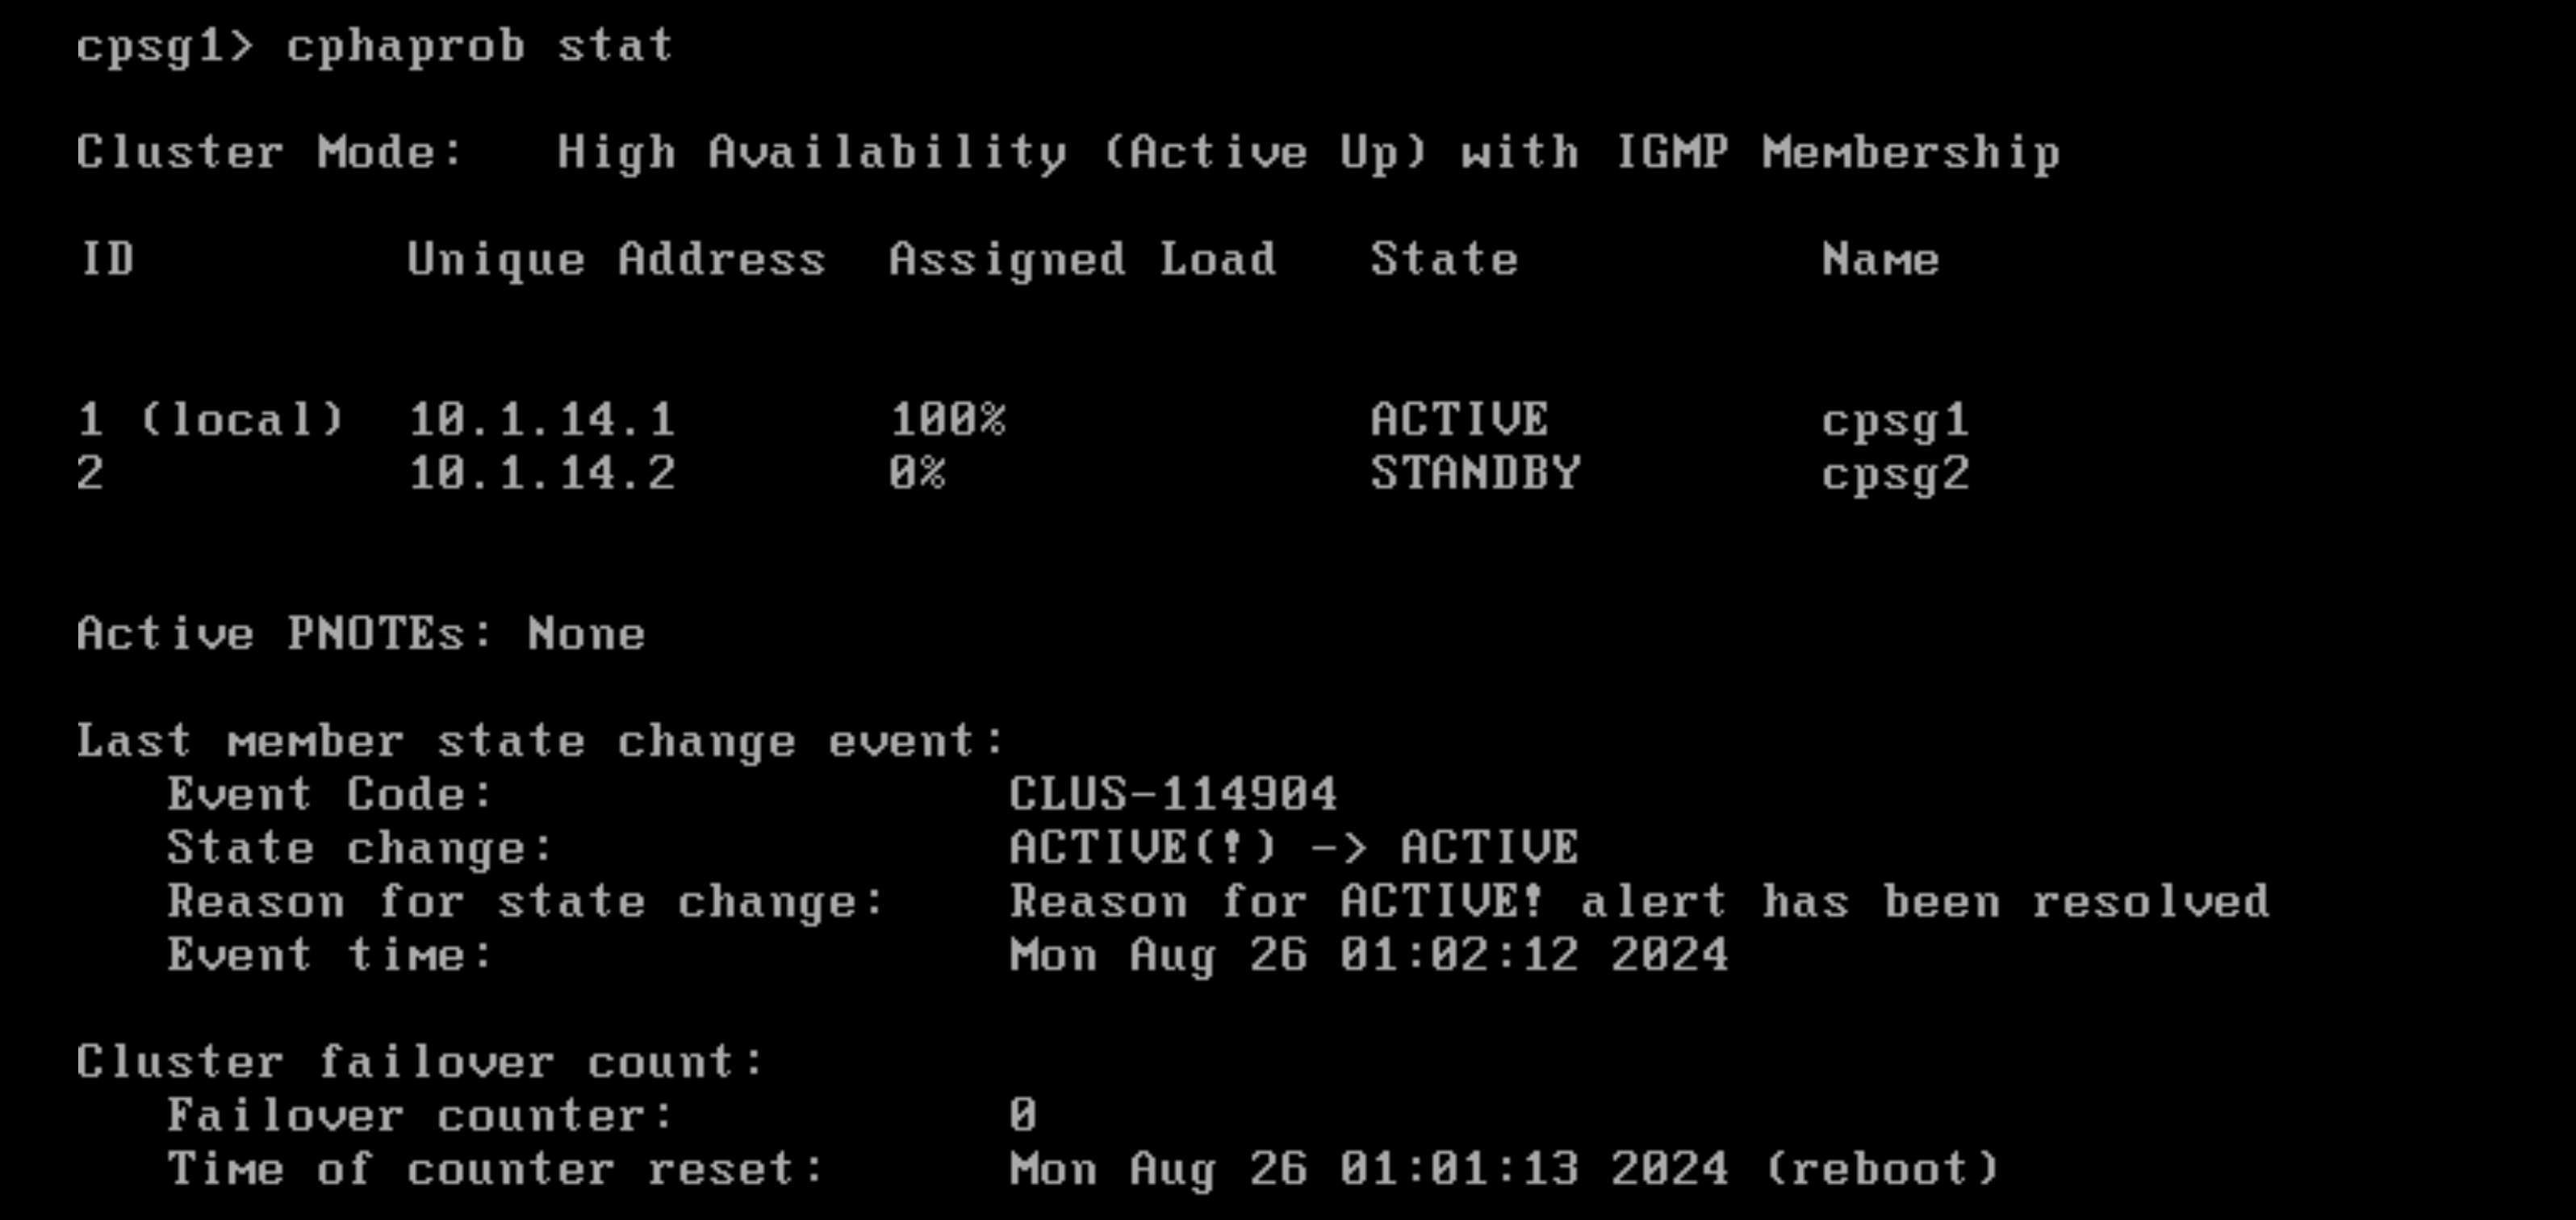
On CLI, run “cphaprob stat” to see the cluster status
Failing Over
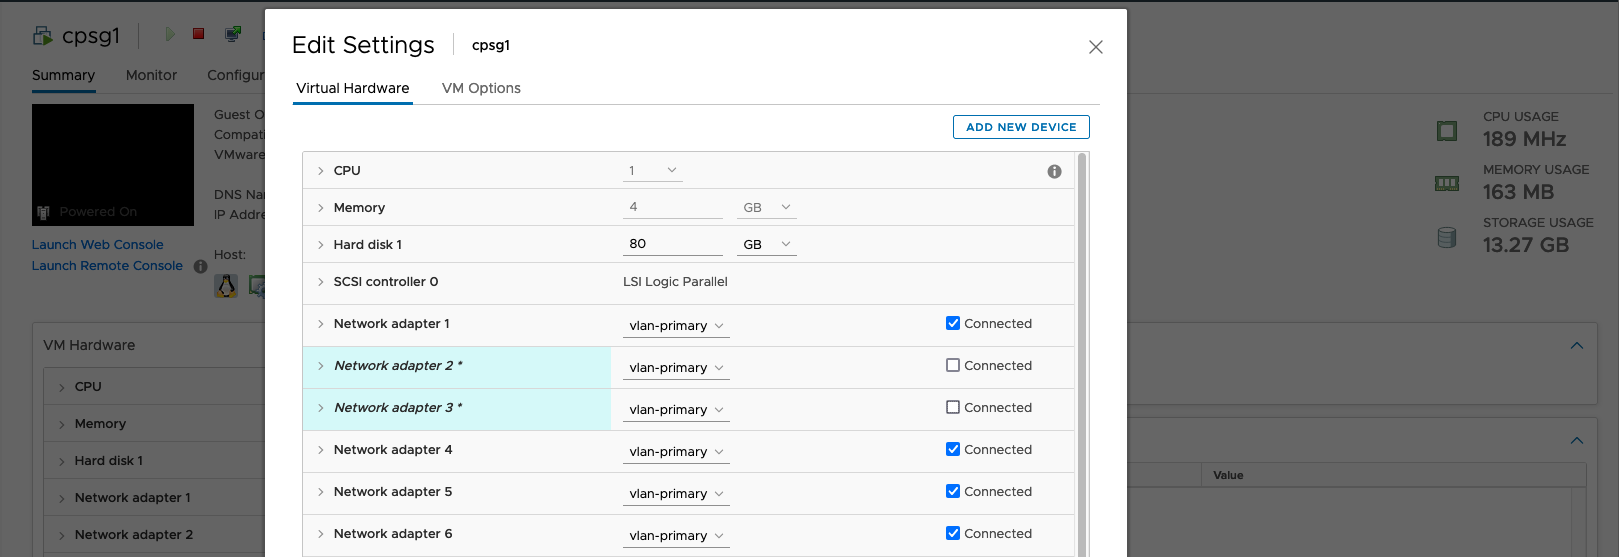
Lets simulate a network failure by disabling the uplink and downlink interfaces
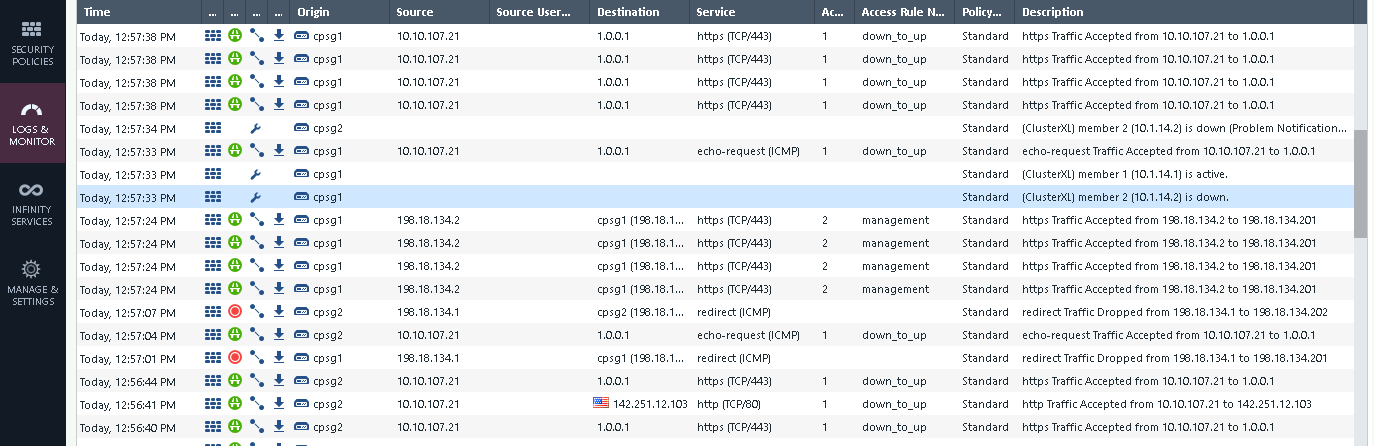
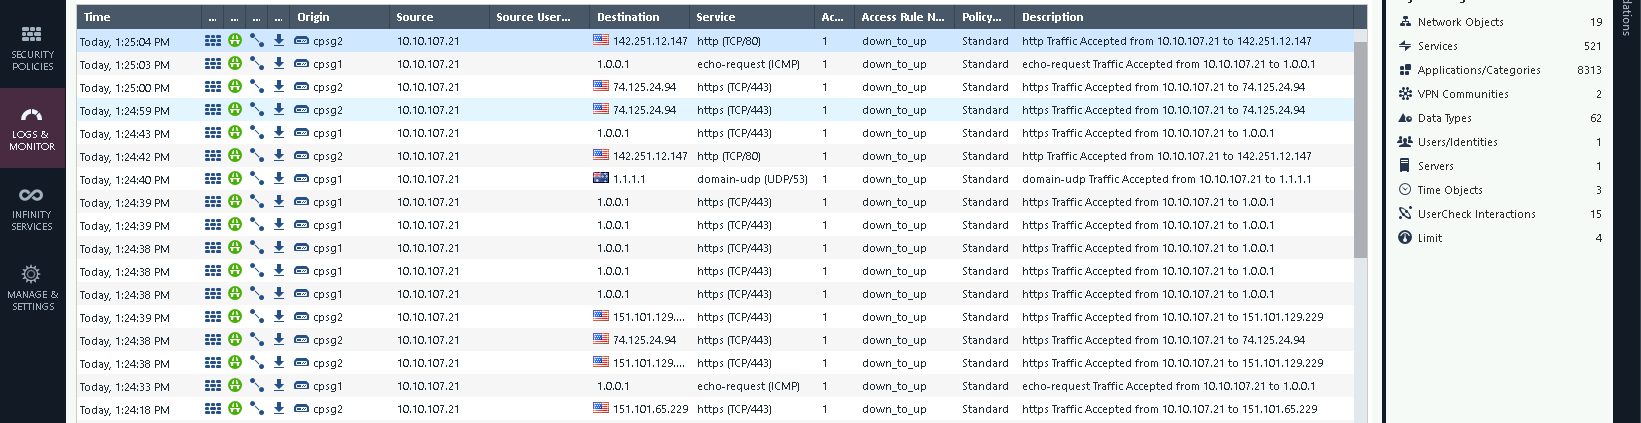
On the logs we can see the traffic is handed over from node 1 to node 2 as the node 2 takes over to become the active firewall

No drops observed on the client side as the failover takes place
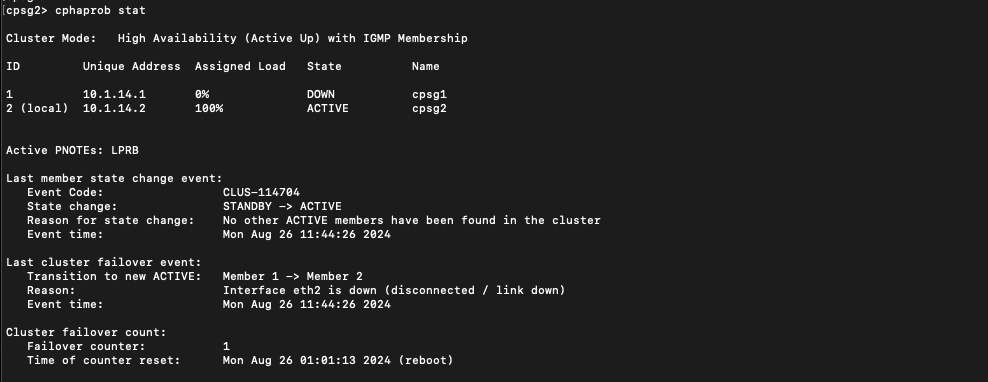
Running “cphaprob stat” shows that now the node 2 is processing 100% traffic
Now lets restore the network functionality on node 1, we can see that it has changed status from Down to Standby

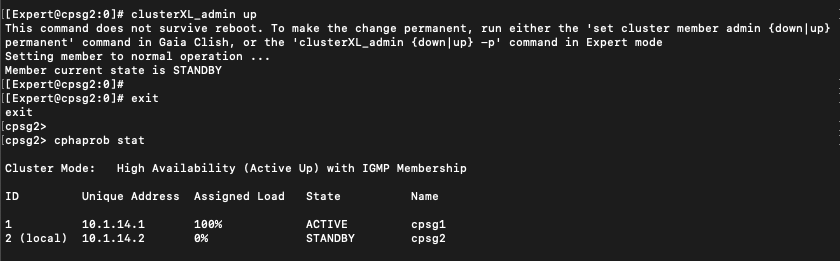
To force a failover back to node 1, run “clusterXL_admin down” on the node 2
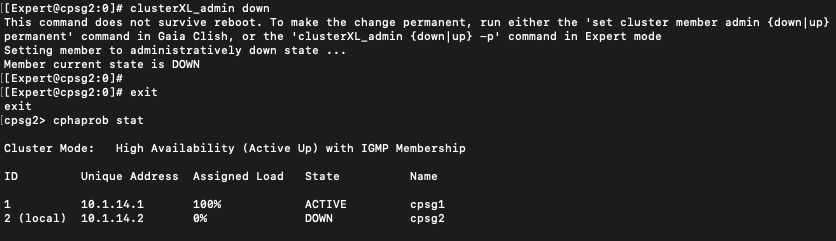
Back on Smartconsole, we can see the node 1 is taking the active role while the node 2 is detected to be down

And all the traffic is passed back to node 1
Run “clusterXL_admin up” to make the node 2 go up, and now it is back again in standby mode
Active-Active (Load Sharing)
- Multicast Mode sends all incoming packets to a multicast MAC address that is associated with all Cluster Members. This allows every member in the cluster to receive each packet. The decision function on each Cluster Member determines whether it should process the packet, ensuring that all members can actively participate in handling traffic, optimizing load distribution and network performance.
- Unicast Mode assigns the cluster’s Virtual IP address to a single Cluster Member, known as the Pivot. The Pivot receives all incoming packets and then forwards them to other members in the cluster for processing based on a decision function. This mode does not require multicast support in the network infrastructure but may result in less balanced traffic distribution, as the Pivot handles initial packet reception and forwarding duties.
Multicast Mode
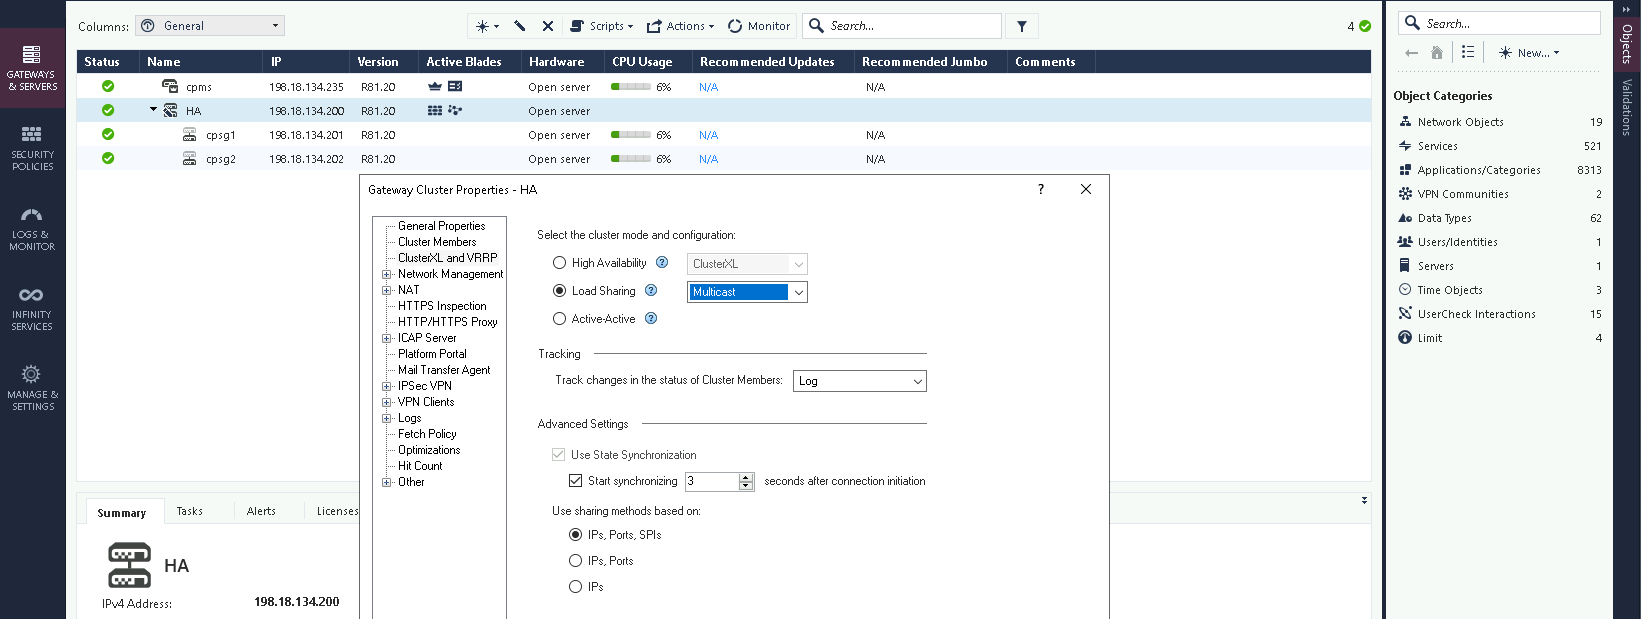
On the HA Properties, change the mode to Load Sharing Multicast
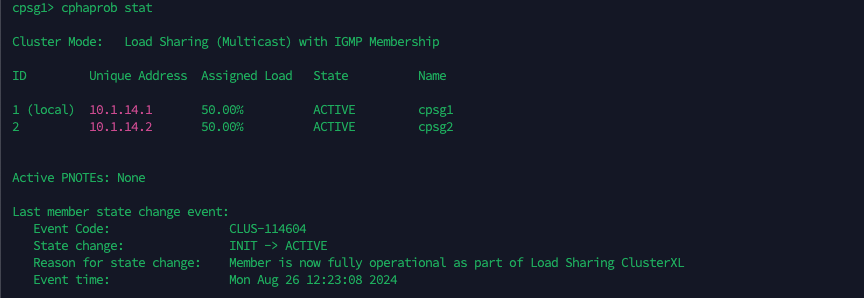
Now both nodes become active and are evenly load balancing traffic
Unicast Mode
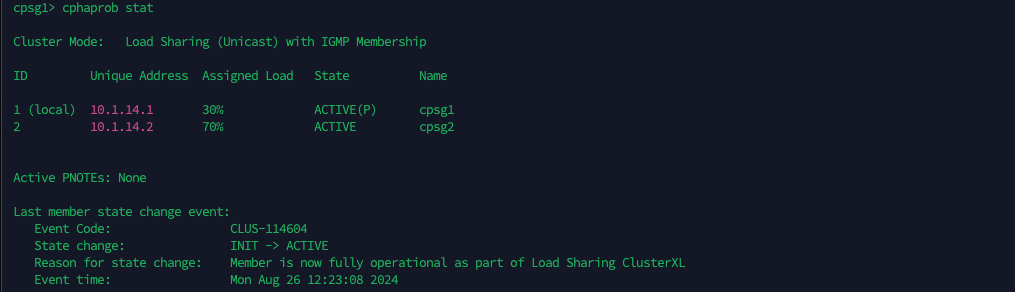
On the HA Properties, change the mode to Load Sharing Unicast
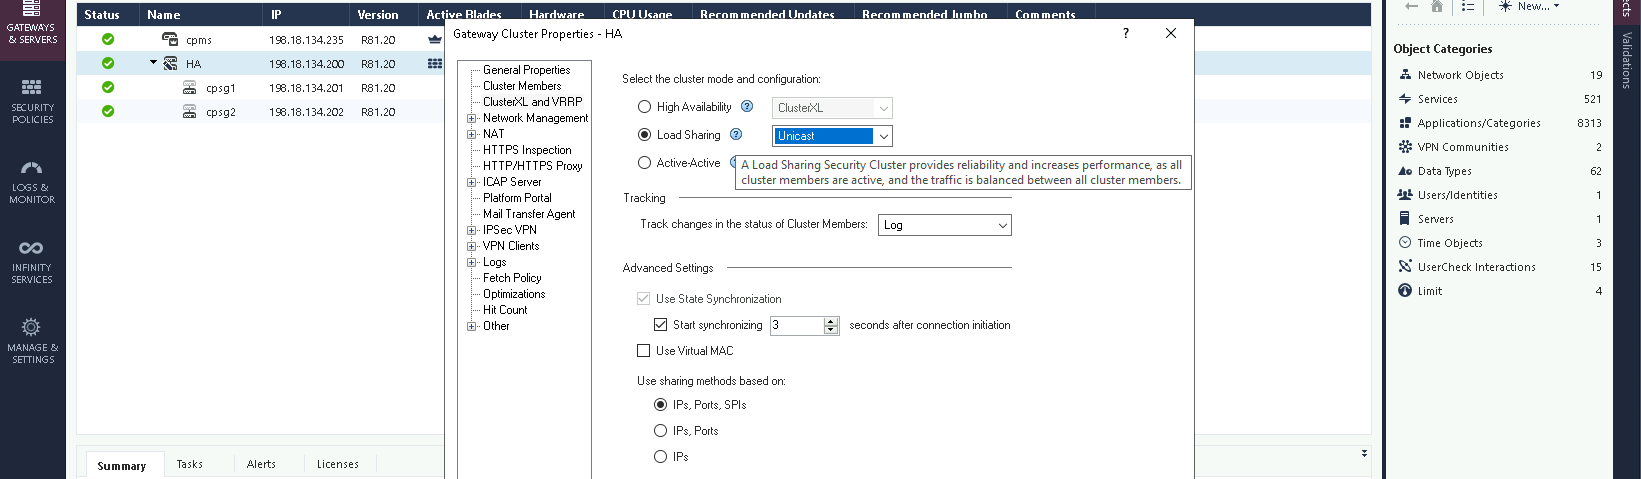
This will cause the pivot (node 1) to only handle 30% traffic while the rest is passed to the node 2
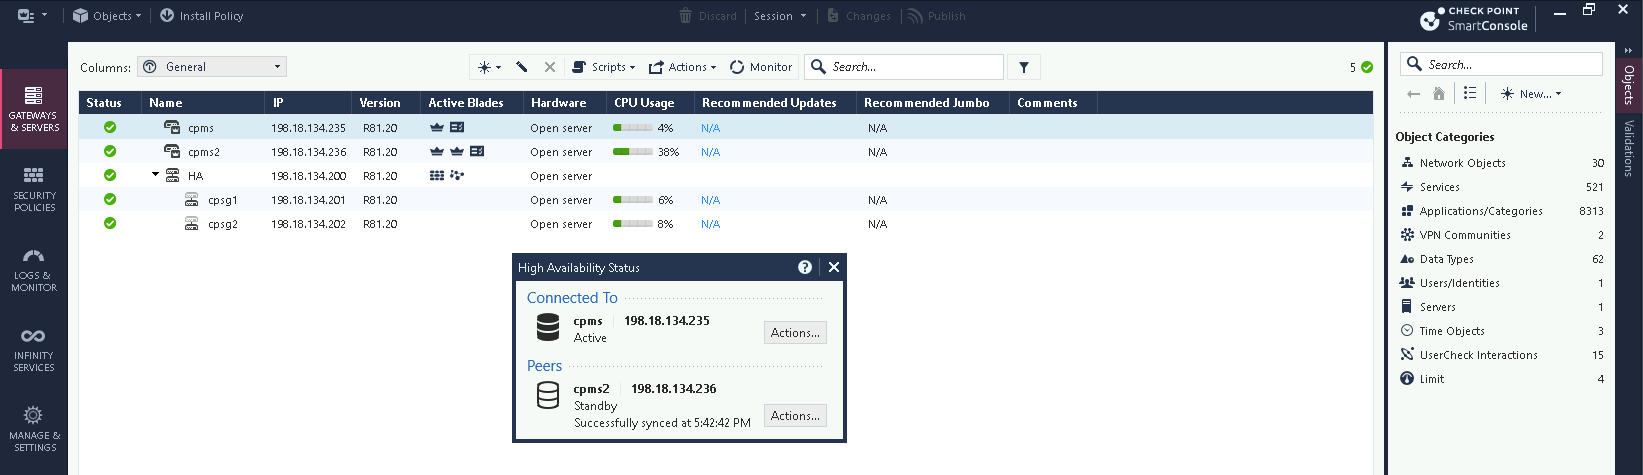
Management HA Cluster
To add another Management Server, deploy a new node and select the role to be Secondary


On Smartconsole, select Add New Check Point Host, enter the details and select Network Policy Management before establishing SIC (Secure Internal Communication)
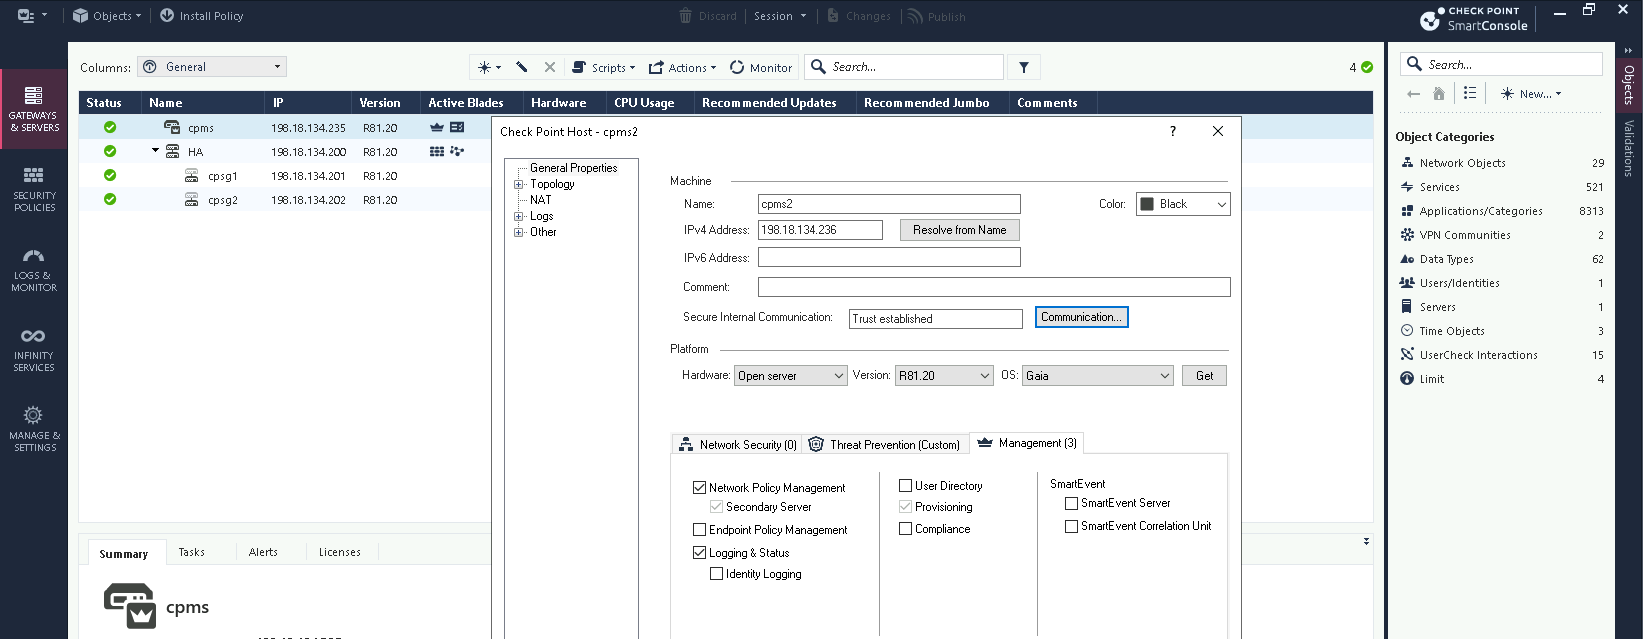
That’s it, now we have an Active-Standby Management Server where all configuration is still done from primary while we can see read-only configurations from the secondary