Check Point HTTPS Inspection
Check Point HTTPS Inspection is a security feature that allows Check Point firewalls to inspect encrypted HTTPS traffic for potential threats. By decrypting SSL/TLS traffic, the firewall can analyze the data for malicious content, apply security policies, and then re-encrypt the traffic before forwarding it to its destination. This process helps protect against encrypted malware, data breaches, and other threats that might otherwise bypass security controls.
Dealing with Certificates
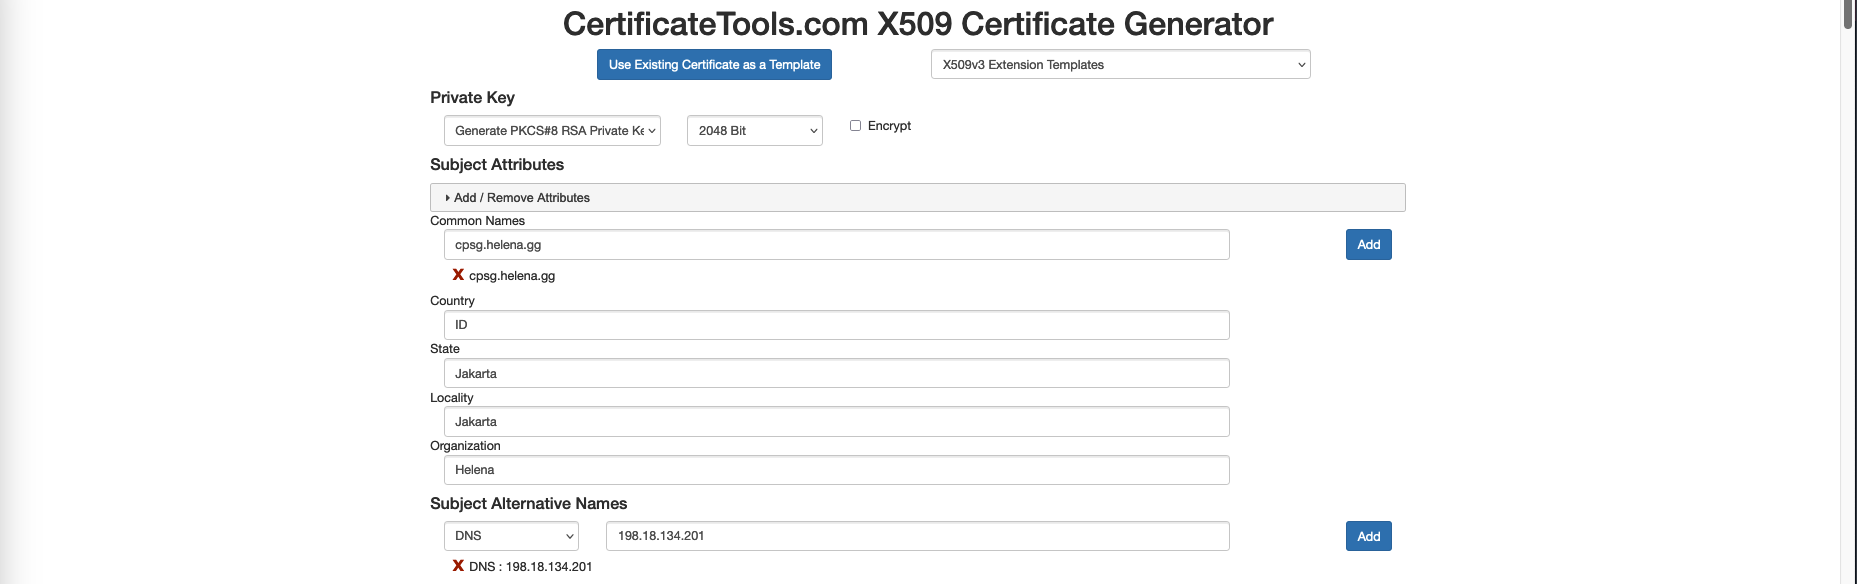
First lets create a CA Signed Certificate for the Check Point Security Gateway, here we’ll use certtools to create the CSR
On Key Usage, we’ll select Digital Signature, Certificate Sign, and CRL Sign to create a Subordinate CA Certificate. This is used for HTTPS inspection on a firewall to enable the firewall to act as a trusted intermediary between clients and servers. When the firewall intercepts HTTPS traffic for inspection, it decrypts the traffic using a subordinate CA certificate it has generated or been assigned.
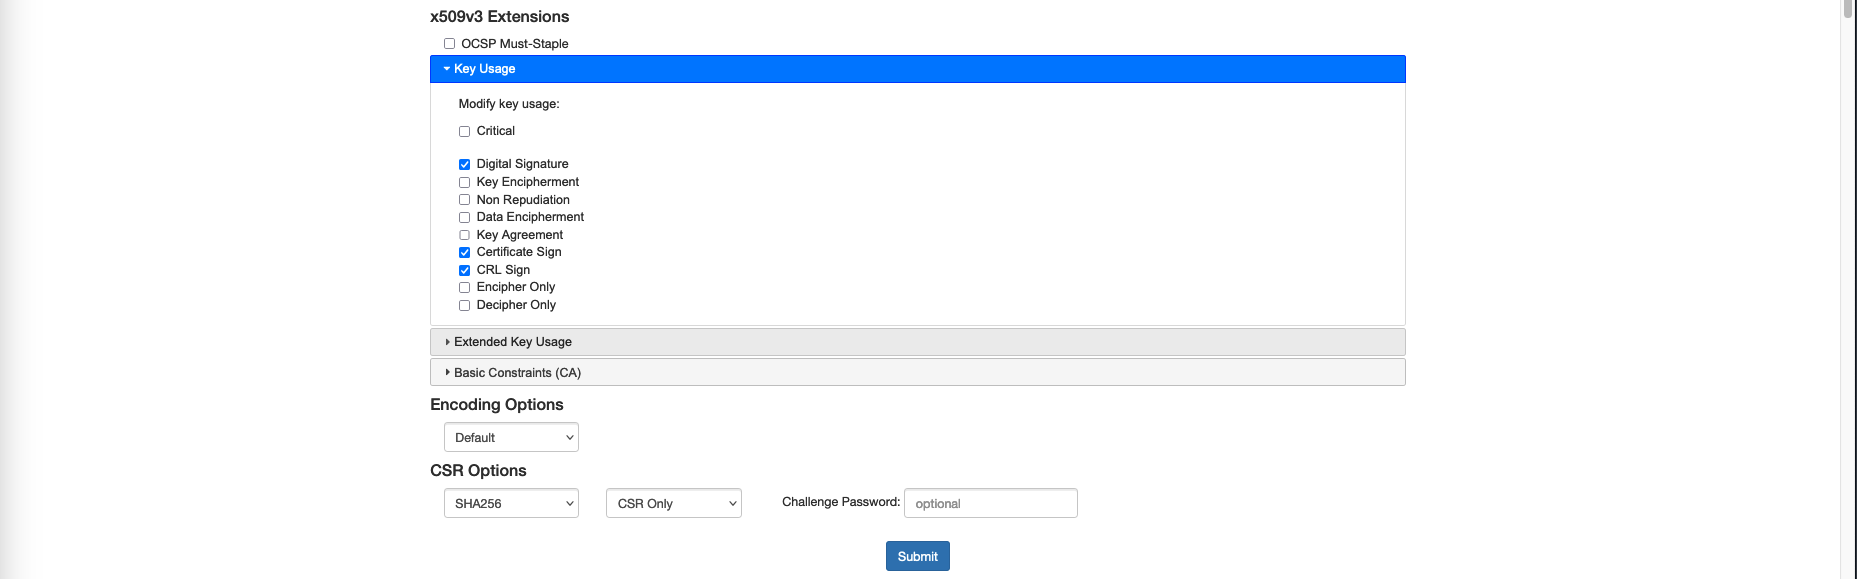
- Digital Signature:
Needed. This is essential for creating digital signatures on certificates issued by the subordinate CA. Digital signatures ensure the authenticity and integrity of the certificates.- Certificate Sign:
Needed. This allows the subordinate CA to sign certificates. For HTTPS inspection, the firewall will dynamically generate and sign certificates for inspected HTTPS traffic, mimicking the original server certificates.- CRL Sign:
Optional but Recommended. This allows the subordinate CA to sign Certificate Revocation Lists (CRLs), which are used to revoke certificates that should no longer be trusted. Including this can help maintain the security of the HTTPS inspection environment.
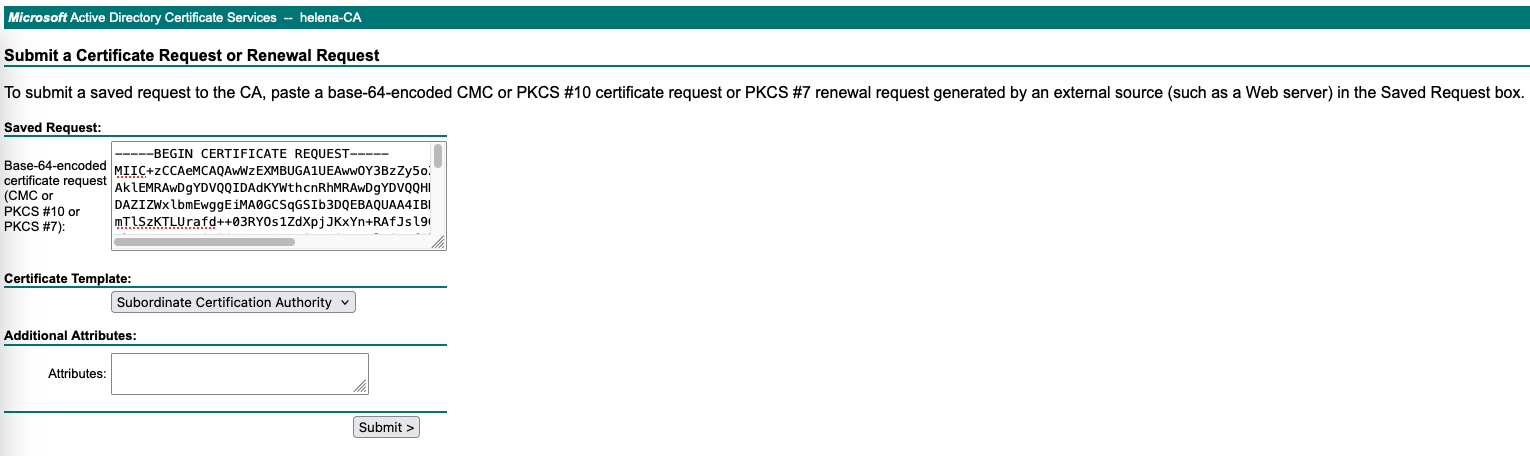
Next we sign this CSR on our CA Server using Subordinate CA Template
Now we have the Certificate and Key file, in order to use these on Check Point, we need to convert them into a .p12 file using openssl
1
openssl pkcs12 -export -out cpsg.p12 -inkey cpsg.key -in cpsg.cer -certfile cpsg.cer -legacy
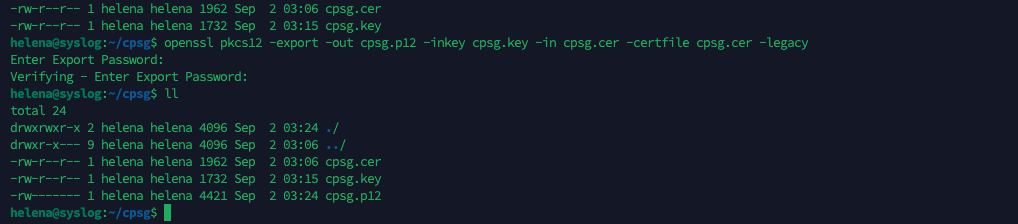
- .cer (Certificate): This file format typically contains only the public key certificate, which includes information about the certificate holder, the issuing CA, and the public key.
- .key (Private Key): This file contains the private key associated with a public key certificate. The .key file is used to sign data and decrypt information encrypted with the corresponding public key.
- .p12 (PKCS#12 or PFX): This is a binary file format that can store a certificate along with its private key and any intermediate certificates in a single, encrypted file.
Next open Smart Dashboard » HTTPS Inspection » Trusted CA, here we import the Root CA

Then on Gateways, select Import Outbond Certificate and import the .p12 file
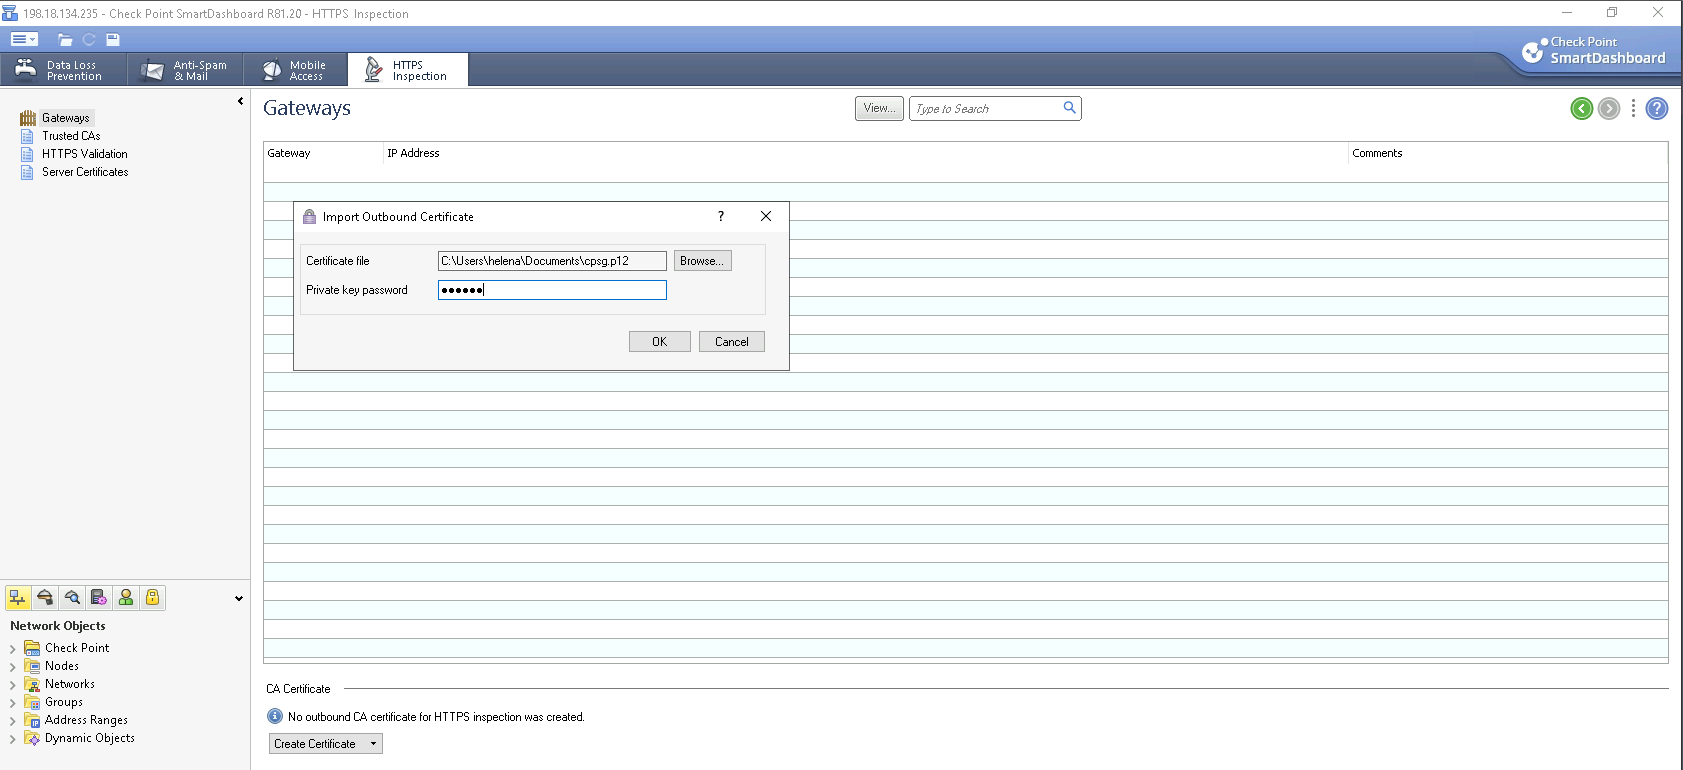
Now the ceritificate has been successfully imported

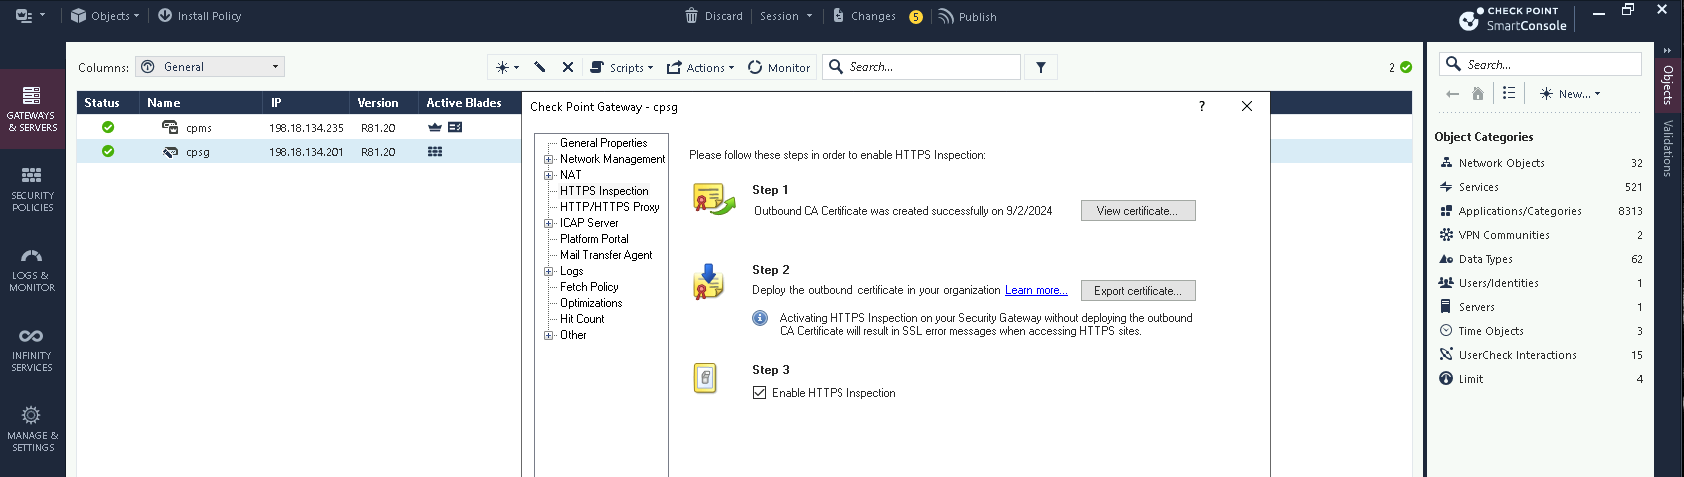
Enabling HTTPS Inspection
Now back to Smart Console, enable the HTTPS Inspection on the Security Gateway
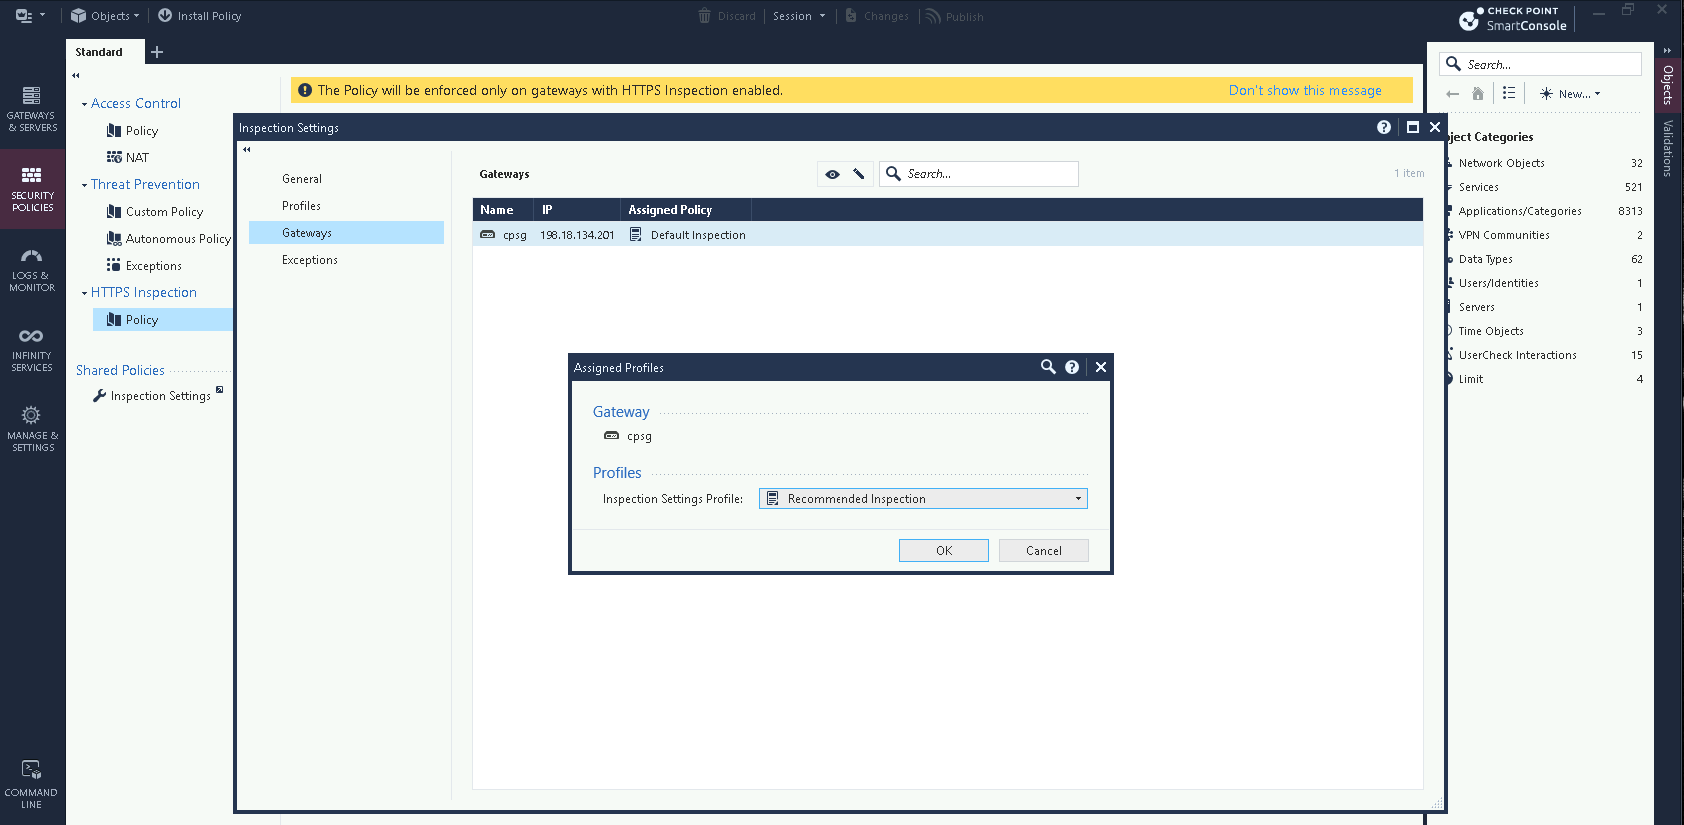
Next on Security Policies » Policy » Gateway, edit the assigned policy to be Recommended Inspection
Then on Policy, here we configure the policy to define the scope of traffic that will be inspected
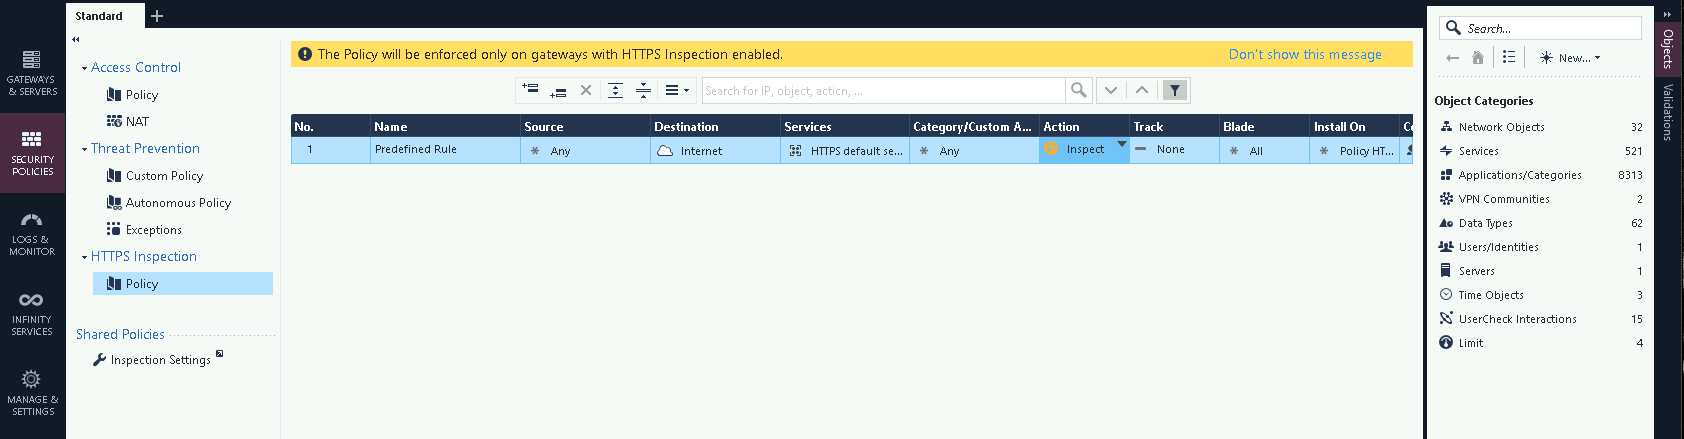
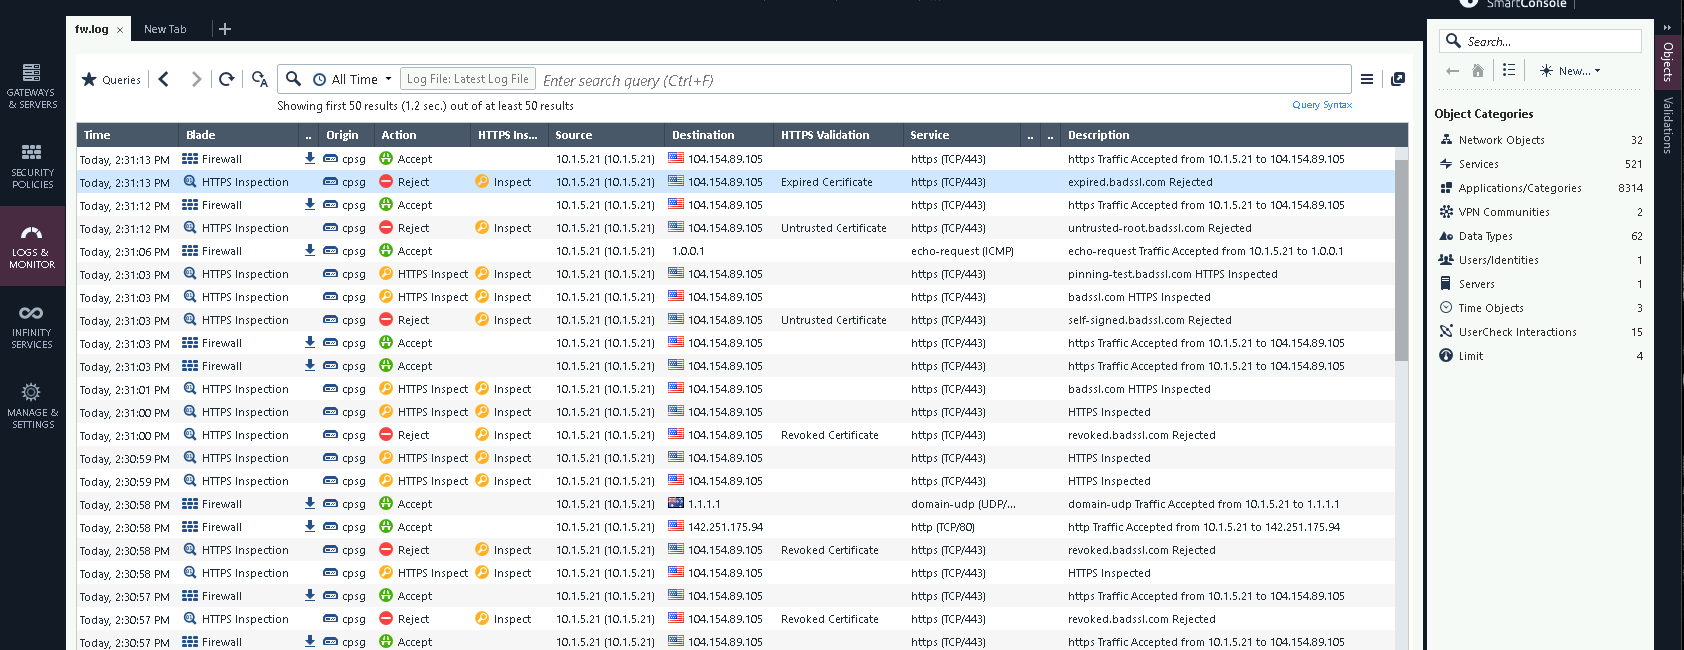
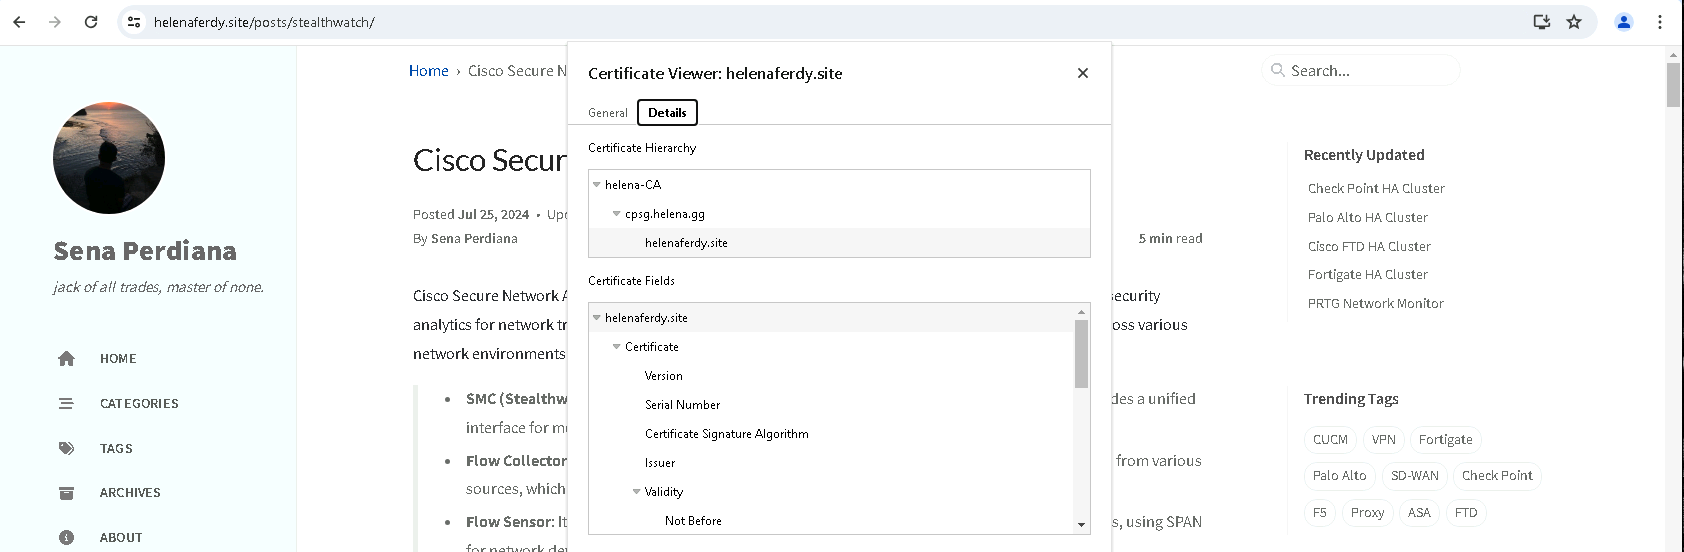
After publishing and installing, now all HTTPS traffic from the client nodes will be inspected, as showm below
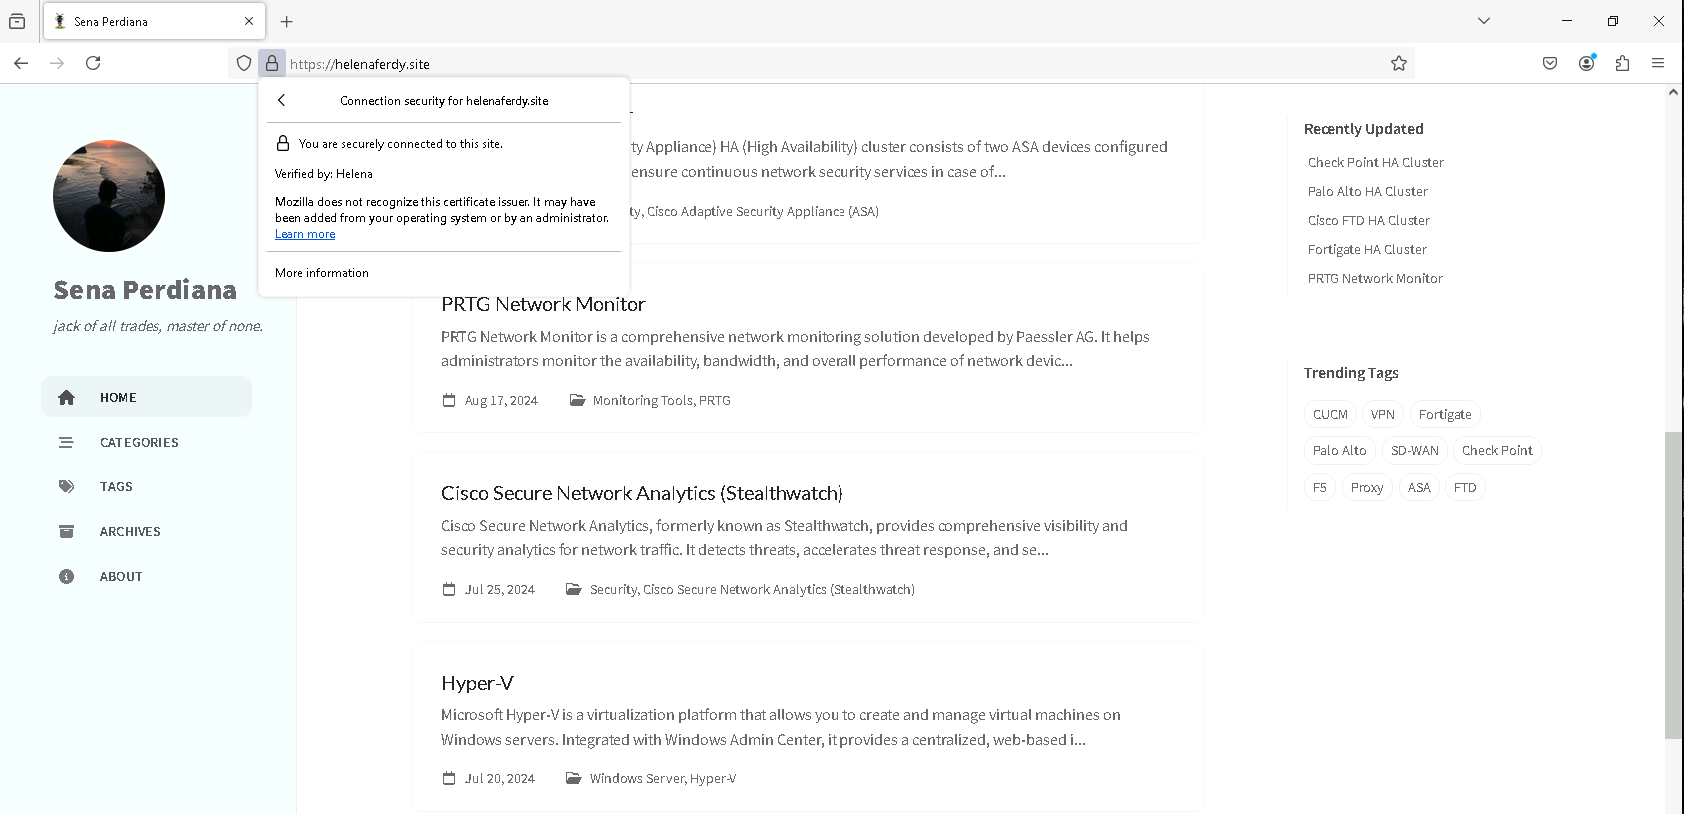
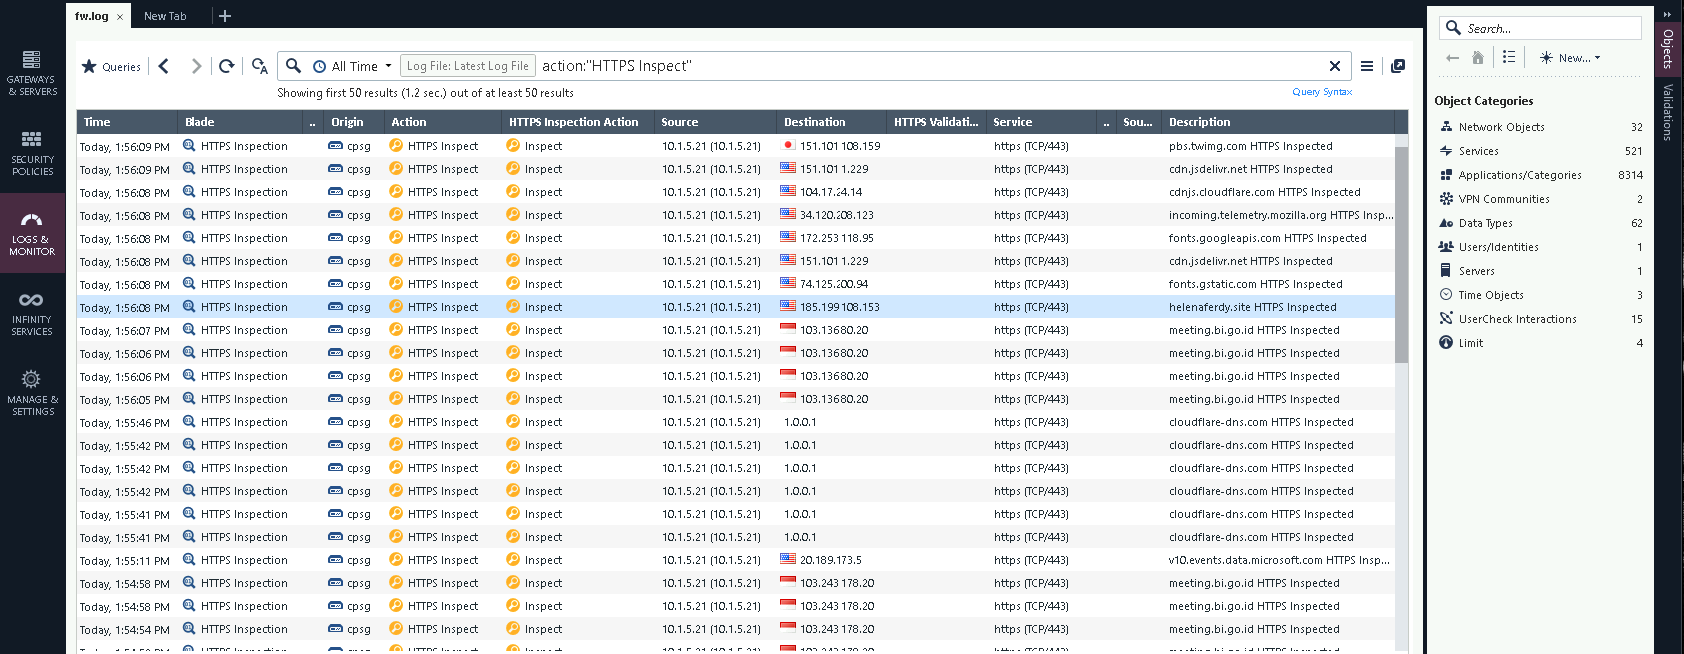
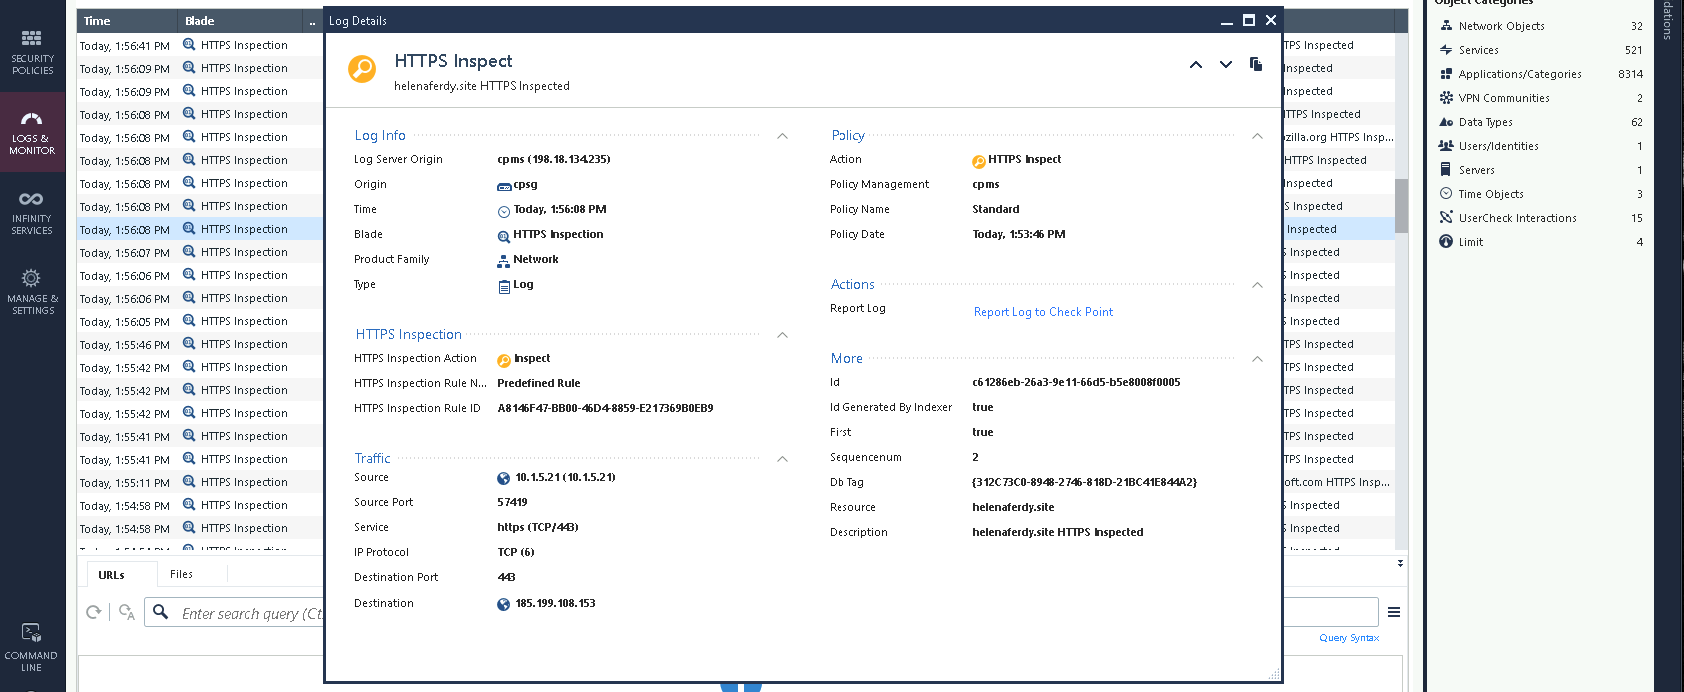
We can also see the logs of the traffic being inspected
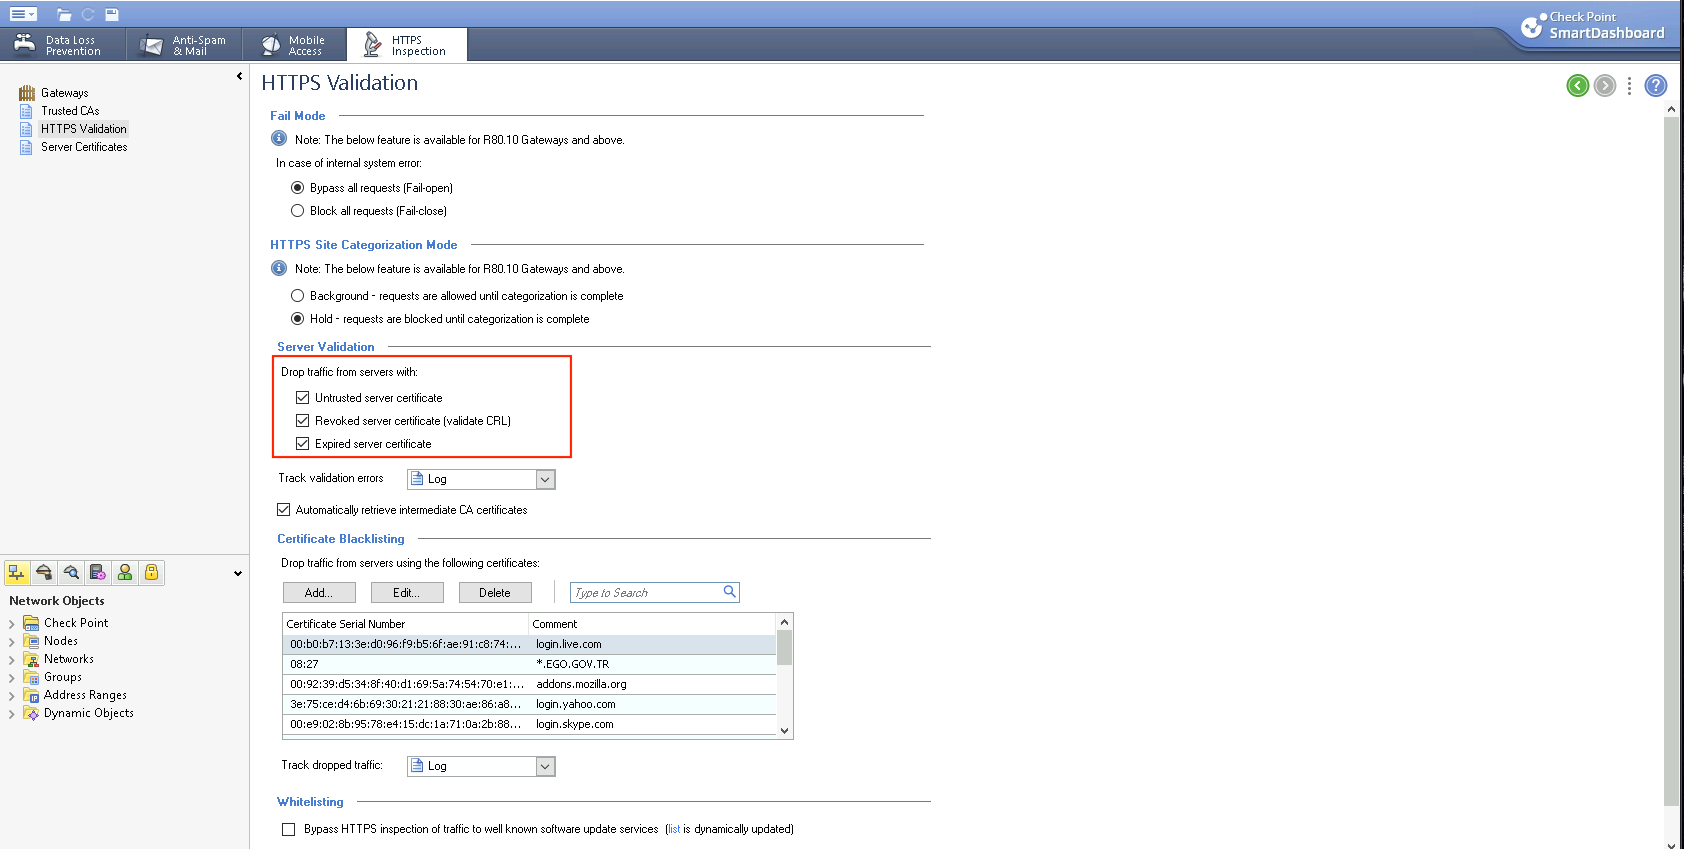
On Smart Dashboard, we can modify the HTTPS Validation, for example here we wanted to make it to be more strict by dropping traffic from lists selected below
And now if we try accessing sites with bad certificates, the traffic will be rejected