CUCM Single Sign On (SSO)
Cisco Unified Communications Manager (CUCM) Single Sign-On (SSO) is a feature that enables users to log in once and access multiple applications and services within the CUCM environment without the need for repeated authentication. This is achieved by integrating CUCM with an identity provider supporting standard protocols like SAML or LDAP.
Exporting Metadata Trust on CUCM
On CUCM, go to System » SAML SSO, select export
We’ll get an XML agreement file

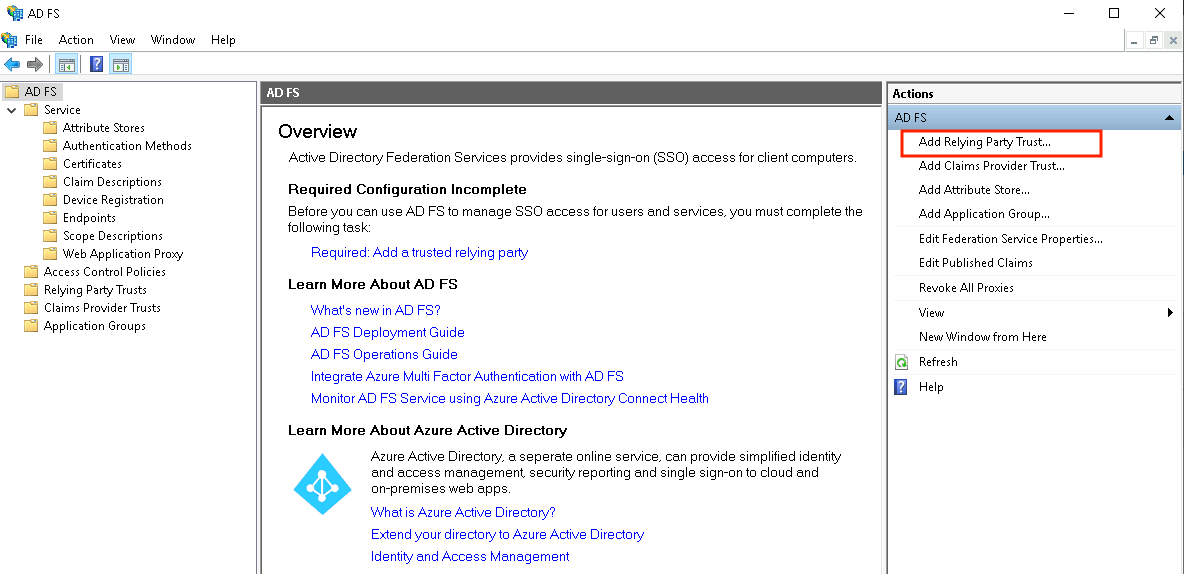
Configuring Relying Party Trust on ADFS
On the Windows ADFS, select Add Relying Party Trust
Relying party trust is a configuration that establishes a trust relationship between the ADFS server (the identity provider) and a relying party, which is the CUCM.
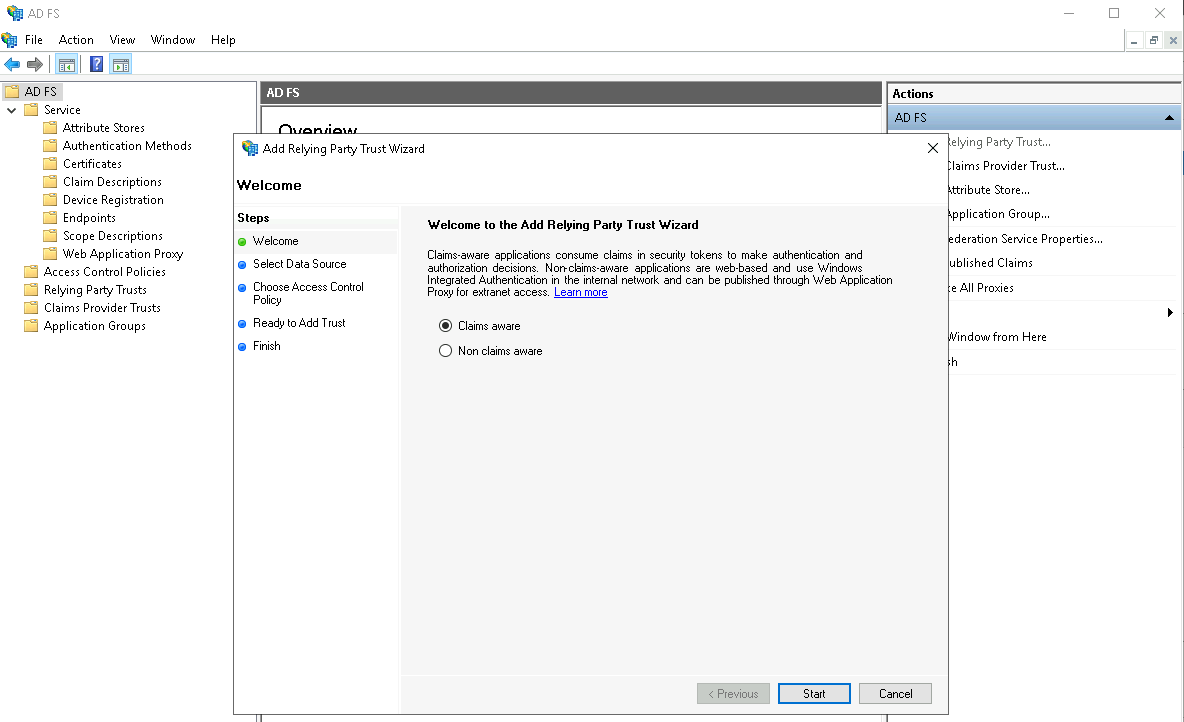
Select Claims Aware
In a claims-aware system, the identity provider (IDP) includes additional information about the user, known as claims, in the authentication token or assertion, whereas In a non-claims-aware system, the authentication token or assertion typically contains only the information necessary for basic authentication.
Select the exported xml file from cucm
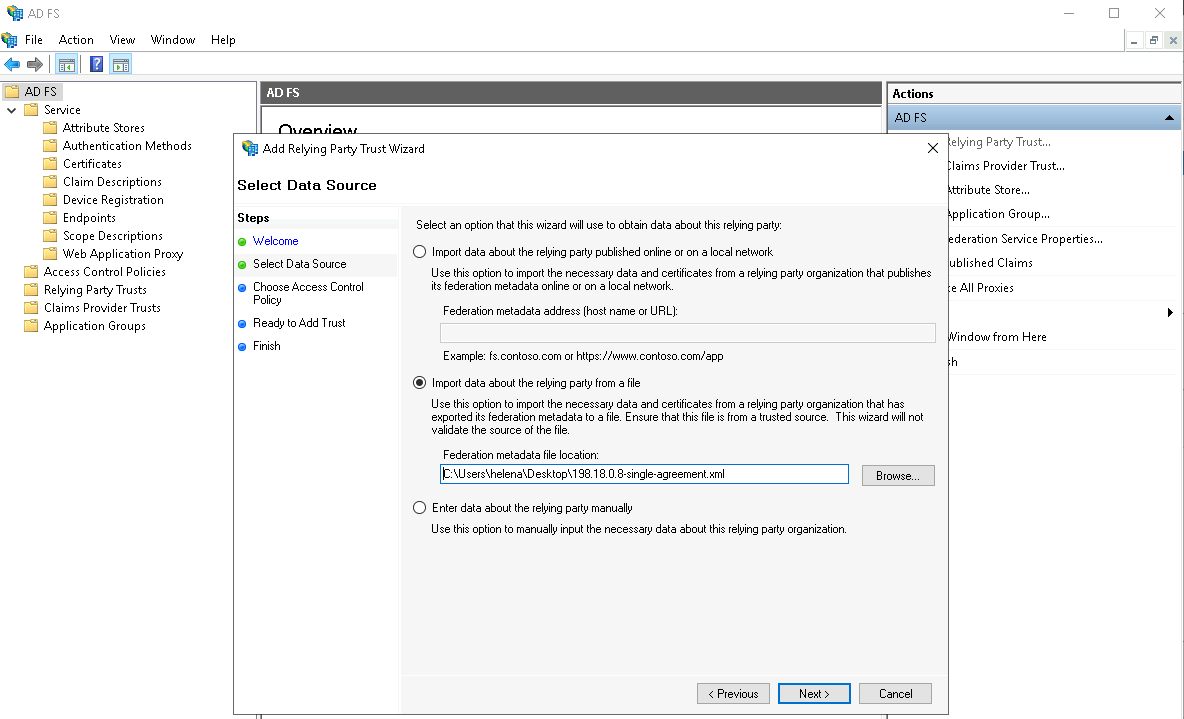
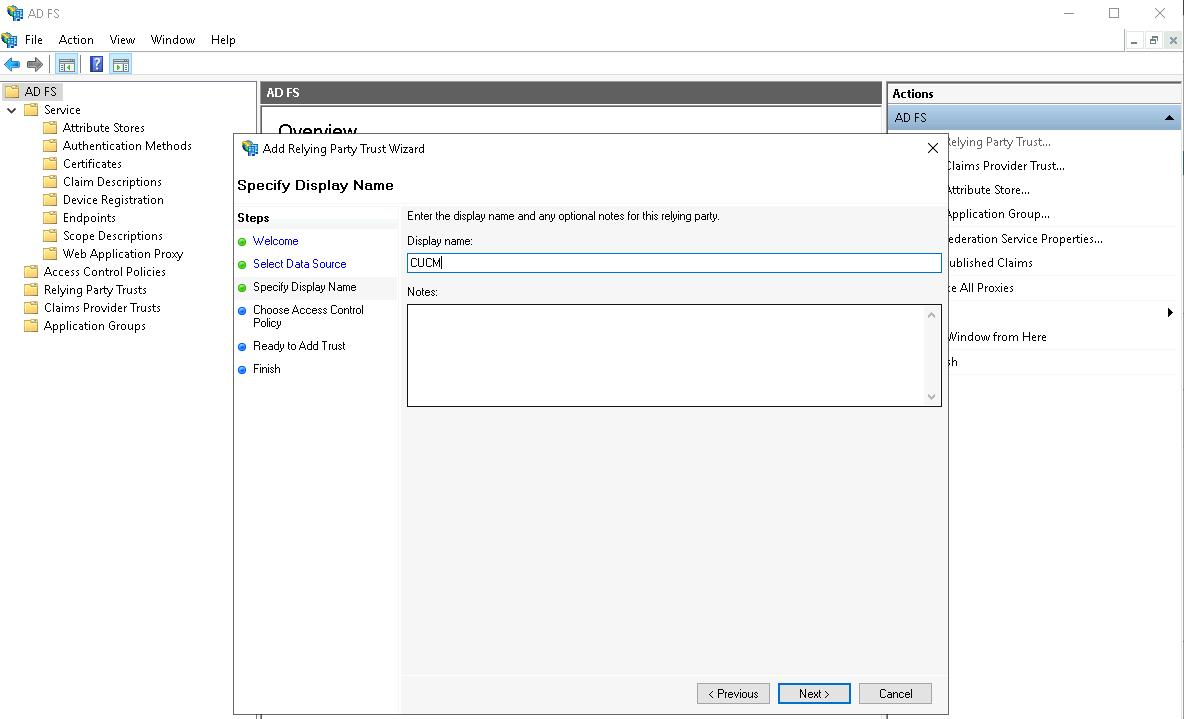
Give it a display name
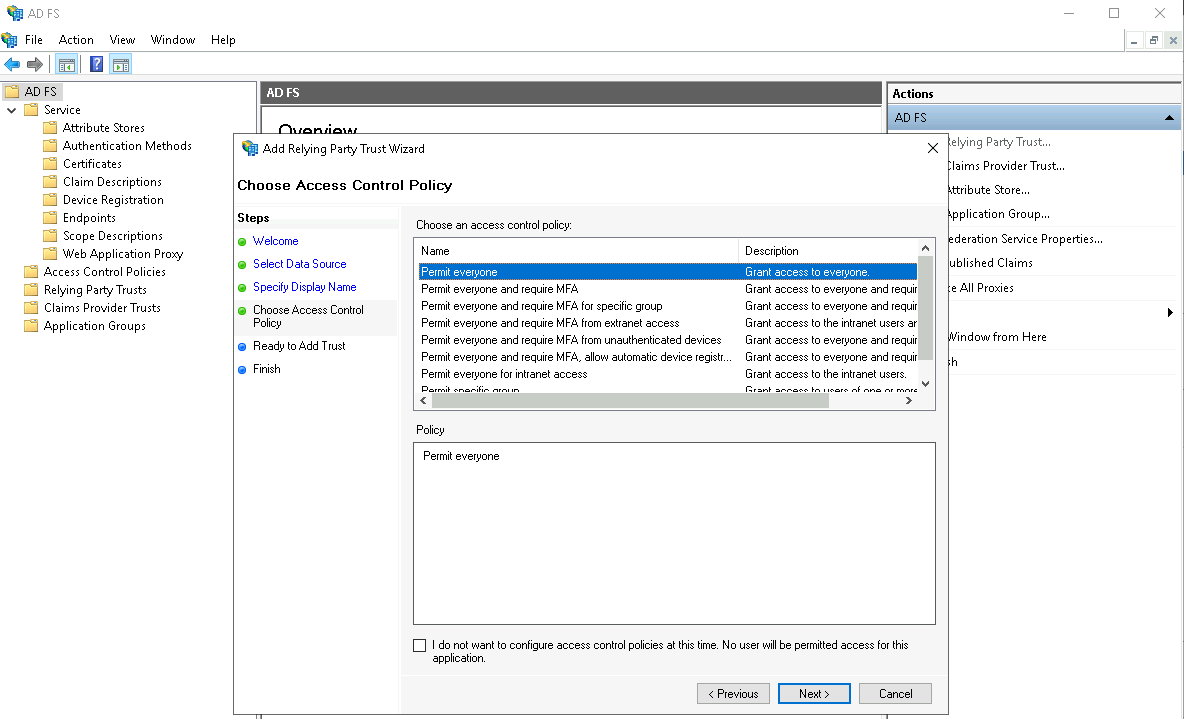
For access control, just permit everyone for the sake of simplicity
Finish it up and close the window

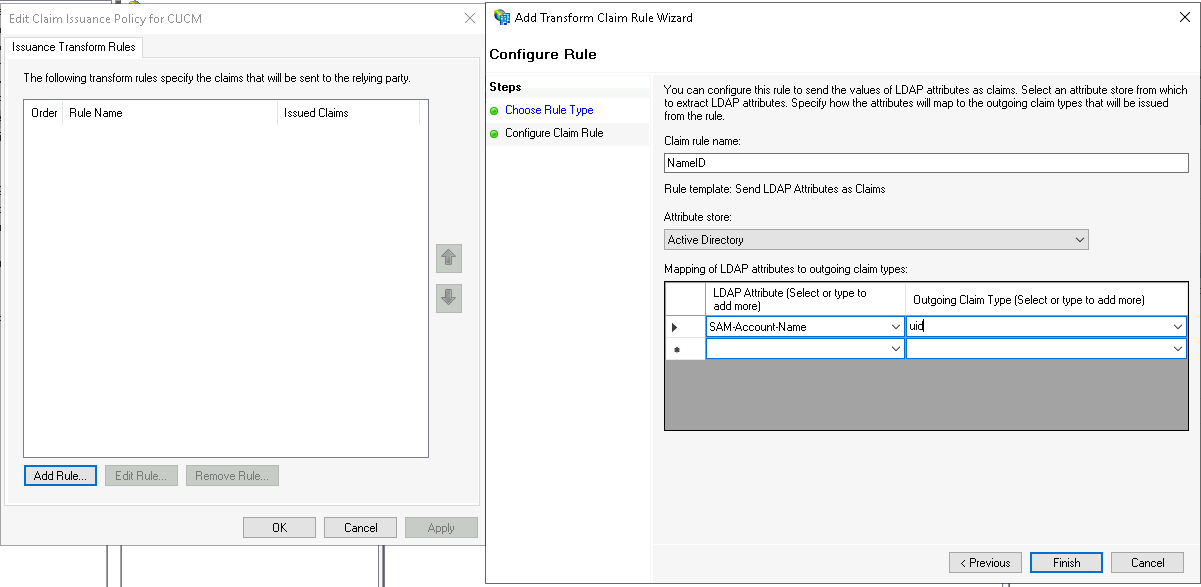
On the edit claim window, select Add Rule and select “Send LDAP Claims as Attributes”
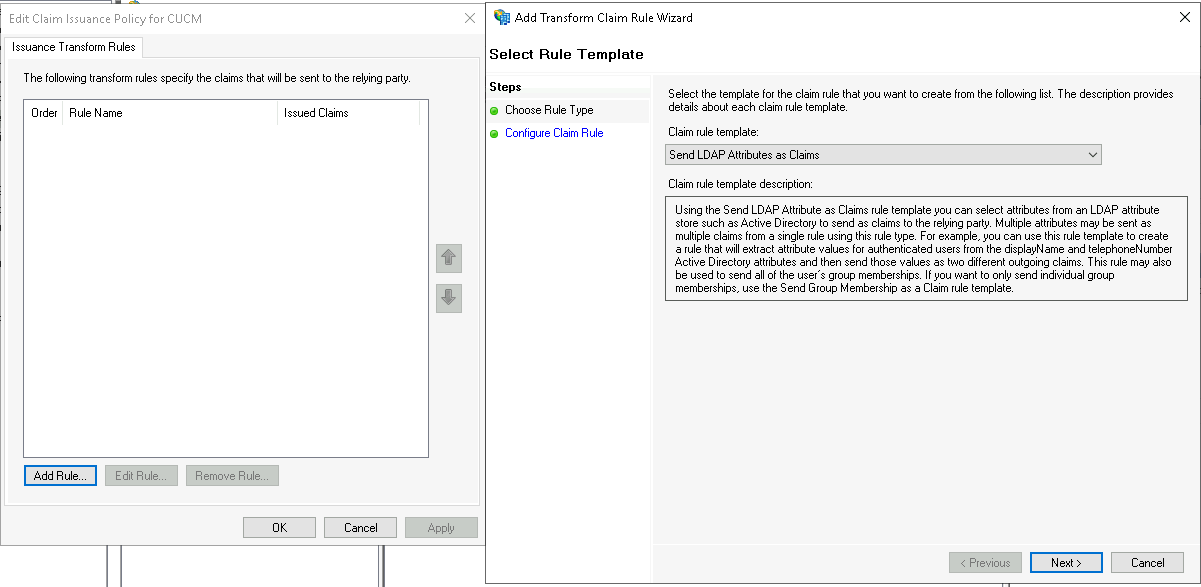
Give it a name and map the SAM-Account-Name to uid
Next add another rule, this time select “Send Claims using a Custom Rule”
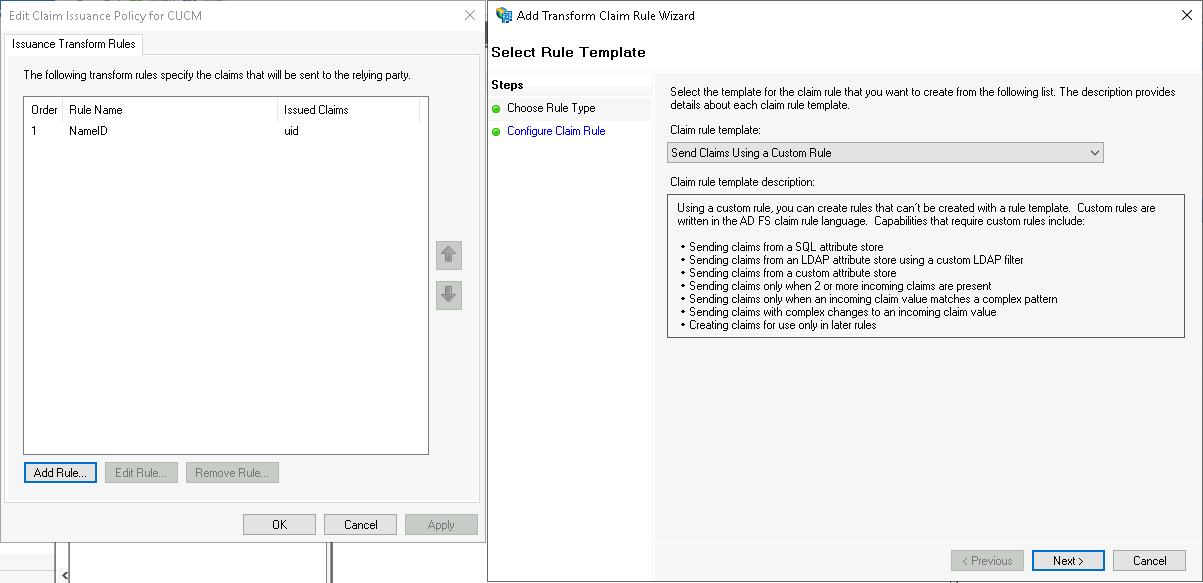
Give it a name and paste this custom rule
1
2
c:[Type == "http://schemas.microsoft.com/ws/2008/06/identity/claims/windowsaccountname"]
=> issue(Type = "http://schemas.xmlsoap.org/ws/2005/05/identity/claims/nameidentifier", Issuer = c.Issuer, OriginalIssuer = c.OriginalIssuer, Value = c.Value, ValueType = c.ValueType,Properties["http://schemas.xmlsoap.org/ws/2005/05/identity/claimproperties/format"] = "urn:oasis:names:tc:SAML:2.0:nameid-format:transient",Properties["http://schemas.xmlsoap.org/ws/2005/05/identity/claimproperties/namequalifier"] = "http://ad.helena.gg/com/adfs/service/trust", Properties["http://schemas.xmlsoap.org/ws/2005/05/identity/claimproperties/spnamequalifier"] = "cucm.helena.gg");

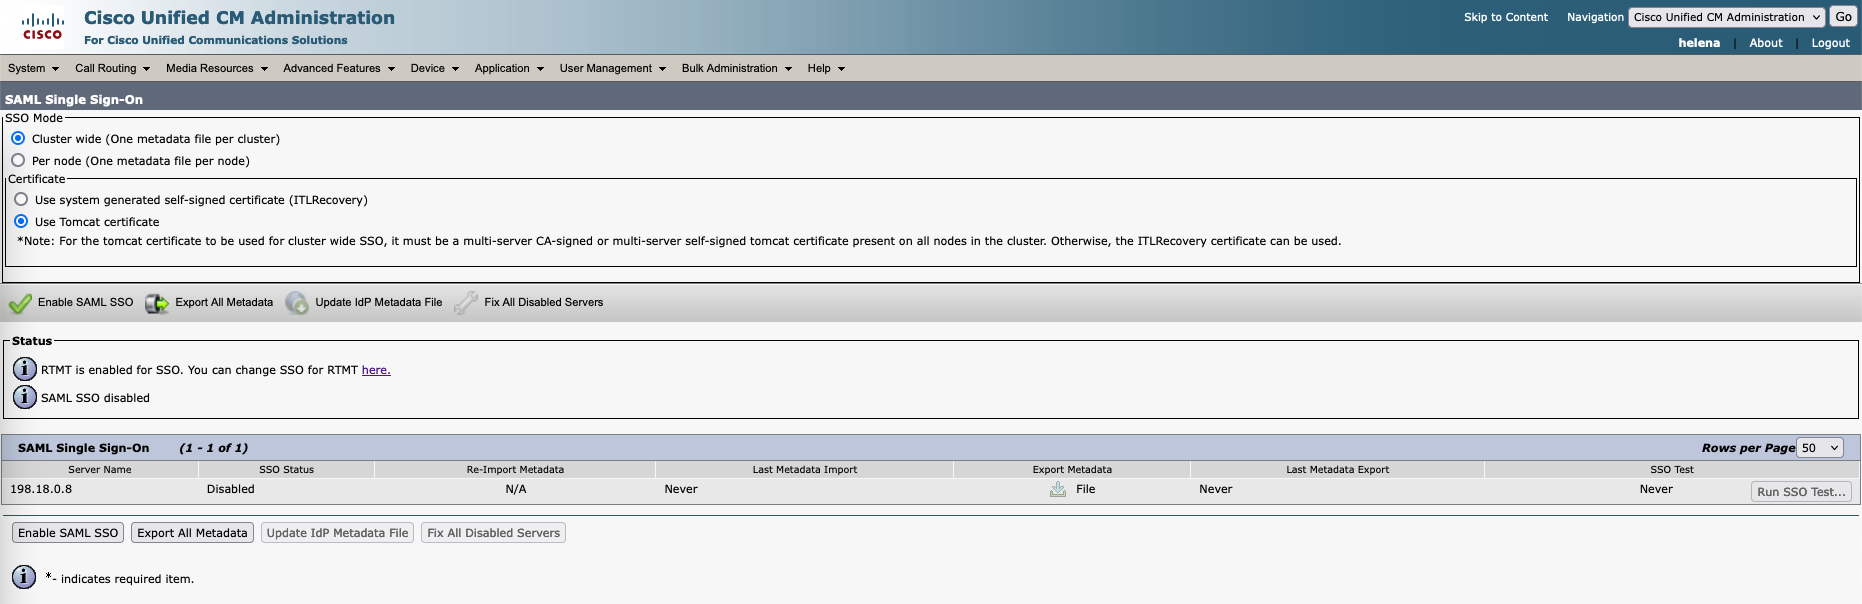
Configuring SSO on CUCM
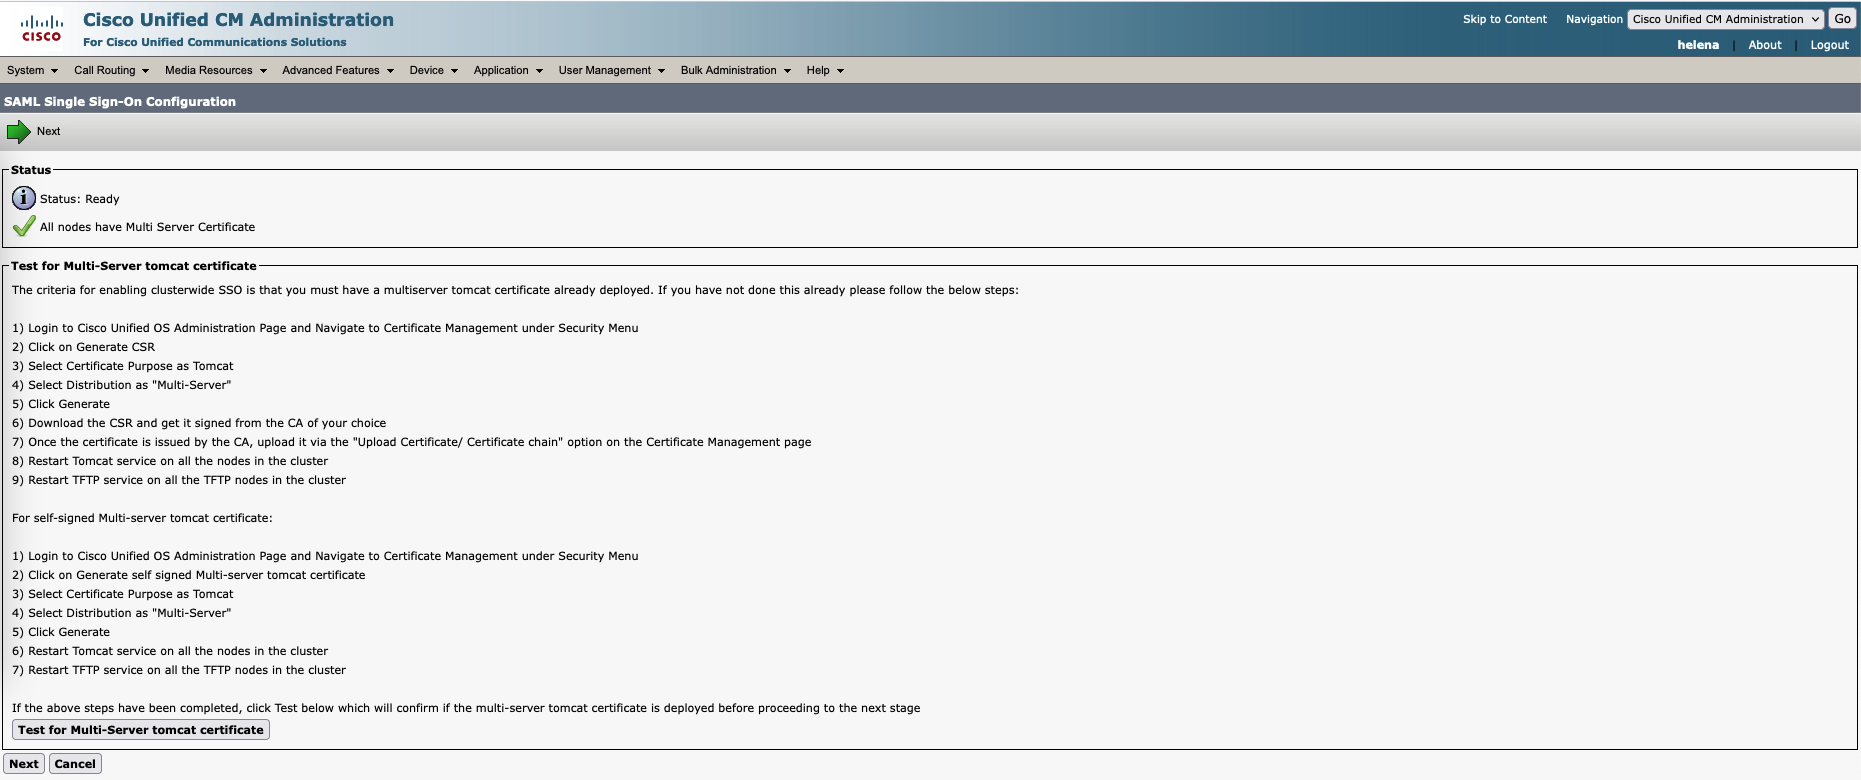
Back on CUCM, select enable SAML SSO
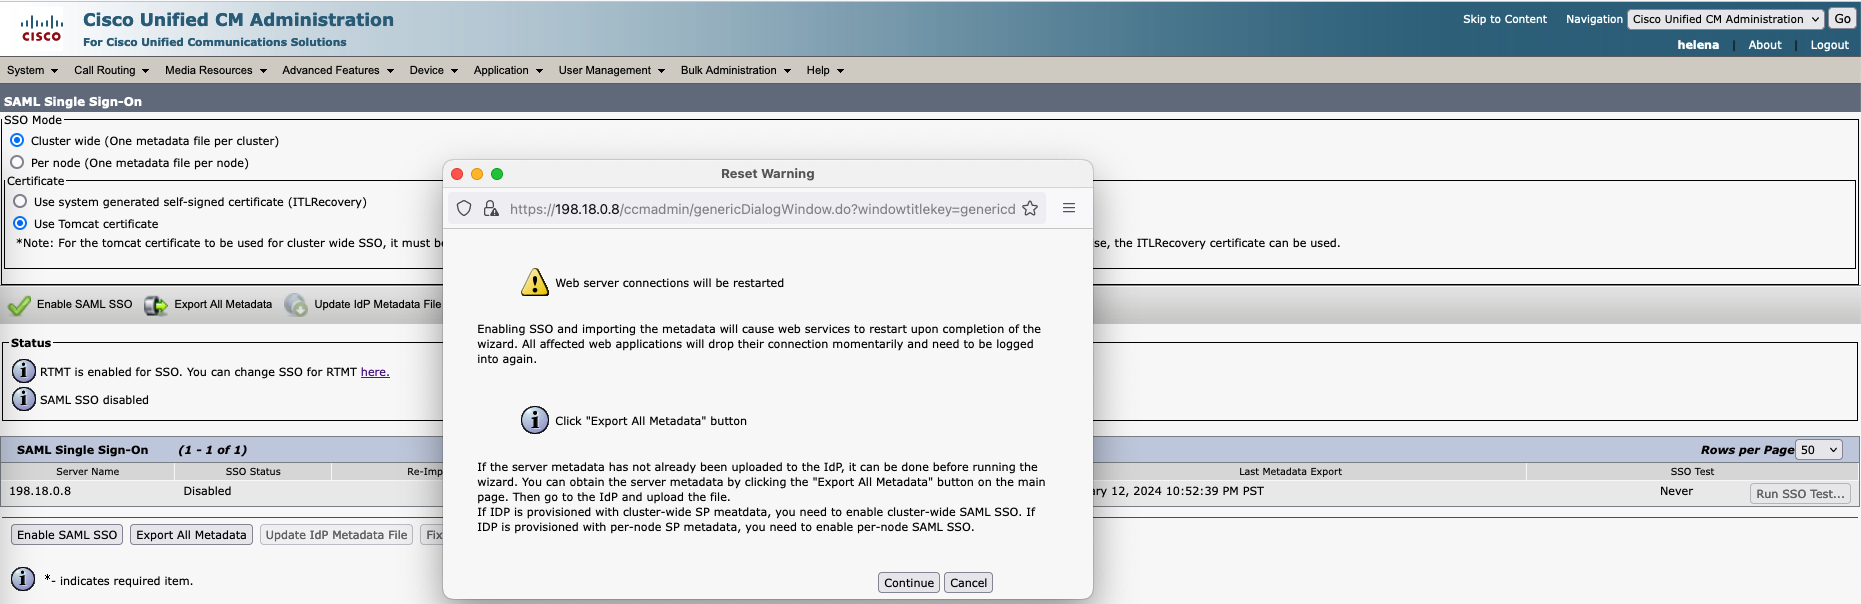
Make sure everthing is green and select next
Next download the IdP Metadata Trust on https://ad.helena.gg/FederationMetadata/2007-06/FederationMetadata.xml
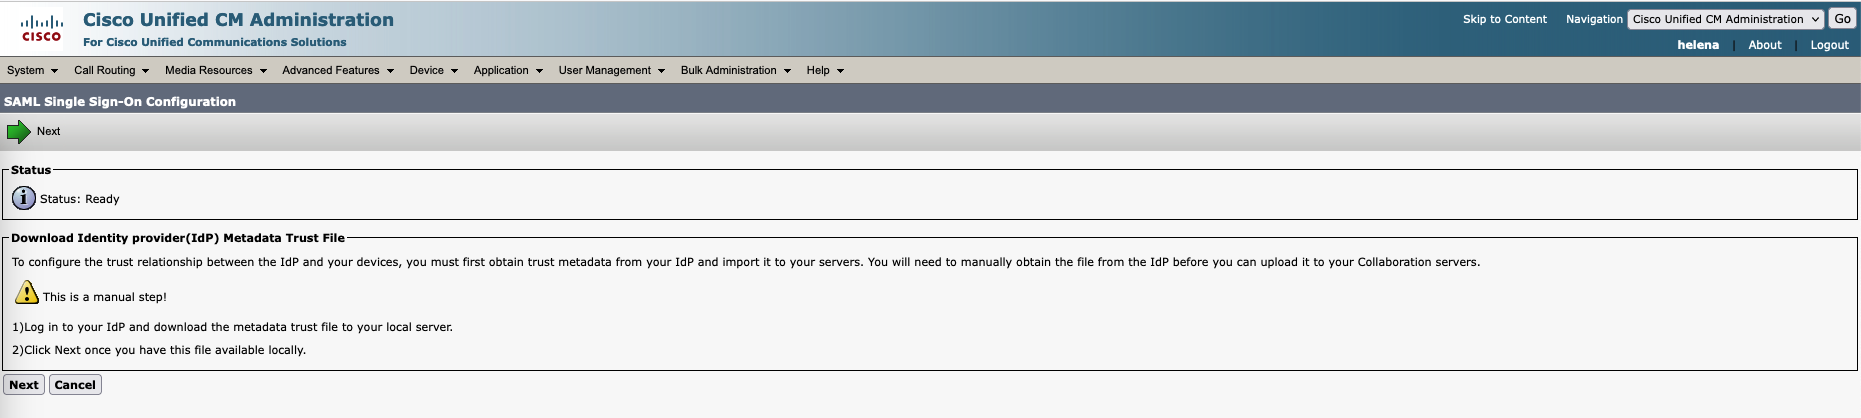
Select the Federation Metadata and select Import
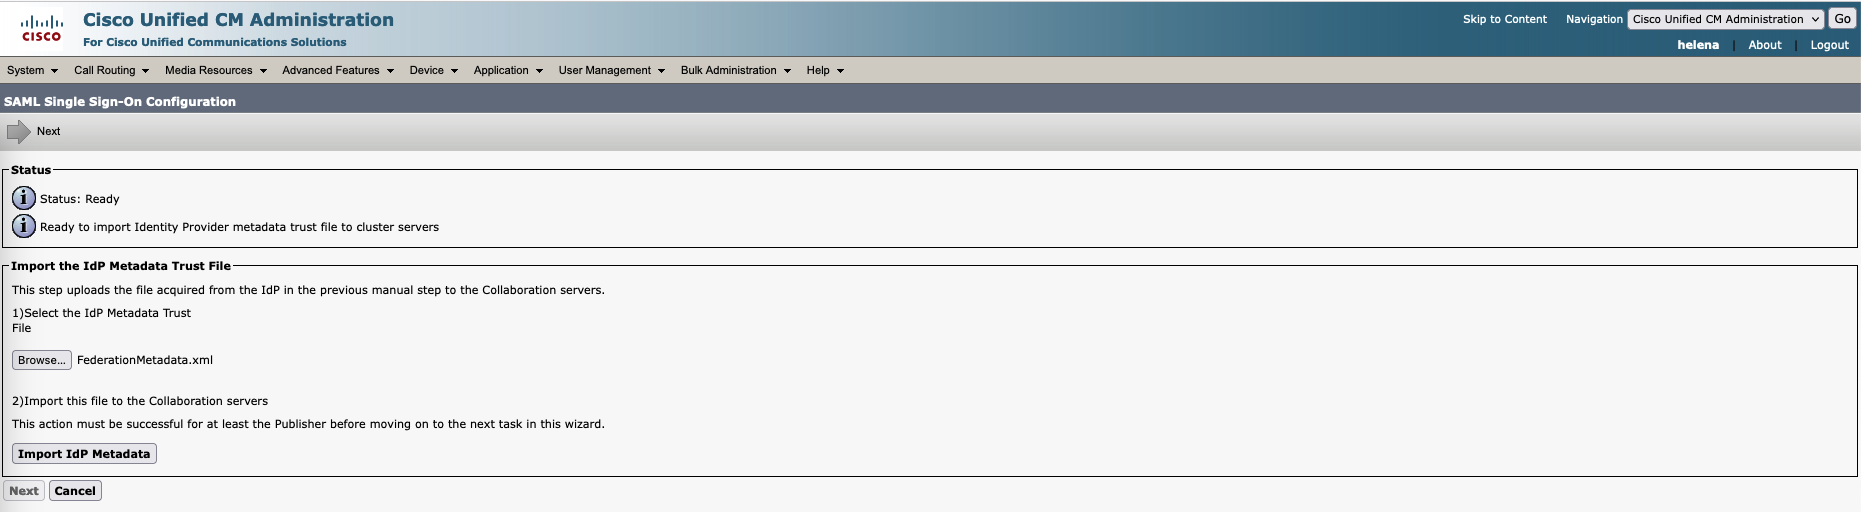
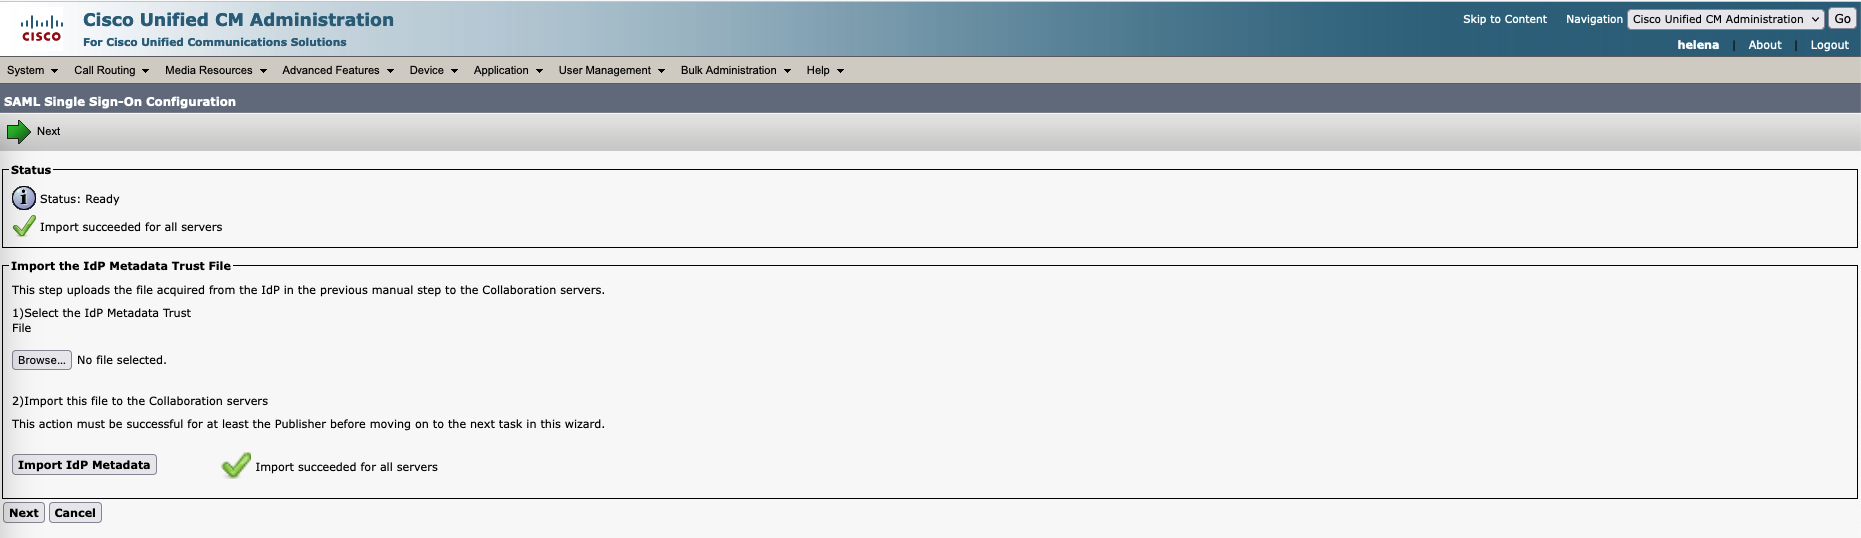
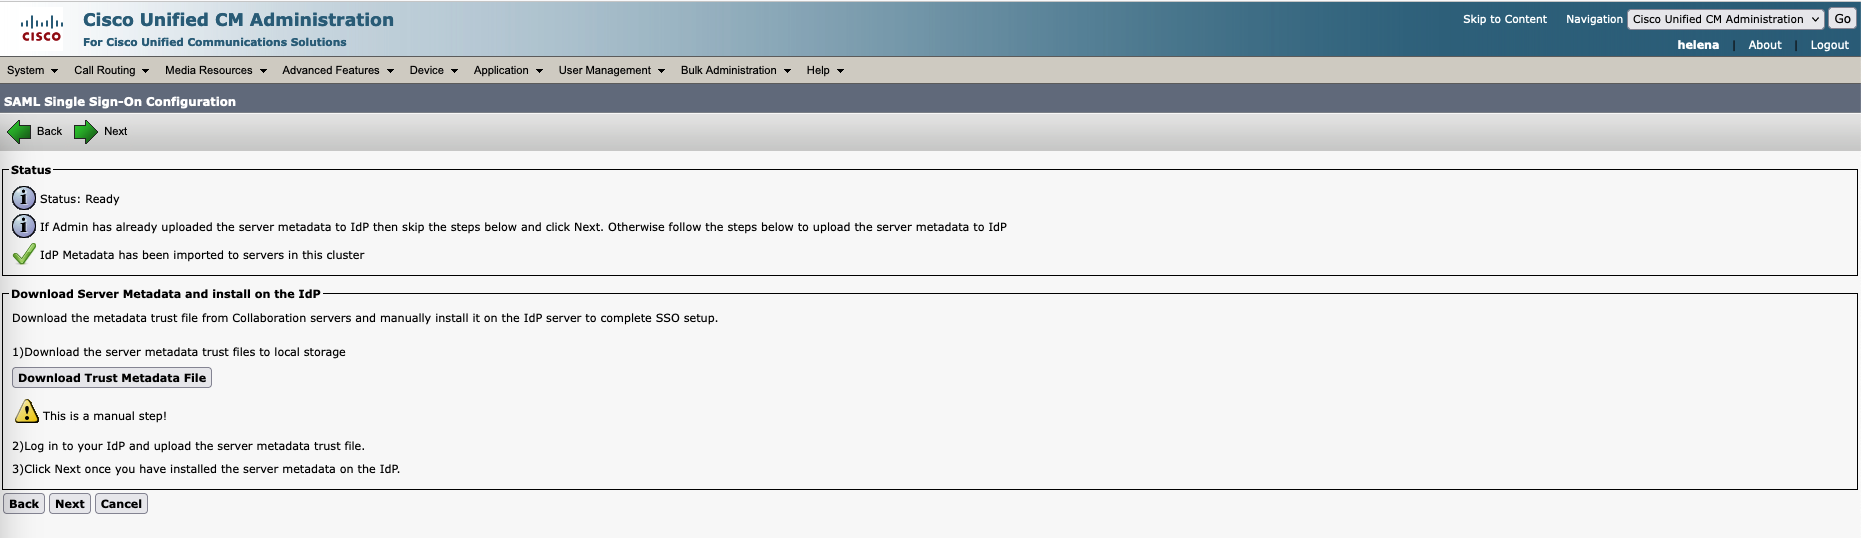
Next we can skip this part because we have done it earlier
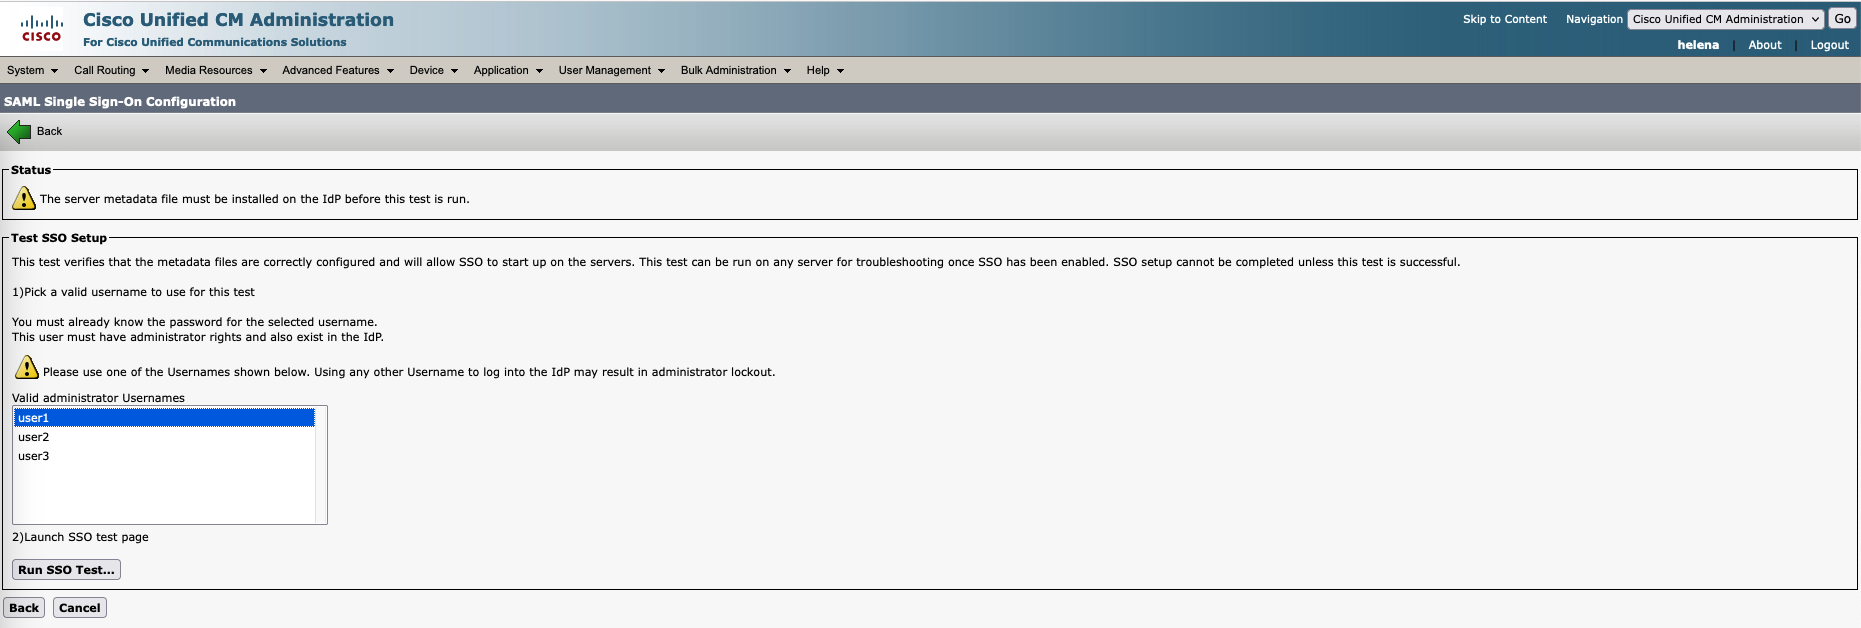
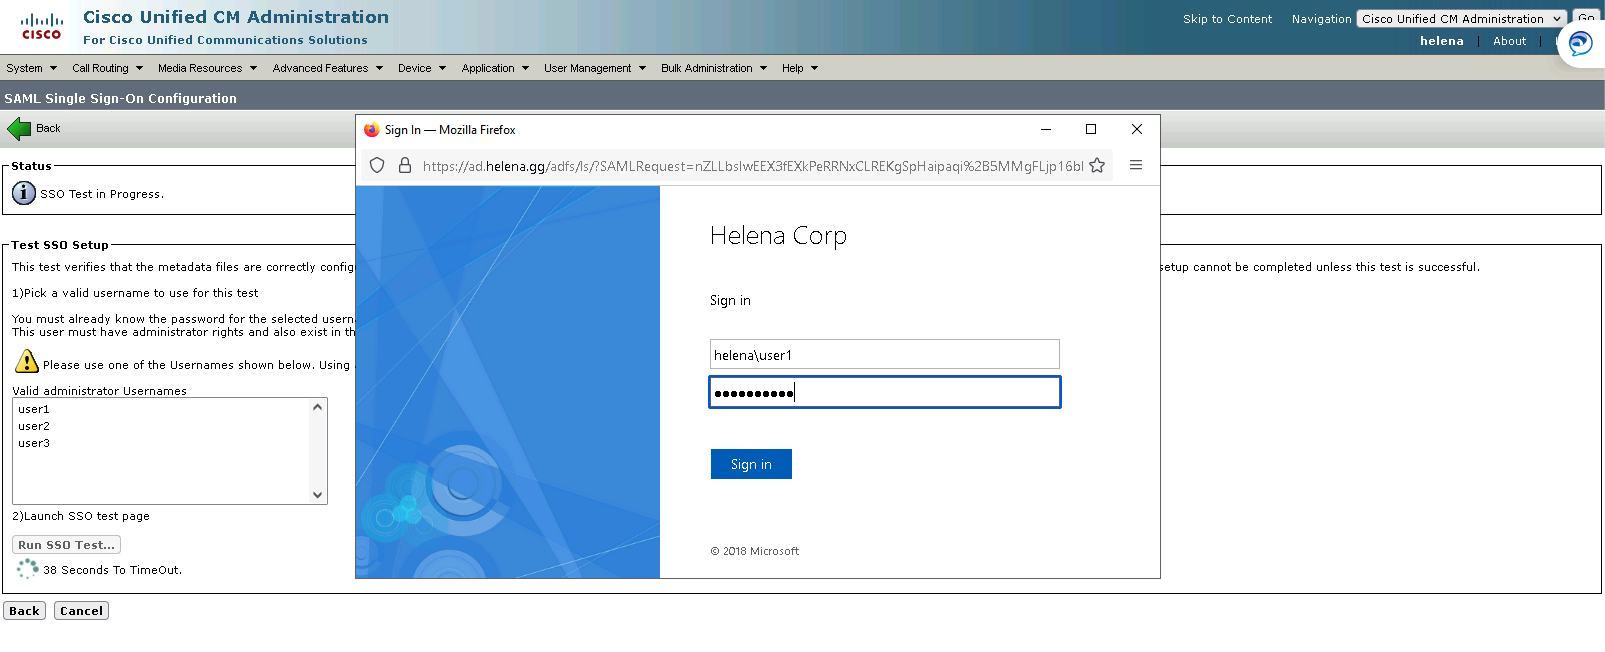
Next select one AD User used to test the SSO functionality
The SSO Login Page should pop up
The test has succeeded!
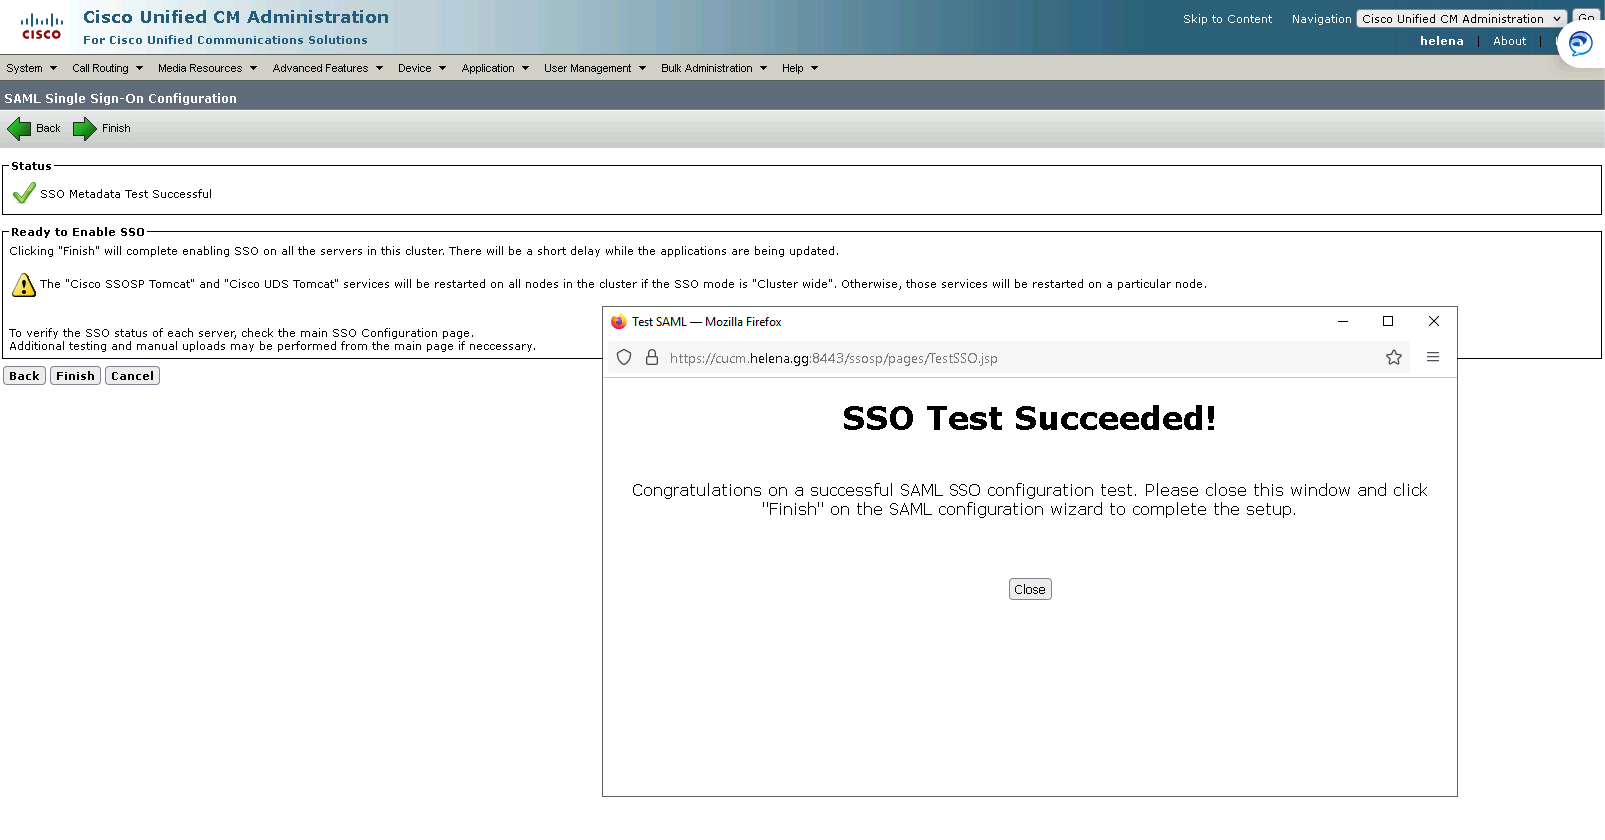
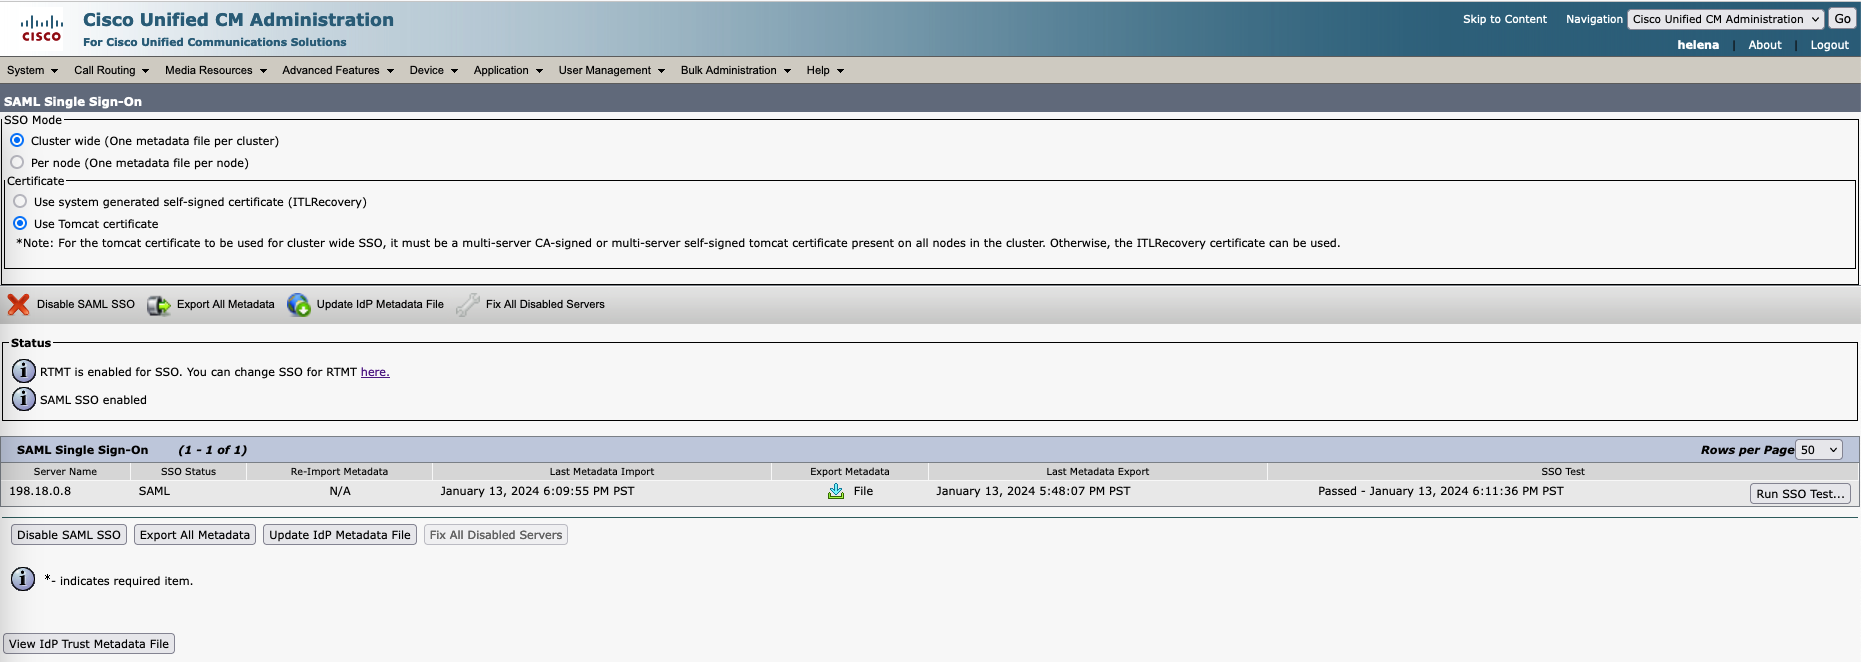
And the SSO is now enabled on CUCM
Login Test on MacOS
On MacOS the test should be pretty straight forward, just open Jabber and the SSO Login Page should pop up
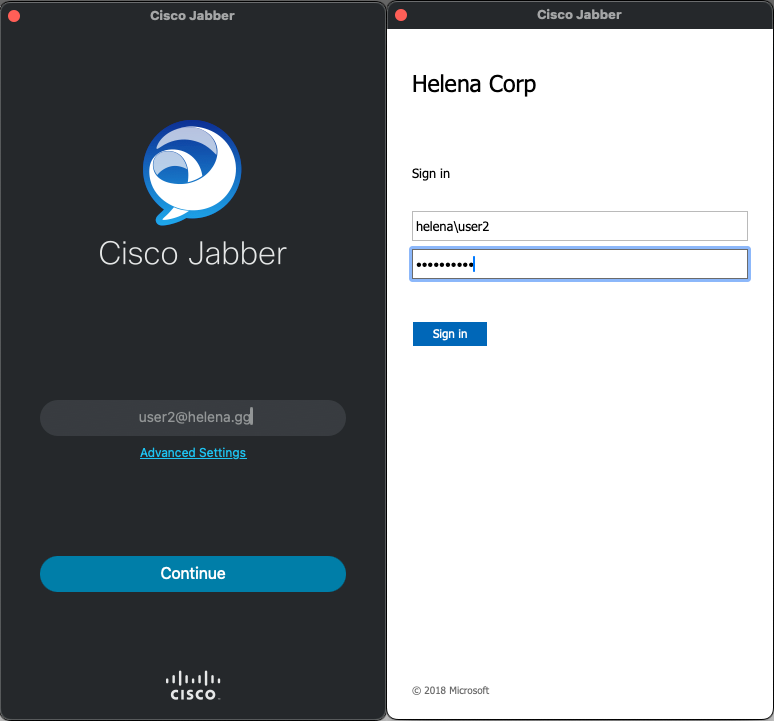
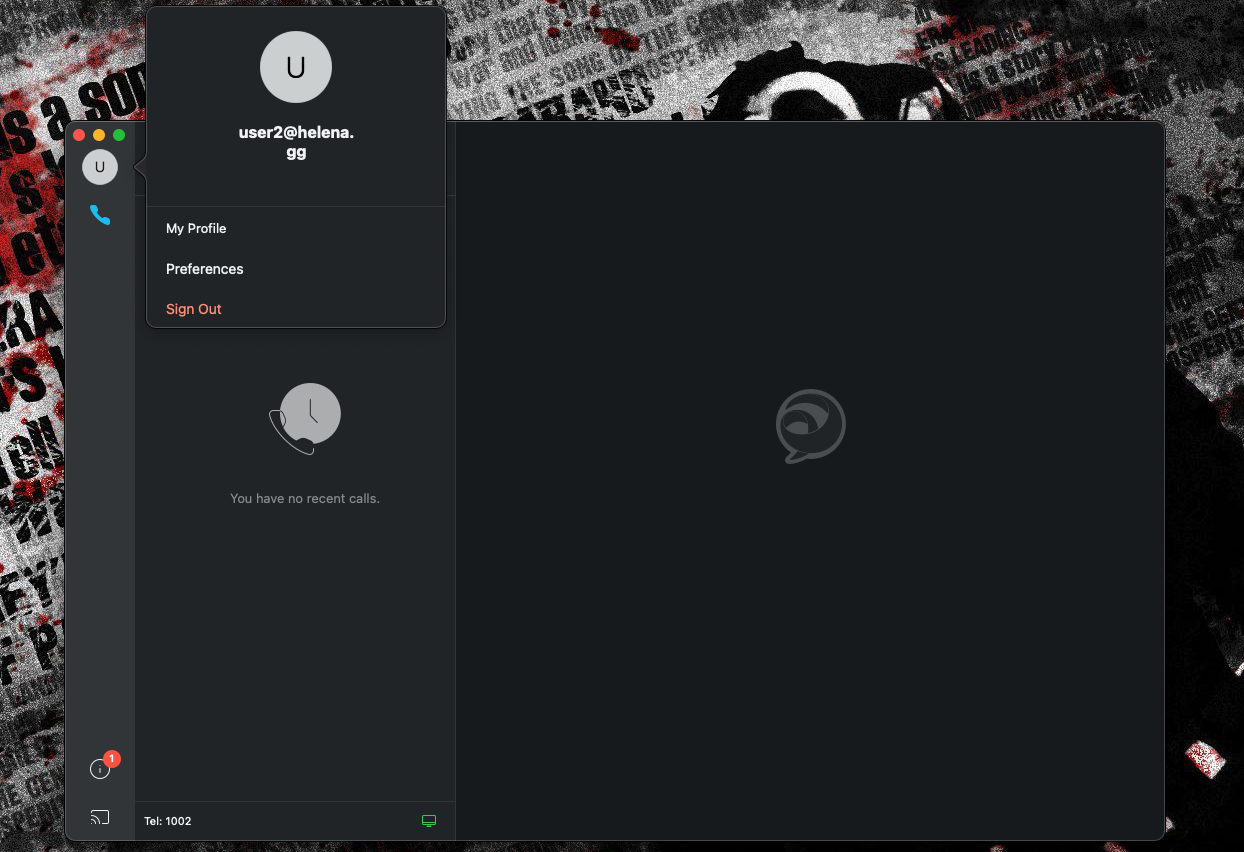
And we have successfully logged in
Login Test on Windows
On windows, on the ADFS Server we have to enable Kerberos authentication by registering Service Principal Names (SPNs) for services running on an ADFS server.
1
setspn -a HTTP/ad.helena.gg helena\helena

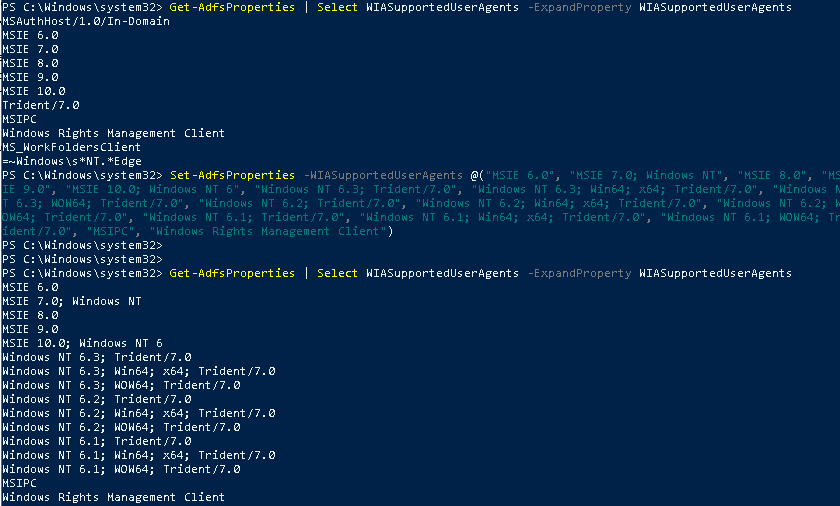
Next we need to make sure to enable all browser/application agents to ADFS’s Windows Integrated Authentication (WIA).
Run this command to check the enabled agents
Get-AdfsProperties Select WIASupportedUserAgents -ExpandProperty WIASupportedUserAgents
and this one to enable it on all agents
Set-AdfsProperties -WIASupportedUserAgents @(“MSIE 6.0”, “MSIE 7.0; Windows NT”, “MSIE 8.0”, “MSIE 9.0”, “MSIE 10.0; Windows NT 6”, “Windows NT 6.3; Trident/7.0”, “Windows NT 6.3; Win64; x64; Trident/7.0”, “Windows NT 6.3; WOW64; Trident/7.0”, “Windows NT 6.2; Trident/7.0”, “Windows NT 6.2; Win64; x64; Trident/7.0”, “Windows NT 6.2; WOW64; Trident/7.0”, “Windows NT 6.1; Trident/7.0”, “Windows NT 6.1; Win64; x64; Trident/7.0”, “Windows NT 6.1; WOW64; Trident/7.0”, “MSIPC”, “Windows Rights Management Client”)
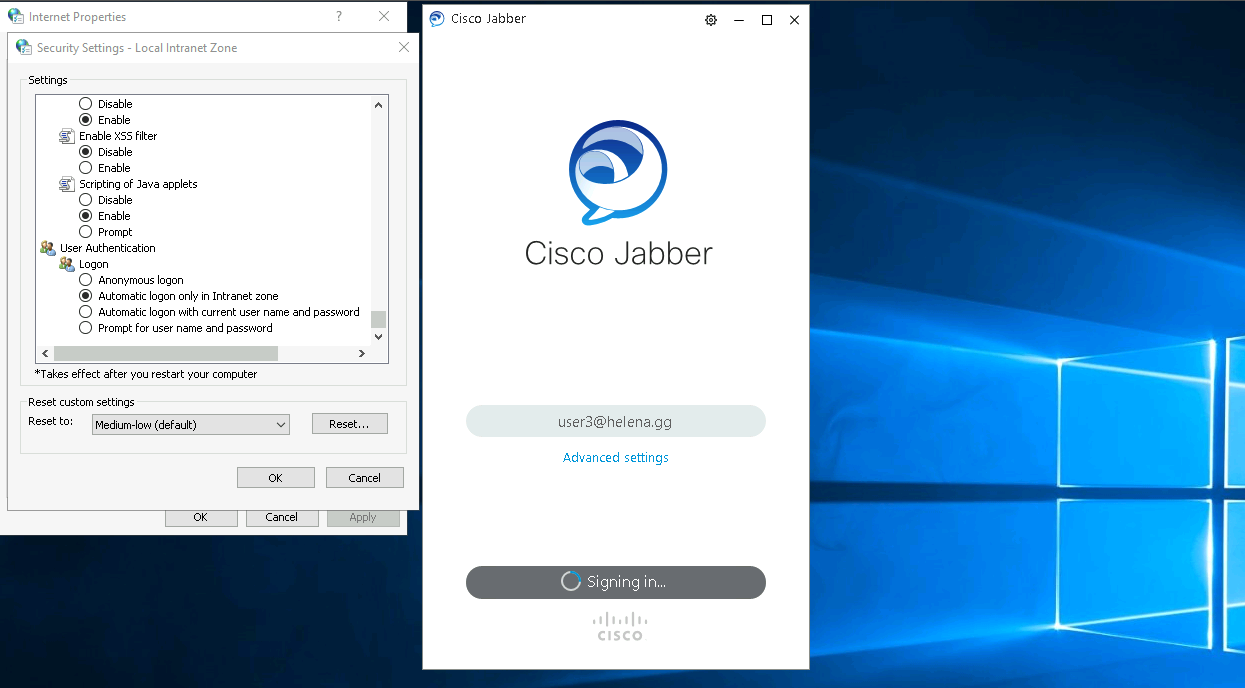
Now on the client side, we also need to whitelist the ADFS Server on the Internet Properties of every client trying to authenticate

Next on security settings, we can configure the behaviour of the SSO Sign In, this configuration will always ask for a credentials
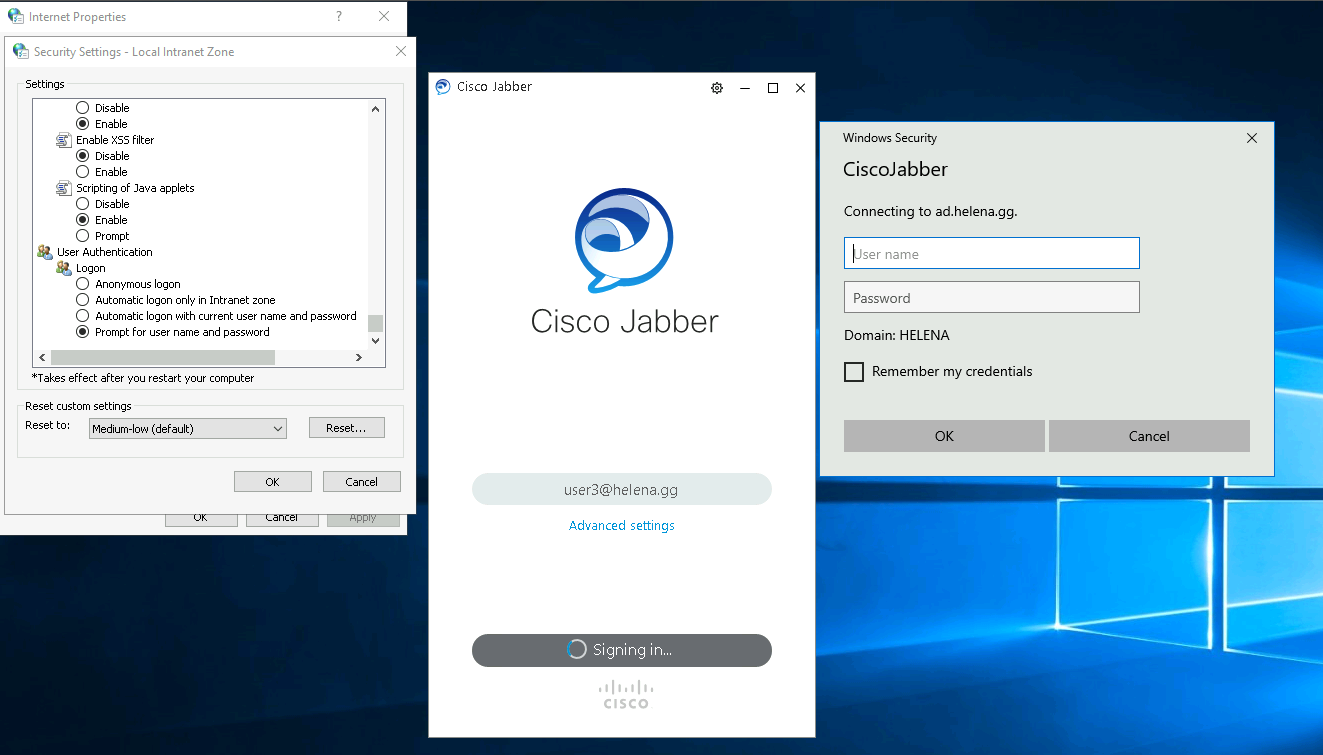
But this one will automatically log the user in if that user has been authenticated
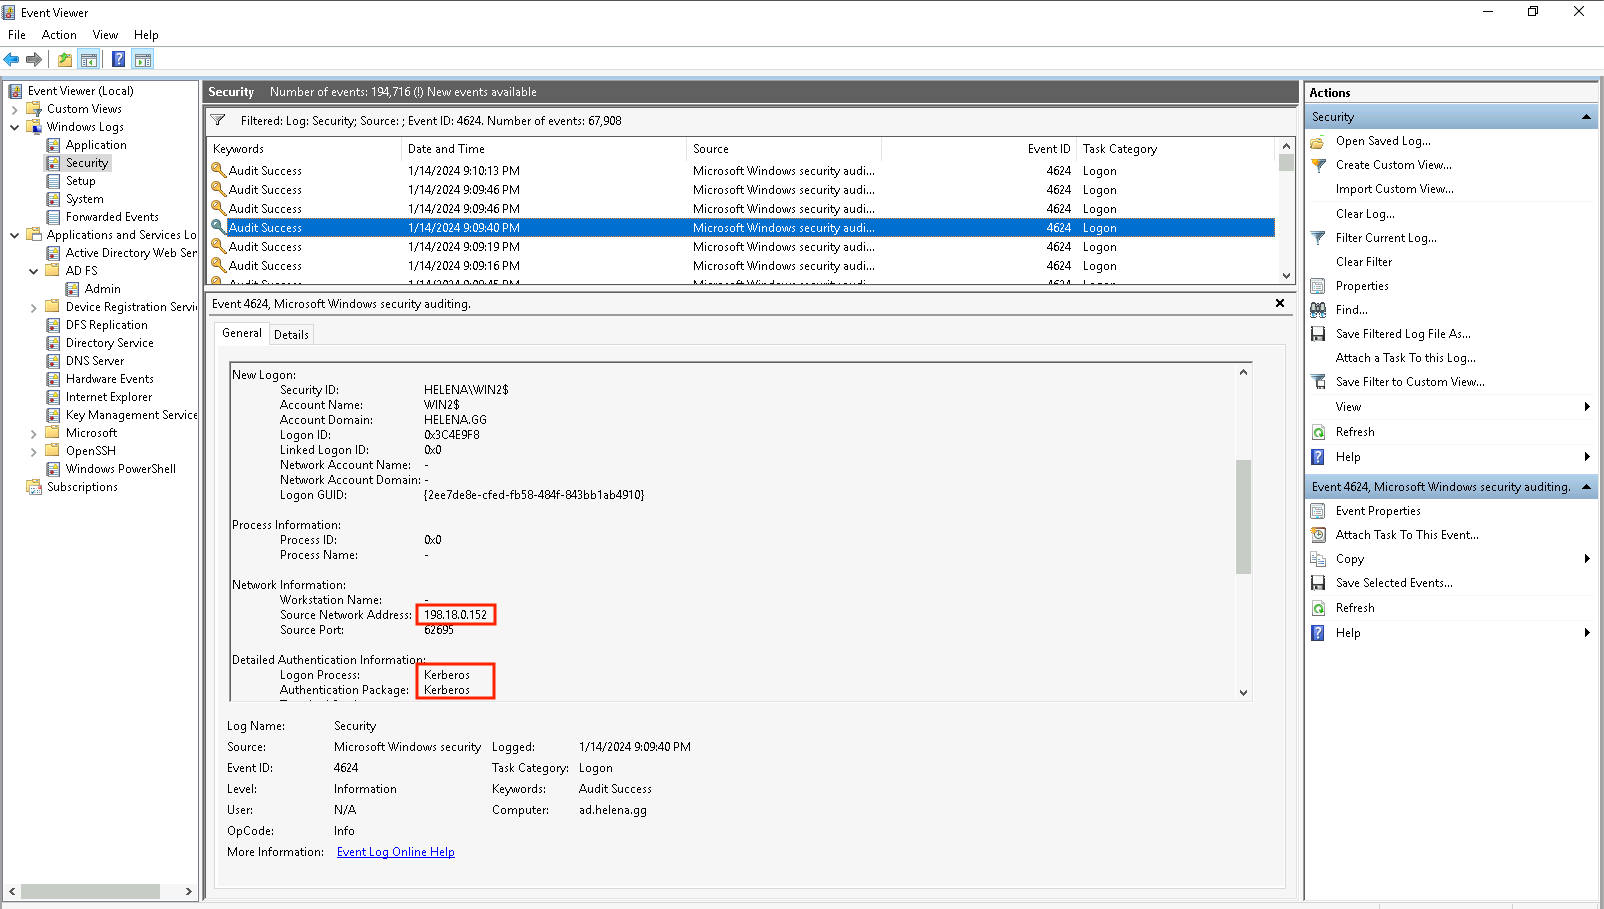
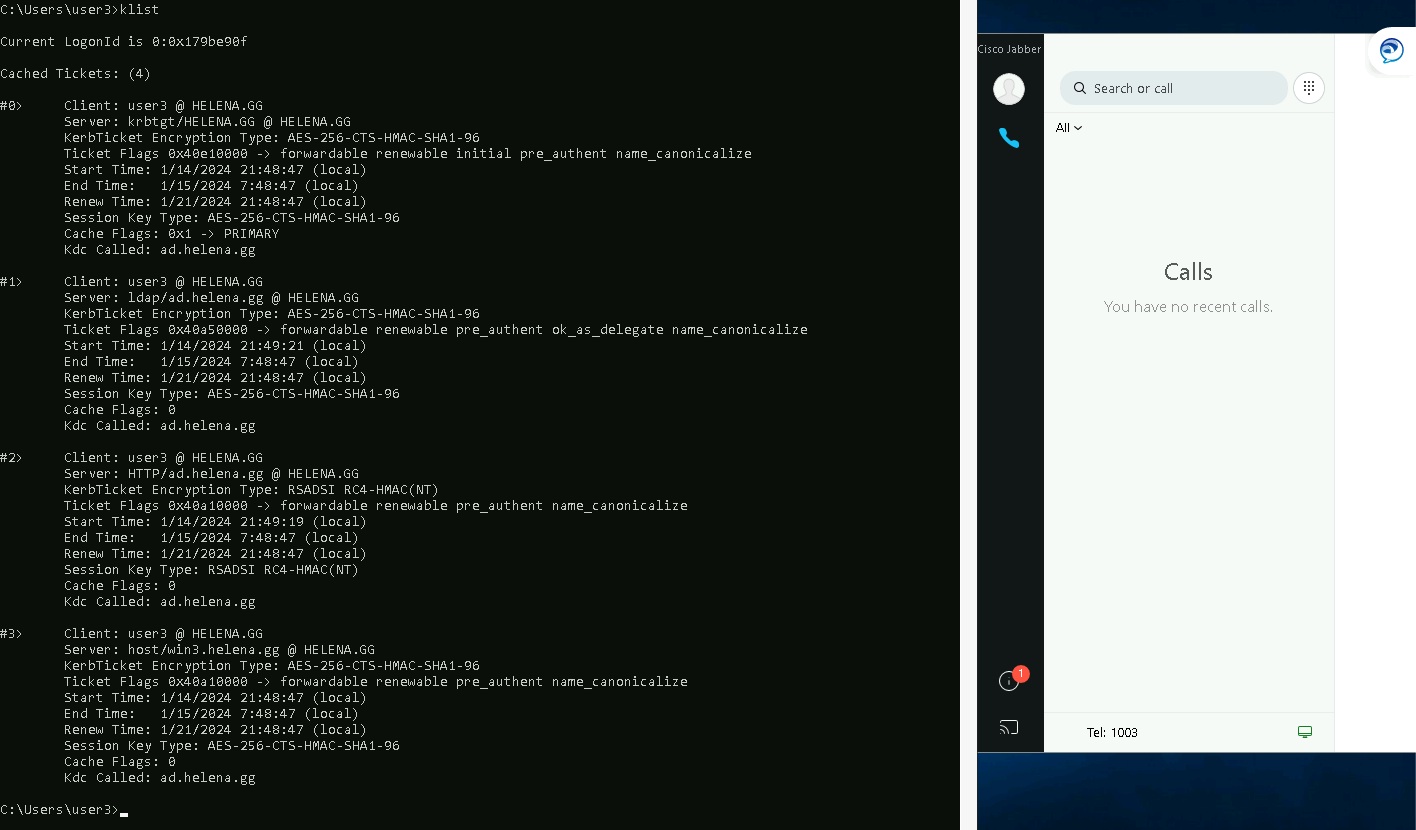
Now that we’ve successfully logged in, on the client’s pc we can run “klist” to see the kerberos tickets used for SSO Authentication
Furthermore on the ADFS Server, we can see the Event Viewer audit for every user that authenticates on the ADFS server