Cisco ISE TACACS & RADIUS Device Admin
The Cisco Identity Services Engine (ISE) is a security policy management platform that enables secure access control and policy enforcement across wired, wireless, and VPN networks. It provides centralized authentication, authorization, and accounting (AAA) services, as well as comprehensive visibility and control over network access.
Installing ISE
To install ISE, just deploy the ISE as VM per usual
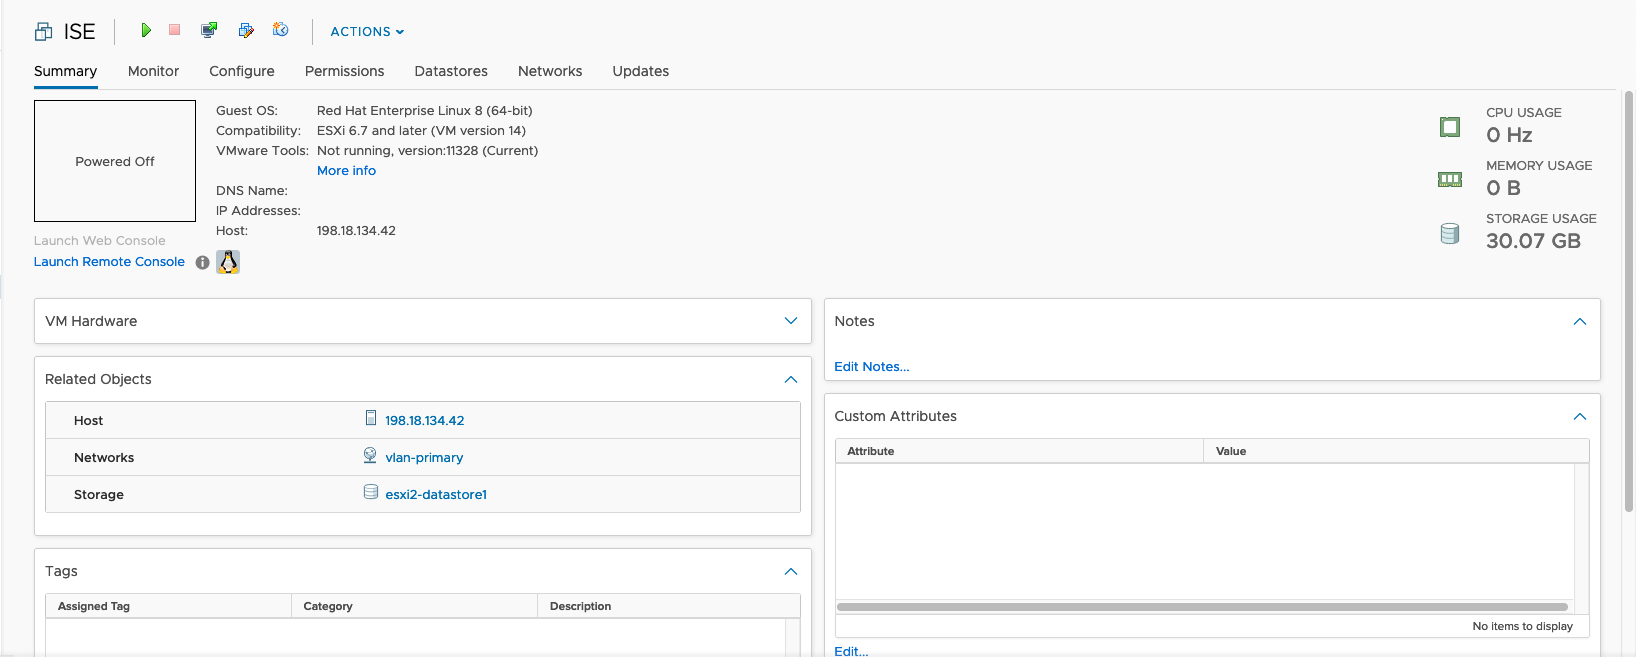
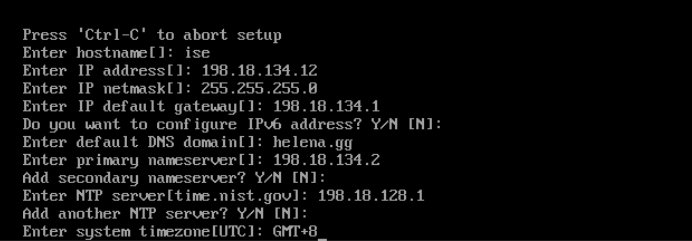
Configure the IP Addressing and other settings upon installation
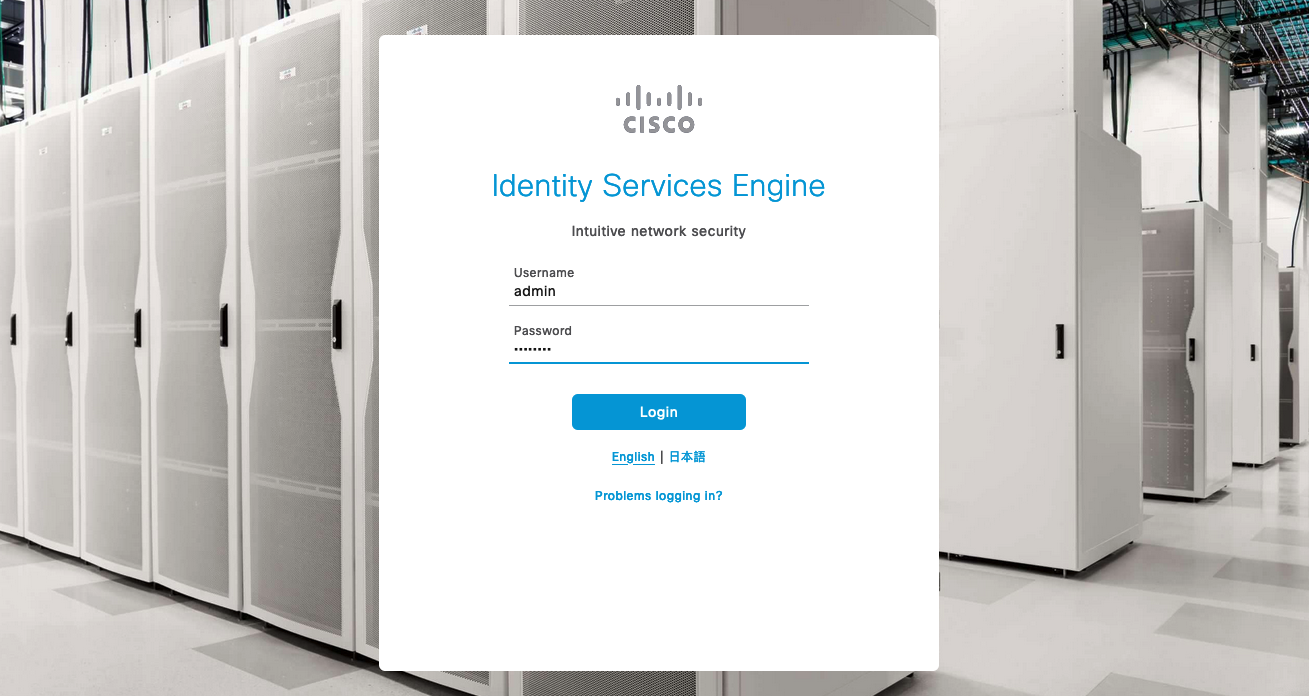
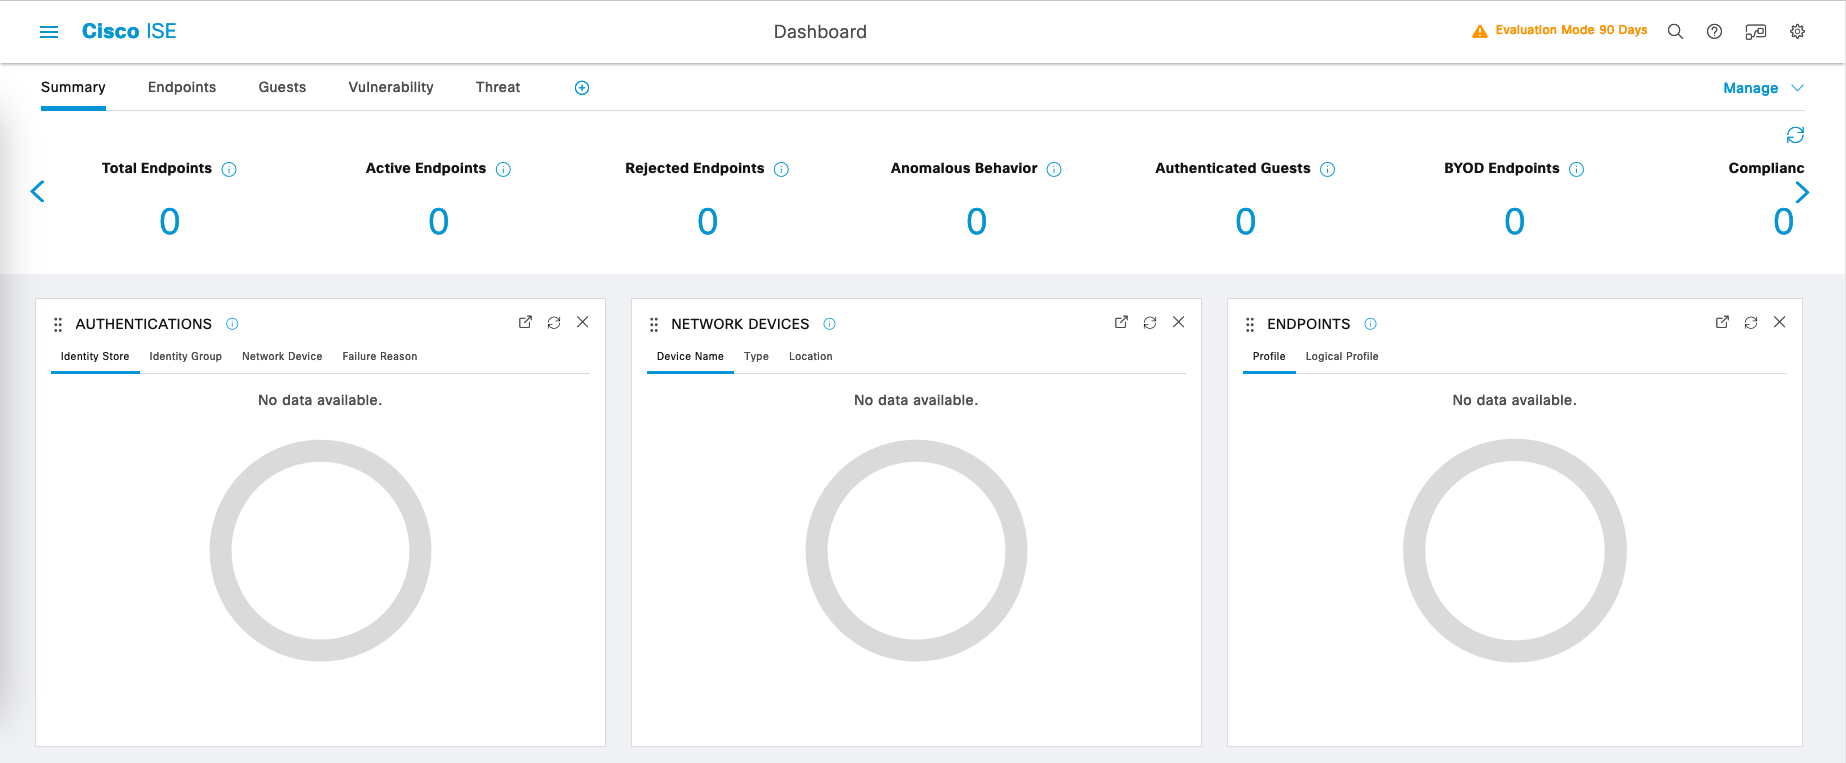
After awhile, the Web UI should be accessible
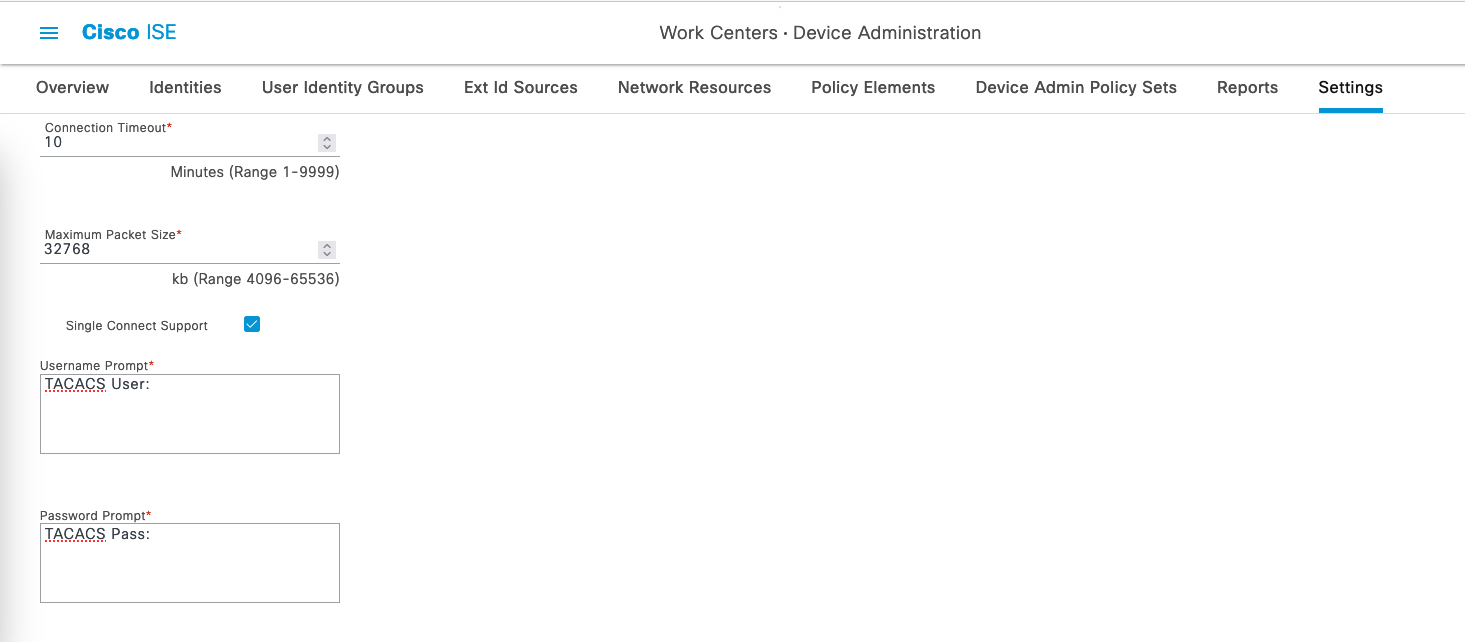
Configuring TACACS
- TACACS (Terminal Access Controller Access-Control System) is a network protocol used for authentication, authorization, and accounting (AAA) services in network devices such as routers, switches, and firewalls.
- TACACS separates authentication, authorization, and accounting functions, providing granular control over access policies and facilitating auditing and reporting of network activity.
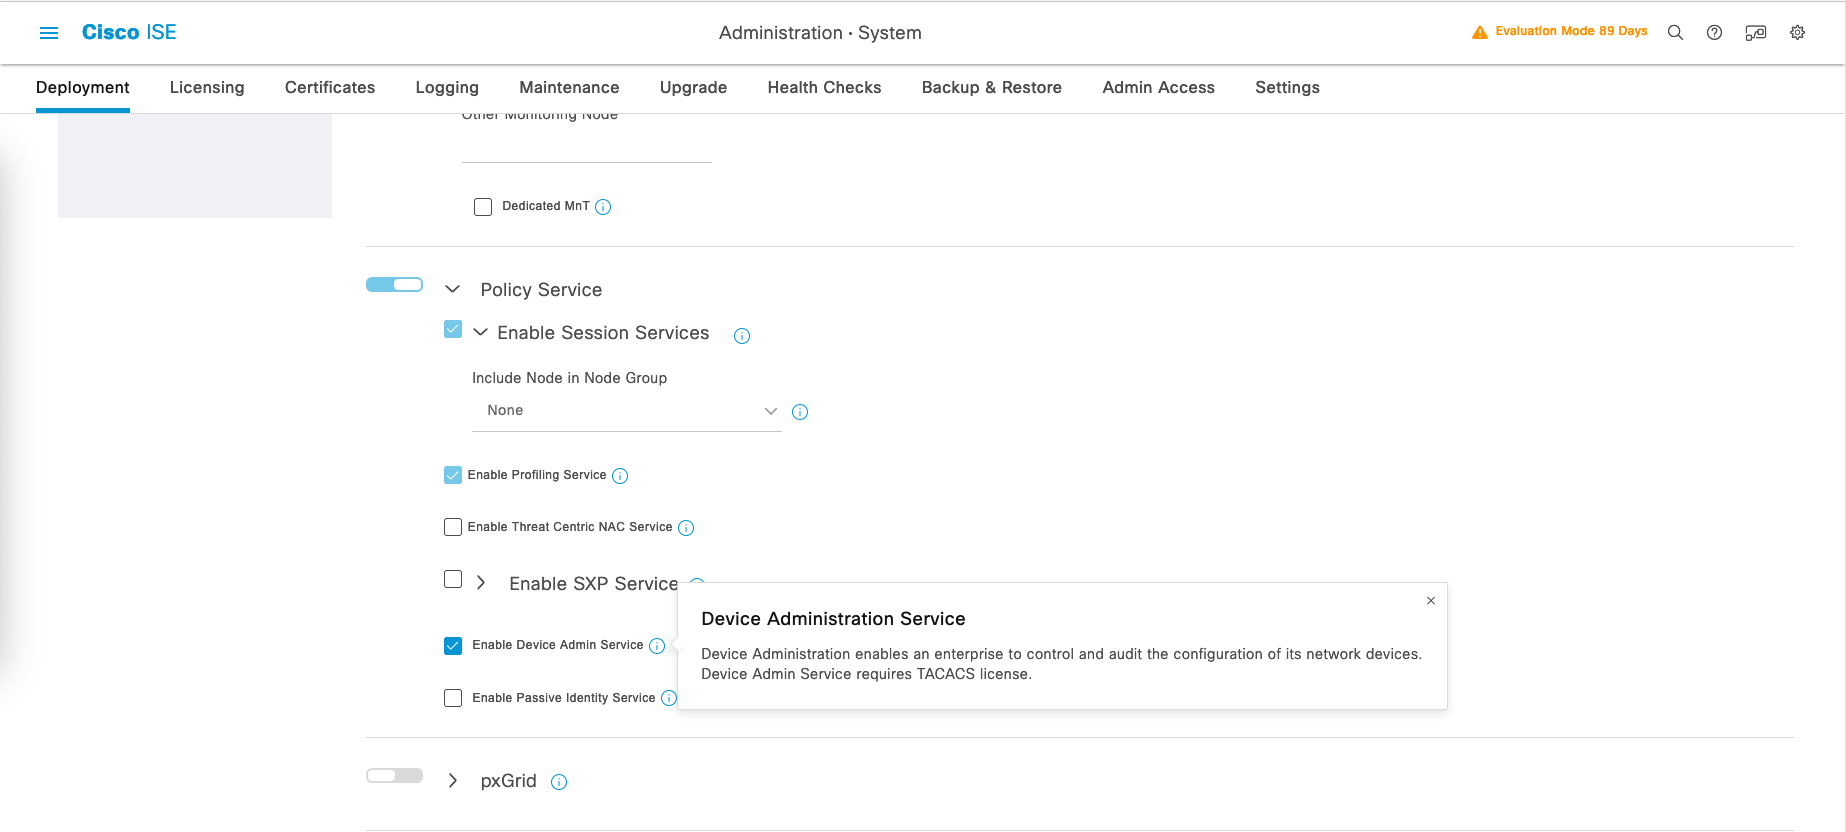
To allow the use of TACACS, firstly we have to enable Device Admin Service on Administration » System » Deployment
Creating Users
Next on Administration » Identities, create some users within their respective groups for the authentication
Adding Network Devices
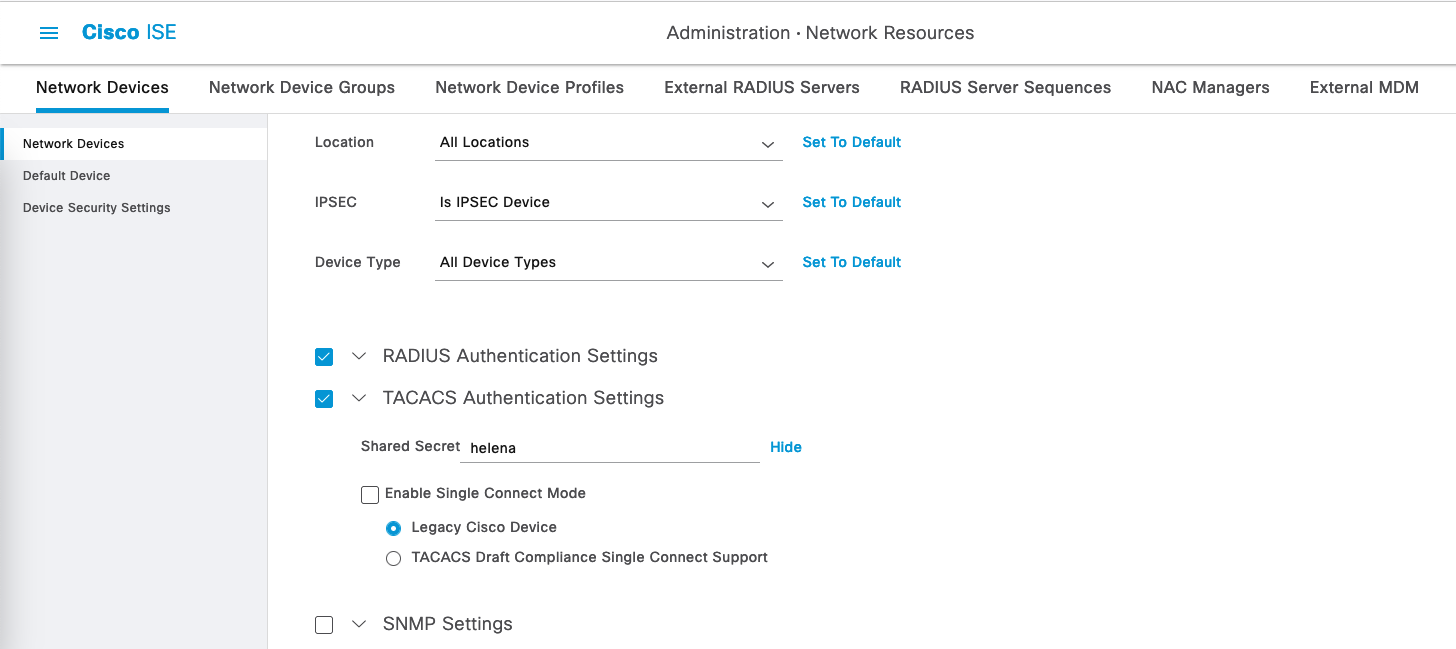
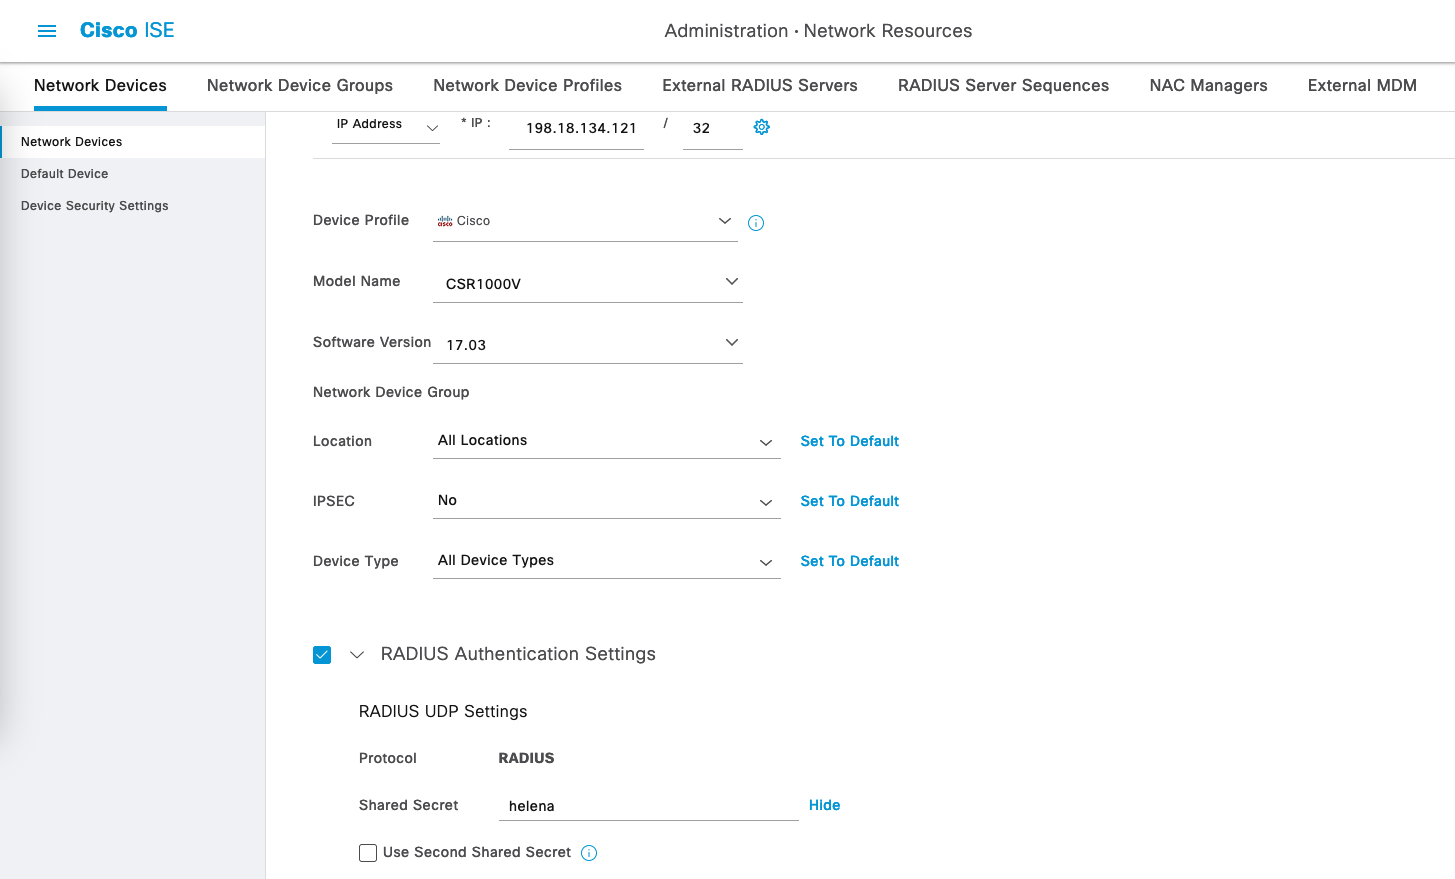
On Administration » Network Devices, add the Network Device
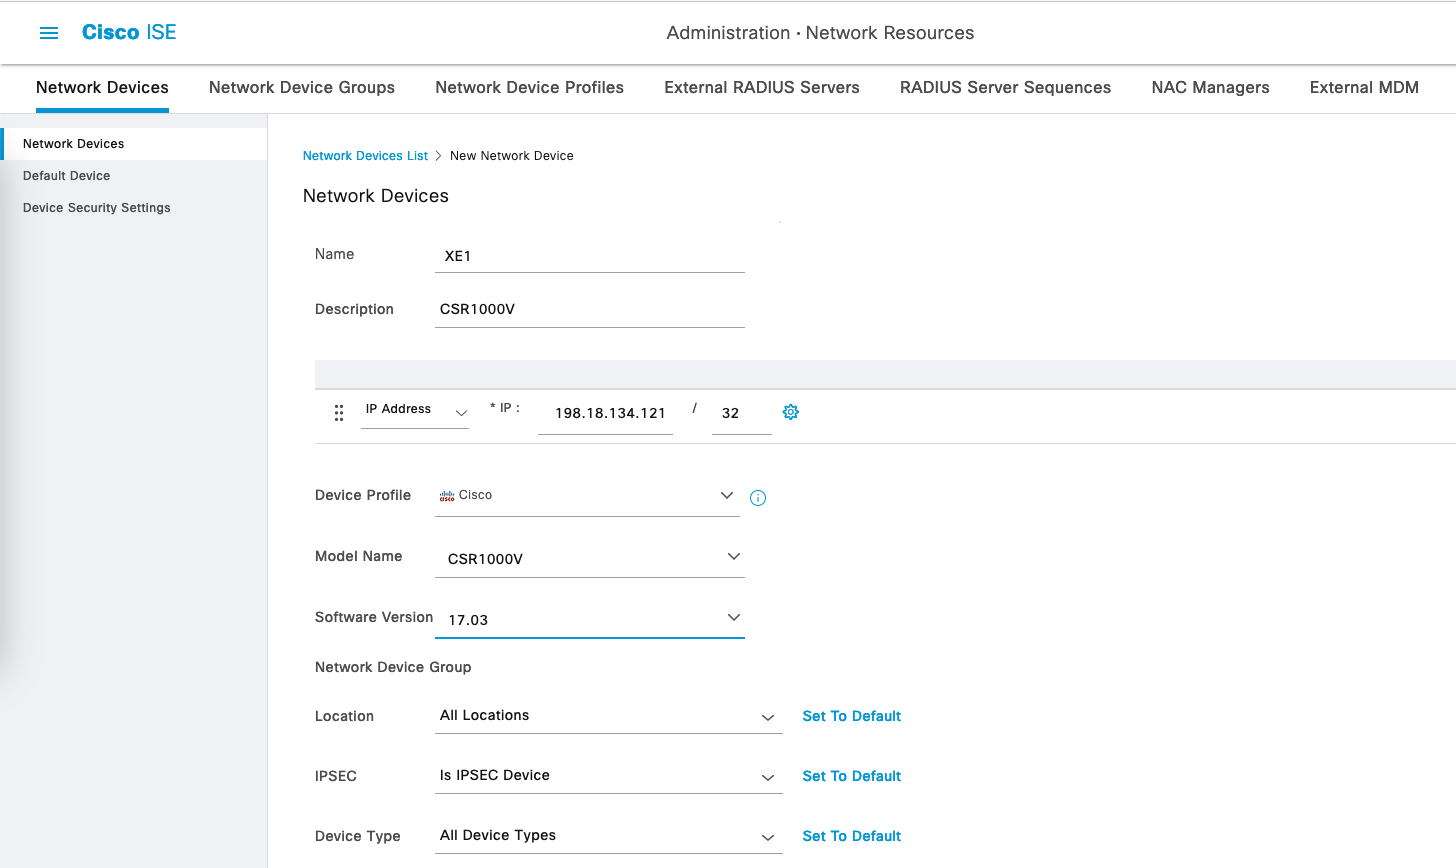
Enable TACACS Authentication and enter the shared secret
Creating TACACS Policies
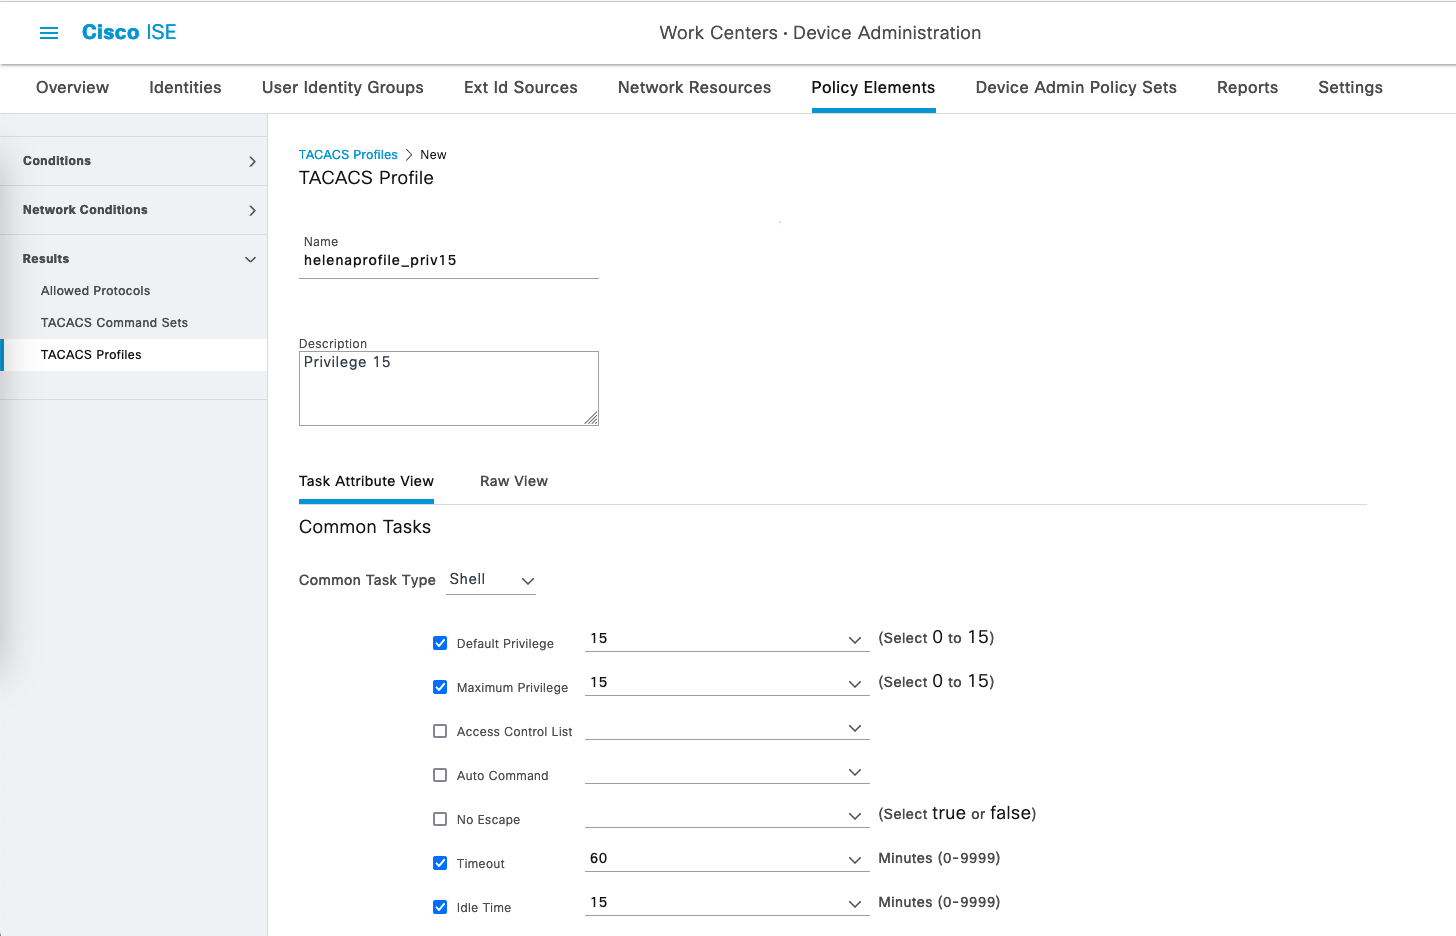
On Work Centers » Policy Elements » Results » TACACS Profile, create a new profile to allow access with privilege level 15
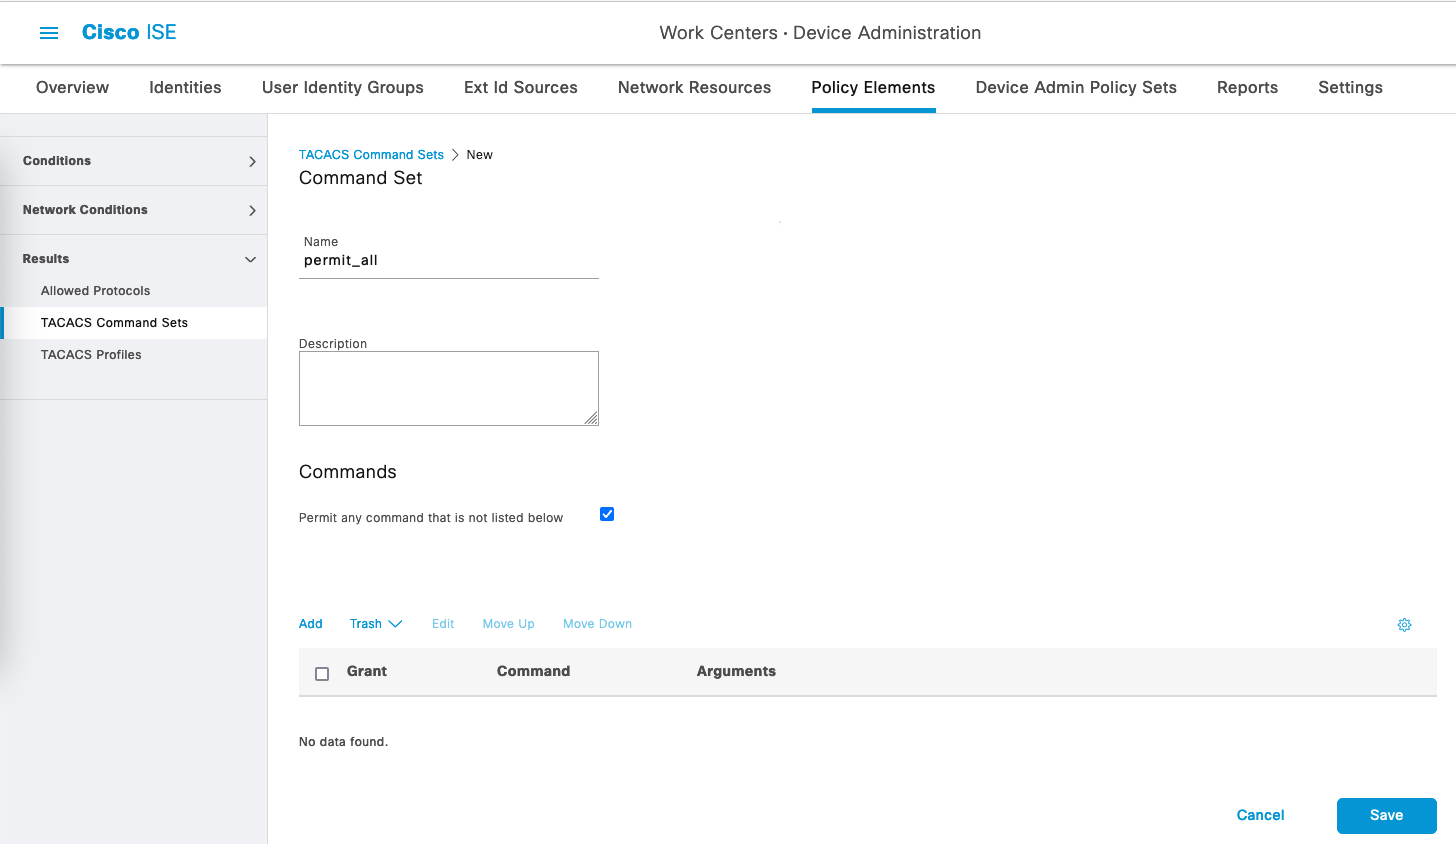
Then on TACACS Command Sets, create new one named “permit_all” to allow all commands
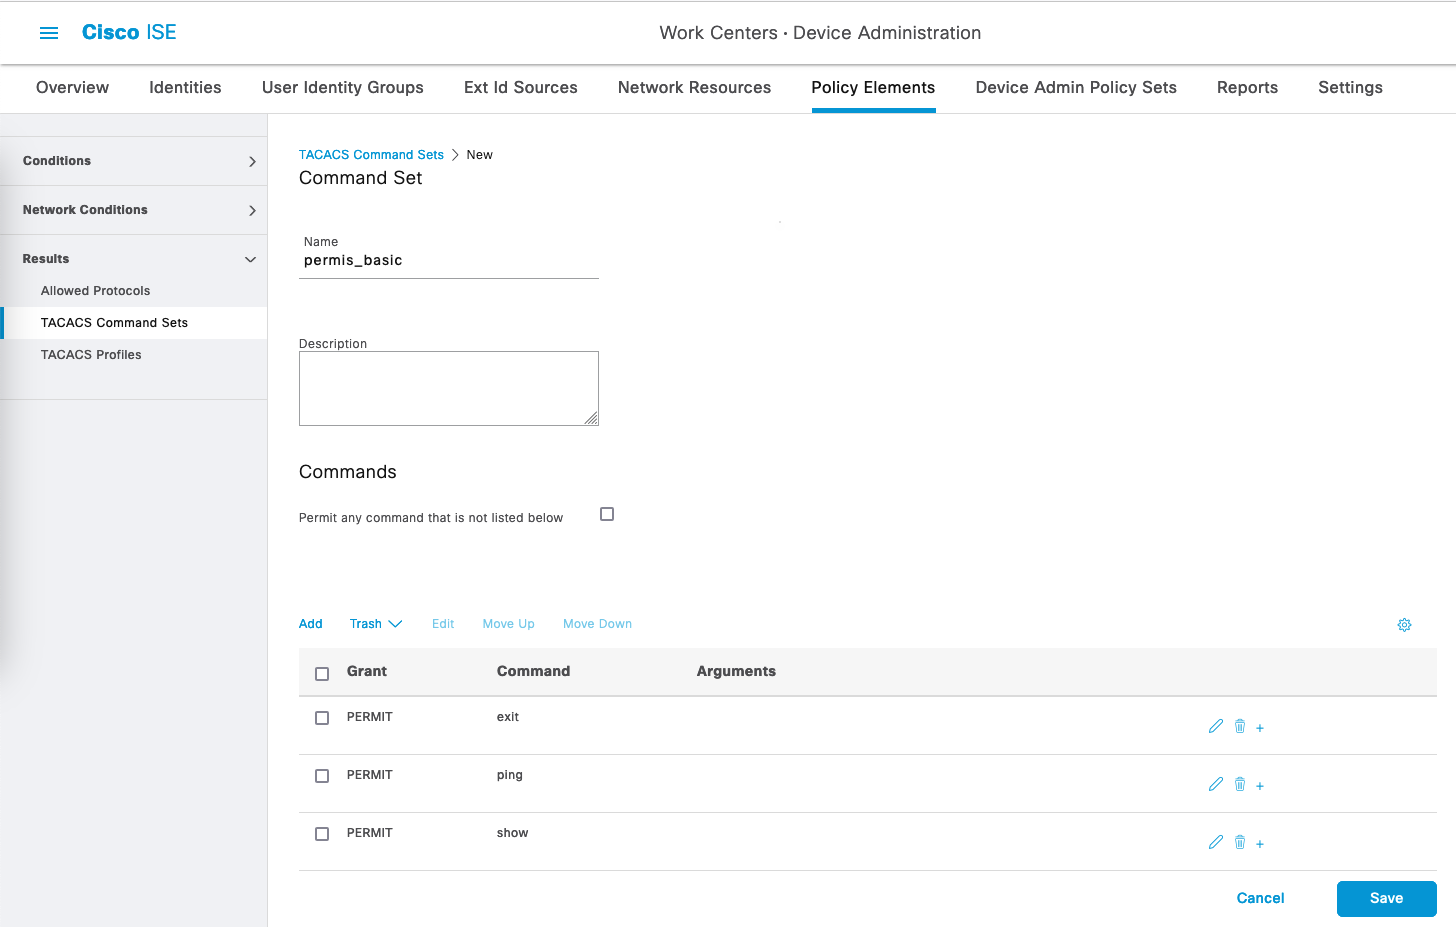
Create another one to allow only limited number of commands
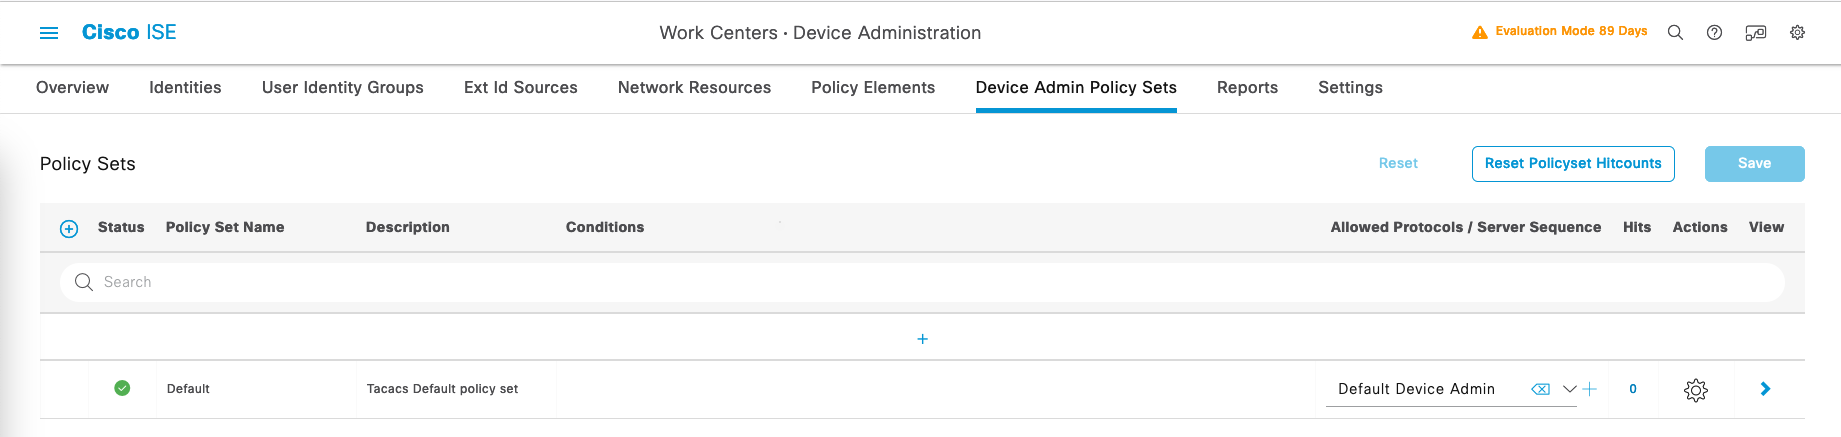
Configuring Policy Sets
On the Policy Sets, we’ll just use the Default one
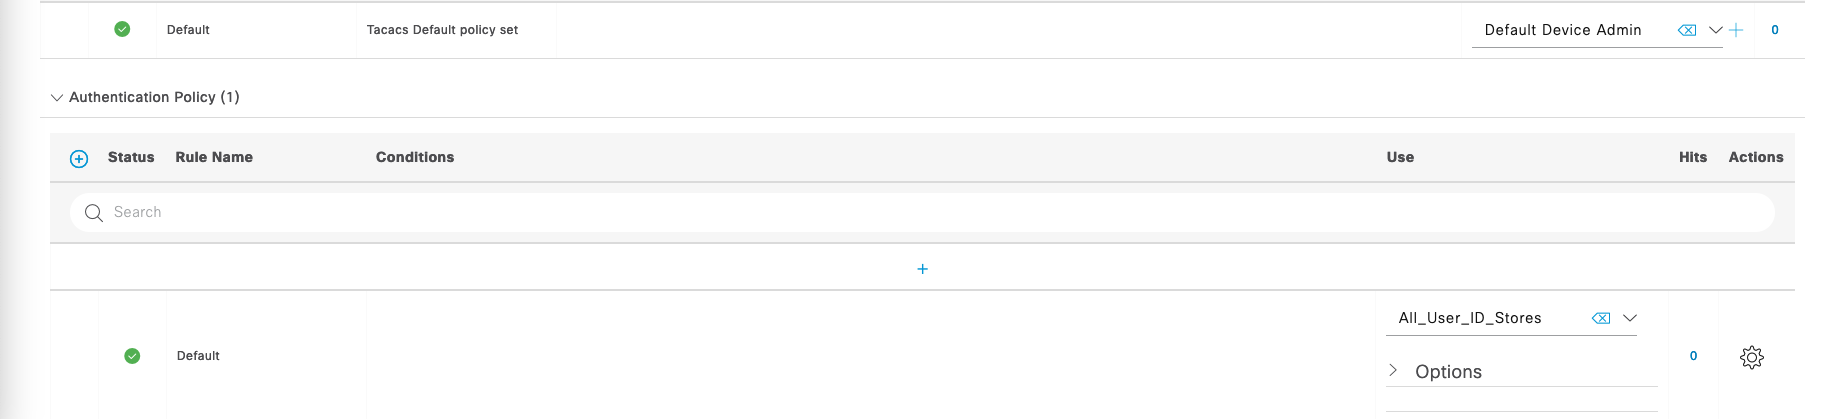
For Authentication Policy, select “All_User_ID_Stores” to include all users wether its internal users or external AD ones
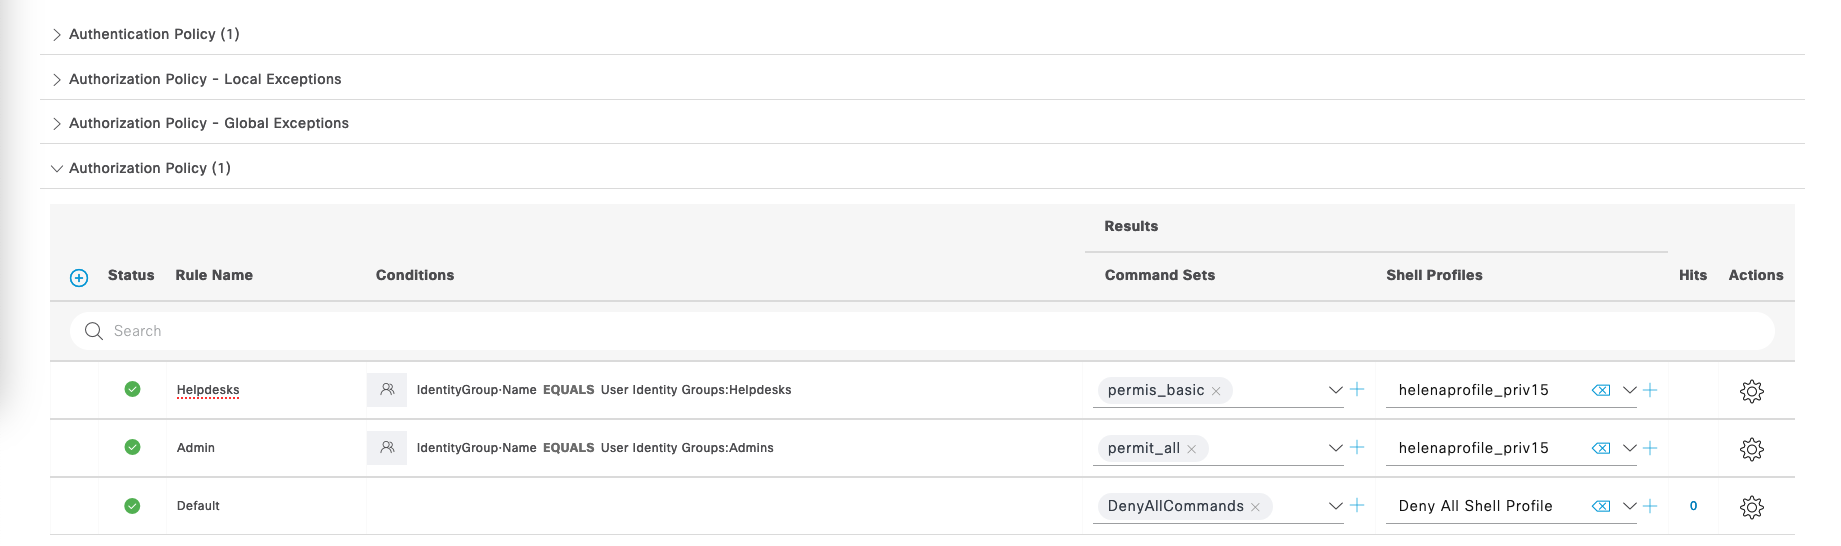
Next on Authorization Policy, we’ll make 2 policies for Helpdesks to have access to limited command sets and Admins with full command sets access
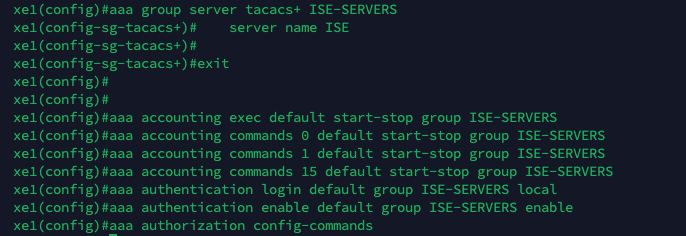
Configuring TACACS on IOS XE Router
To configure TACACS on Cisco Routers, run these commands :
1
2
3
4
5
6
7
8
9
10
11
12
13
14
15
16
17
aaa new-model
tacacs server ISE
 address ipv4 198.18.134.12
 key helena

aaa group server tacacs+ ISE-SERVERS
  server name ISE

aaa accounting exec default start-stop group ISE-SERVERS
aaa accounting commands 0 default start-stop group ISE-SERVERS
aaa accounting commands 1 default start-stop group ISE-SERVERS
aaa accounting commands 15 default start-stop group ISE-SERVERS

aaa authentication login default group ISE-SERVERS local
aaa authentication enable default group ISE-SERVERS enable

aaa authorization config-commands
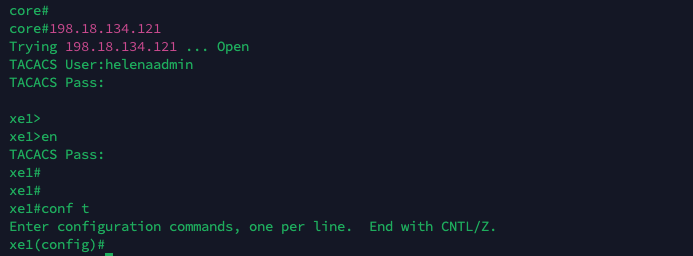
Now if try logging in to the router, we’ll be greeted by the TACACS authentication
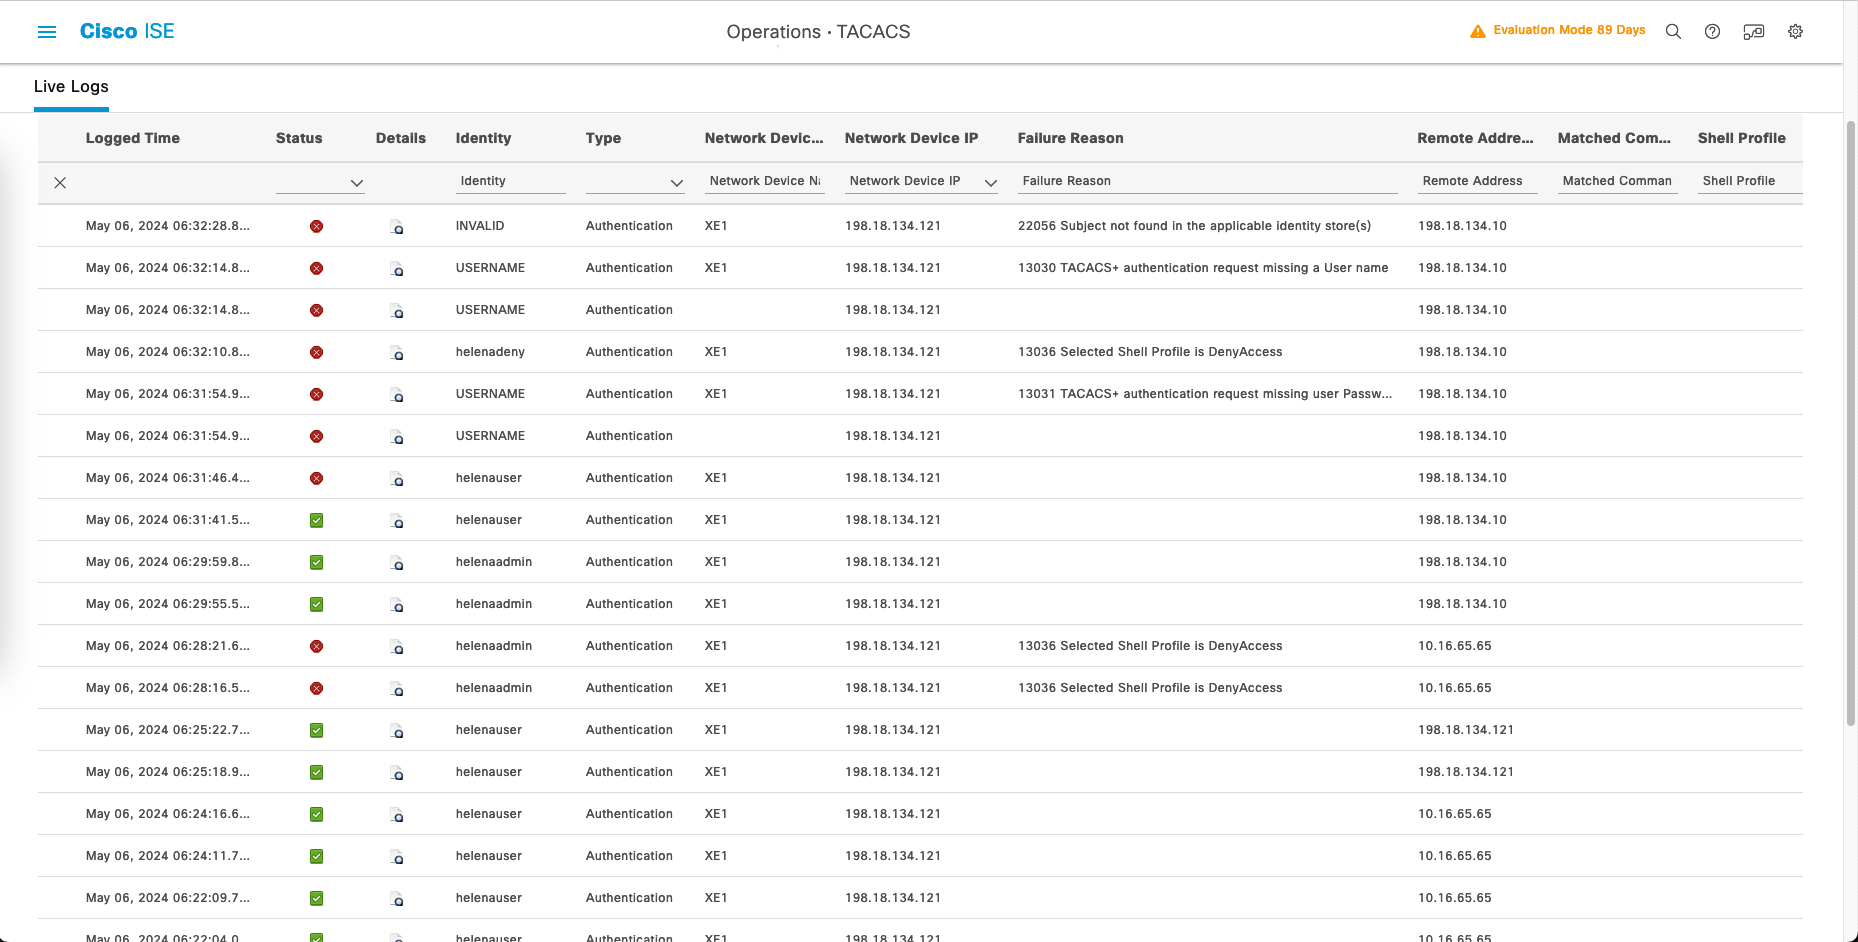
And on TACACS Live Logs, we can see the logs of the users logging in to the router
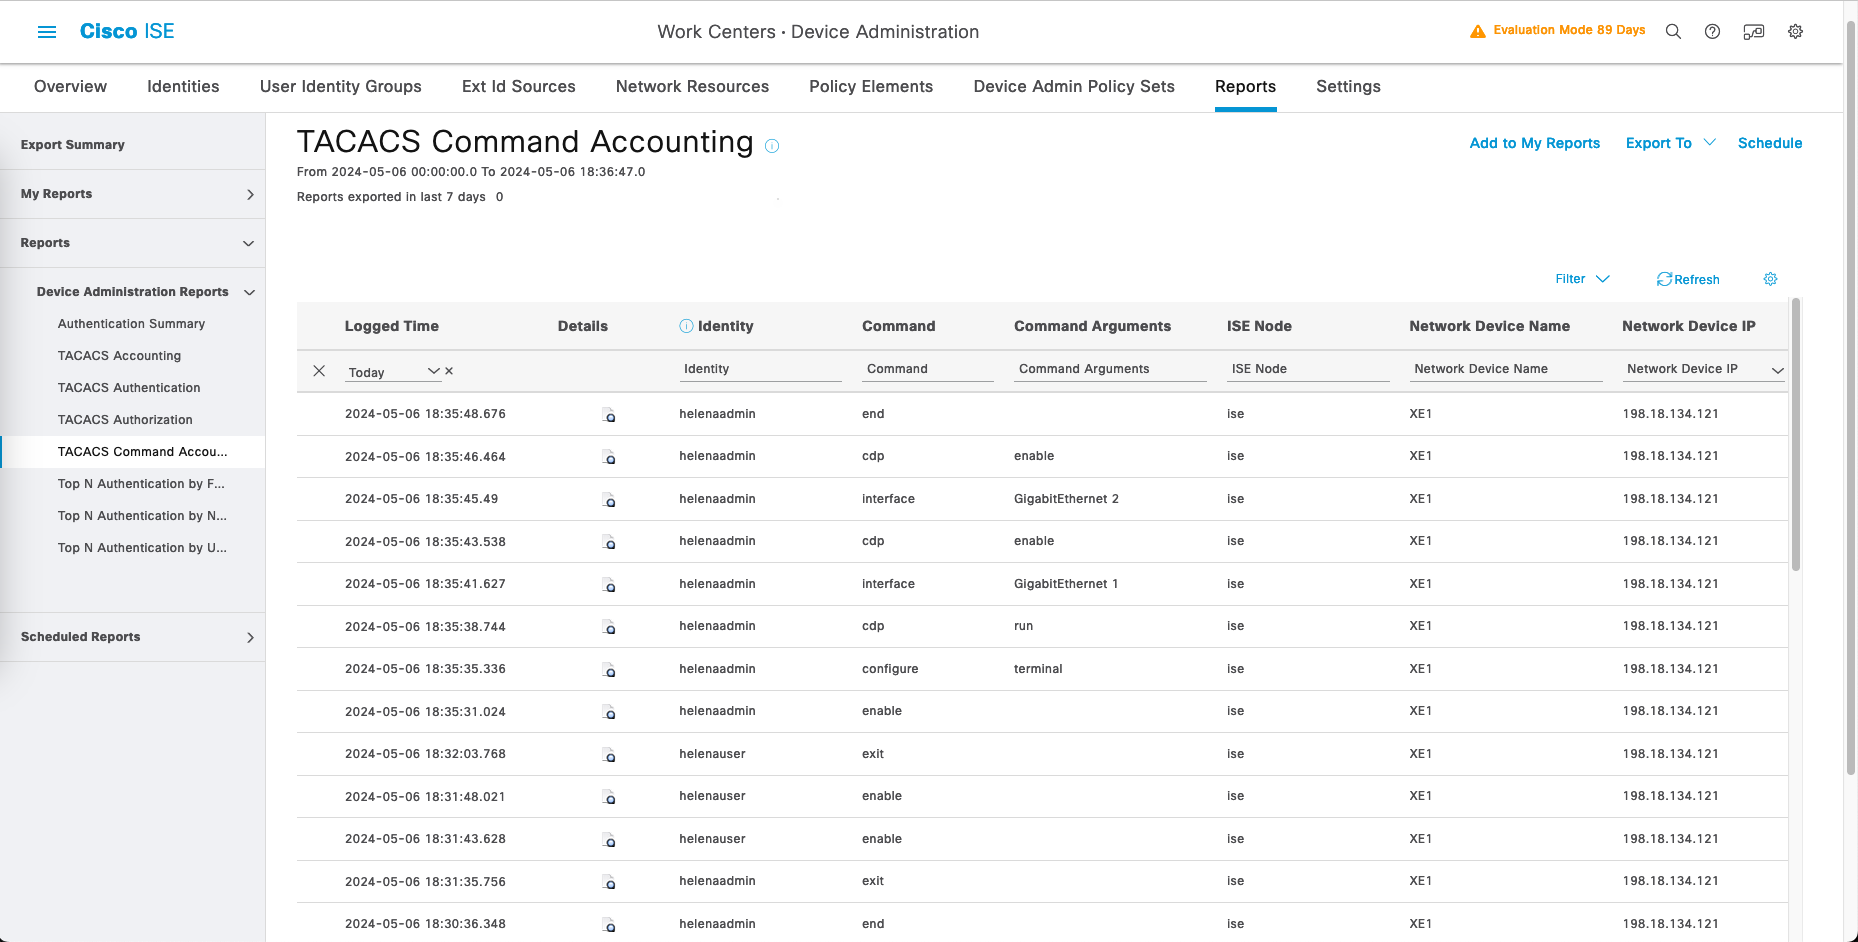
And on TACACS Command Accounting, we can also see all the commands executed by the users
Configuring RADIUS
- RADIUS (Remote Authentication Dial-In User Service) is a networking protocol that provides centralized authentication, authorization, and accounting (AAA) services.
- Compared to TACACS, RADIUS has less advanced features and weaker security, but maybe has more vendor support.
Configuring Network Devices
On the Network Device, enable RADIUS and give it a shared secret
Configuring Policy Elements
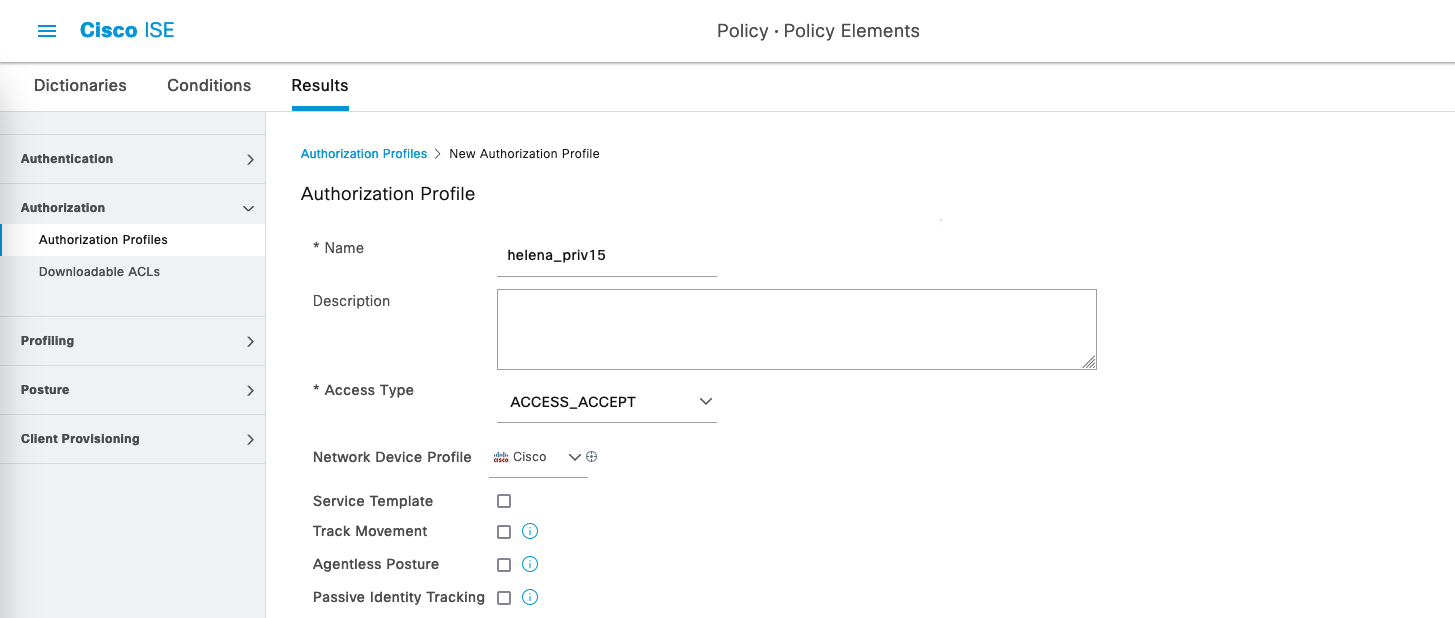
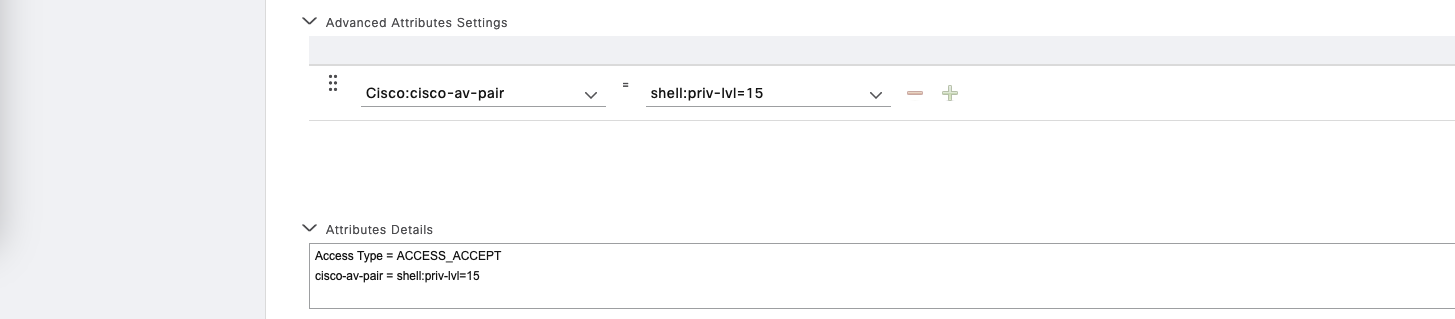
On Policy » Policy Elements » Results » Authorization » Authorization Profiles, create a new profile for level 15 privilege access
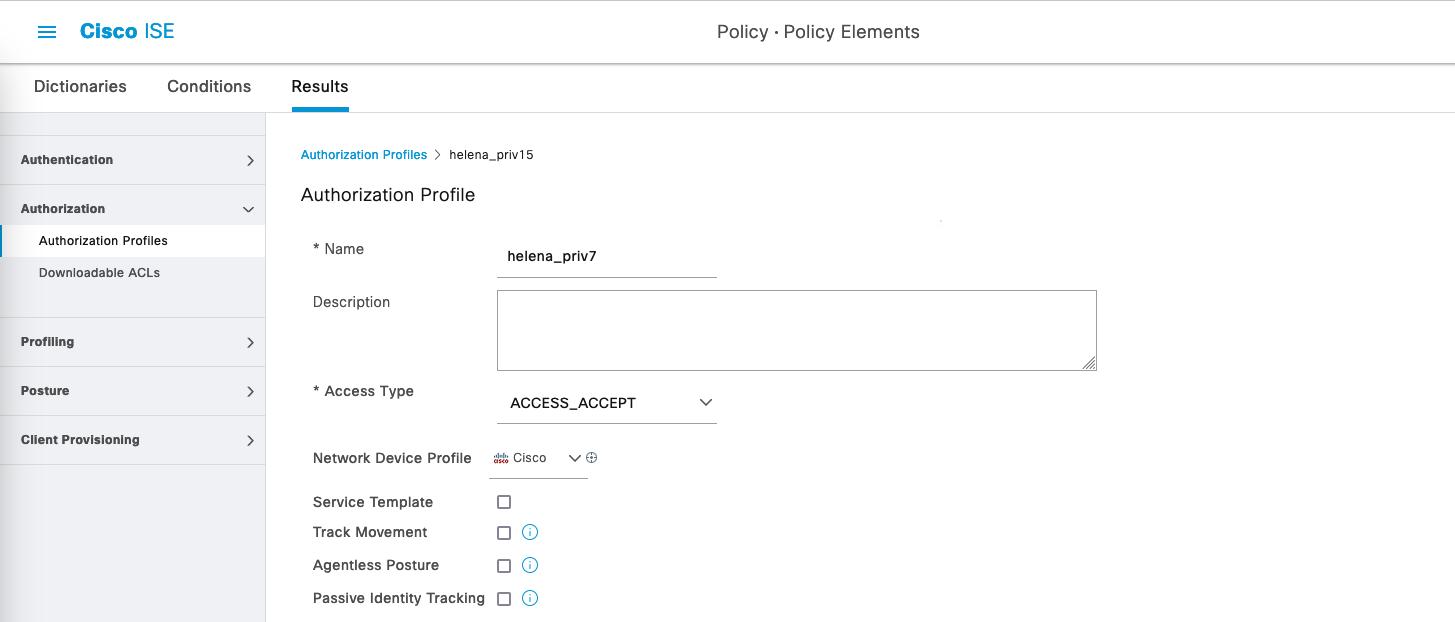
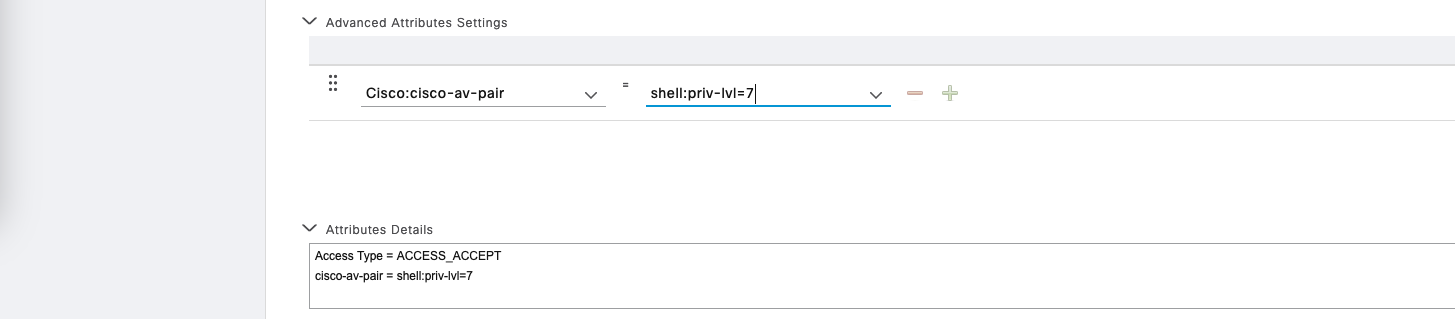
Then create another one for level 7 privilege access
Configuring Policy Sets
On Policy » Policy Sets, create a new policy set that captures
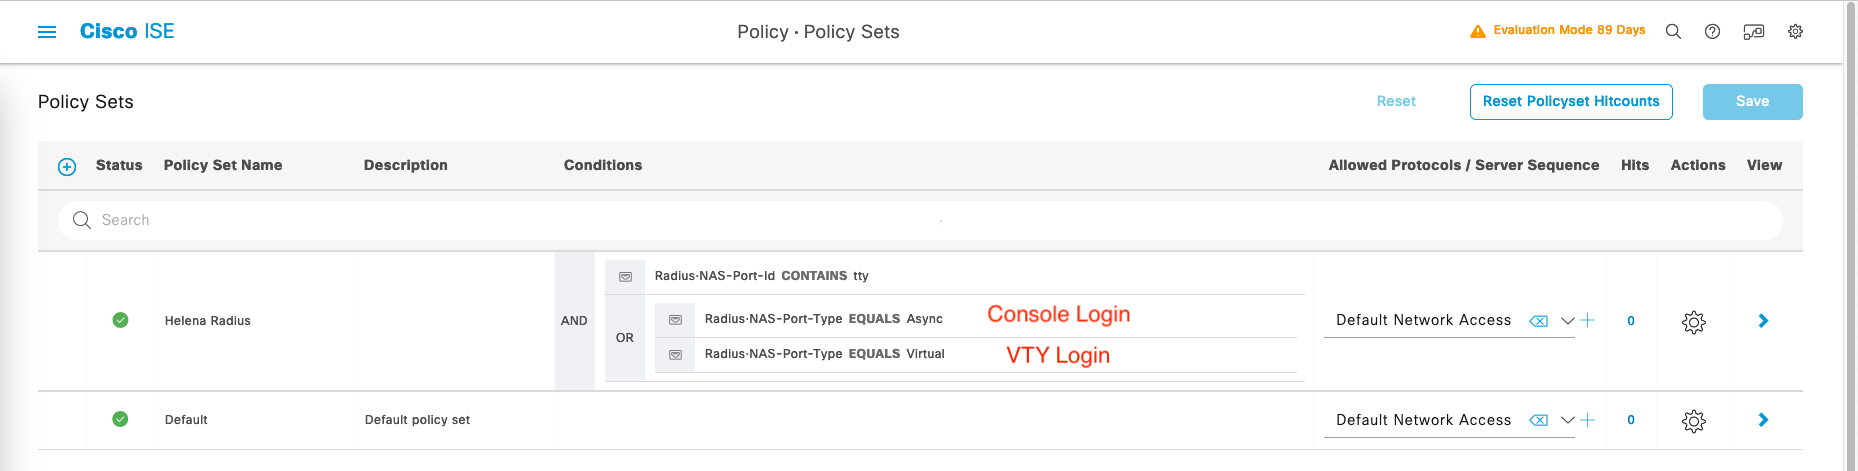
- To avoid disrupting regular RADIUS requests (like 802.1x/MAB authentication), specific Conditions must be created to exclusively match RADIUS requests intended for accessing network devices directly.
- This is done by matching parameters called Radius:NAS-Port-ID and Radius:NAS-Port-Type
- In RADIUS requests, the NAS-Port-ID should include “tty” to indicate access to the network device itself. In detailed ISE logs, “tty” is followed by a number indicating the connection ID (typically 0 for Console port, then 1 and above for VTY Lines).
- For RADIUS requests, NAS-Port-Type must match two values: “Async” for access via the Console port and “Virtual” for access via a VTY Line (SSH or Telnet connection).
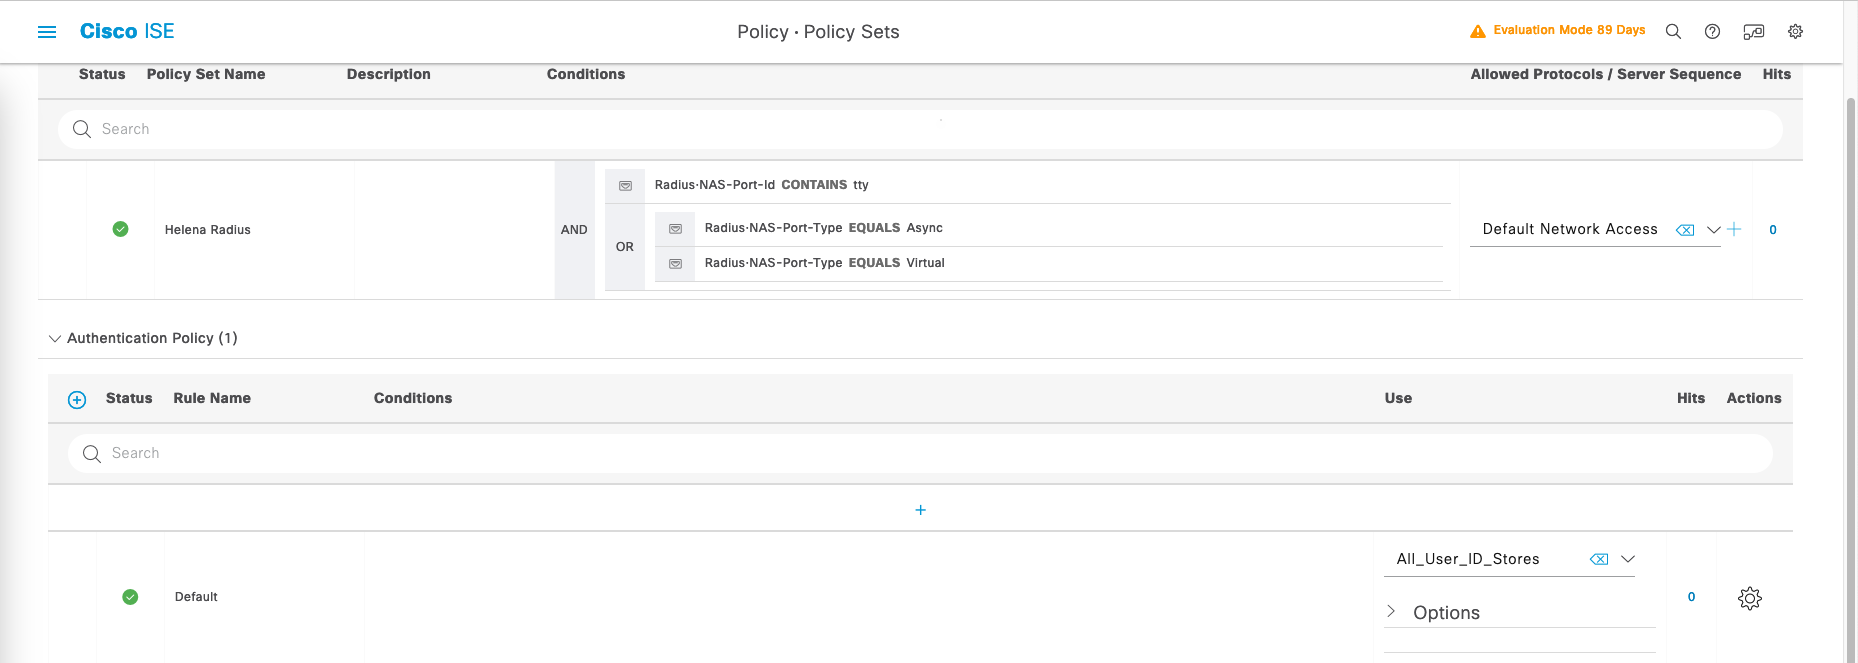
For Authentication Policy, select “All_User_ID_Stores” to include all users wether its internal users or external AD ones
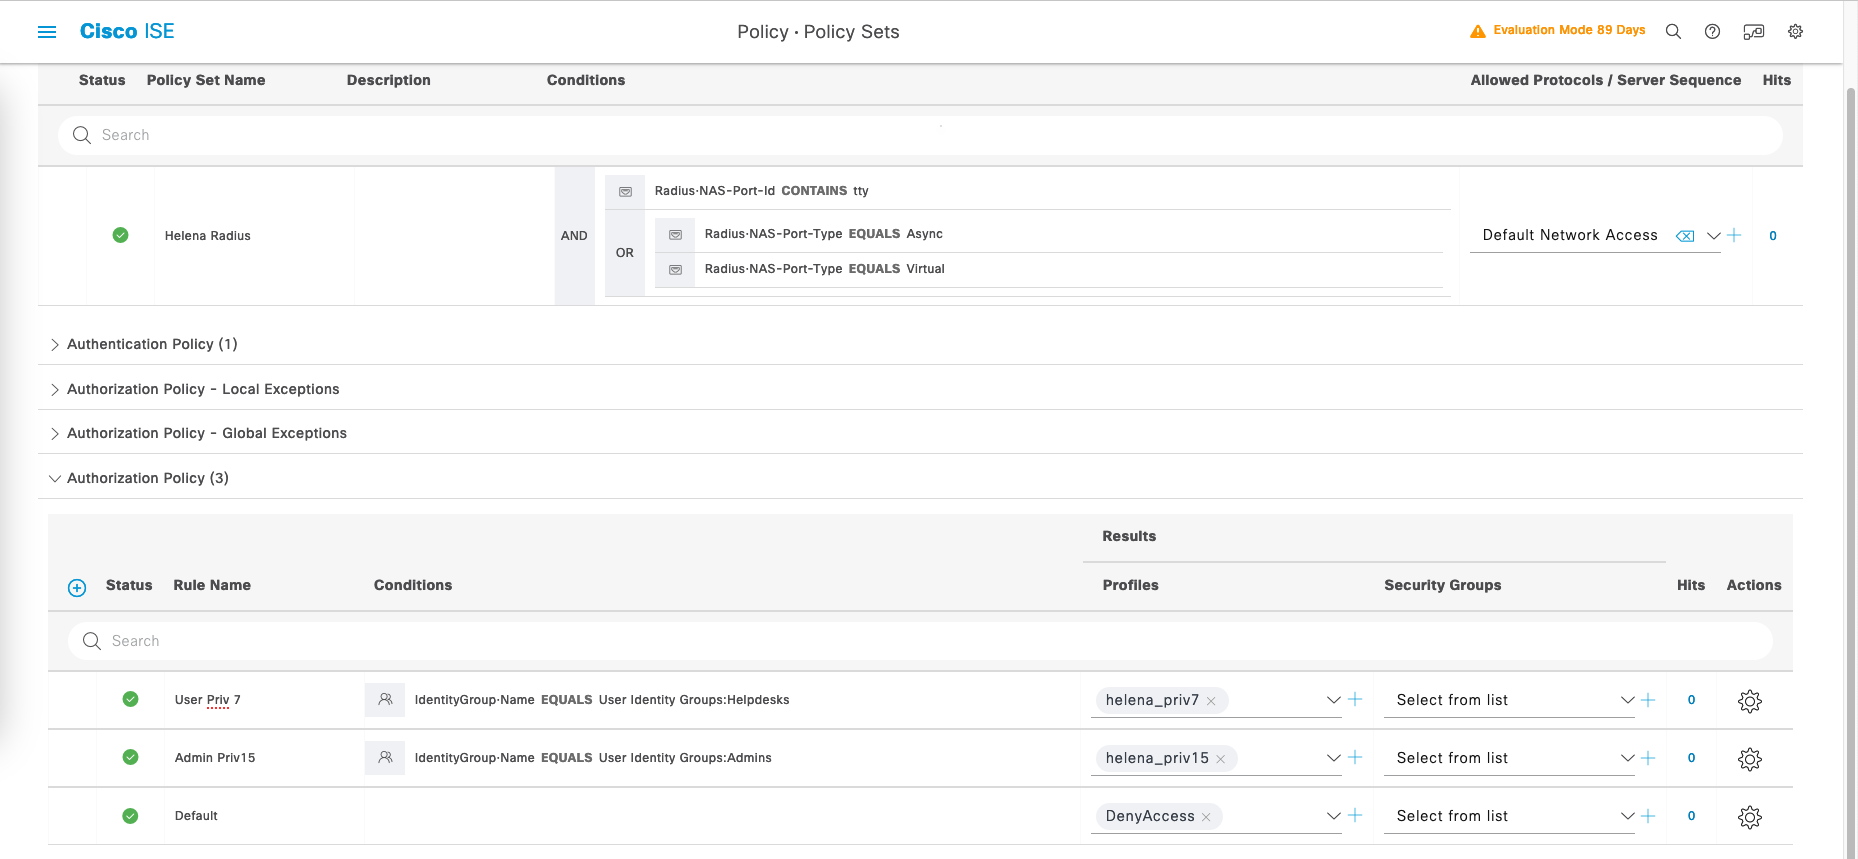
Then for Authorization Policy, create policies for Helpdesks to have level 7 privilege access and Admins to have level 15 privilege access
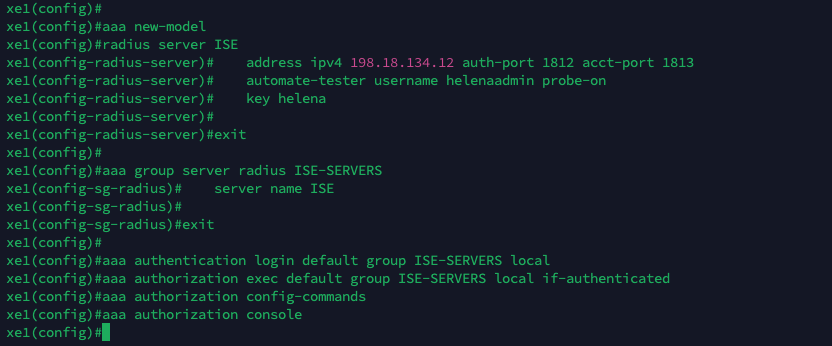
Configuring RADIUS on IOS XE Router
To configure RADIUS on Cisco Routers, run these commands :
1
2
3
4
5
6
7
8
9
10
11
12
13
aaa new-model

radius server ISE
 address ipv4 198.18.134.12 auth-port 1812 acct-port 1813
 key helena

aaa group server radius ISE-SERVERS
 server name ISE

aaa authentication login default group ISE-SERVERS local
aaa authorization exec default group ISE-SERVERS local if-authenticated
aaa authorization config-commands
aaa authorization console
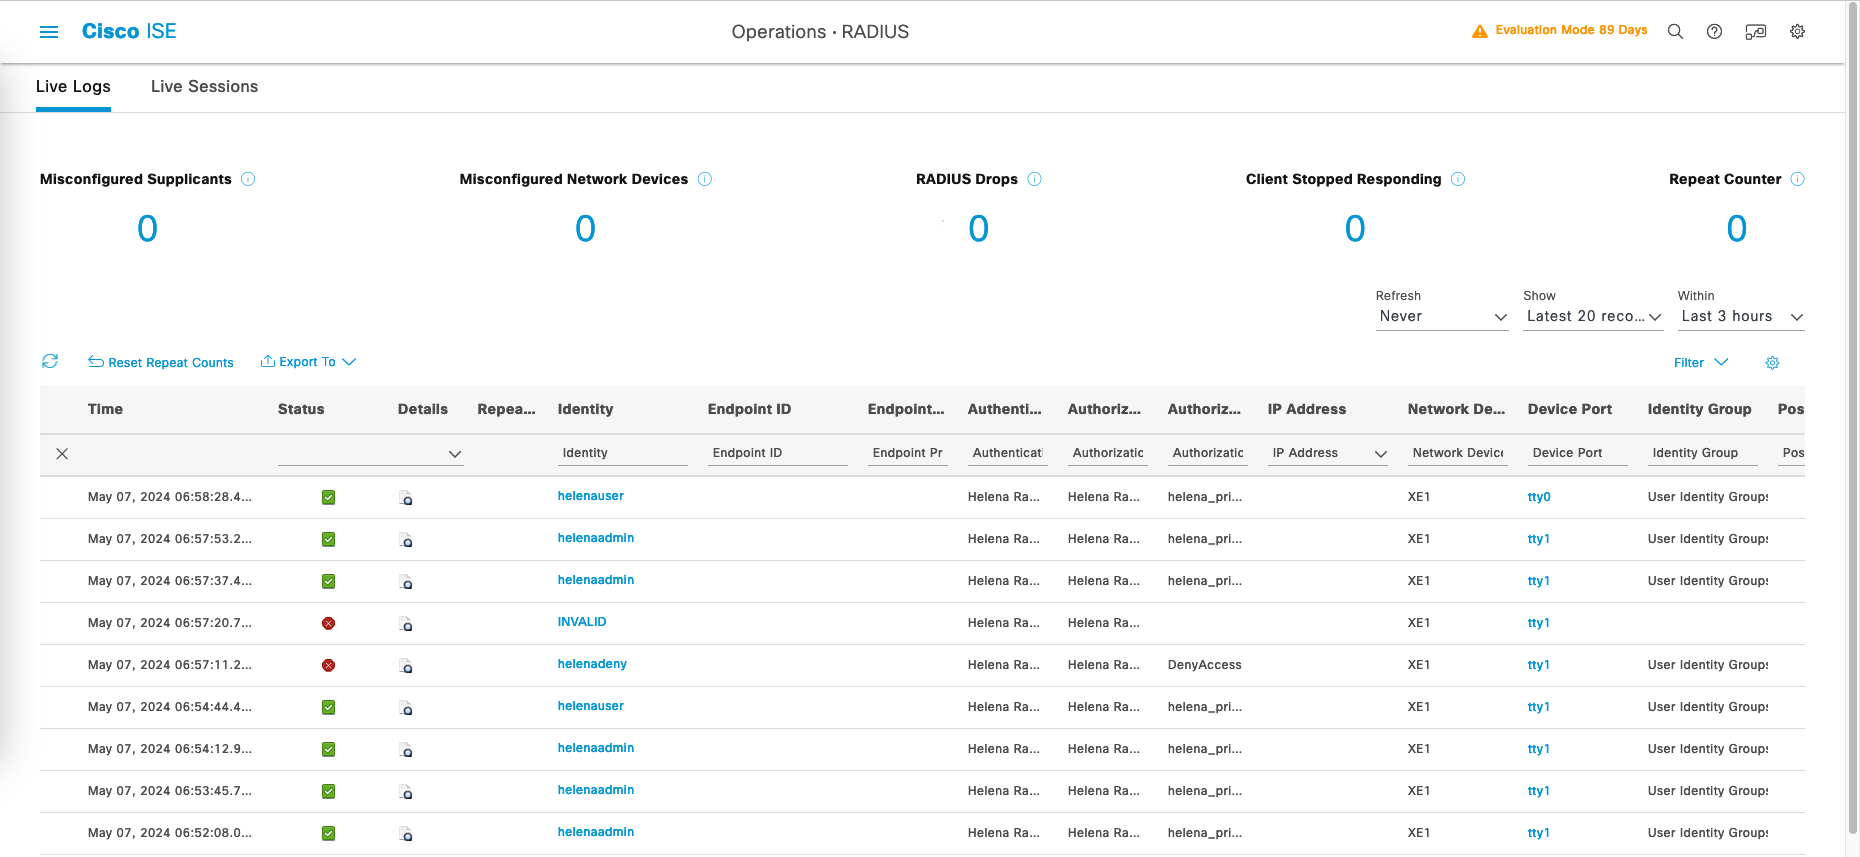
Now if try logging in to the router, we’ll be greeted by the RADIUS authentication
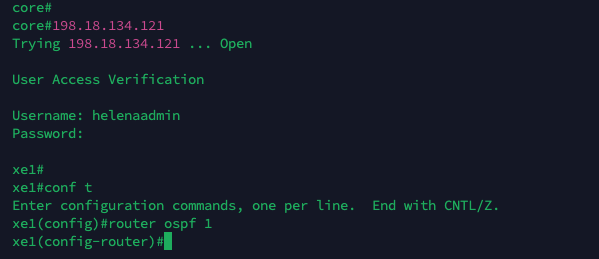
for helenaadmin, having level 15 access meaning this user can access all commands
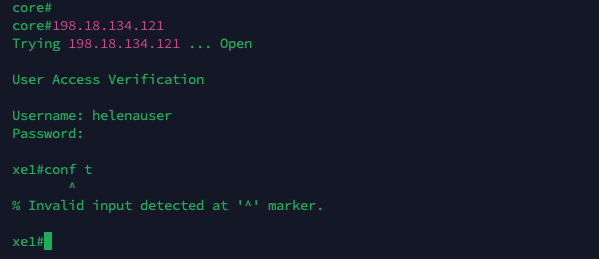
for helenauser, having only level 7 access meaning this user can access limited sets of command
And on RADIUS Live Logs, we can see the logs of the users logging in to the router