Palo Alto SD-WAN with Panorama
Palo Alto SD-WAN enables secure, intelligent branch connectivity by dynamically selecting the best path for traffic across multiple WAN links. Palo Alto SD-WAN must be configured and managed through Panorama, which acts as the central controller for all settings and policies.
Preparing Environments
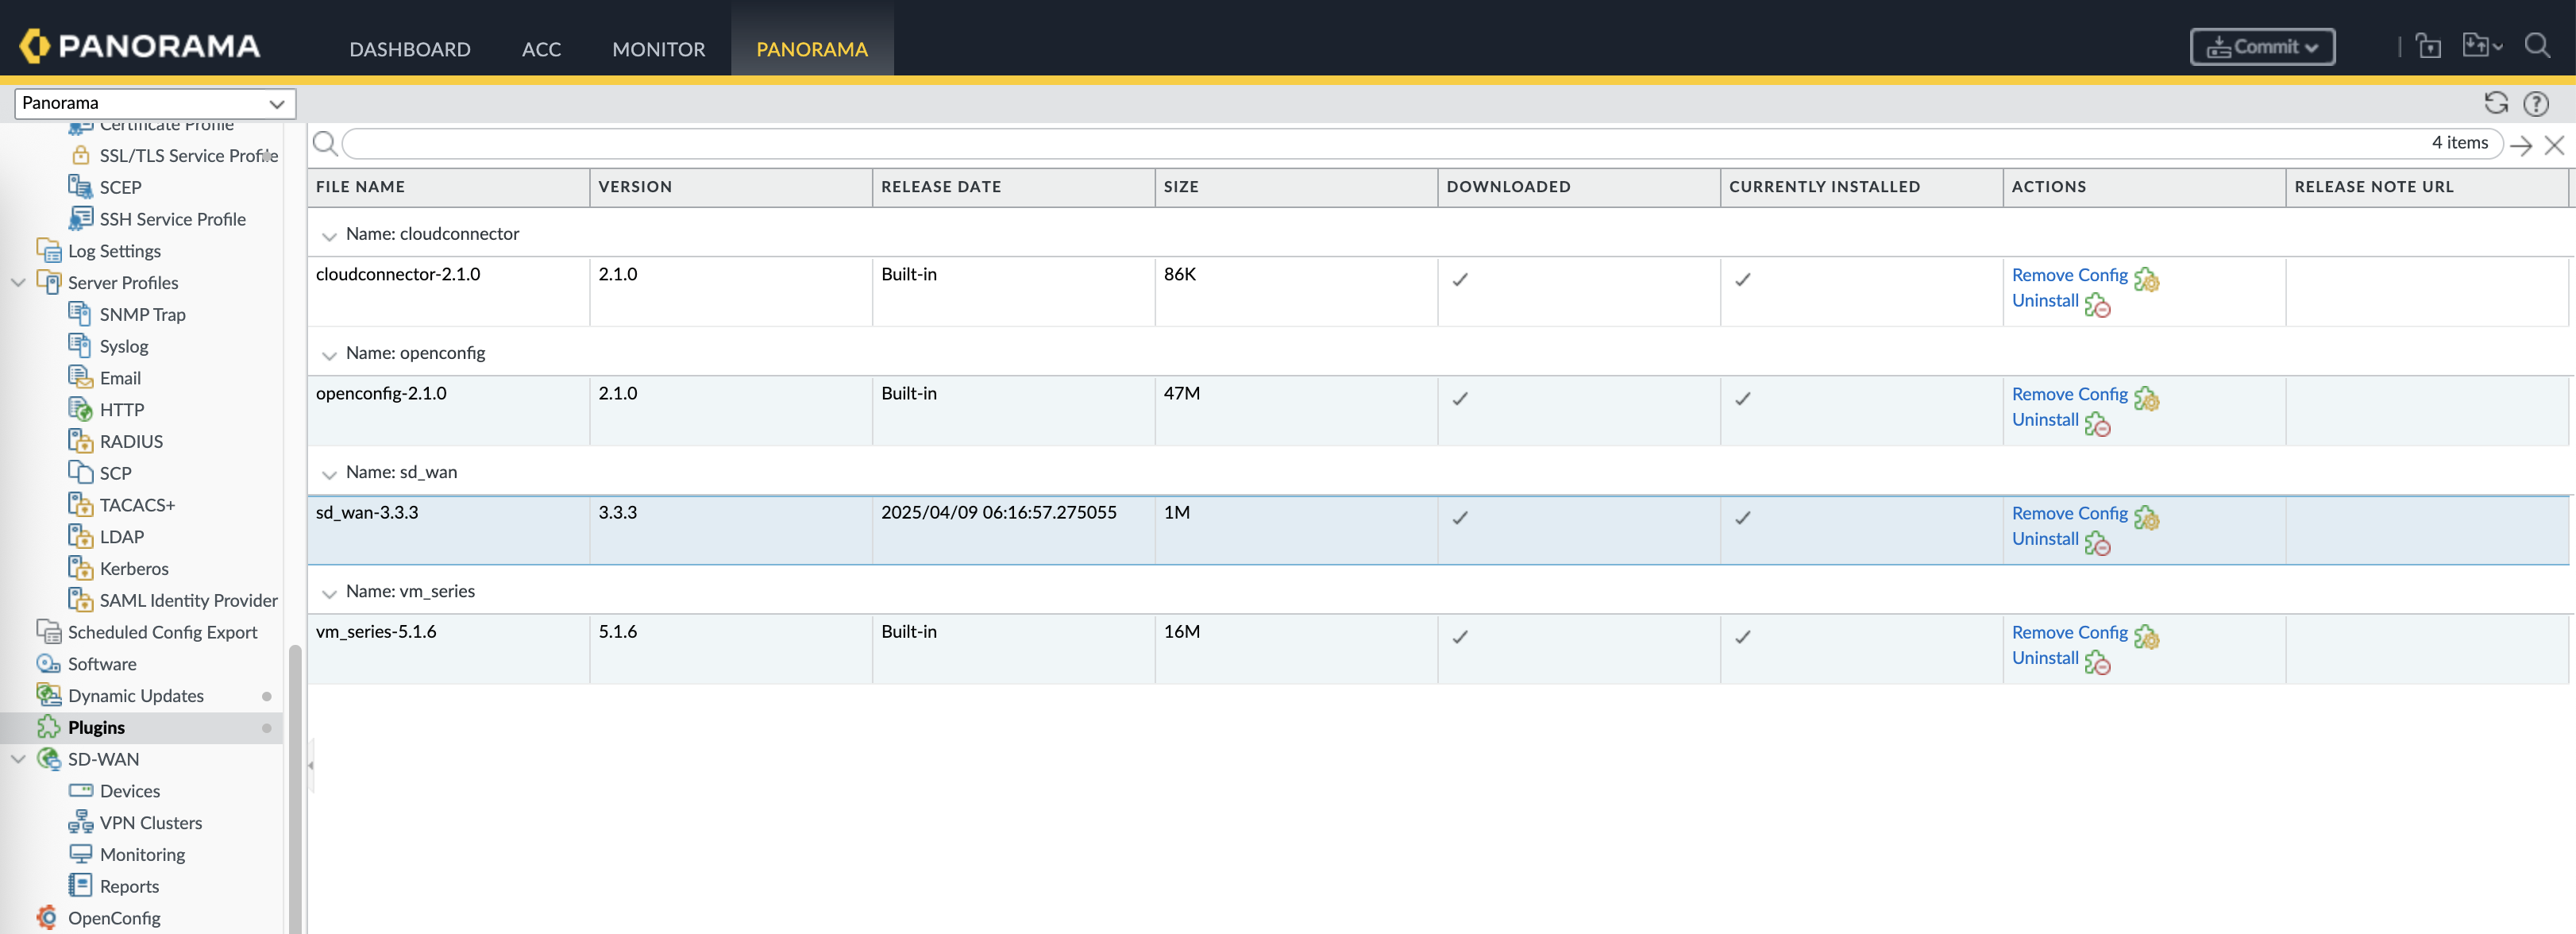
First off we install the SD-WAN plugin
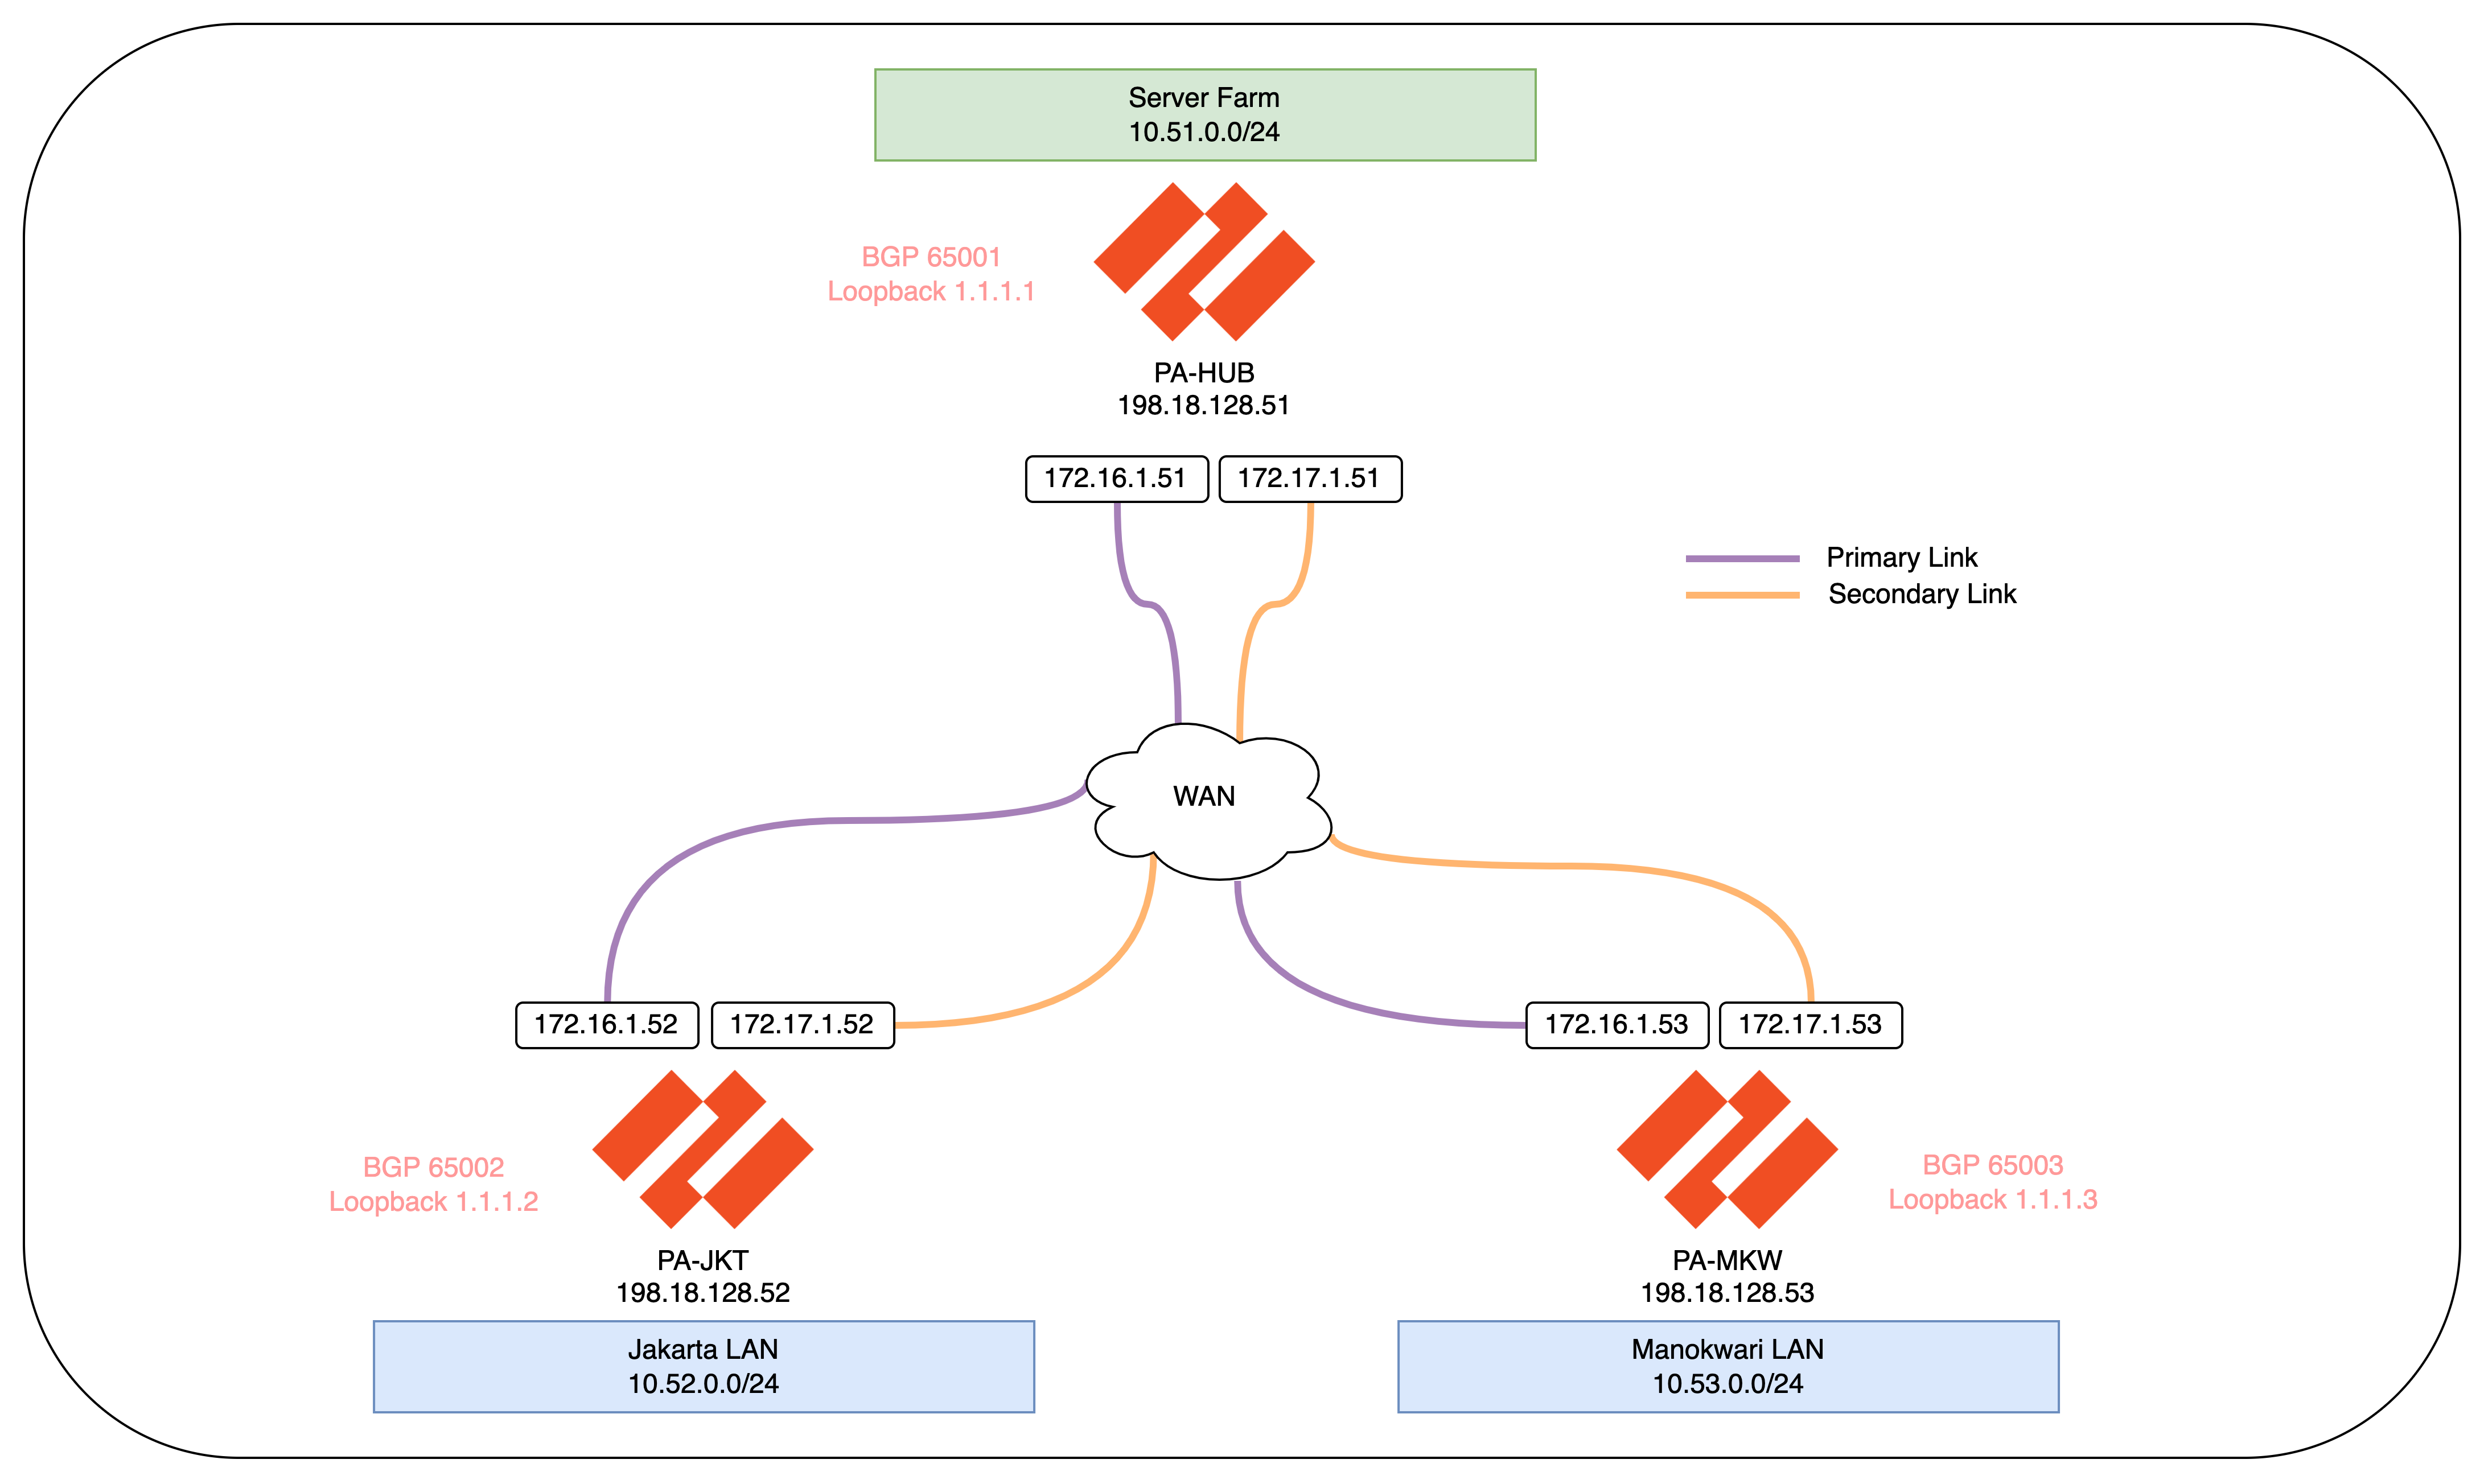
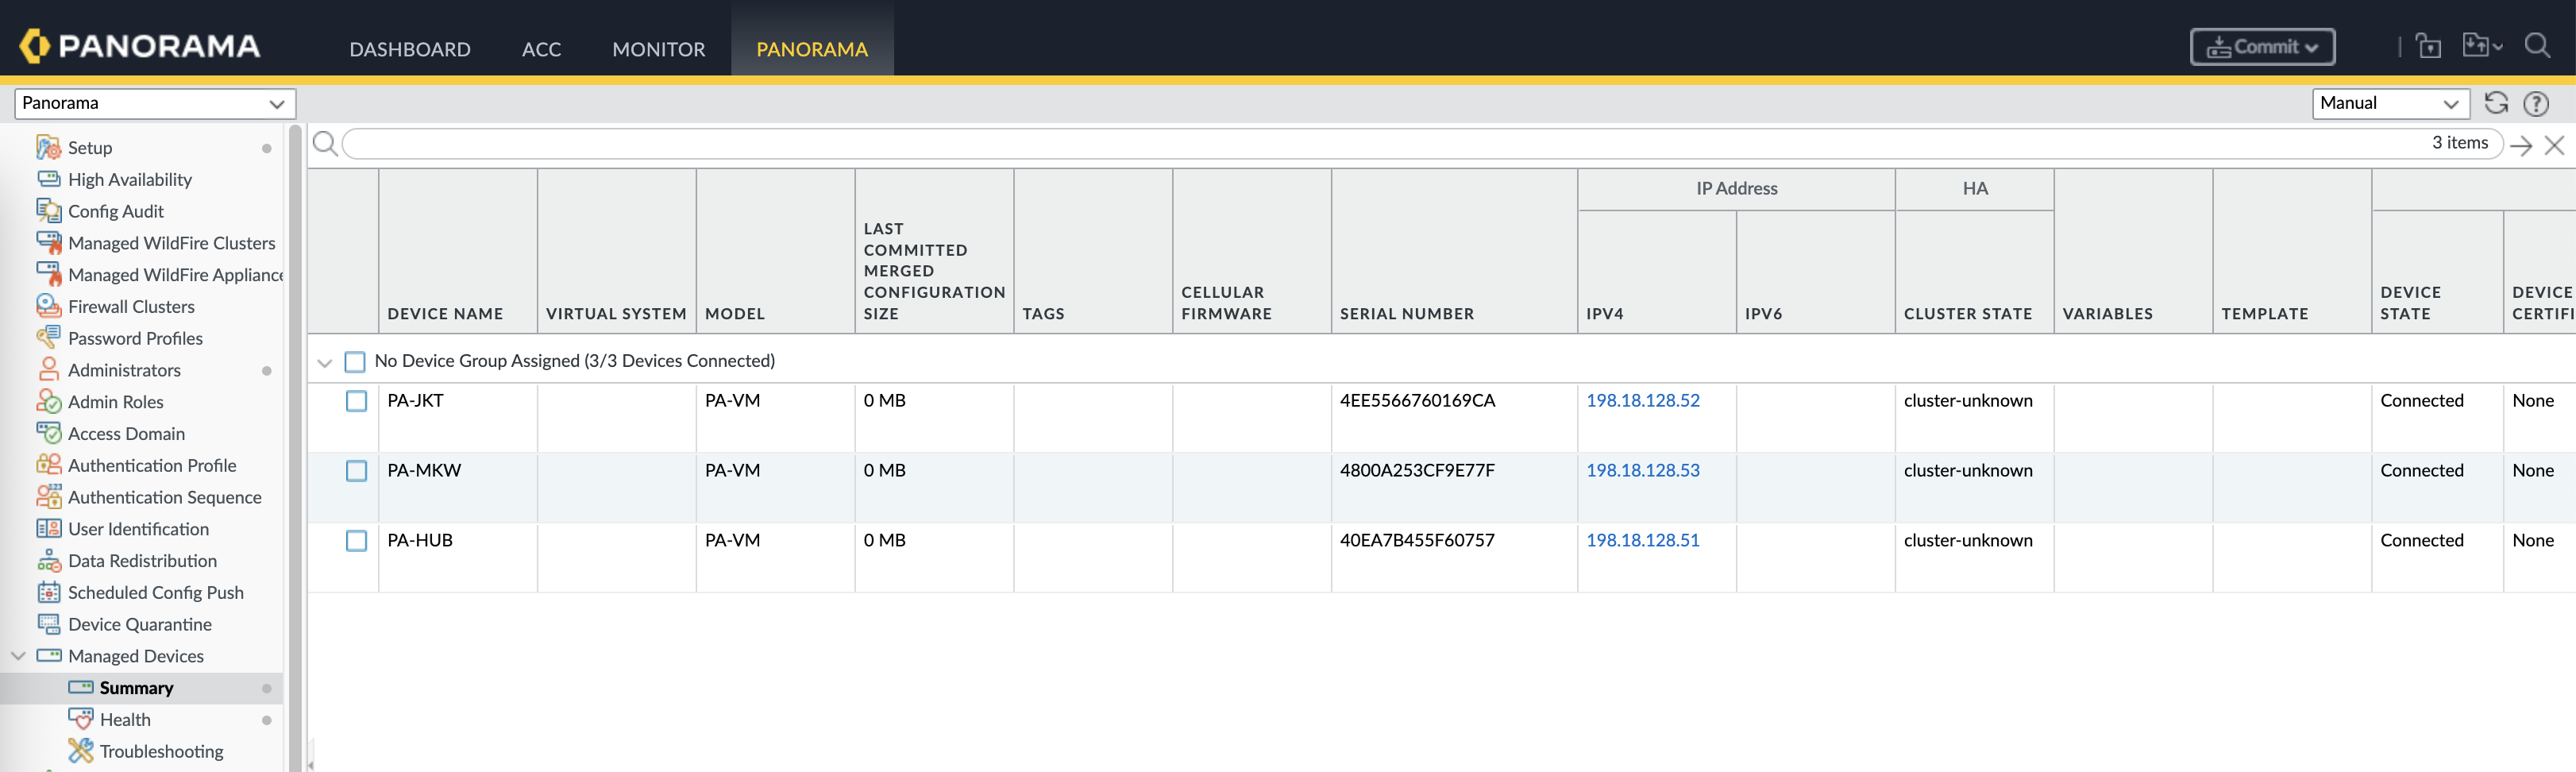
Here we have 3 Firewalls managed by our Panorama, one is for Hub and two are for Branches
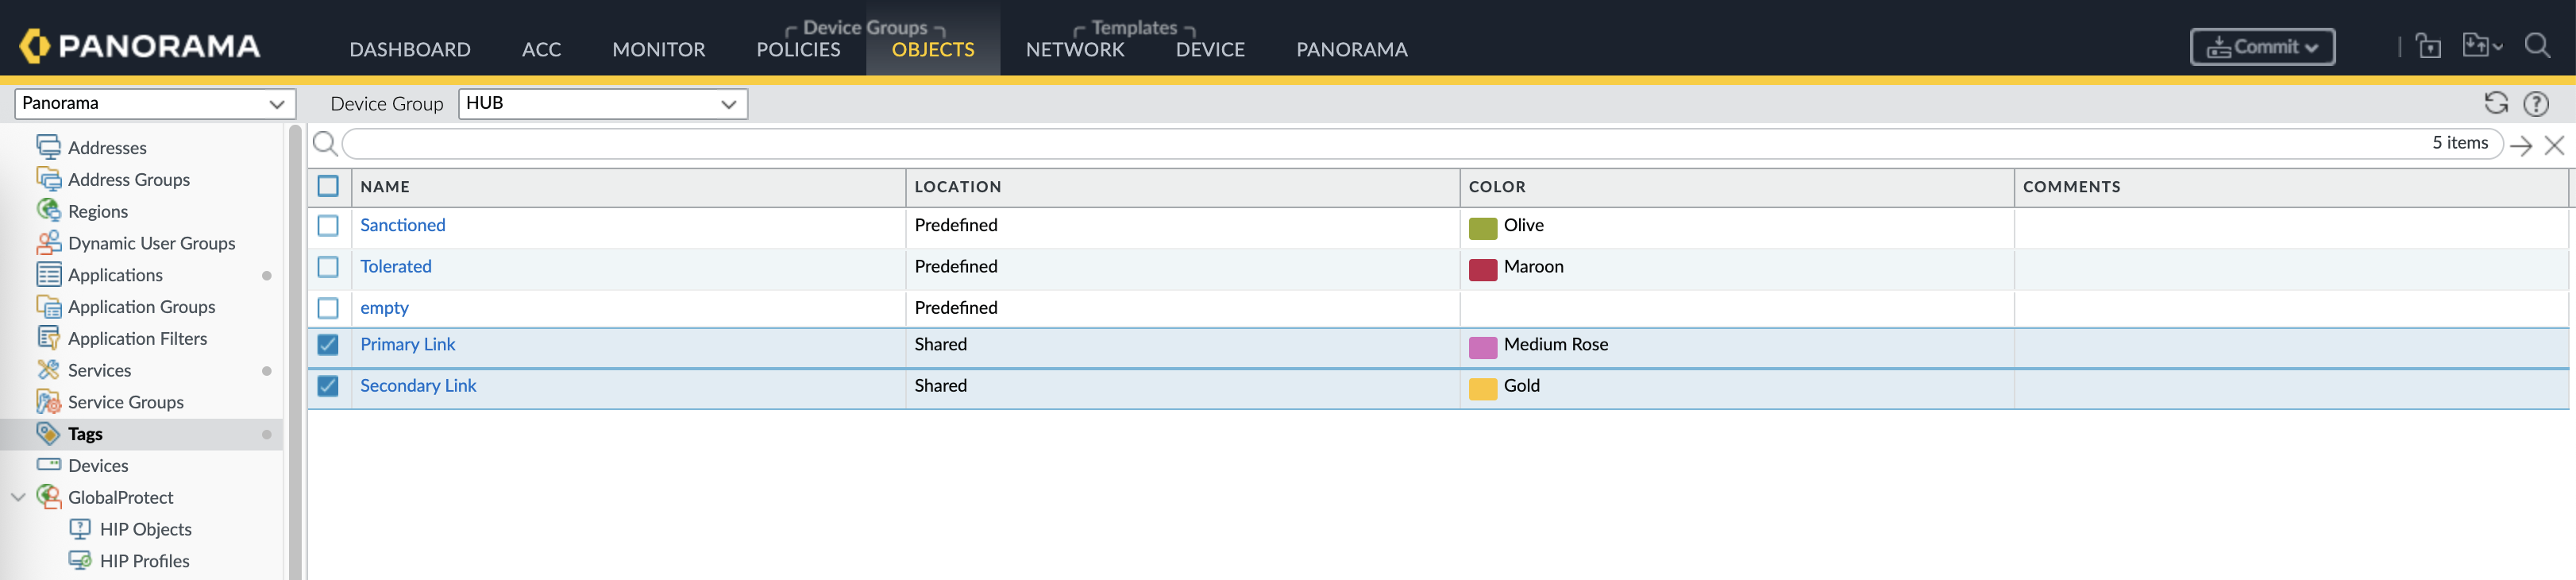
Next on the Objects, we create 2 shared tags to tag our 2 WAN links
Basic Network Configuration
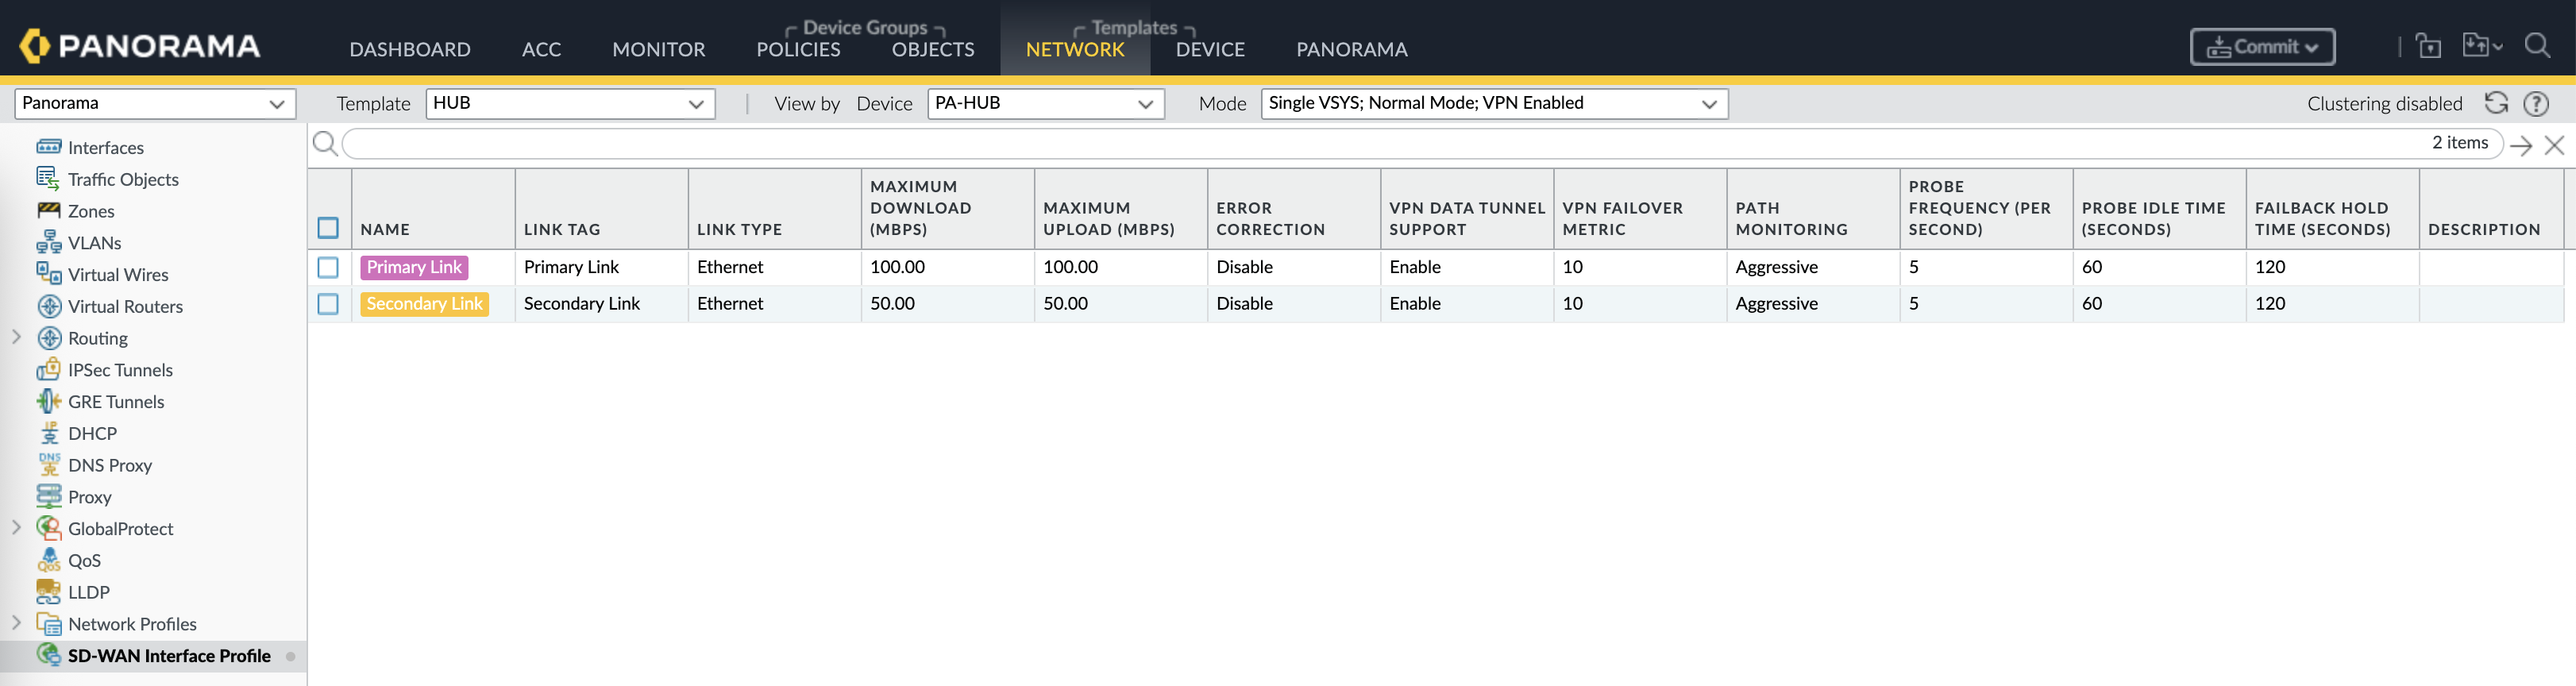
HUB
Then on the Network Template, here we configure SD-WAN Interface Profile based on the 2 tags created
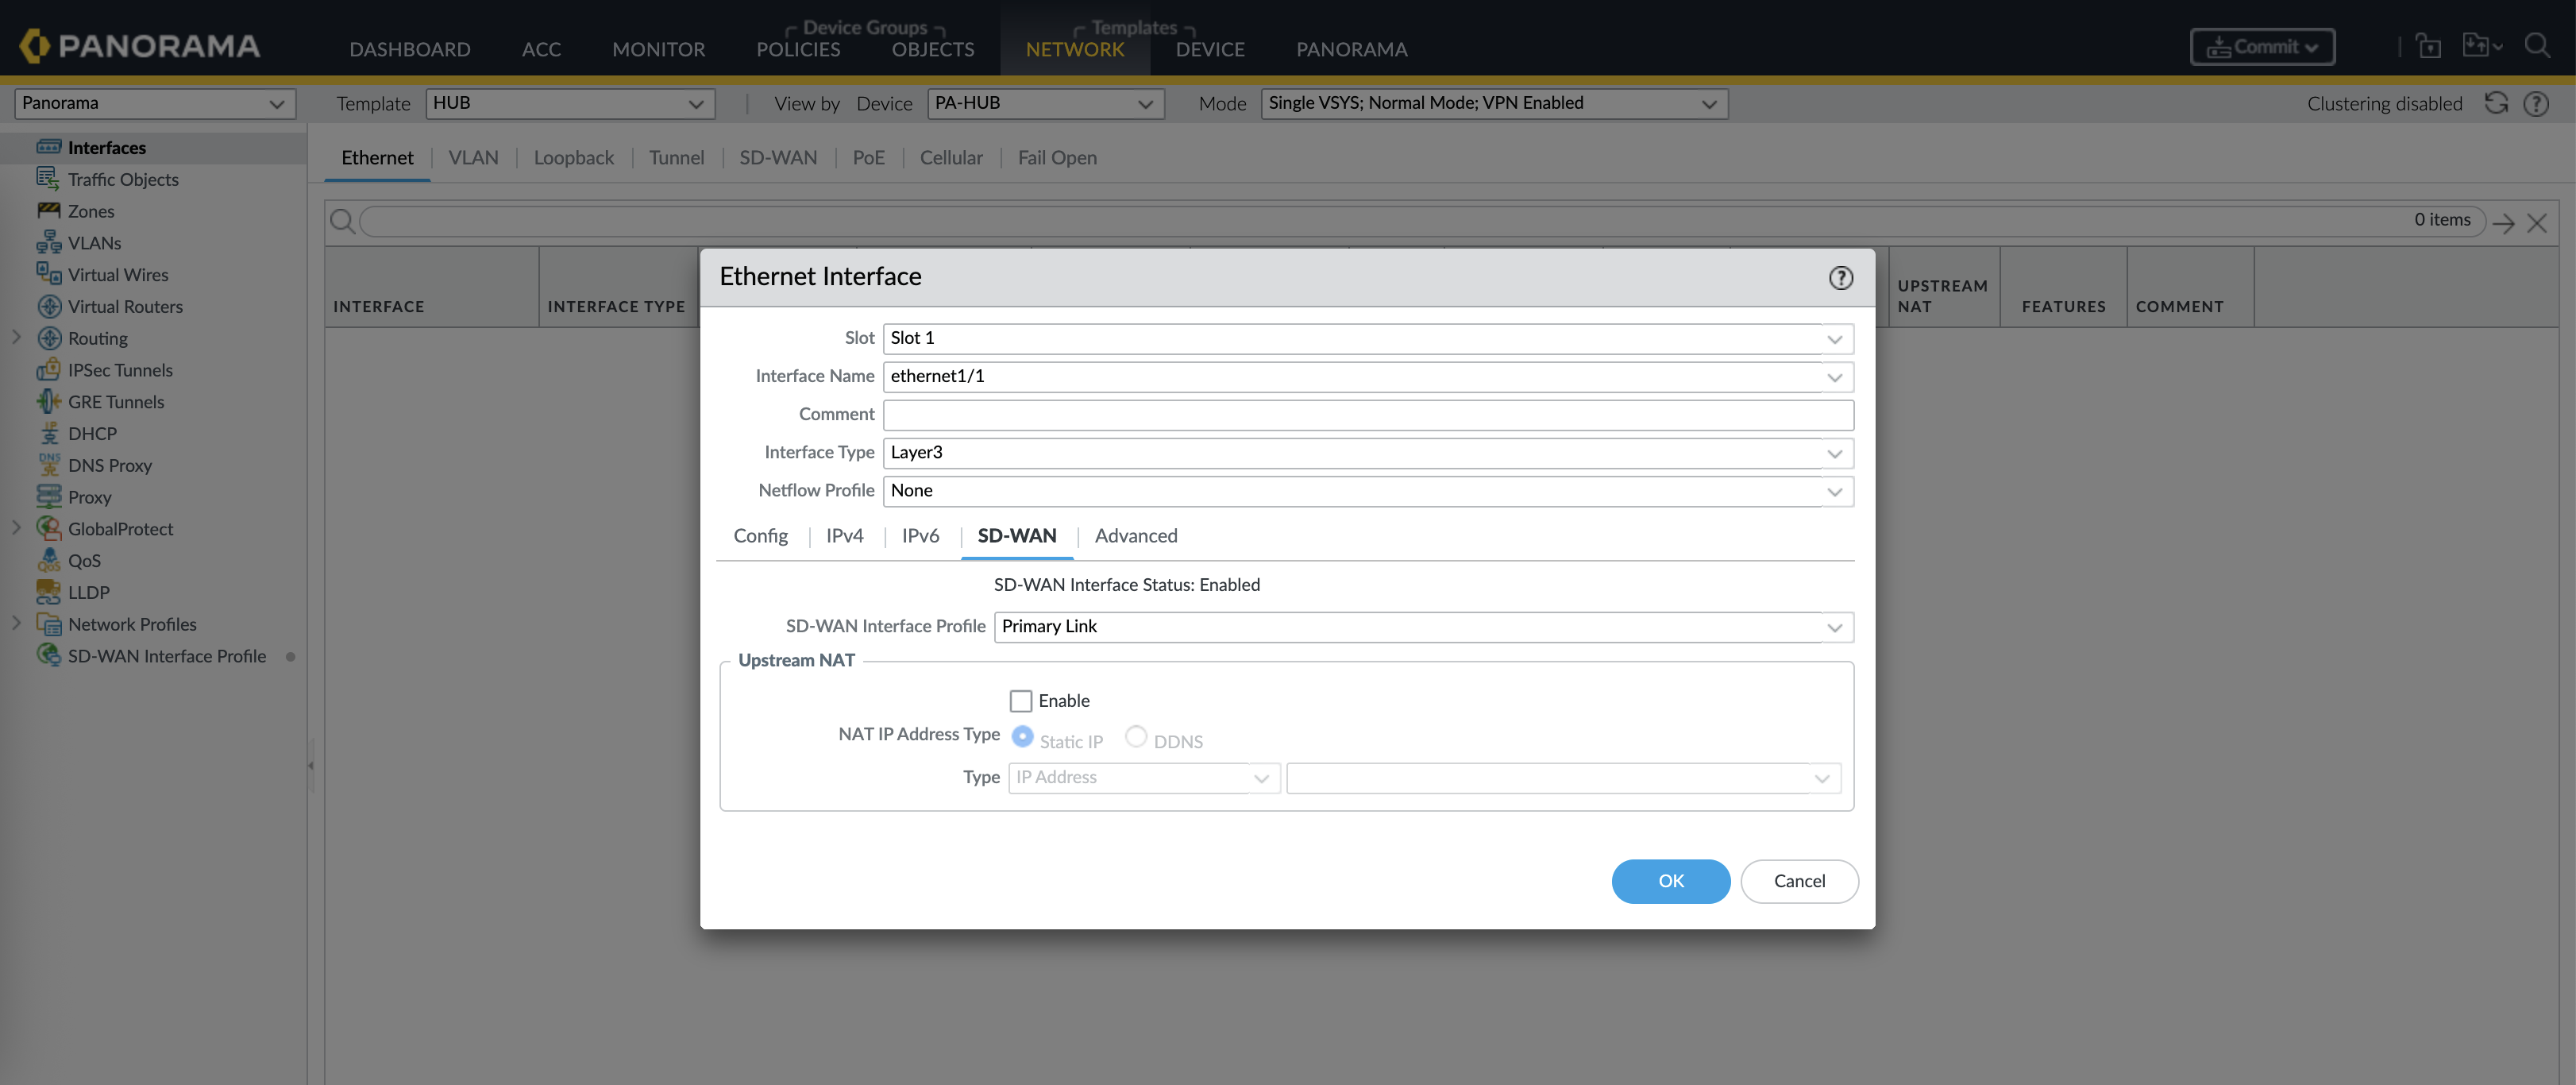
Next on the Network Interface, configure the Primary WAN Interface with IP Address & Next Hop, with SD-WAN enabled

Then select the SD-WAN Interface Profile
Do the same for the Secondary link, and add the Non SD-WAN LAN interface as well

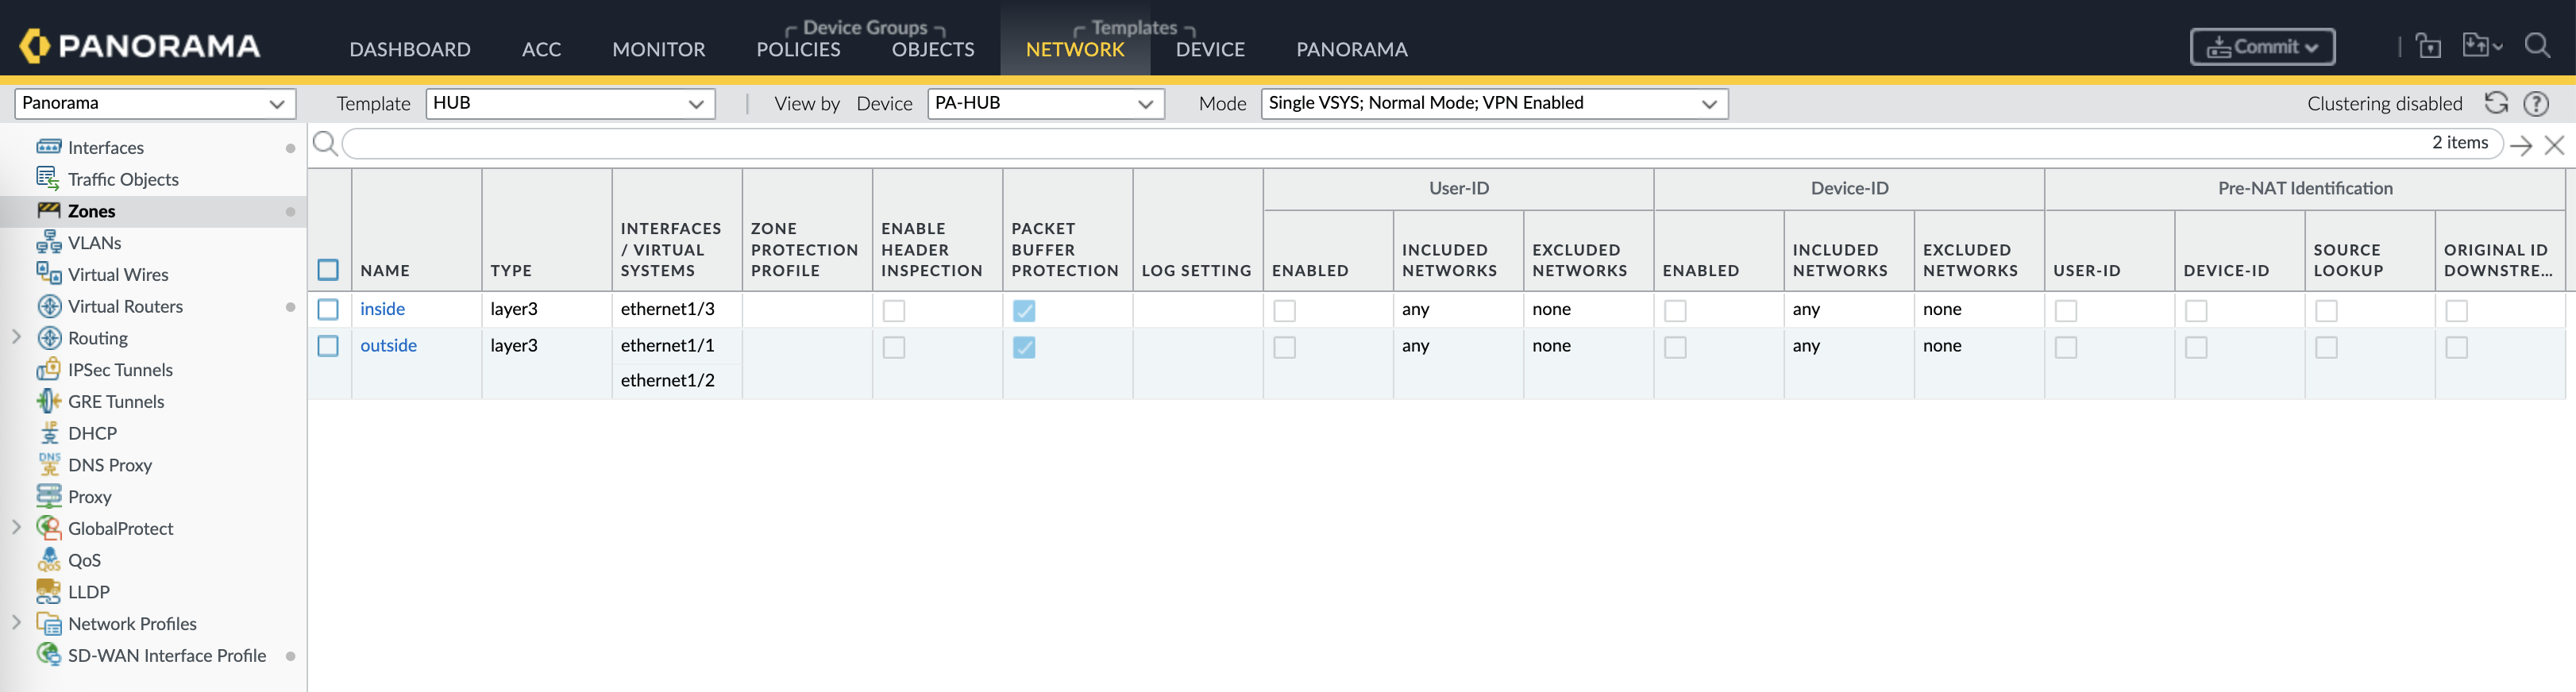
Next create the default inside and outside zones
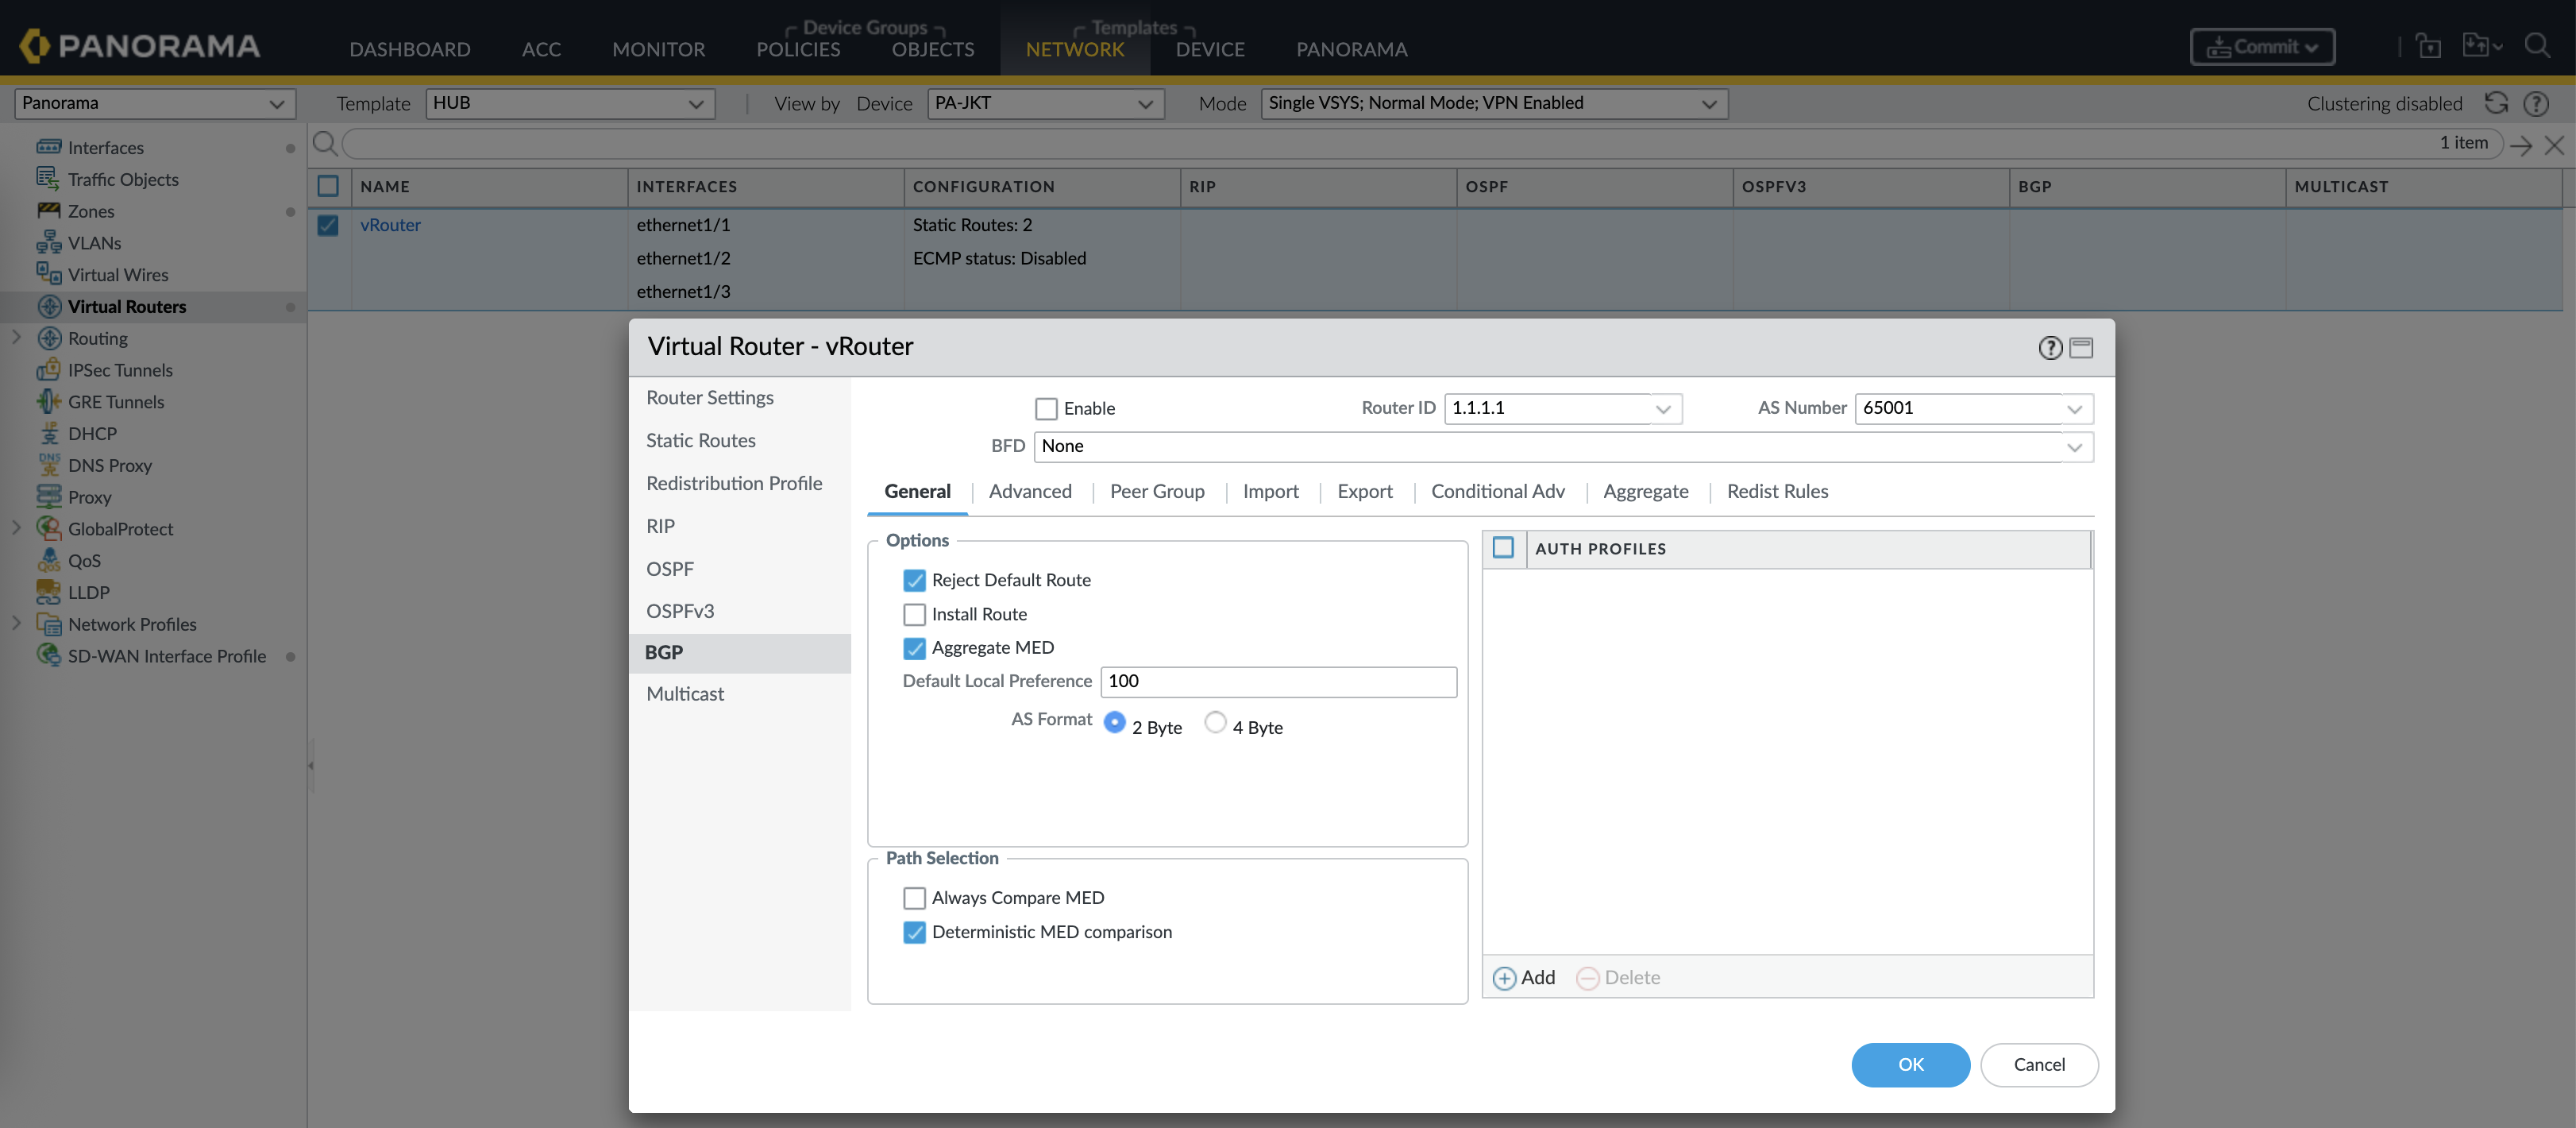
Then create a Virtual Router configured to pass traffic to both WAN gateways
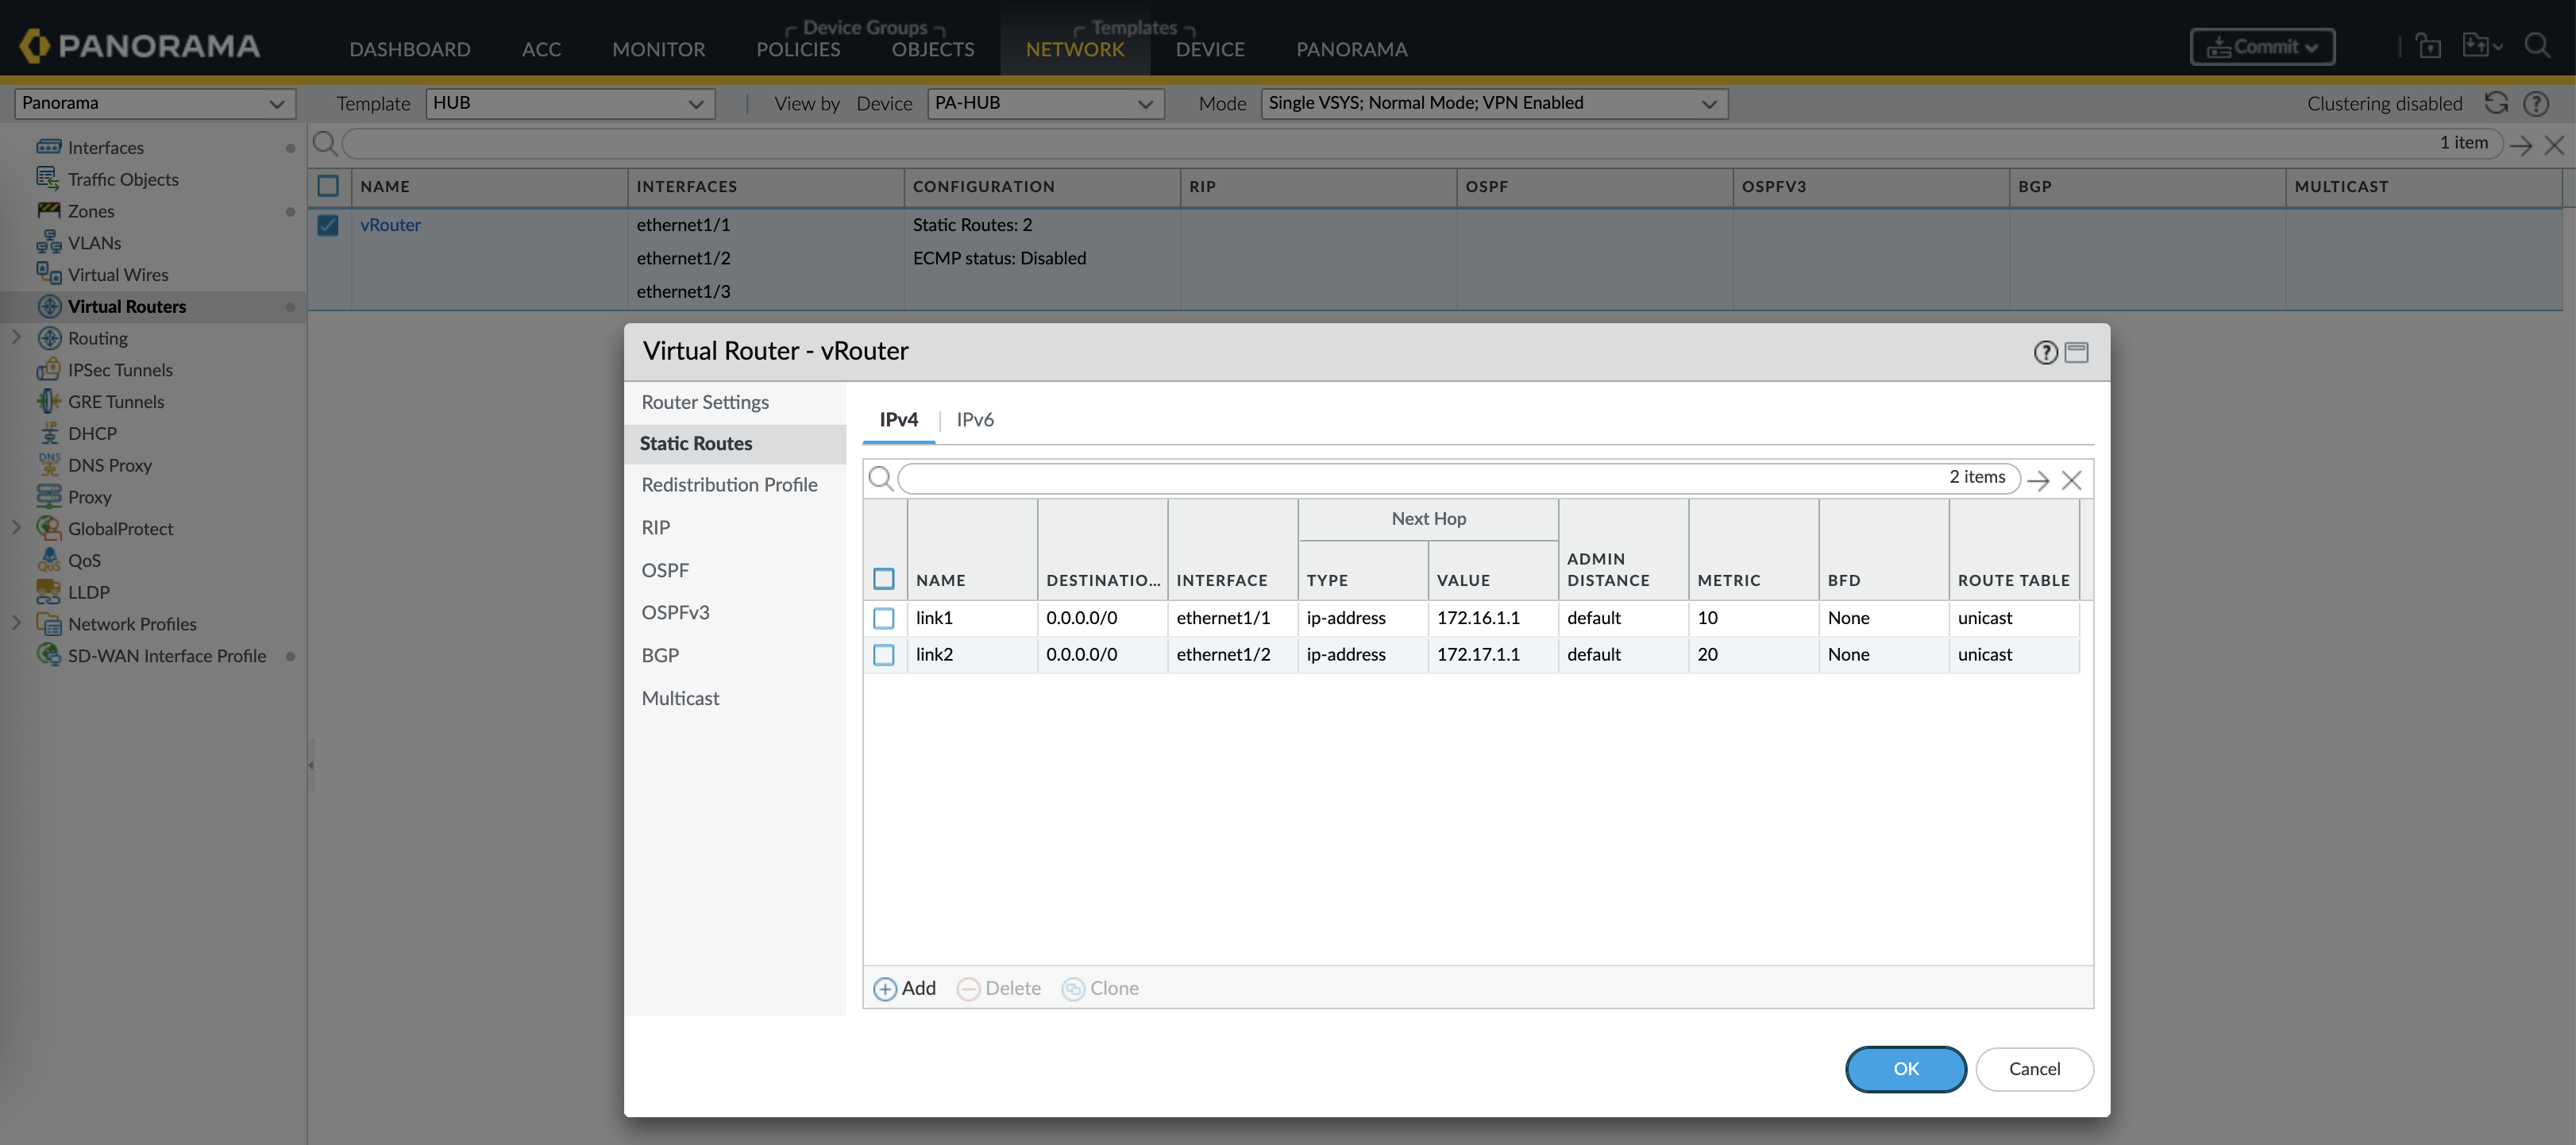
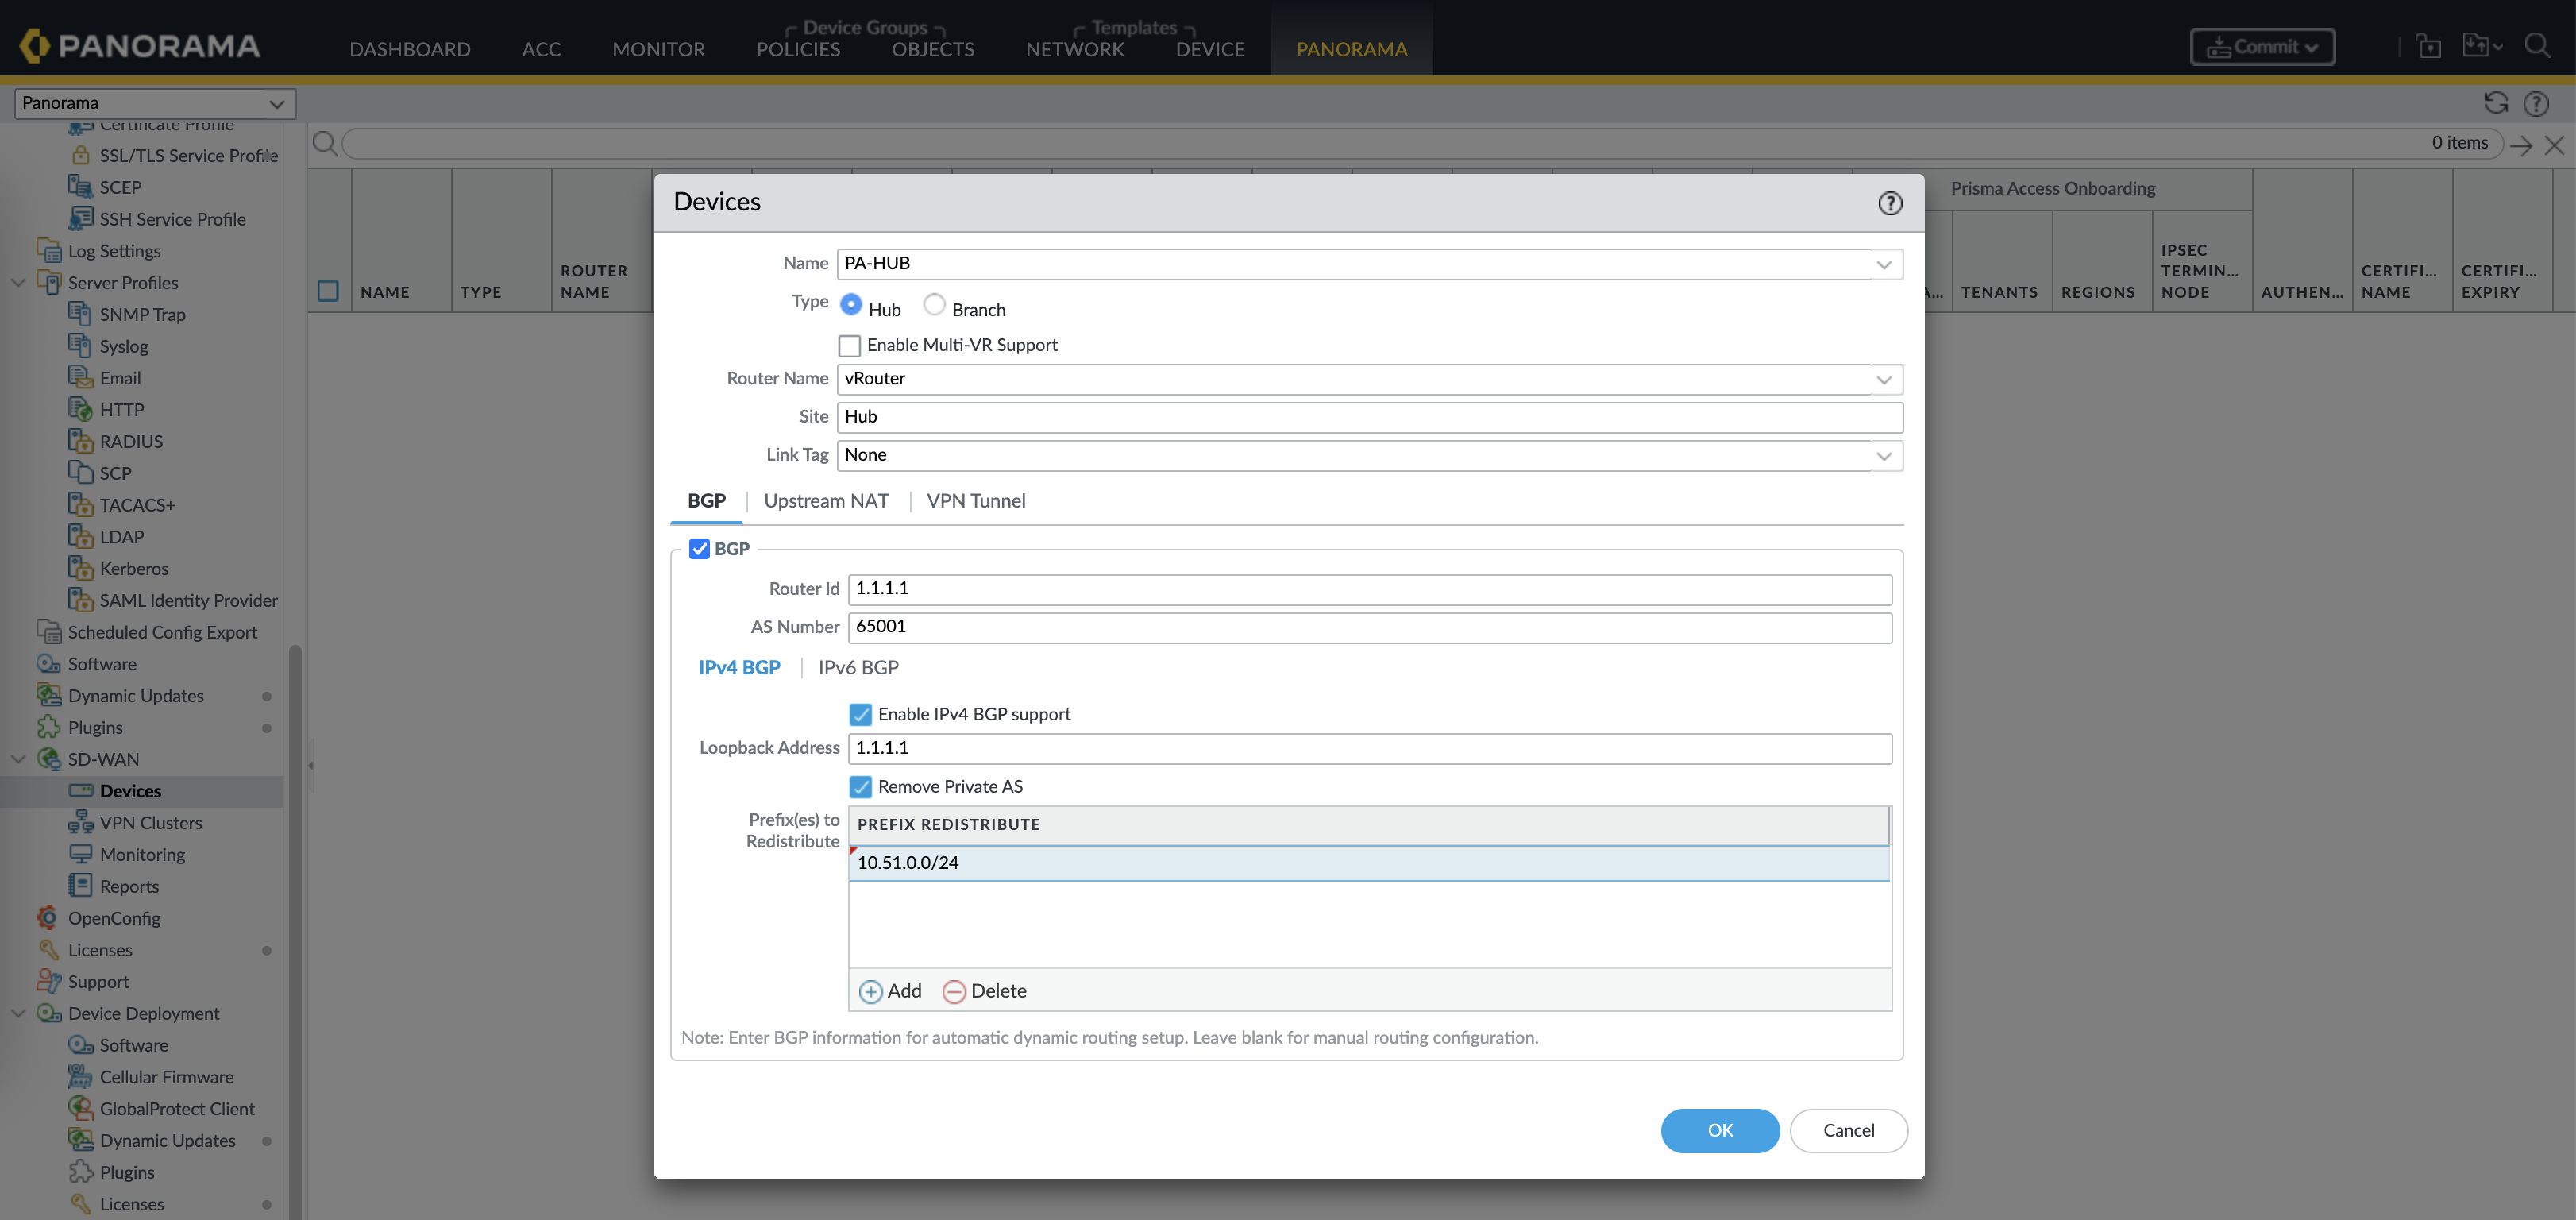
Enabel BGP, give it Router ID and AS Number
Branches
Do the same for the JKT & MKW Branches


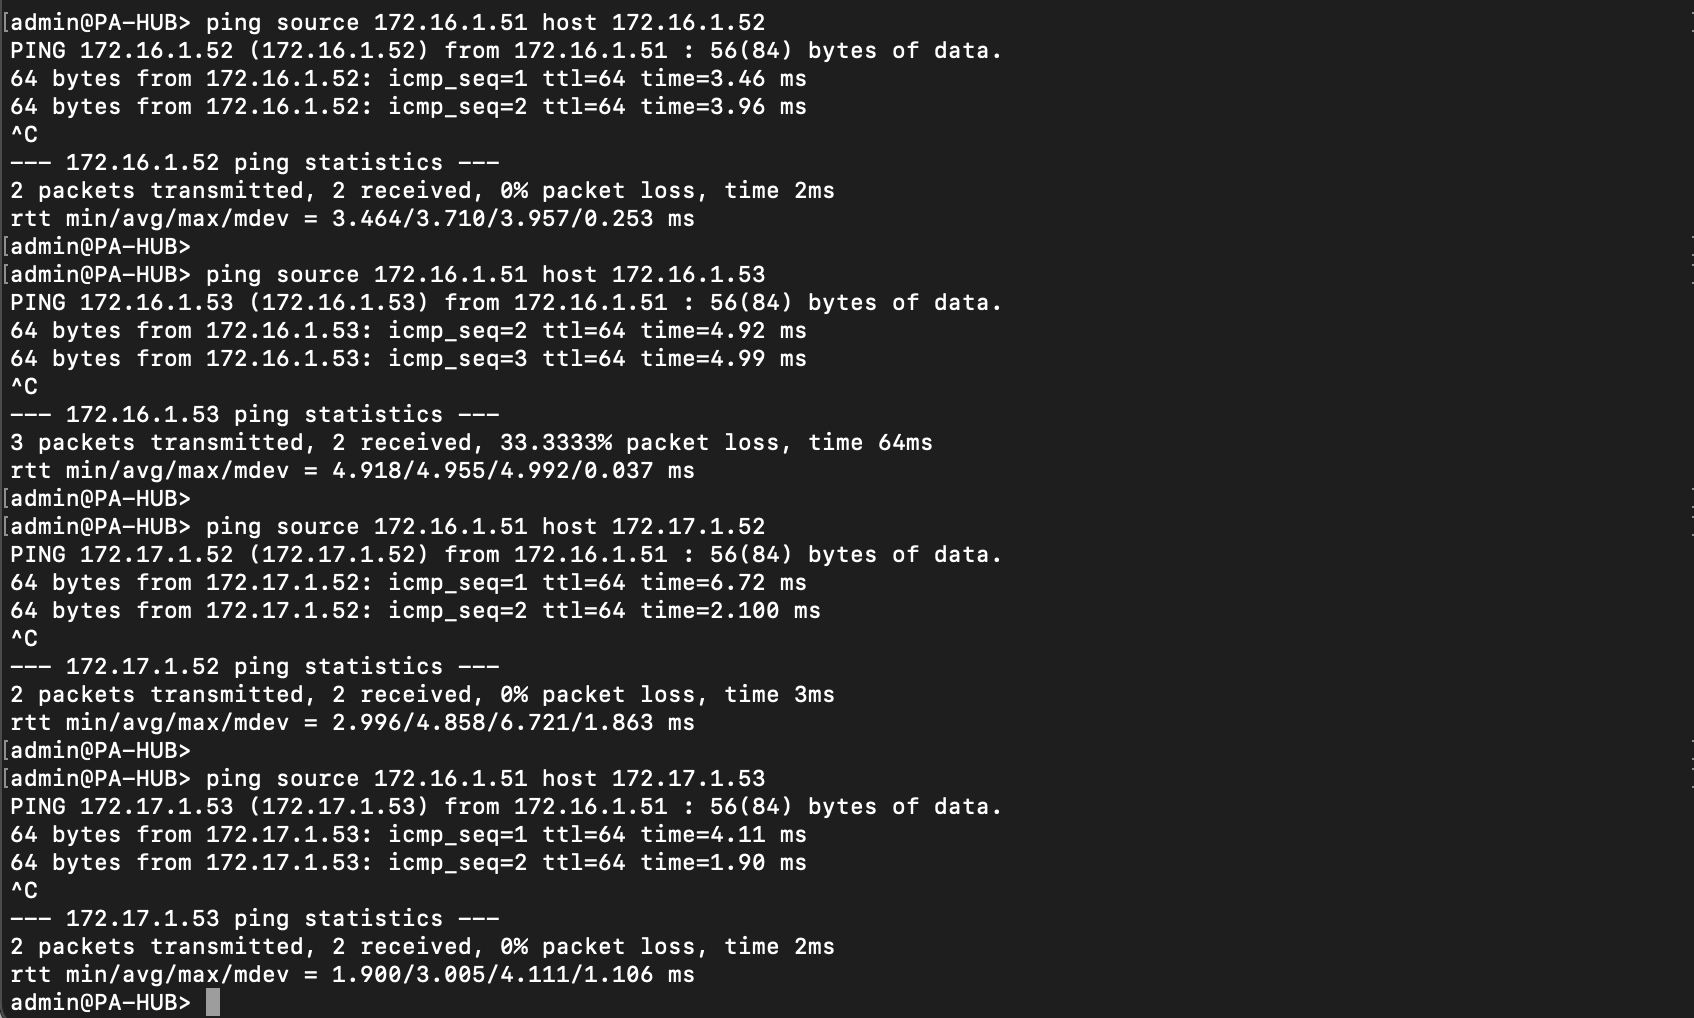
At this point its a good practice to make sure that all nodes have full mesh connectivity through their WAN links
Policies
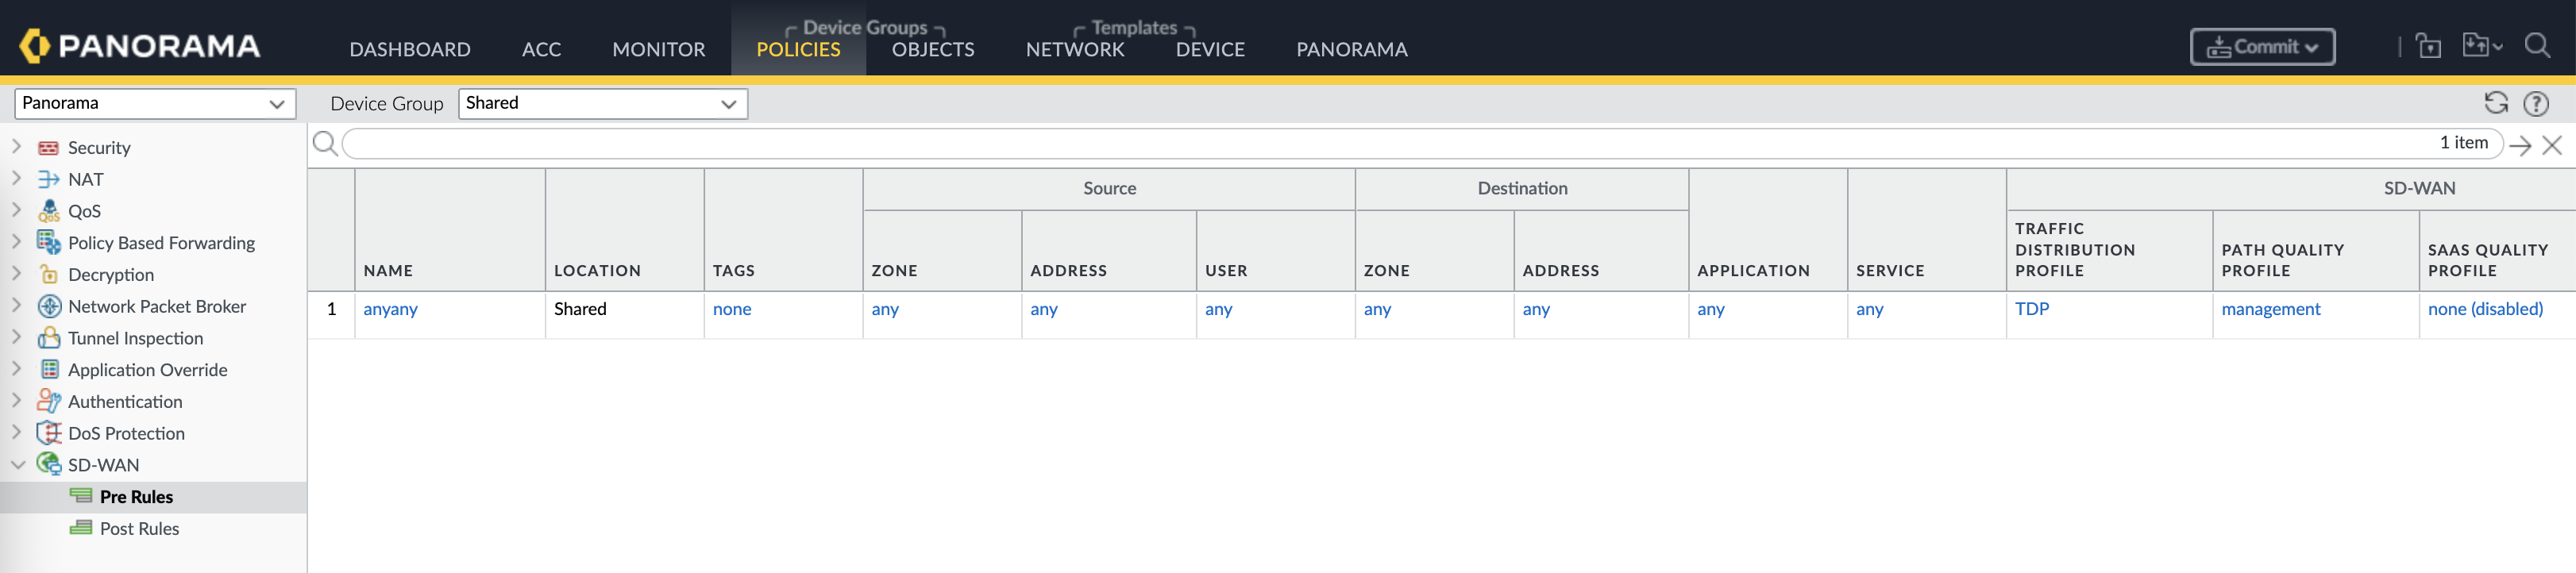
Next we tackle the policies, we will use a shared policy of “any-any” for the sake of simplicity

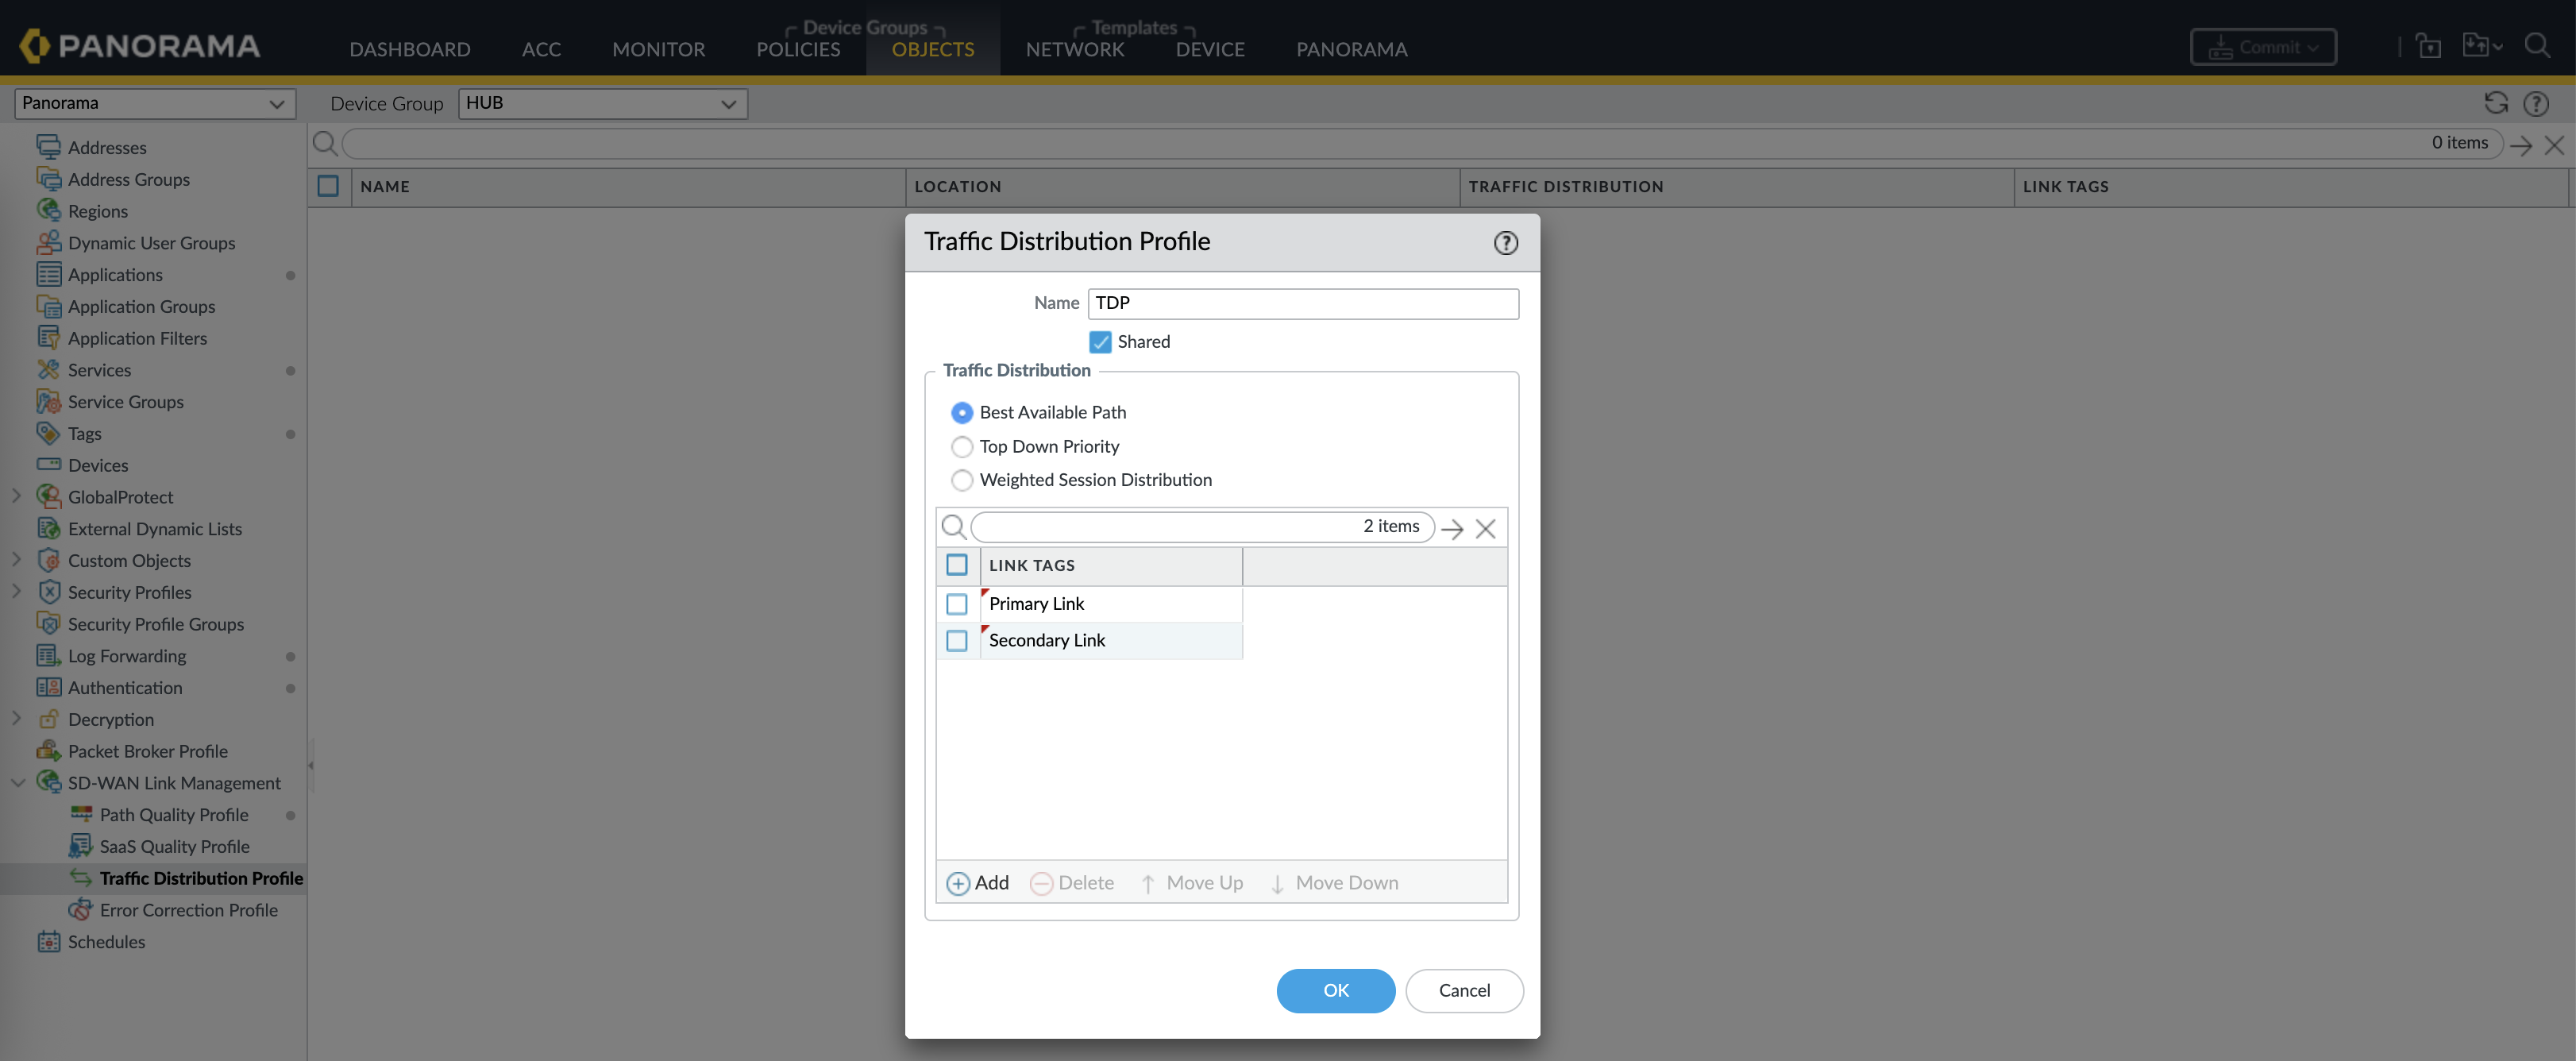
Then create a Traffic Distribution Profile for link distribution algorithm, enter the 2 link tags created earlier
Then create a SD-WAN Policy, we also use “any-any” to ease up the deployment, and refer the TDP here
SD-WAN
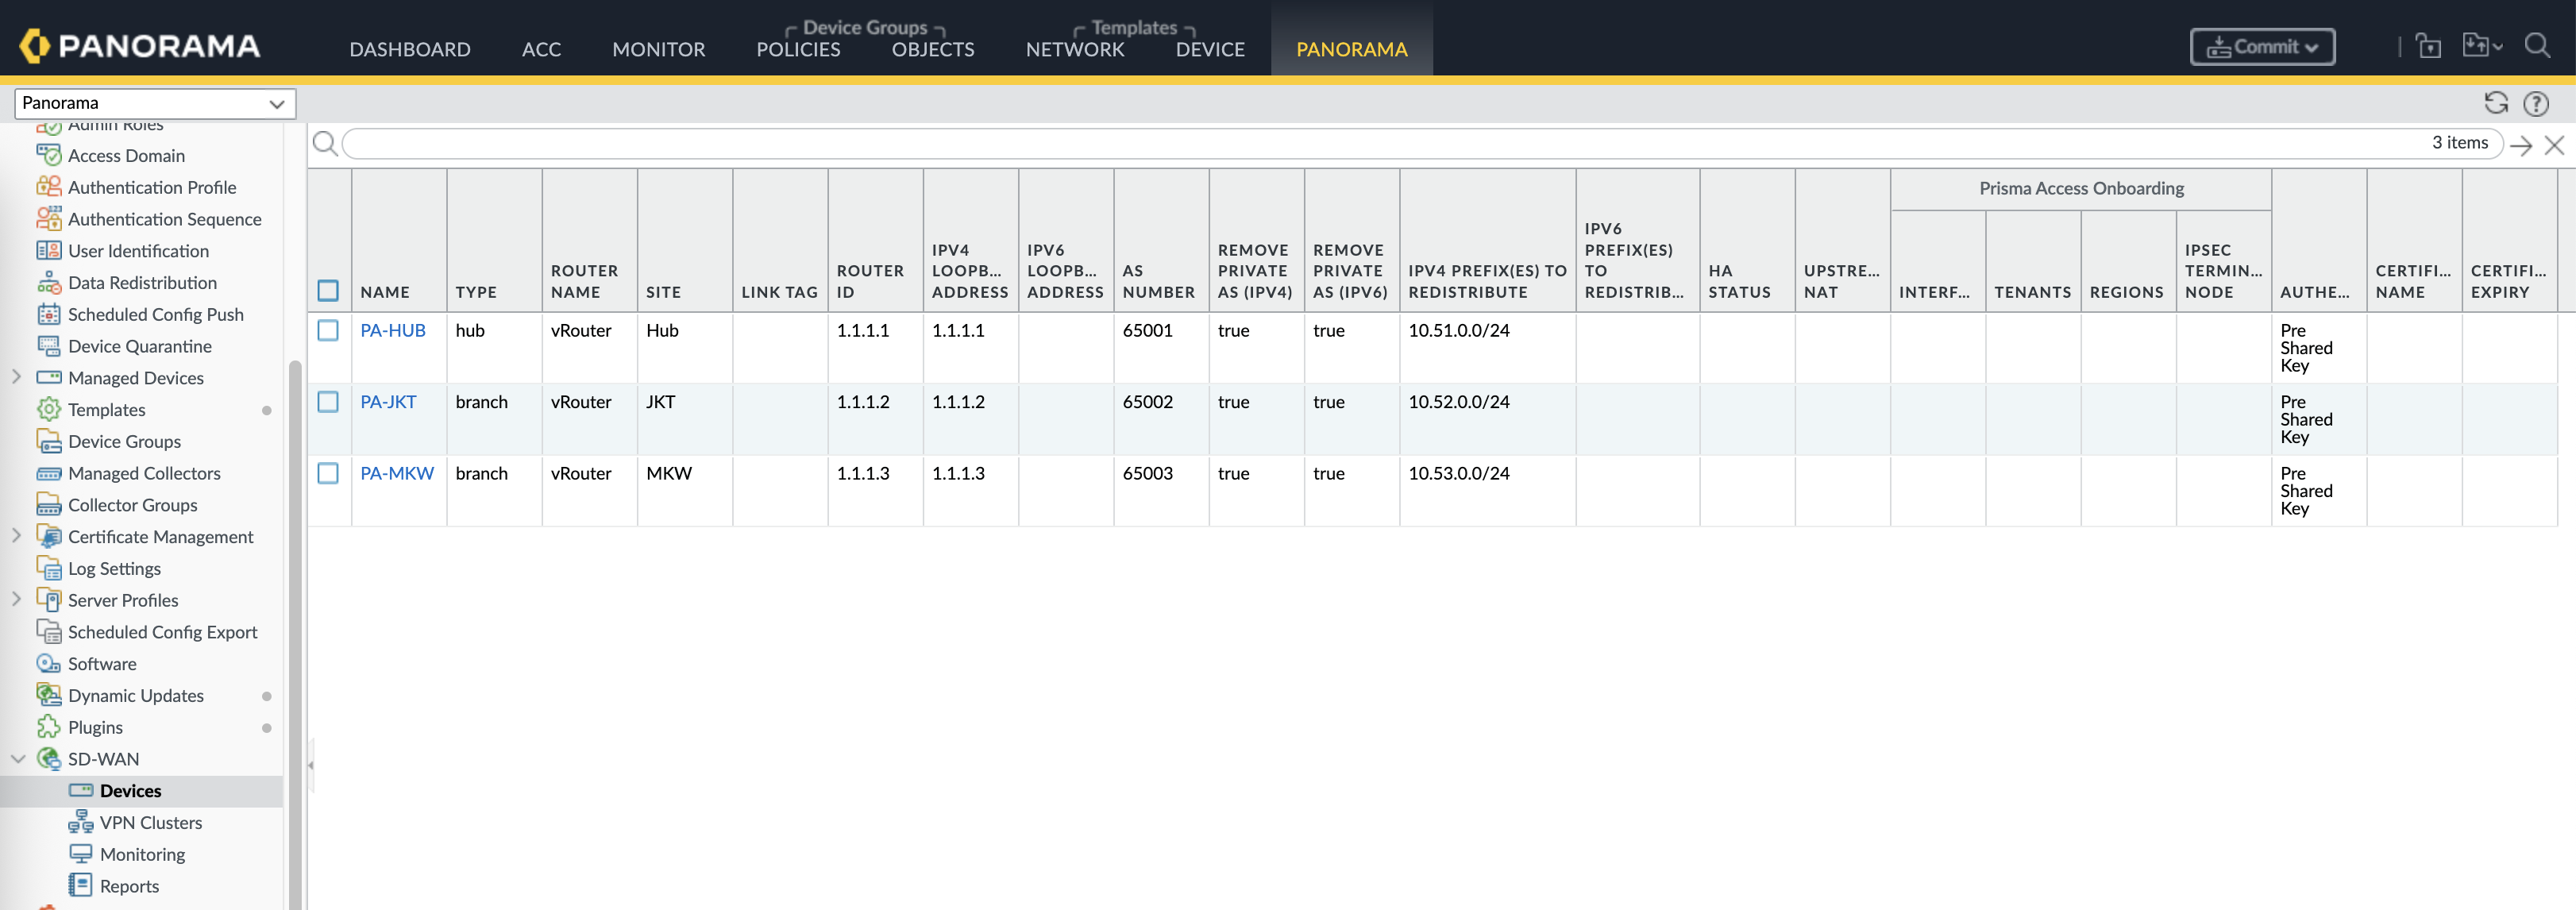
Now we configure the actual SD-WAN configurations, first off we add the HUB to the SD-WAN Devices
Also add the branc devices with type branch
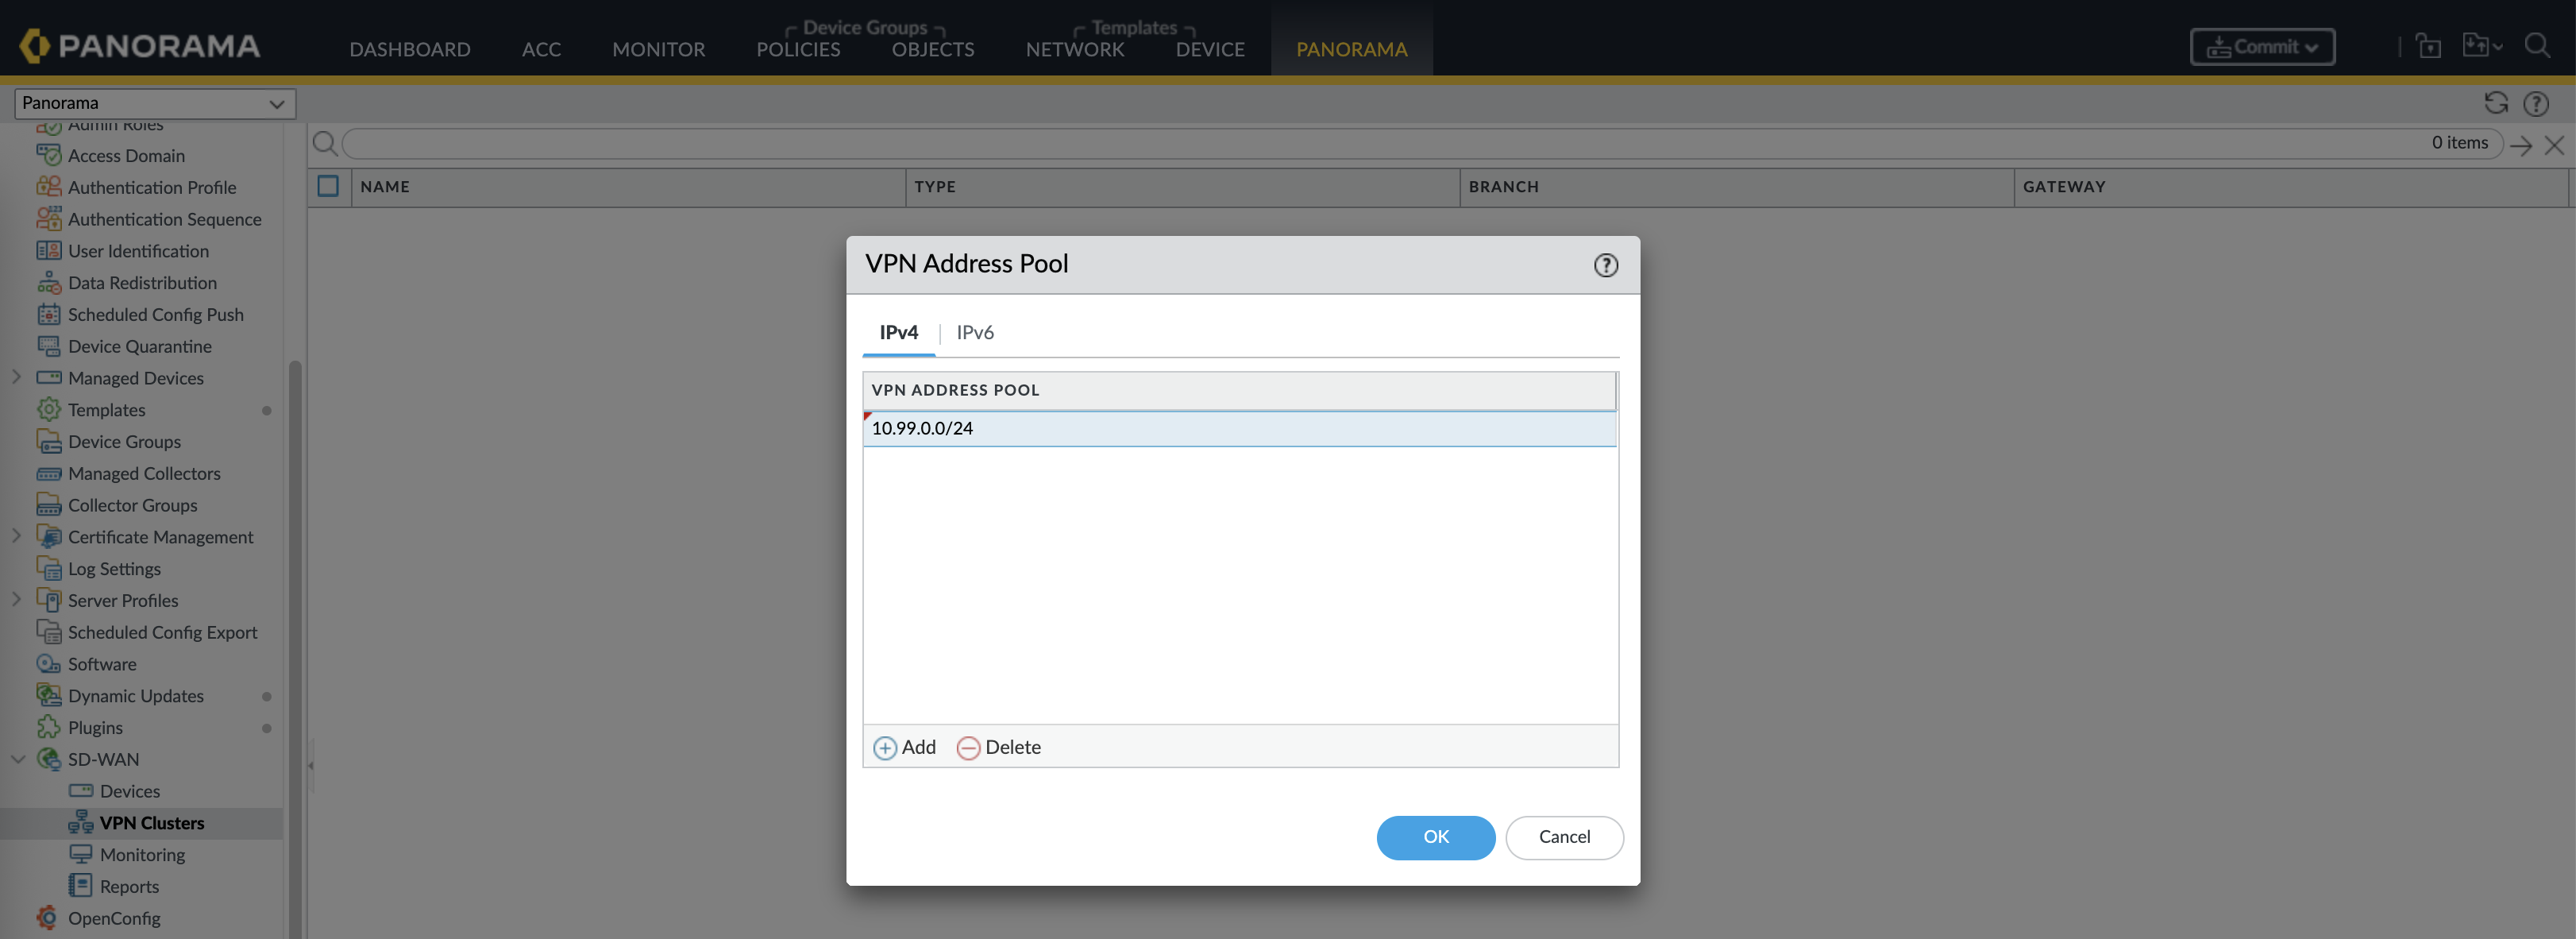
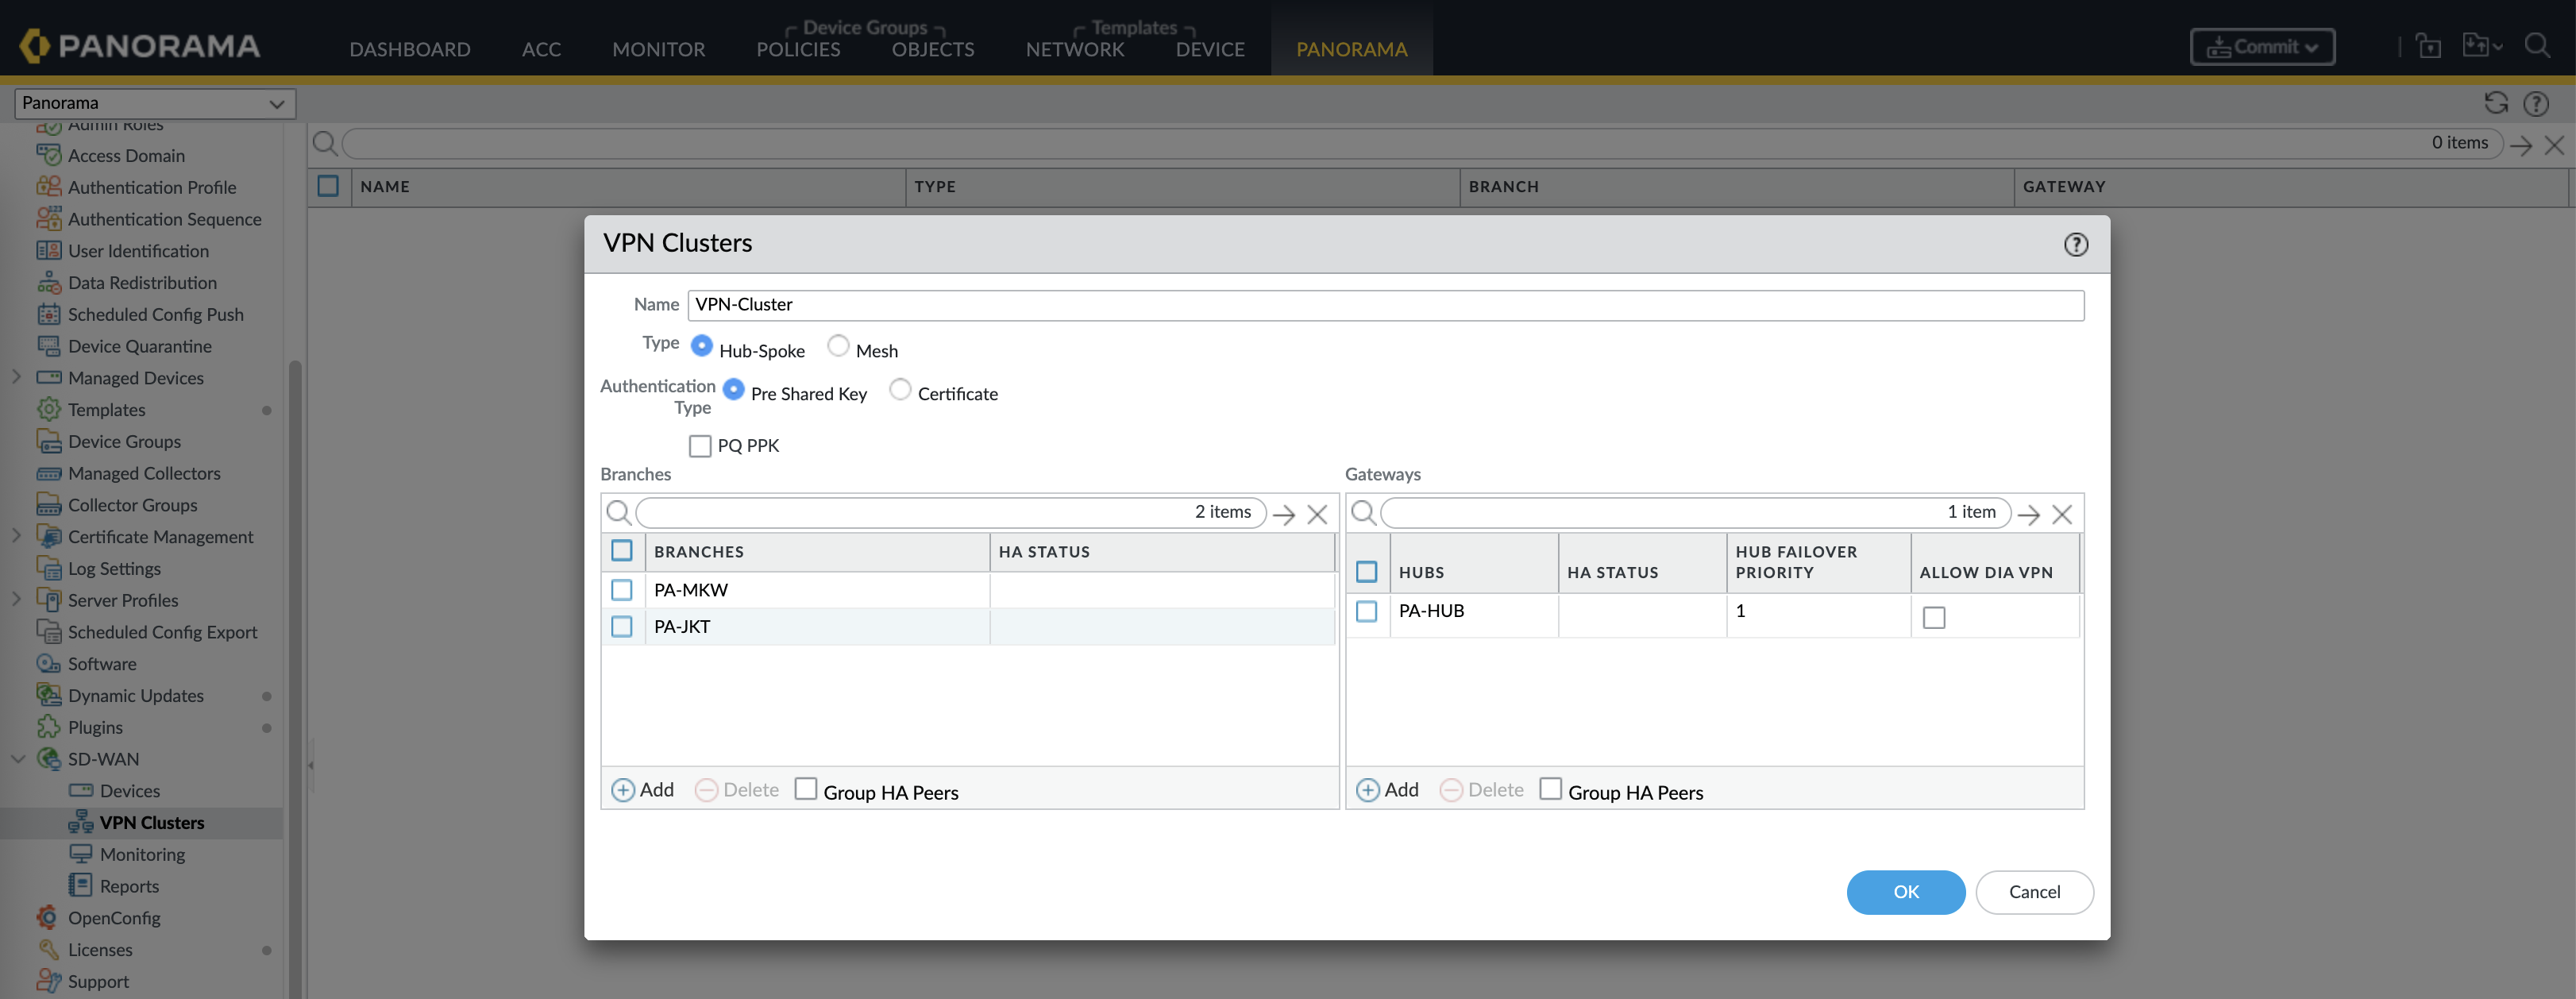
Next on the VPN Clusters, create an VPN Address Pool, this pool will be used dynamically to form up underlay links between hub and spokes
And finally we can create the VPN Cluster with Hub and Spoke type, add all the devices according to their roles and hit commit & push
SD-WAN Validation
Here’s the topology after the configuration is pushed
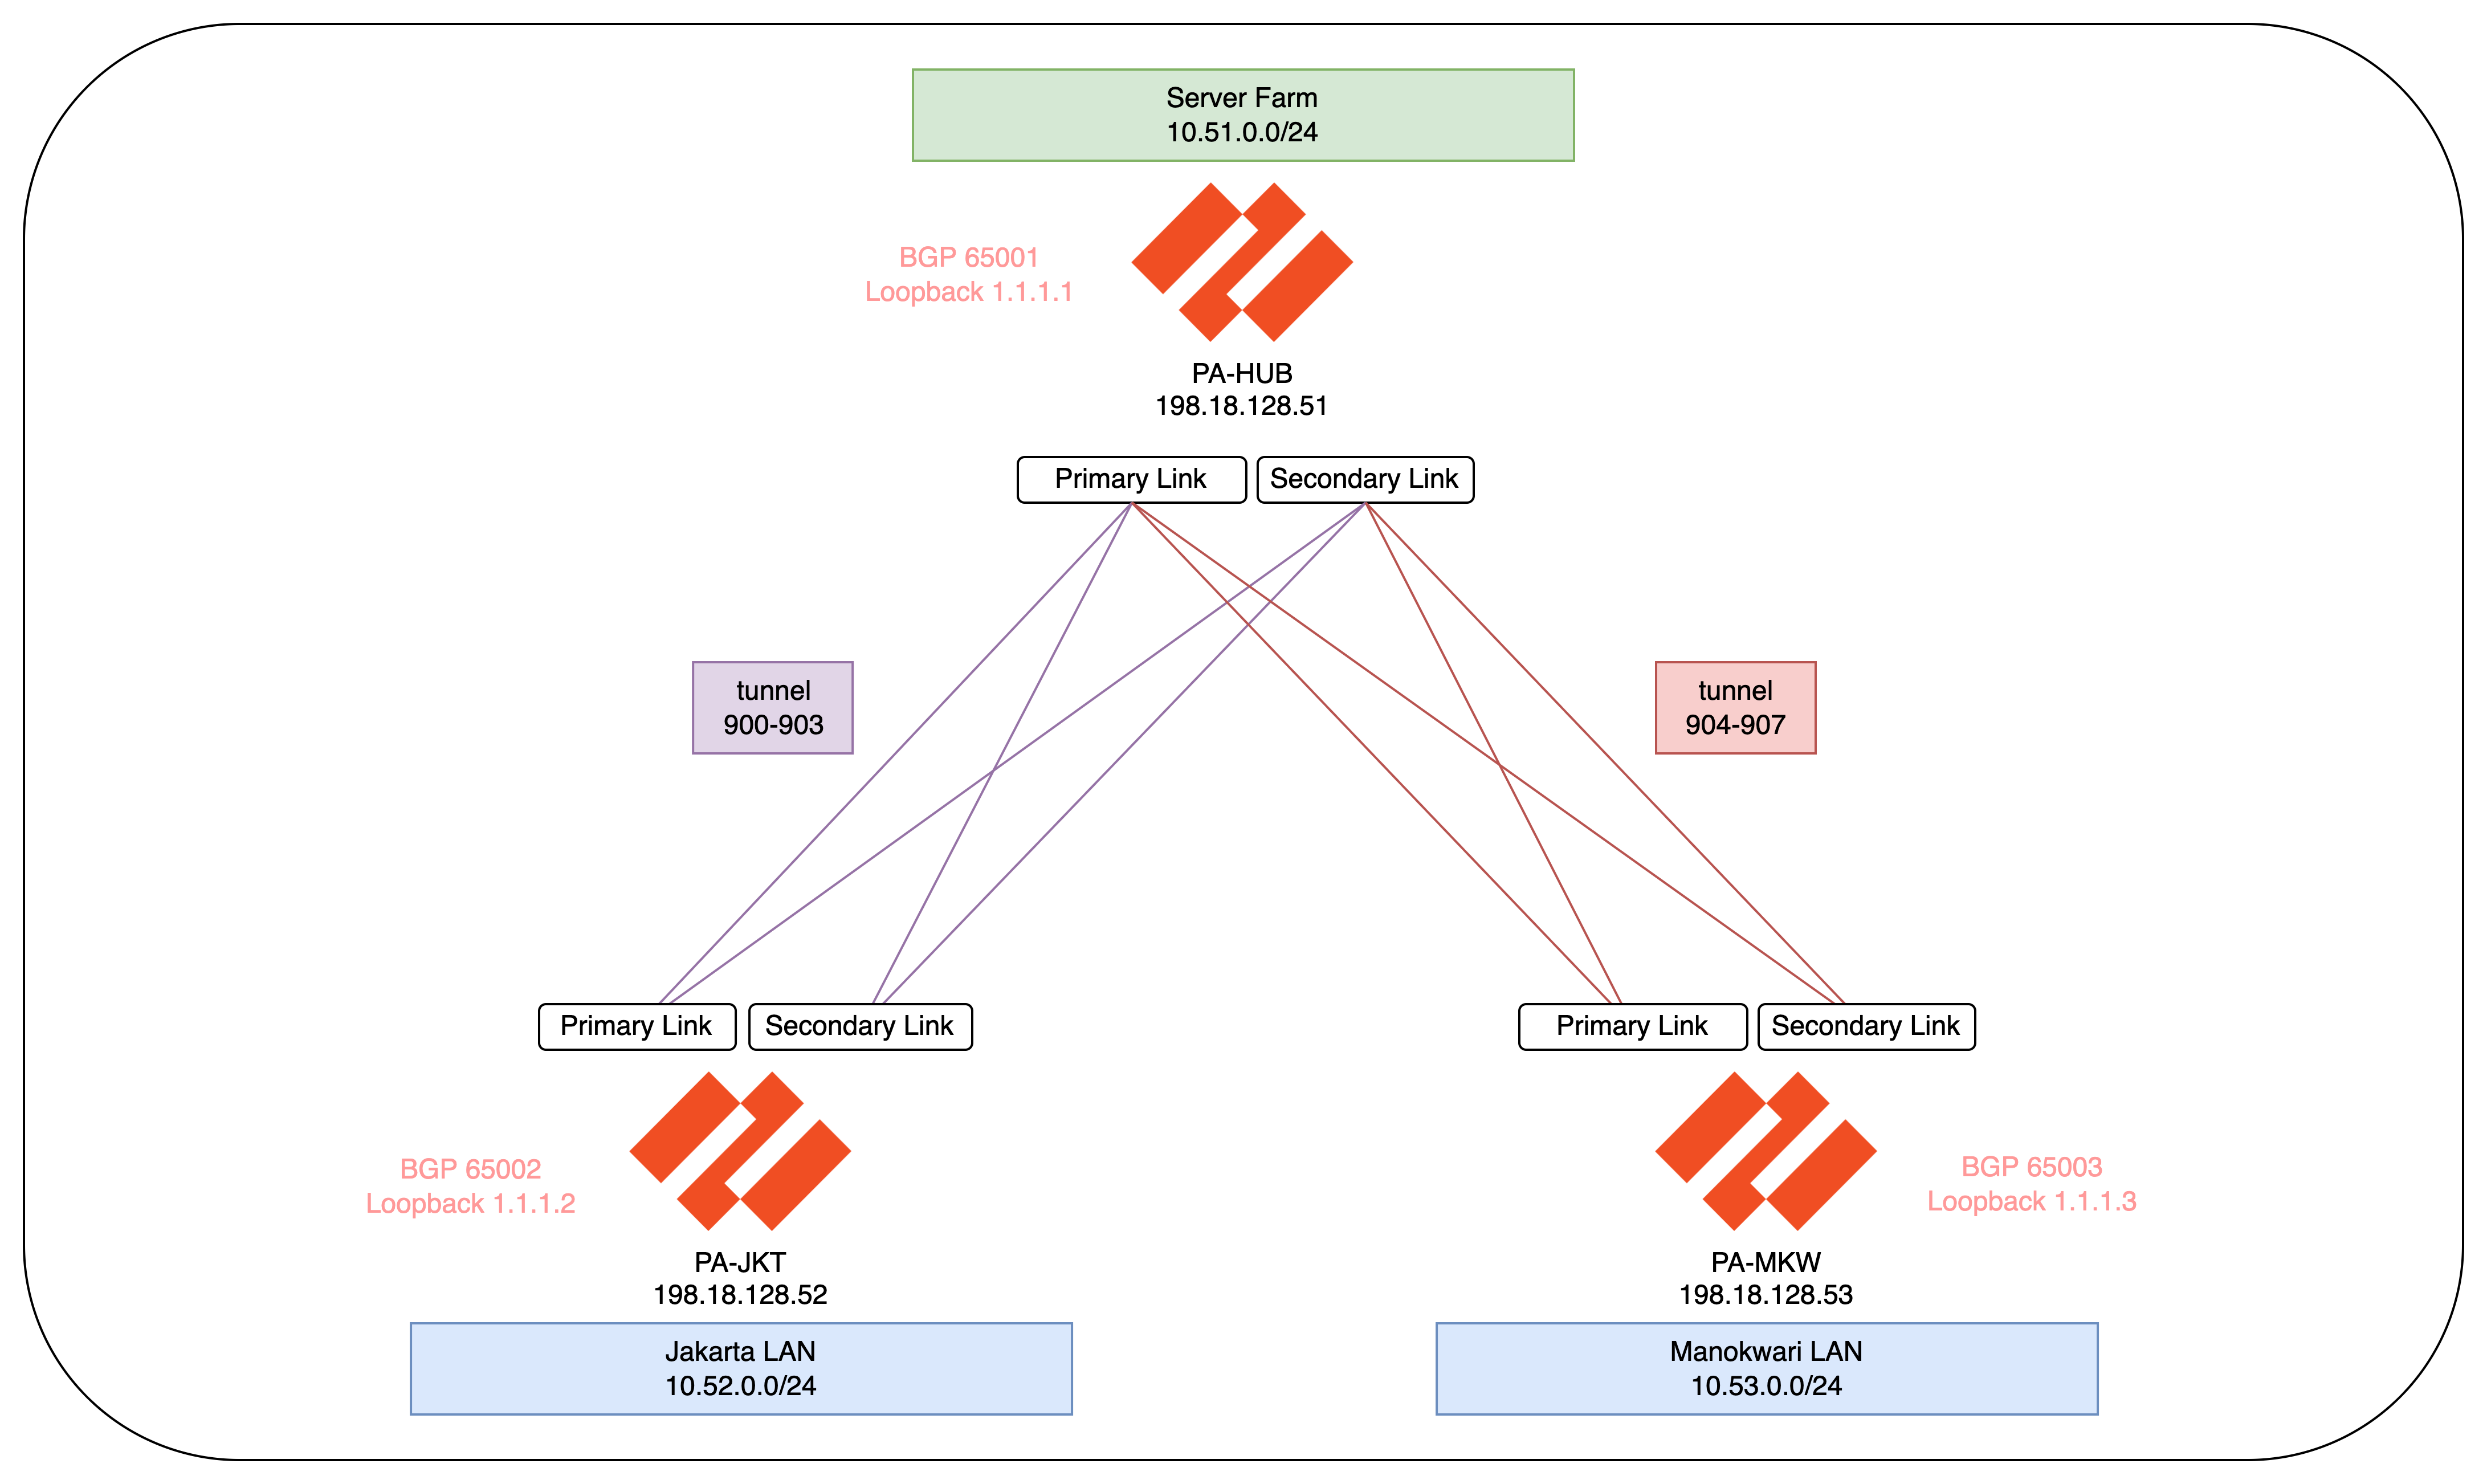
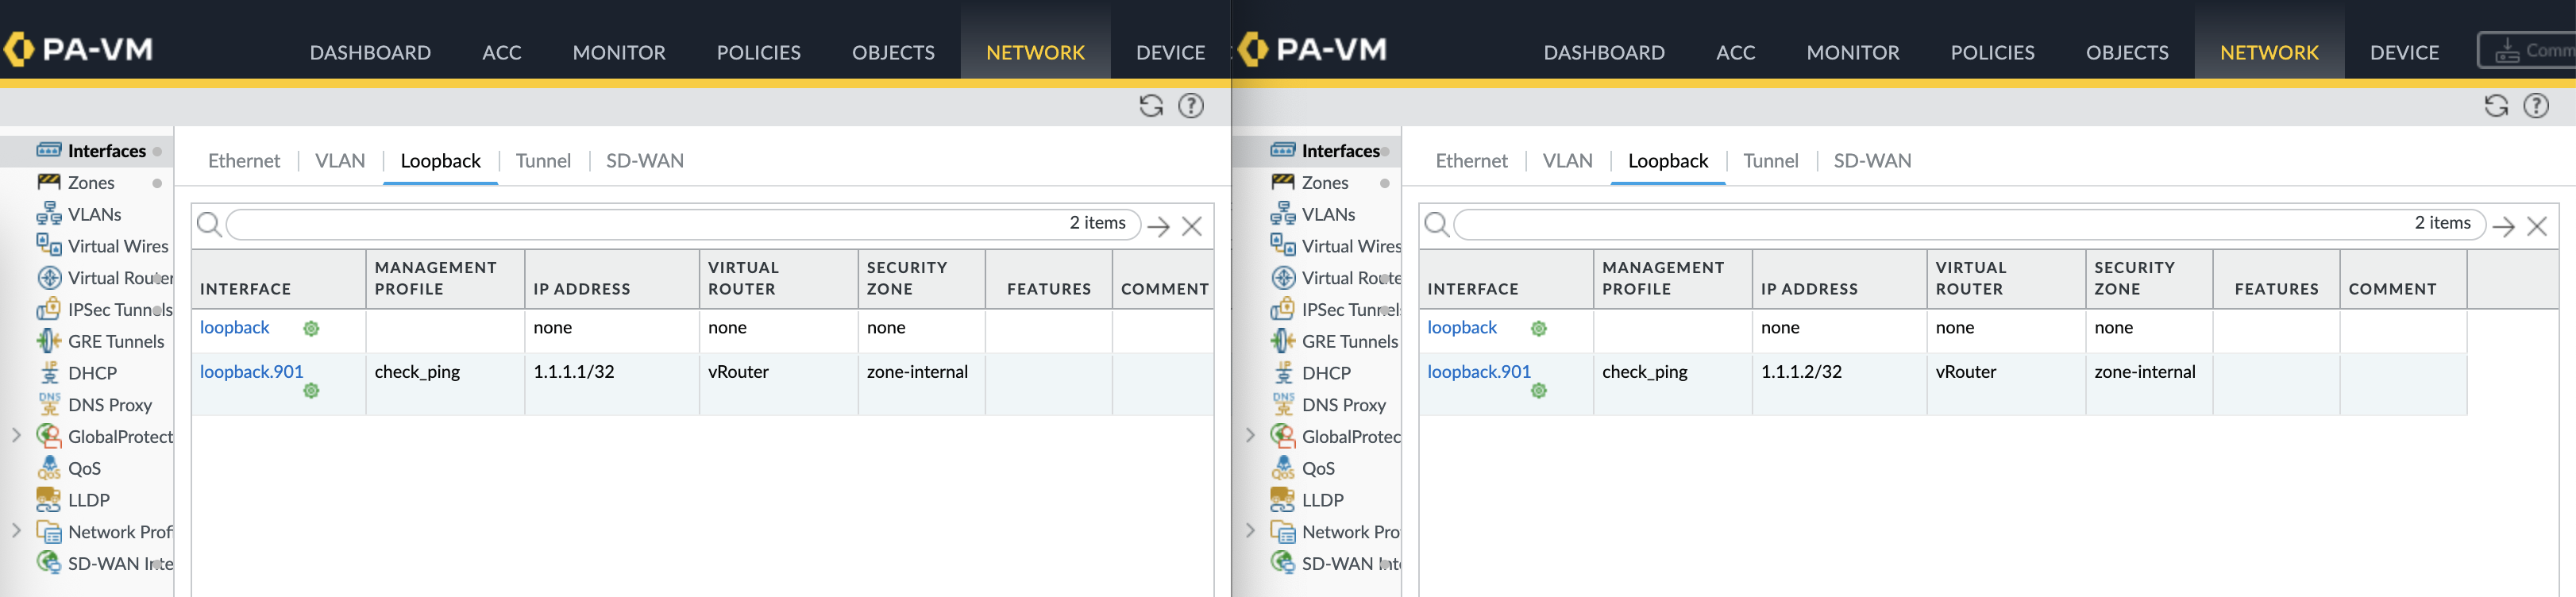
The first thing to see is the plugin automatically creates loopback interface used for overlay routing
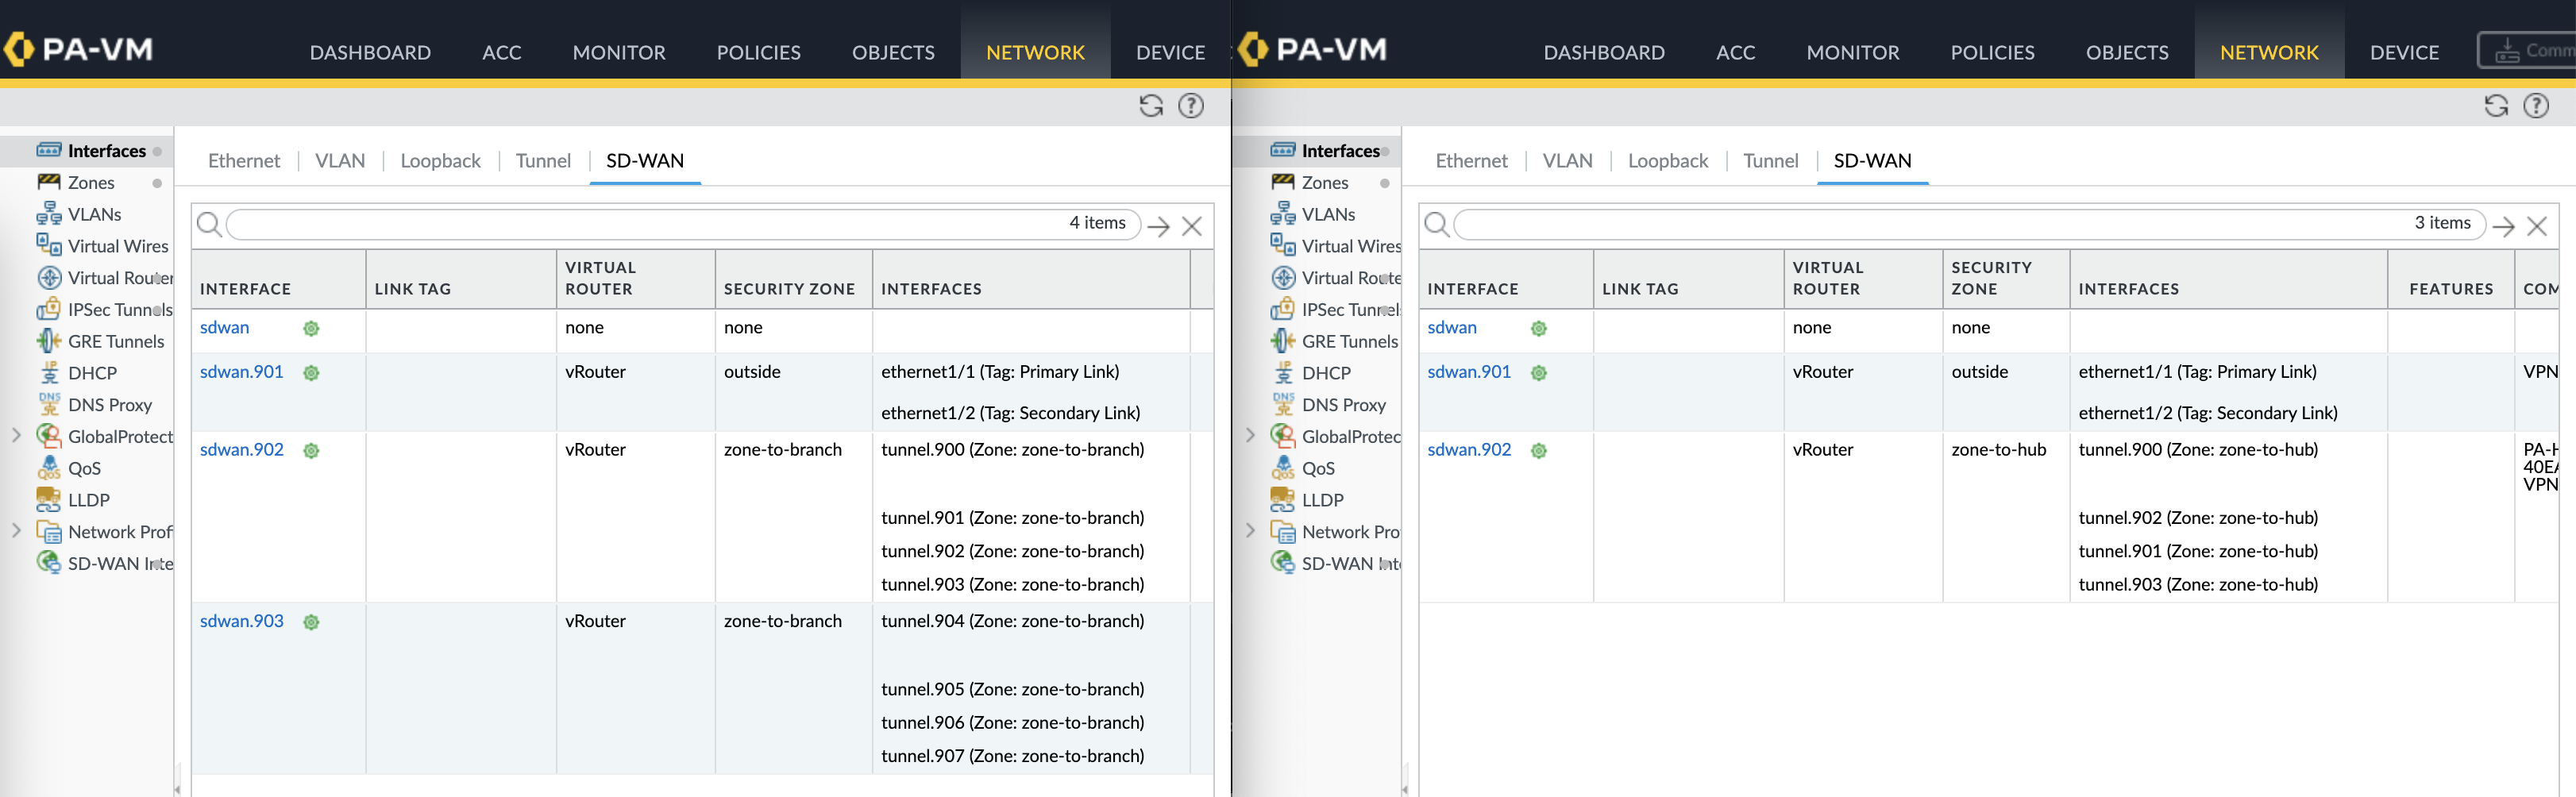
Tunnel interfaces are created based on the number of links and spokes in the cluster
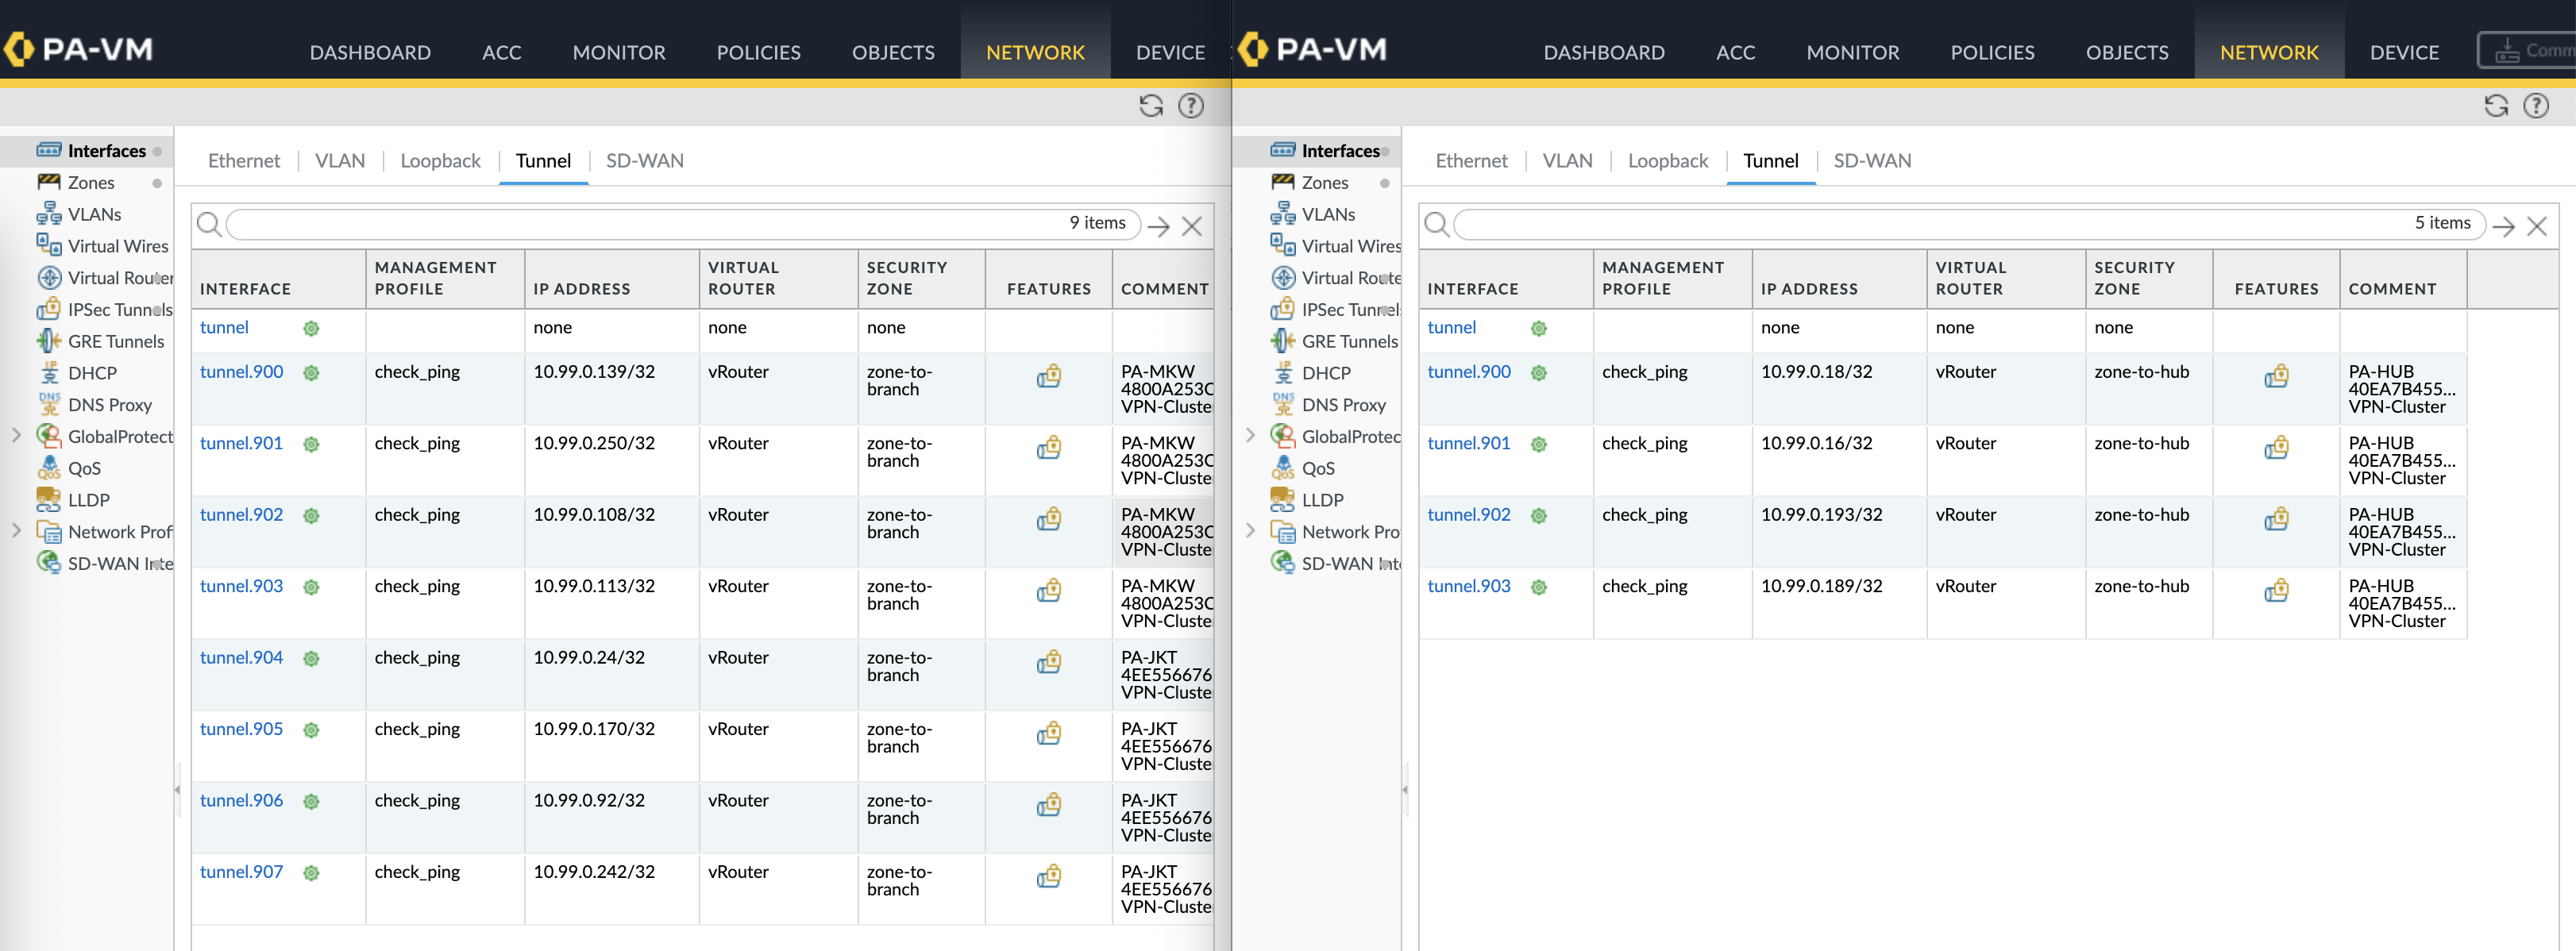
SD-WAN Virtual Interfaces are also created mapped to their respective tunnel interfaces and zones

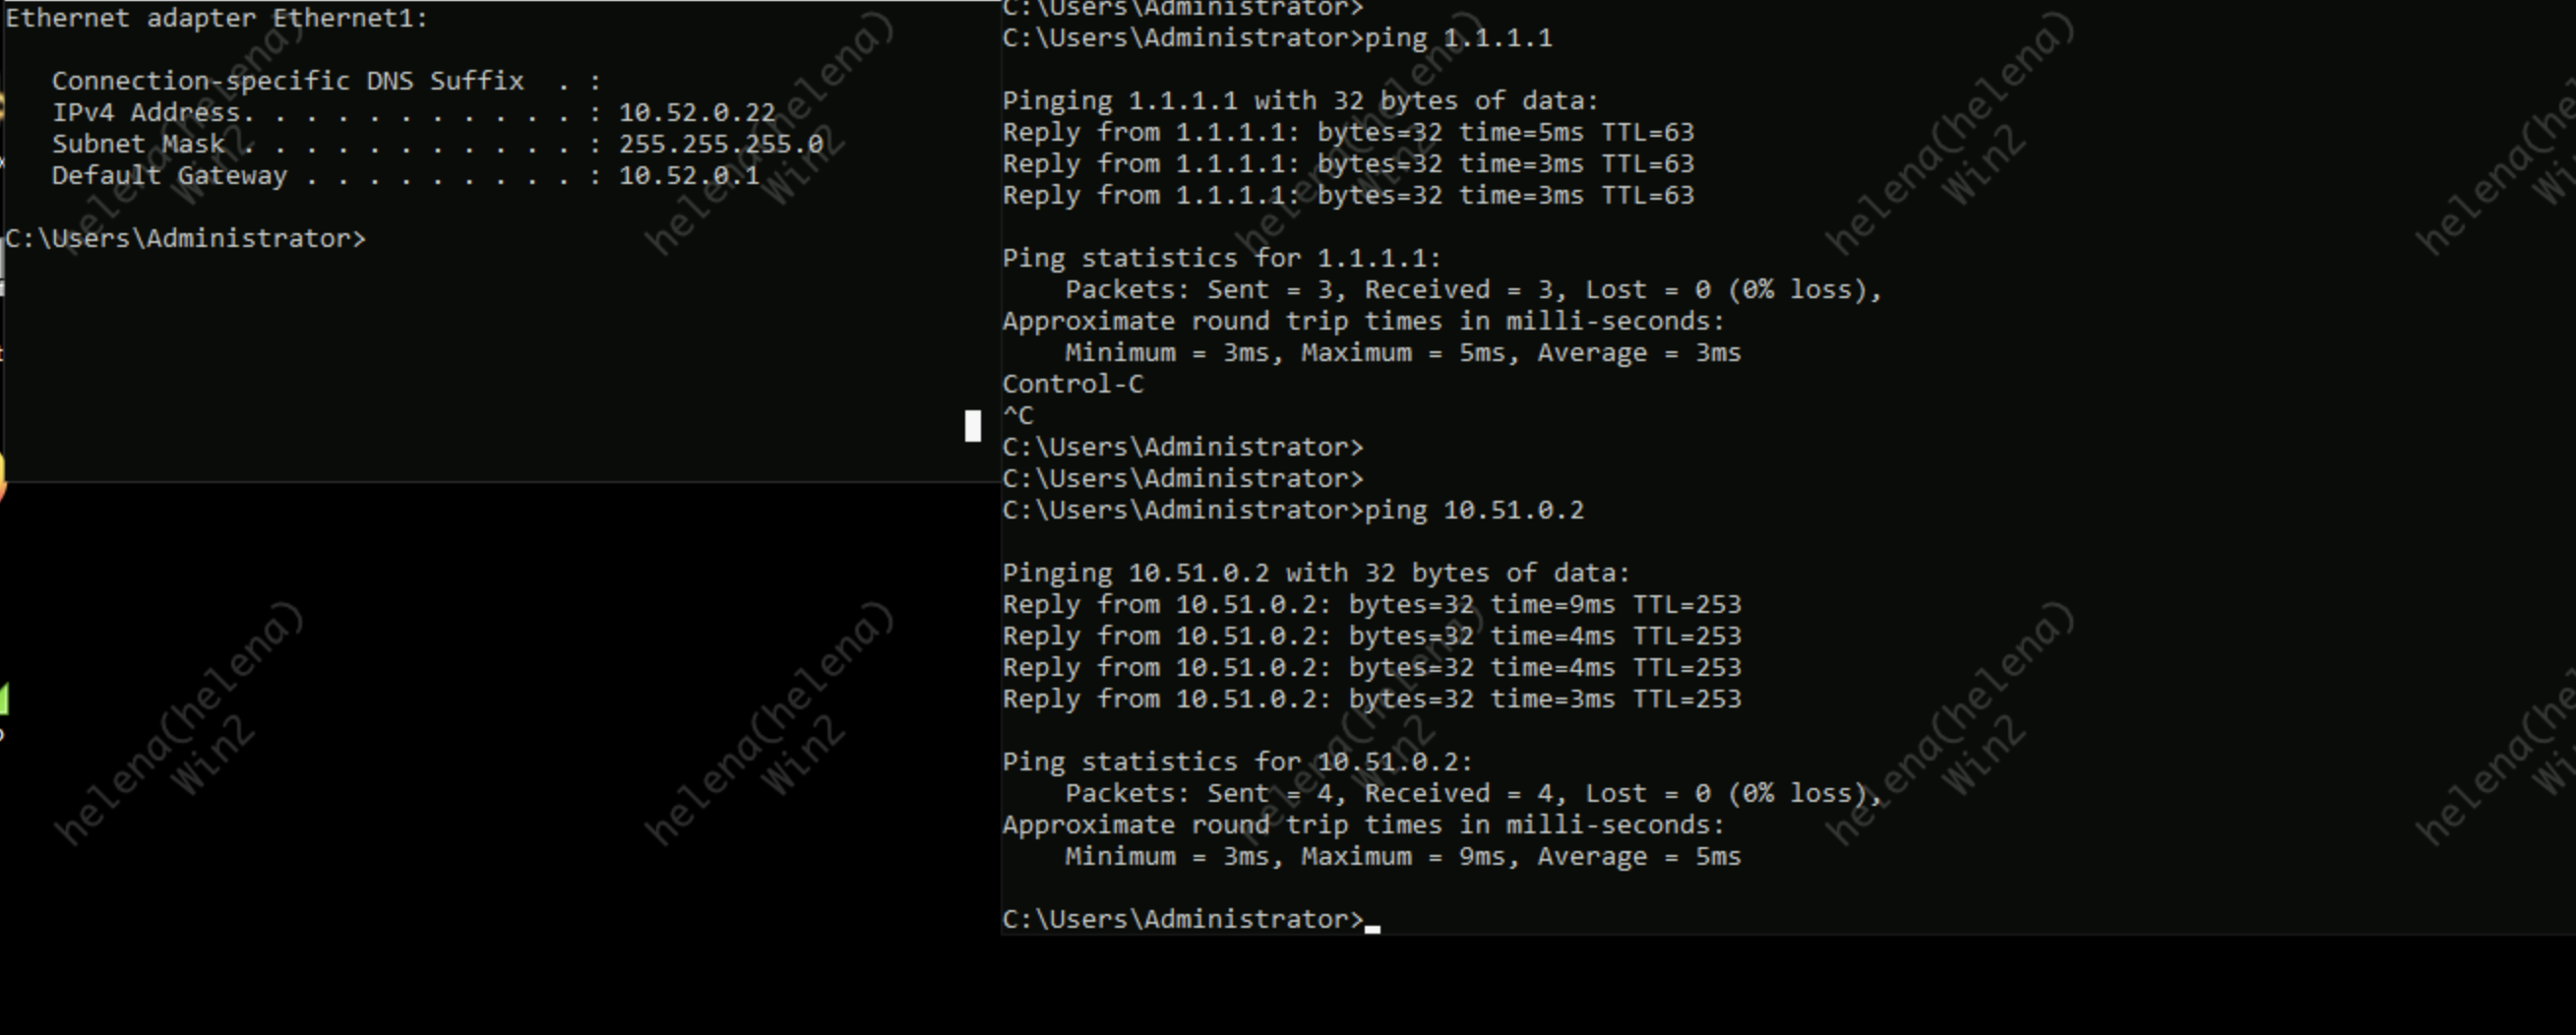
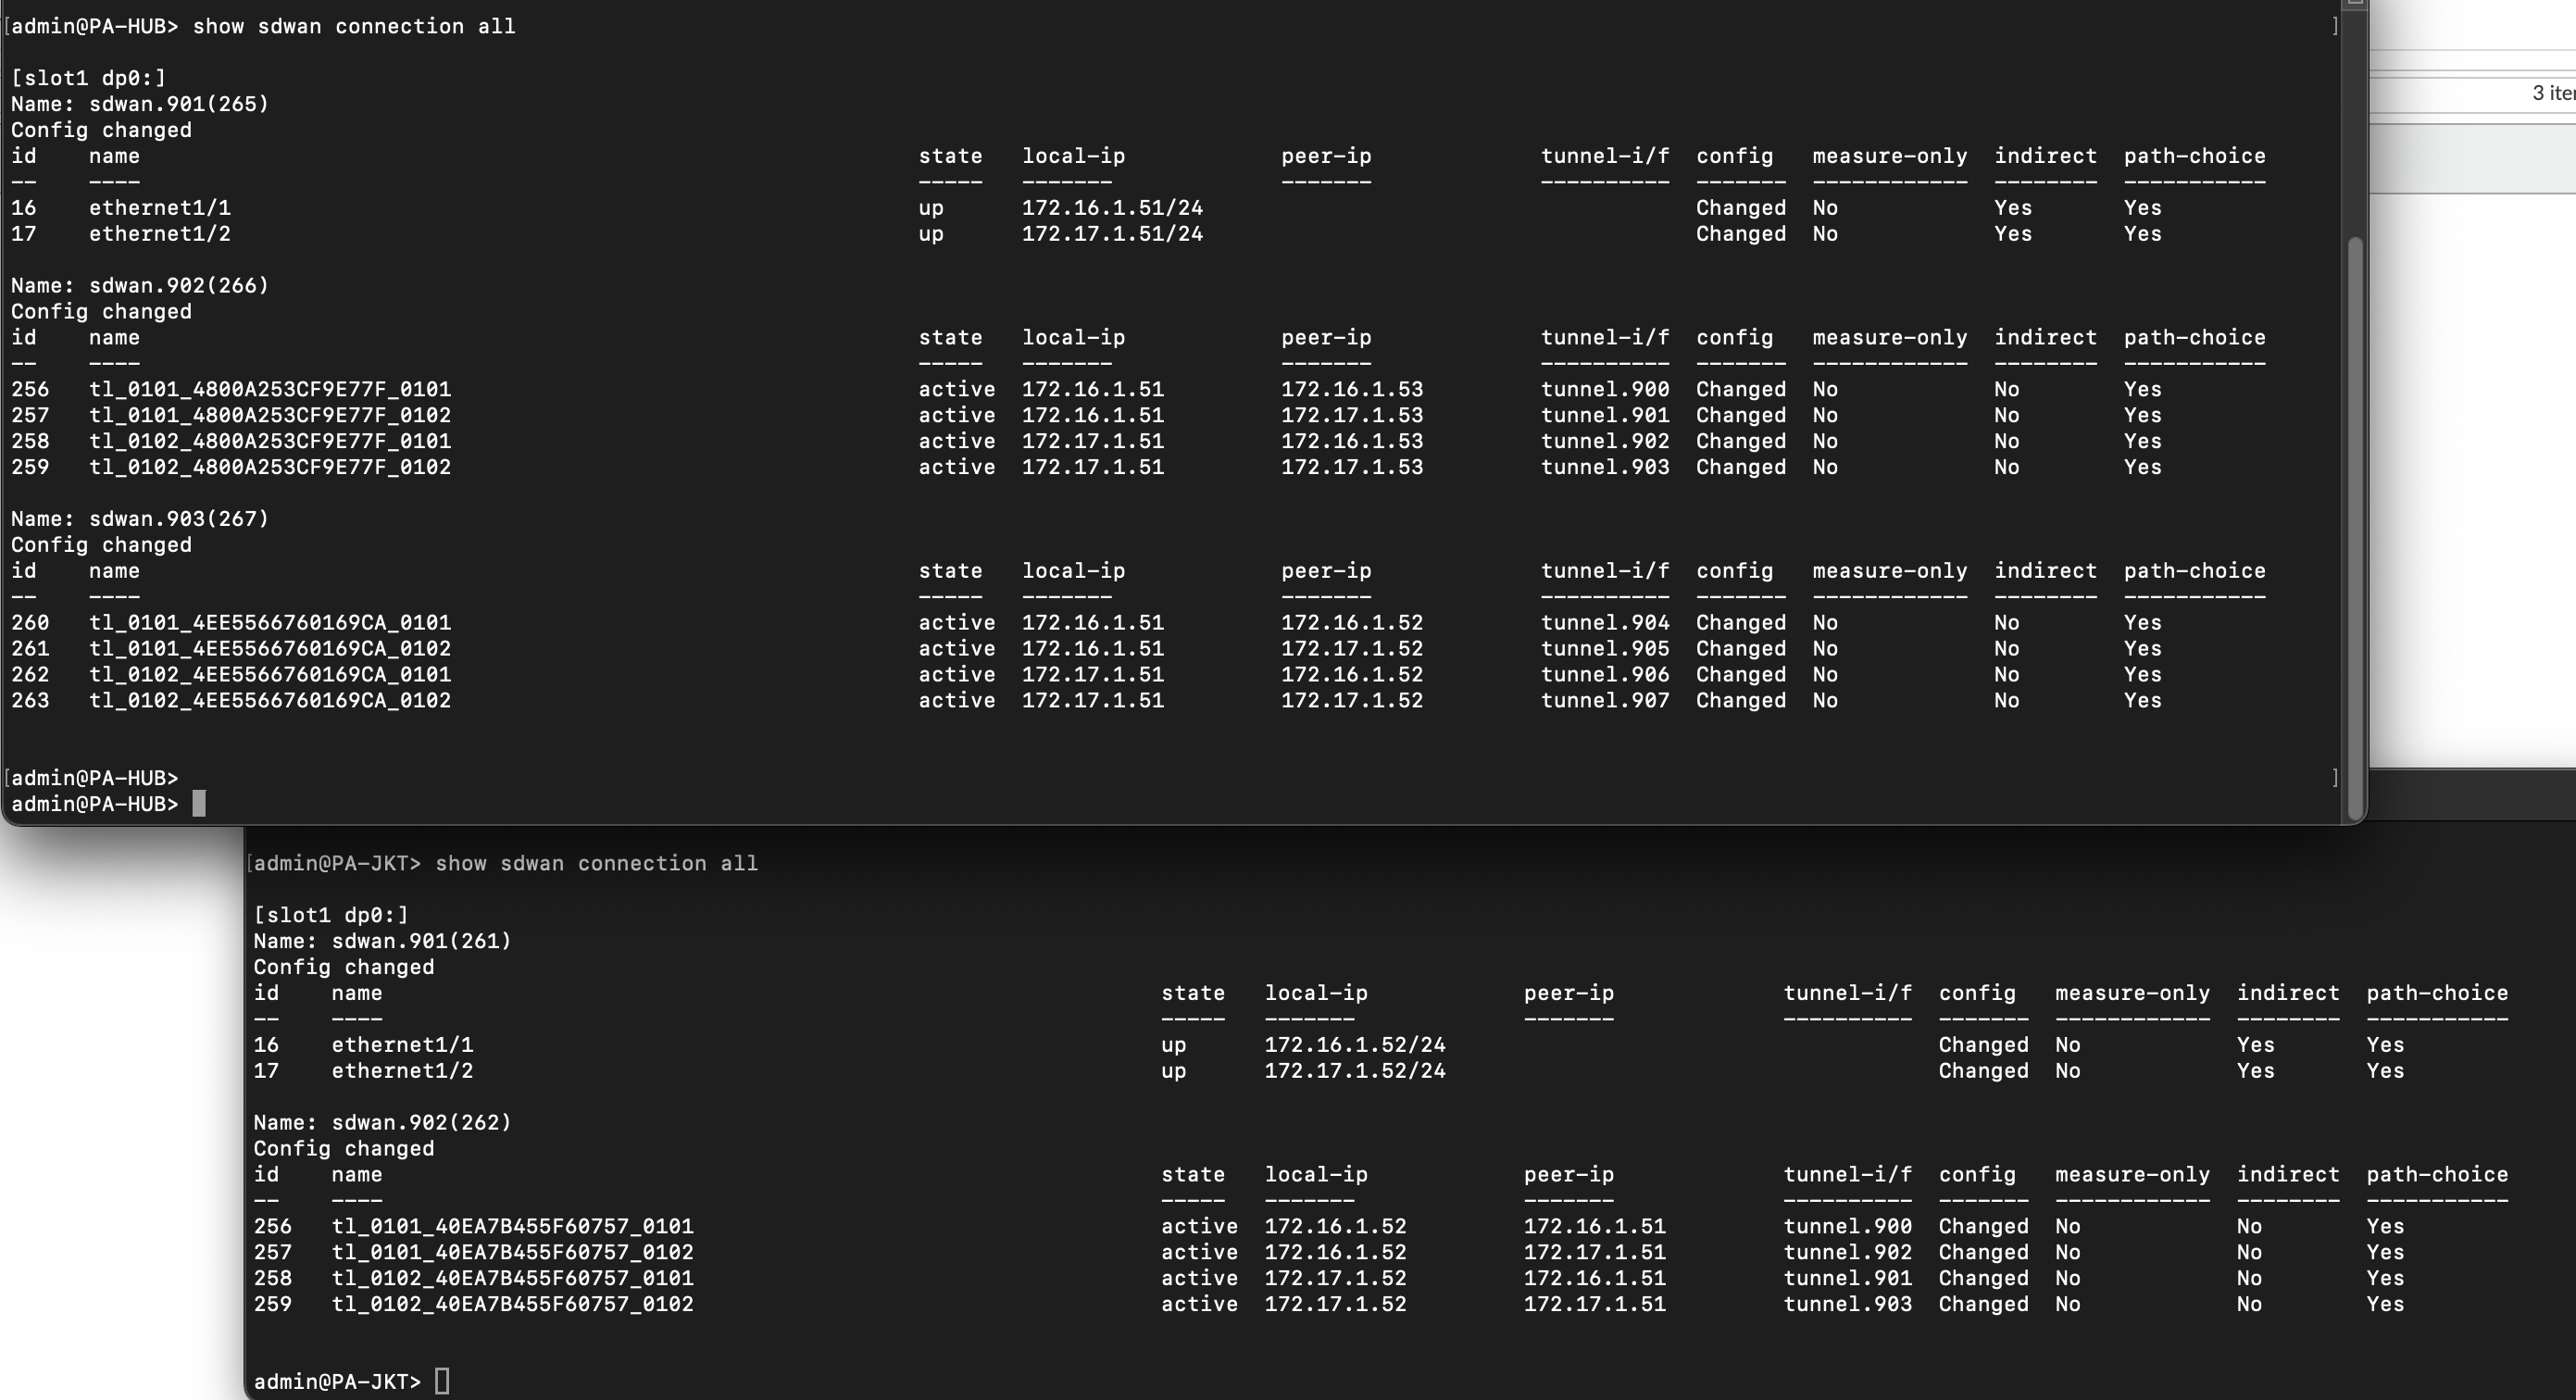
On CLI, we can validate the SD-WAN connectivity with “show sdwan connection all”
Routing Validation
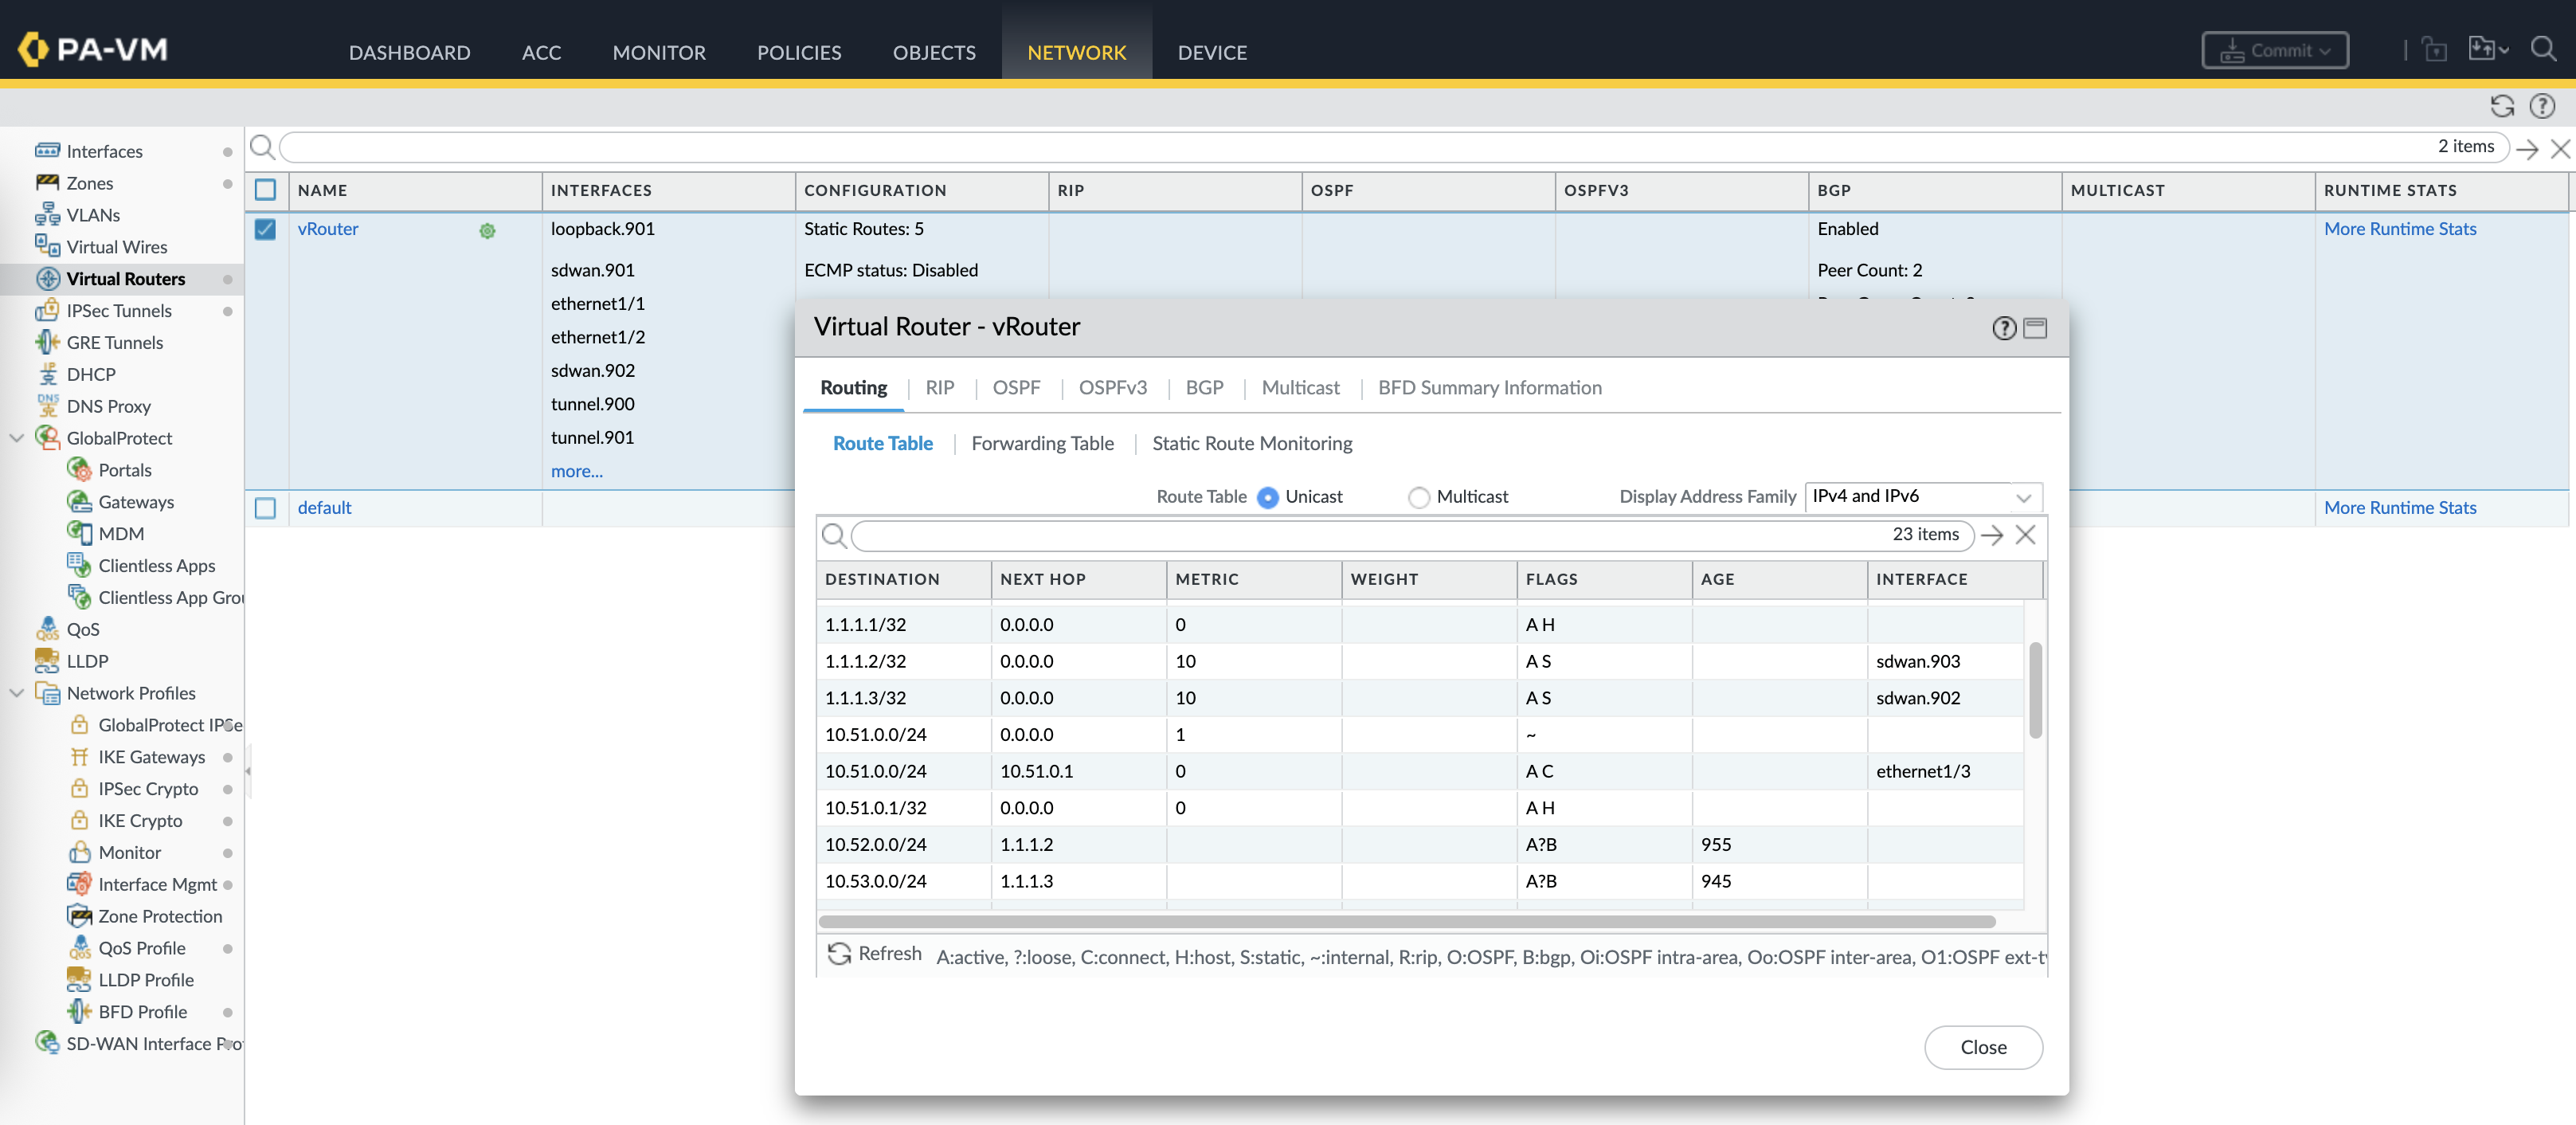
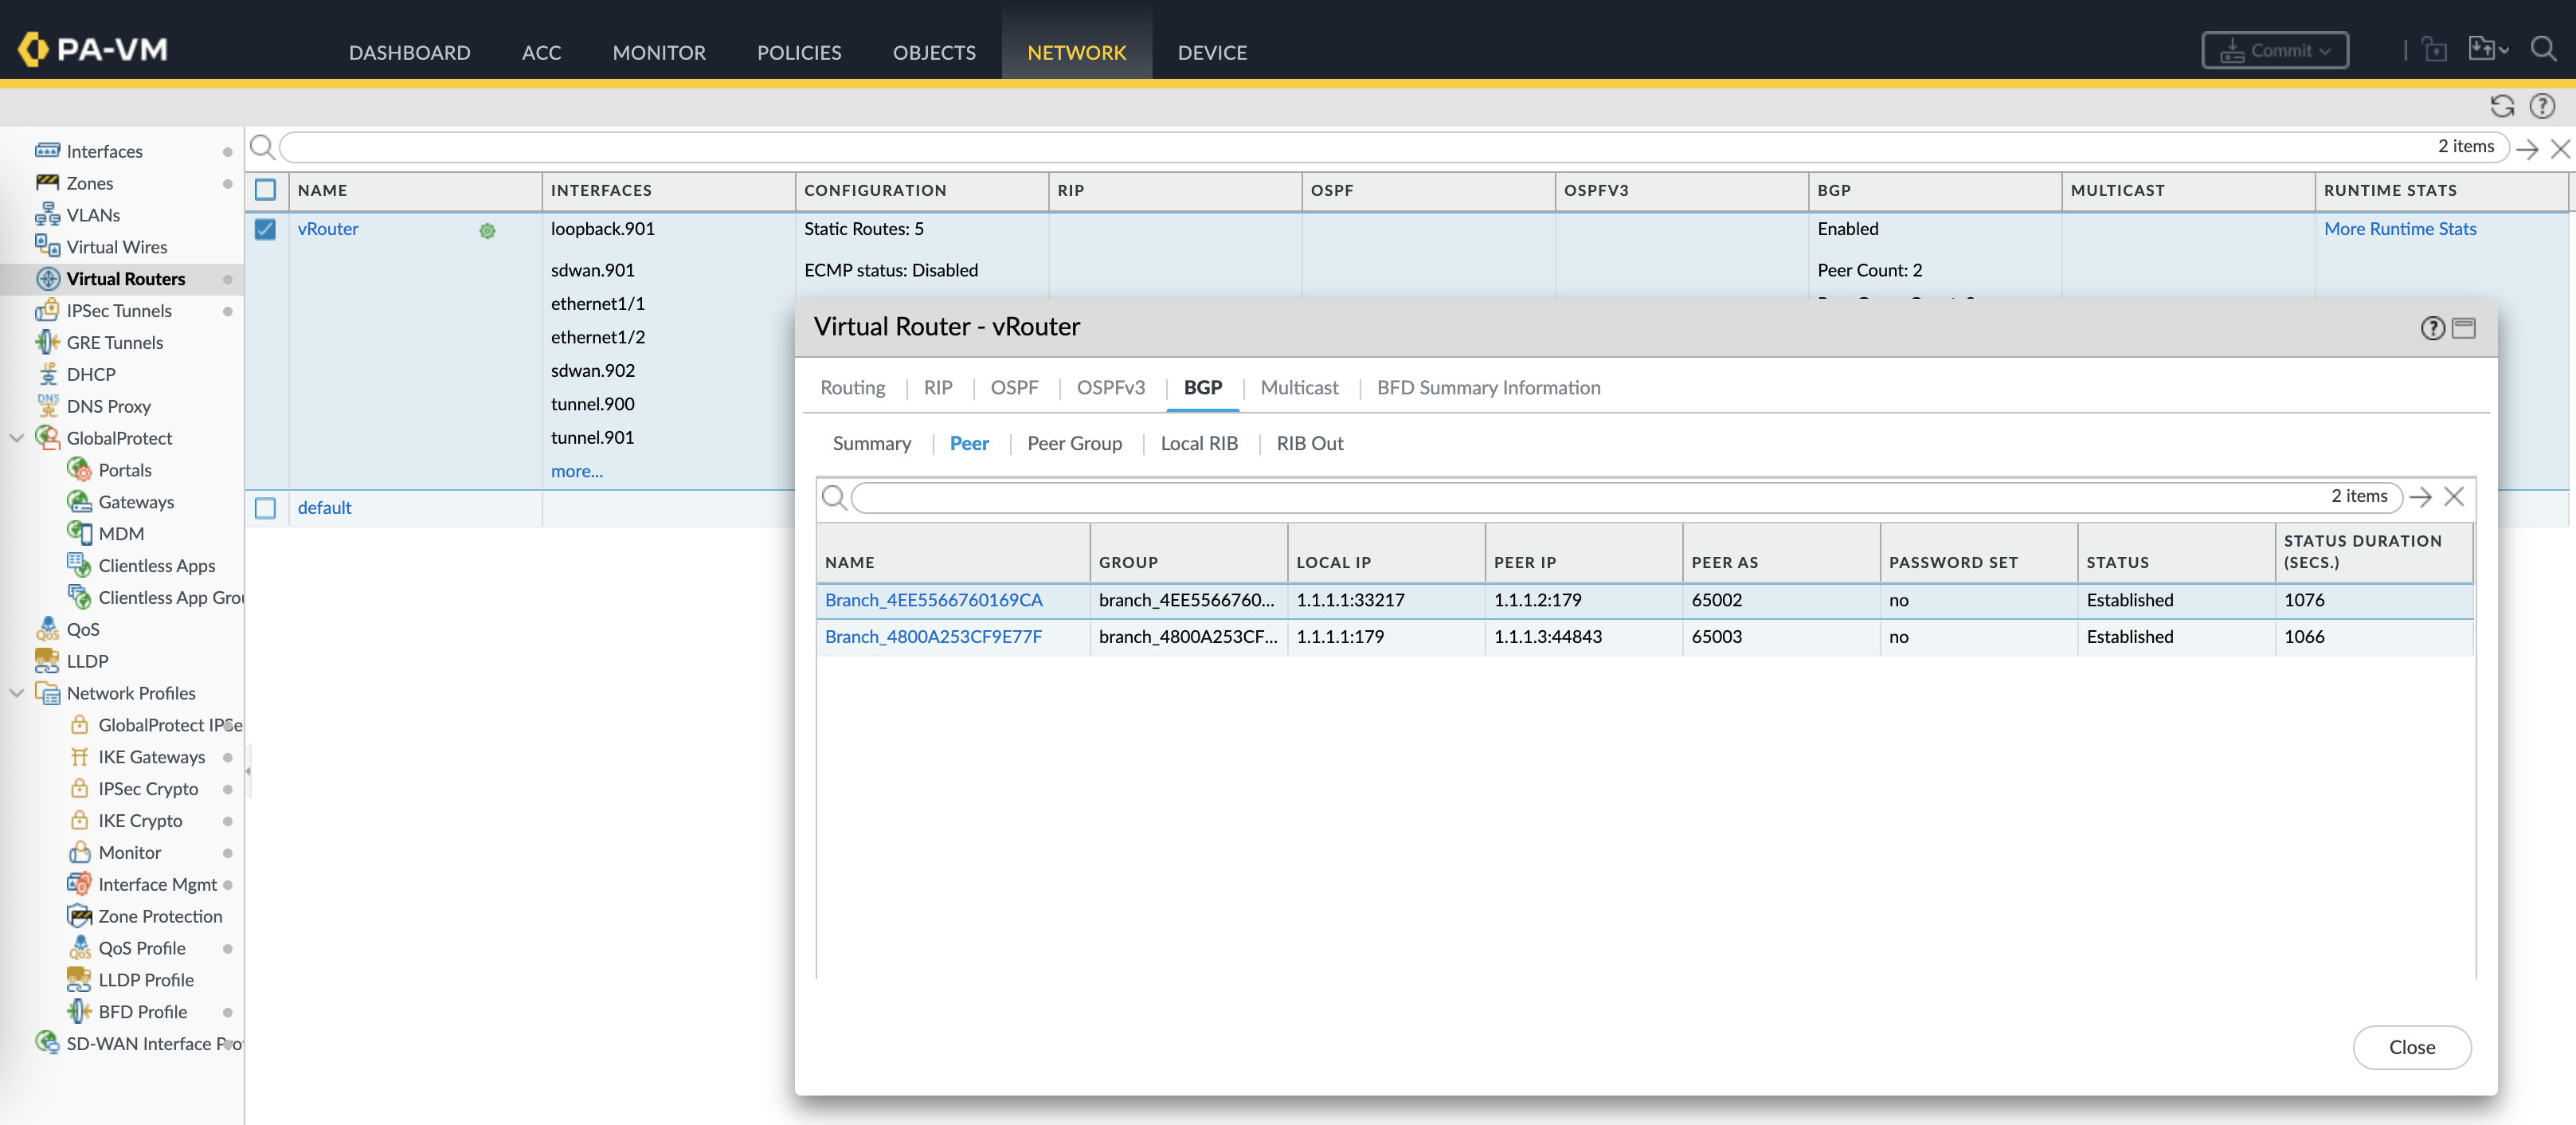
On the vRouter, we can see routing tables to reach the branches with next-hop to the loopback of each firewall advertised through BGP
On the client side, connectivity tests are working, thus validating the SD-WAN deployment