Cisco SD-Access
Cisco Software-Defined Access (SDA) is a network architecture that simplifies and secures enterprise networks through automated segmentation and policy enforcement. It leverages Cisco DNA Center (DNAC) for centralized management, orchestration, and automation of the network, and integrates with Cisco Identity Services Engine (ISE) for advanced identity-based access control and policy enforcement, ensuring a seamless and secure user experience.
Deploying DNAC
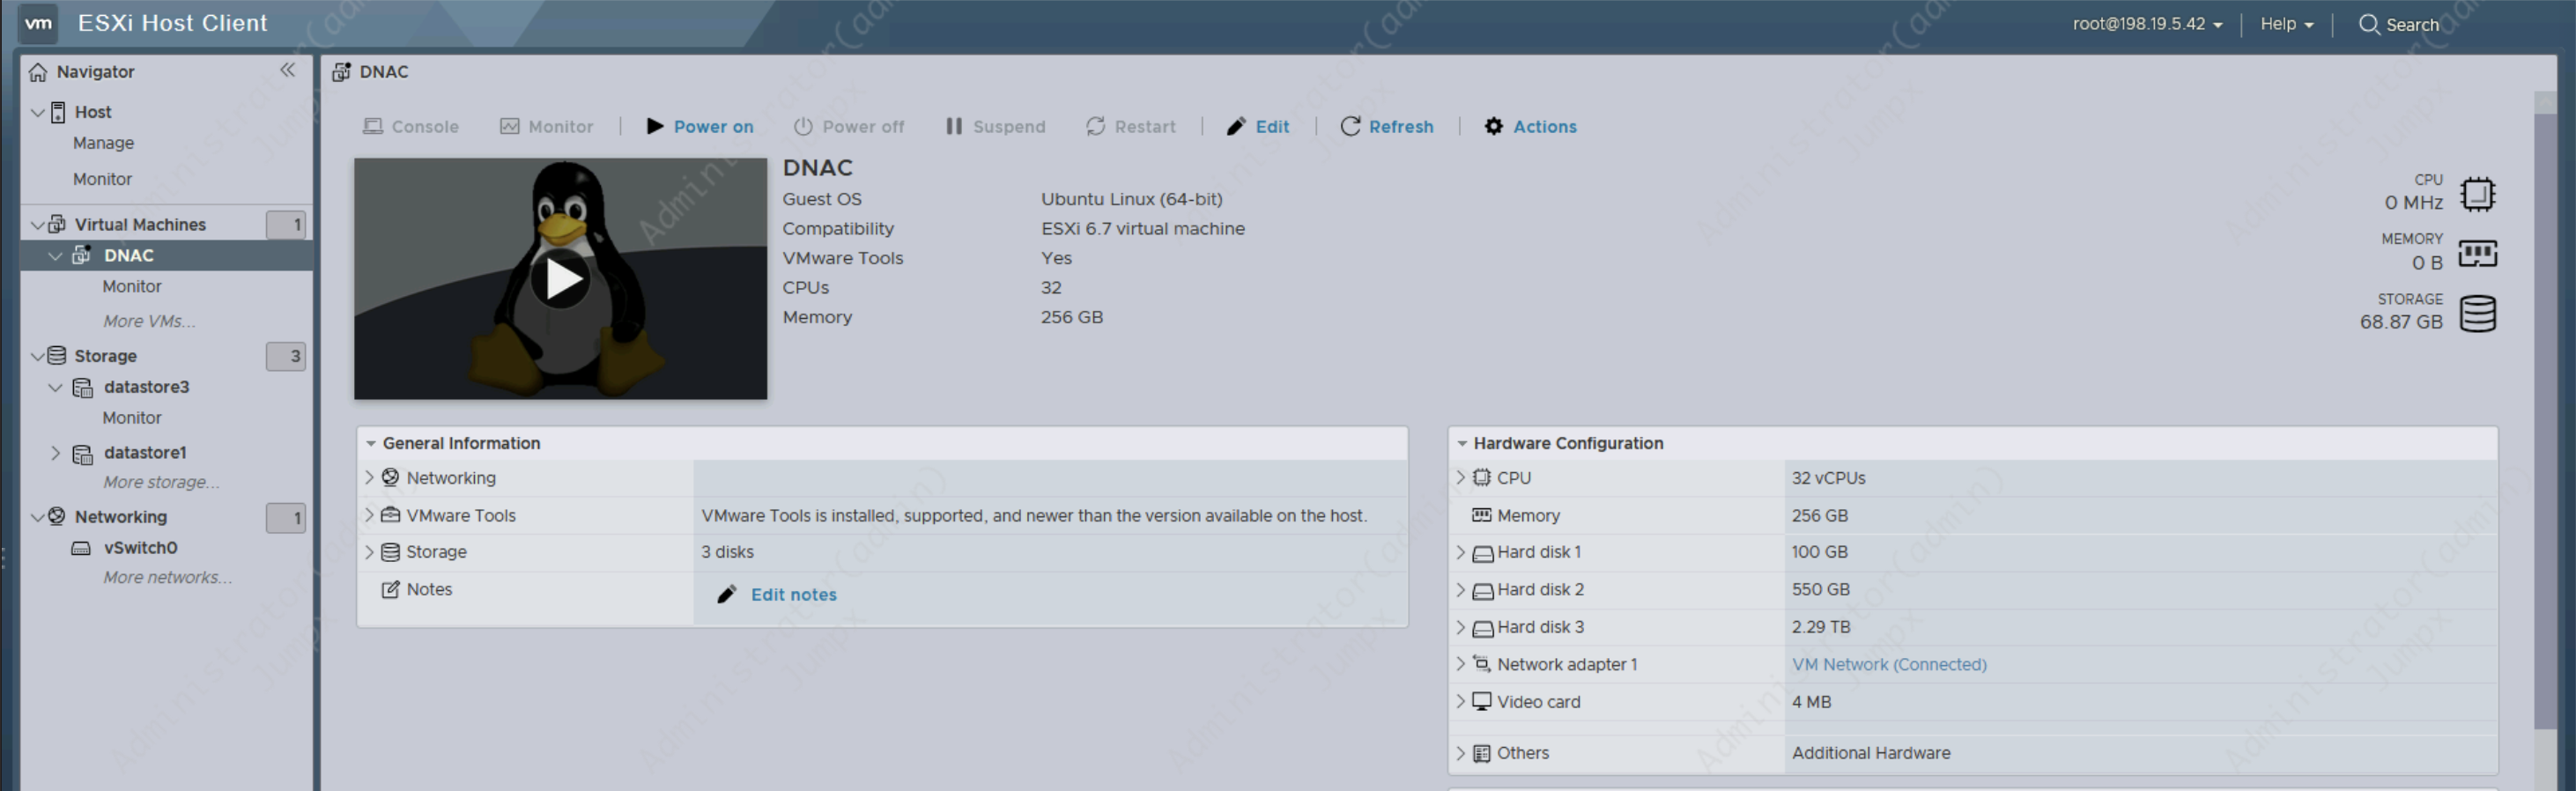
First lets deploy the DNA Center, its called Catalyst Center now for some reason but lets just keep calling it DNAC. This thing requires a lot of resources, so be weary
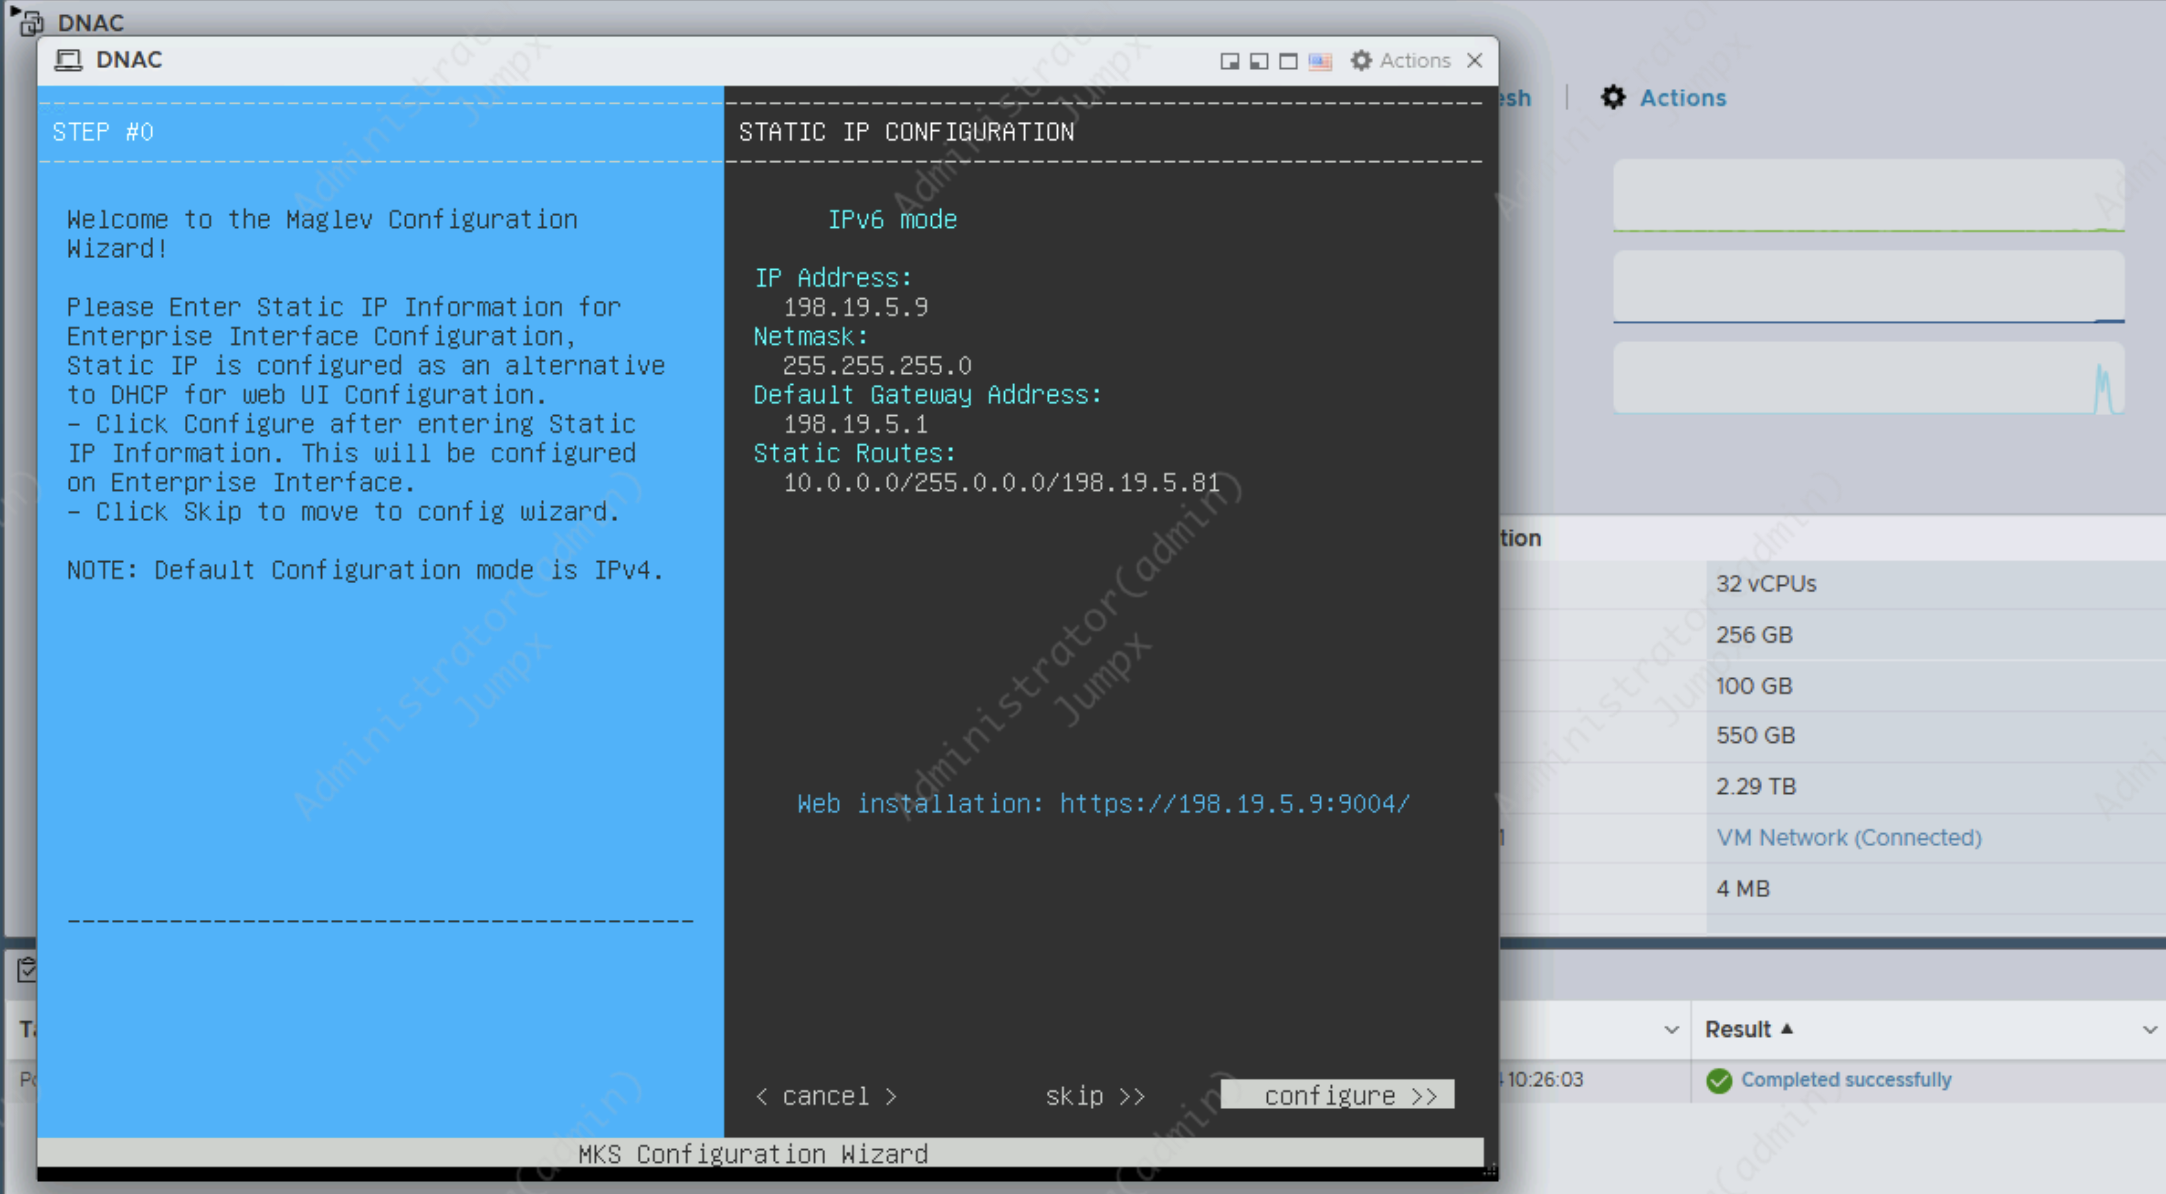
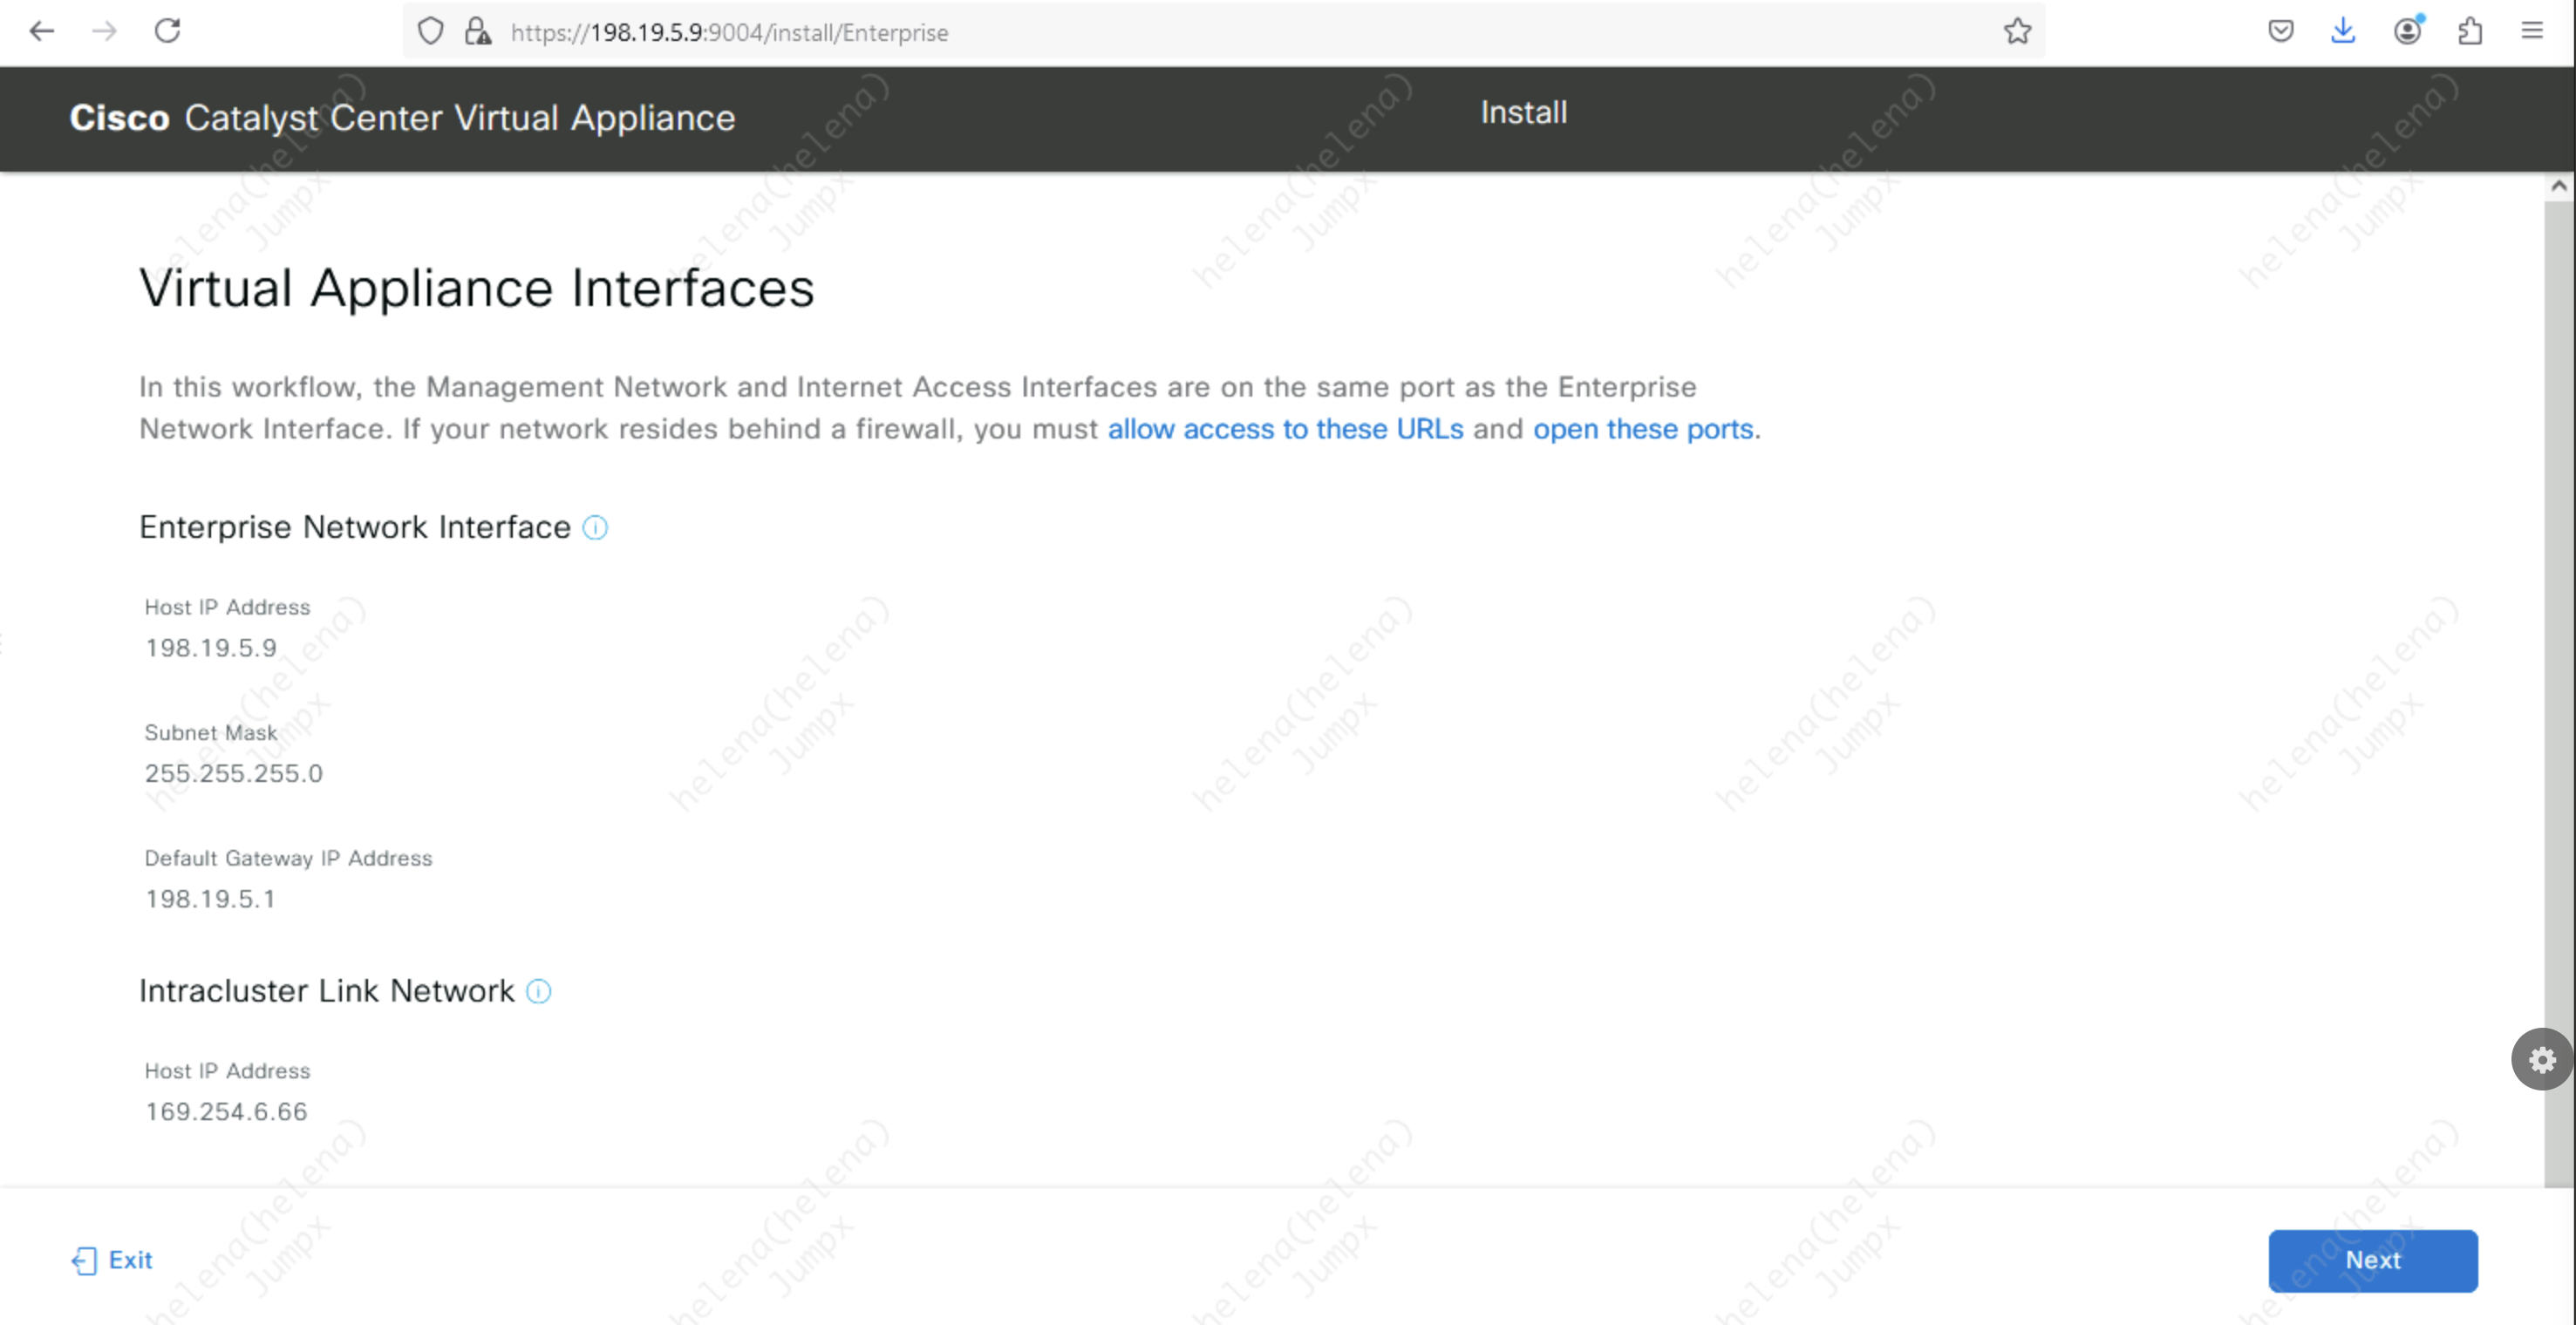
After booting it up, configure the IPv4, here we also configure for DNAC to access 10.0.0.0/8 subnet through the Core Switch
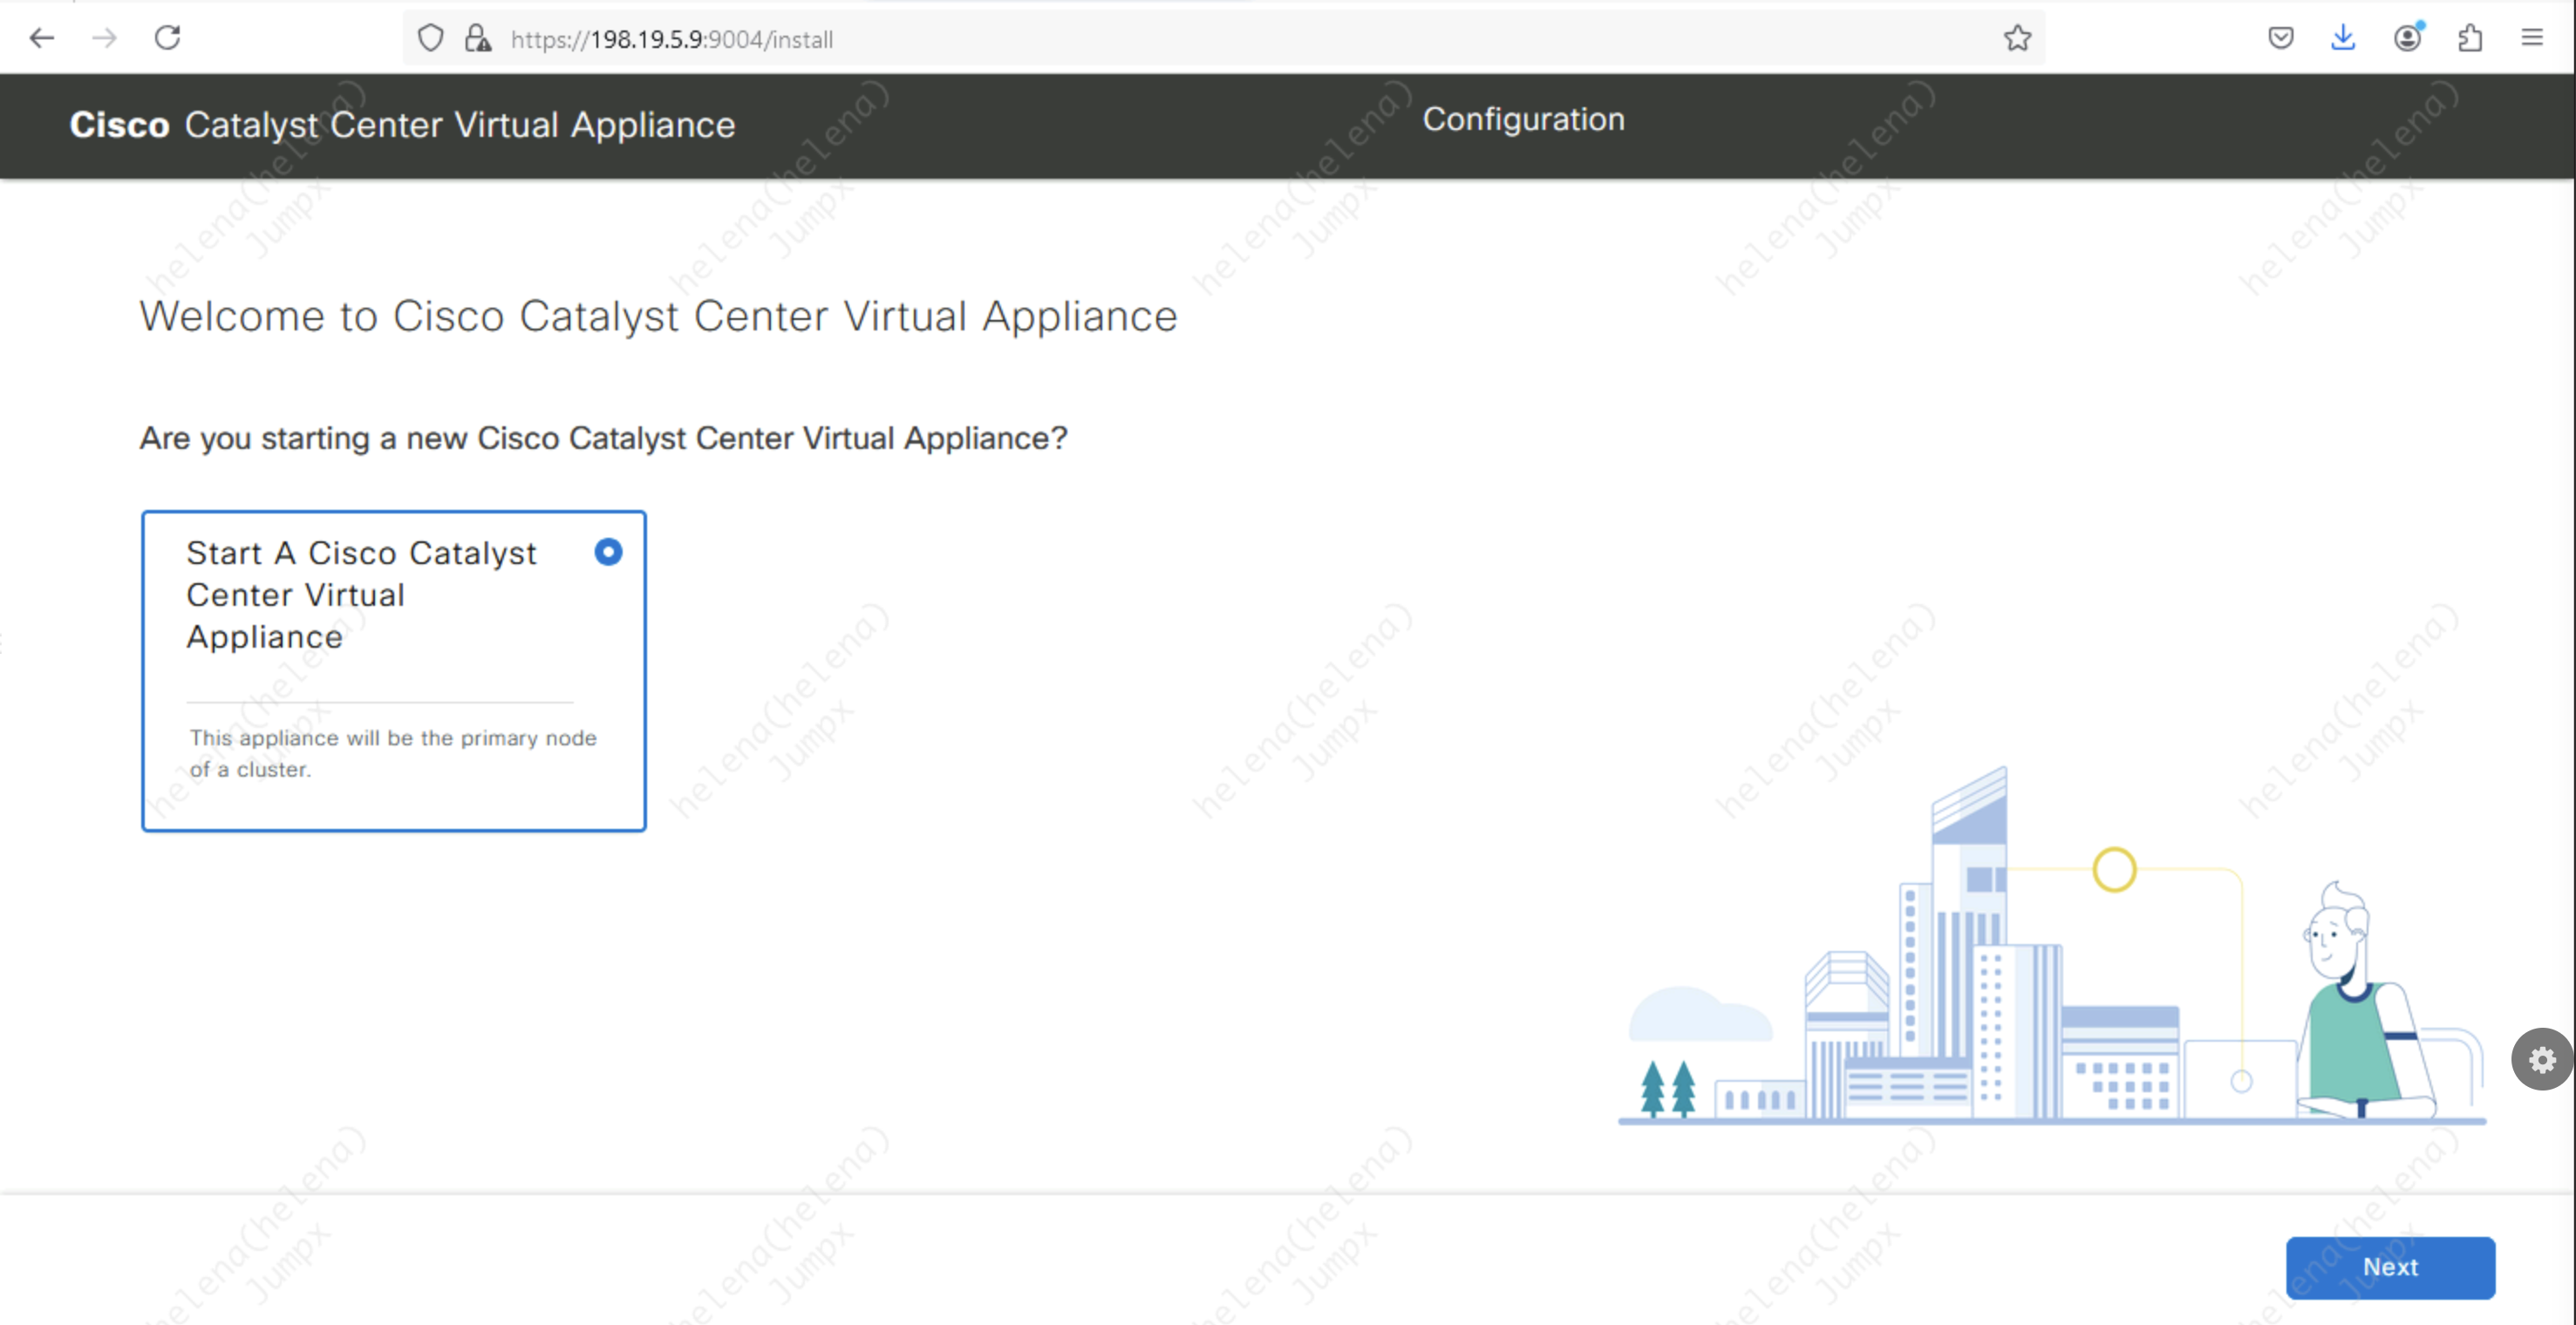
Next we can hit the Web Installation on port 9004
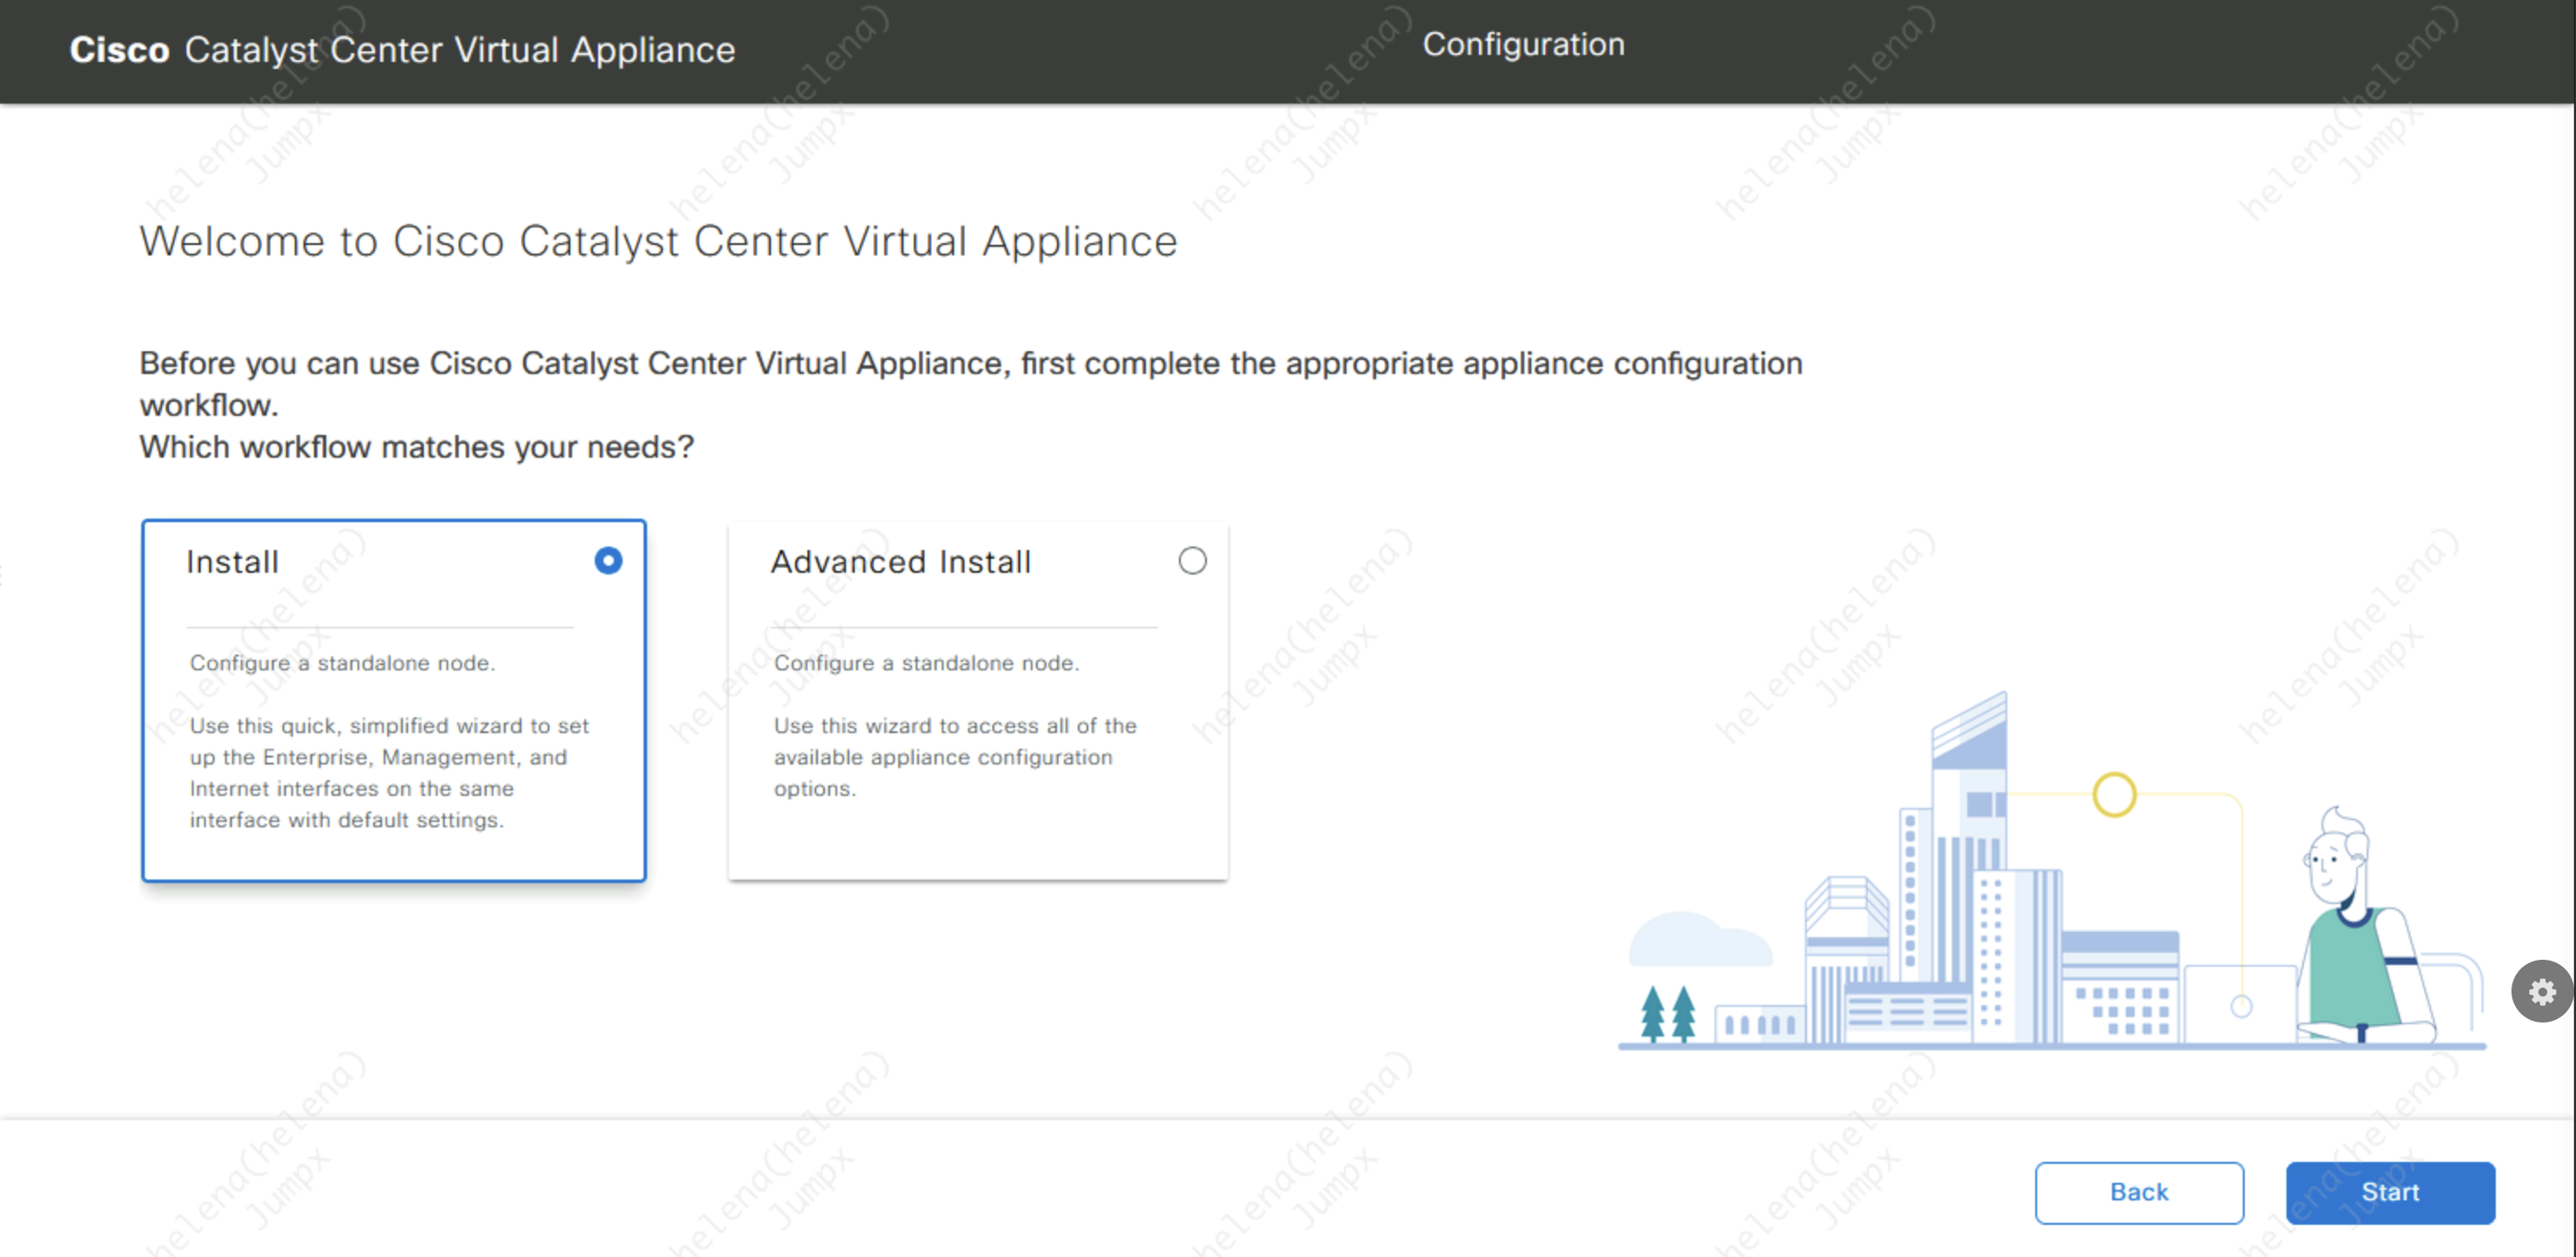
Hit Install
Hit next on IPv4 configuration that we configured earlier
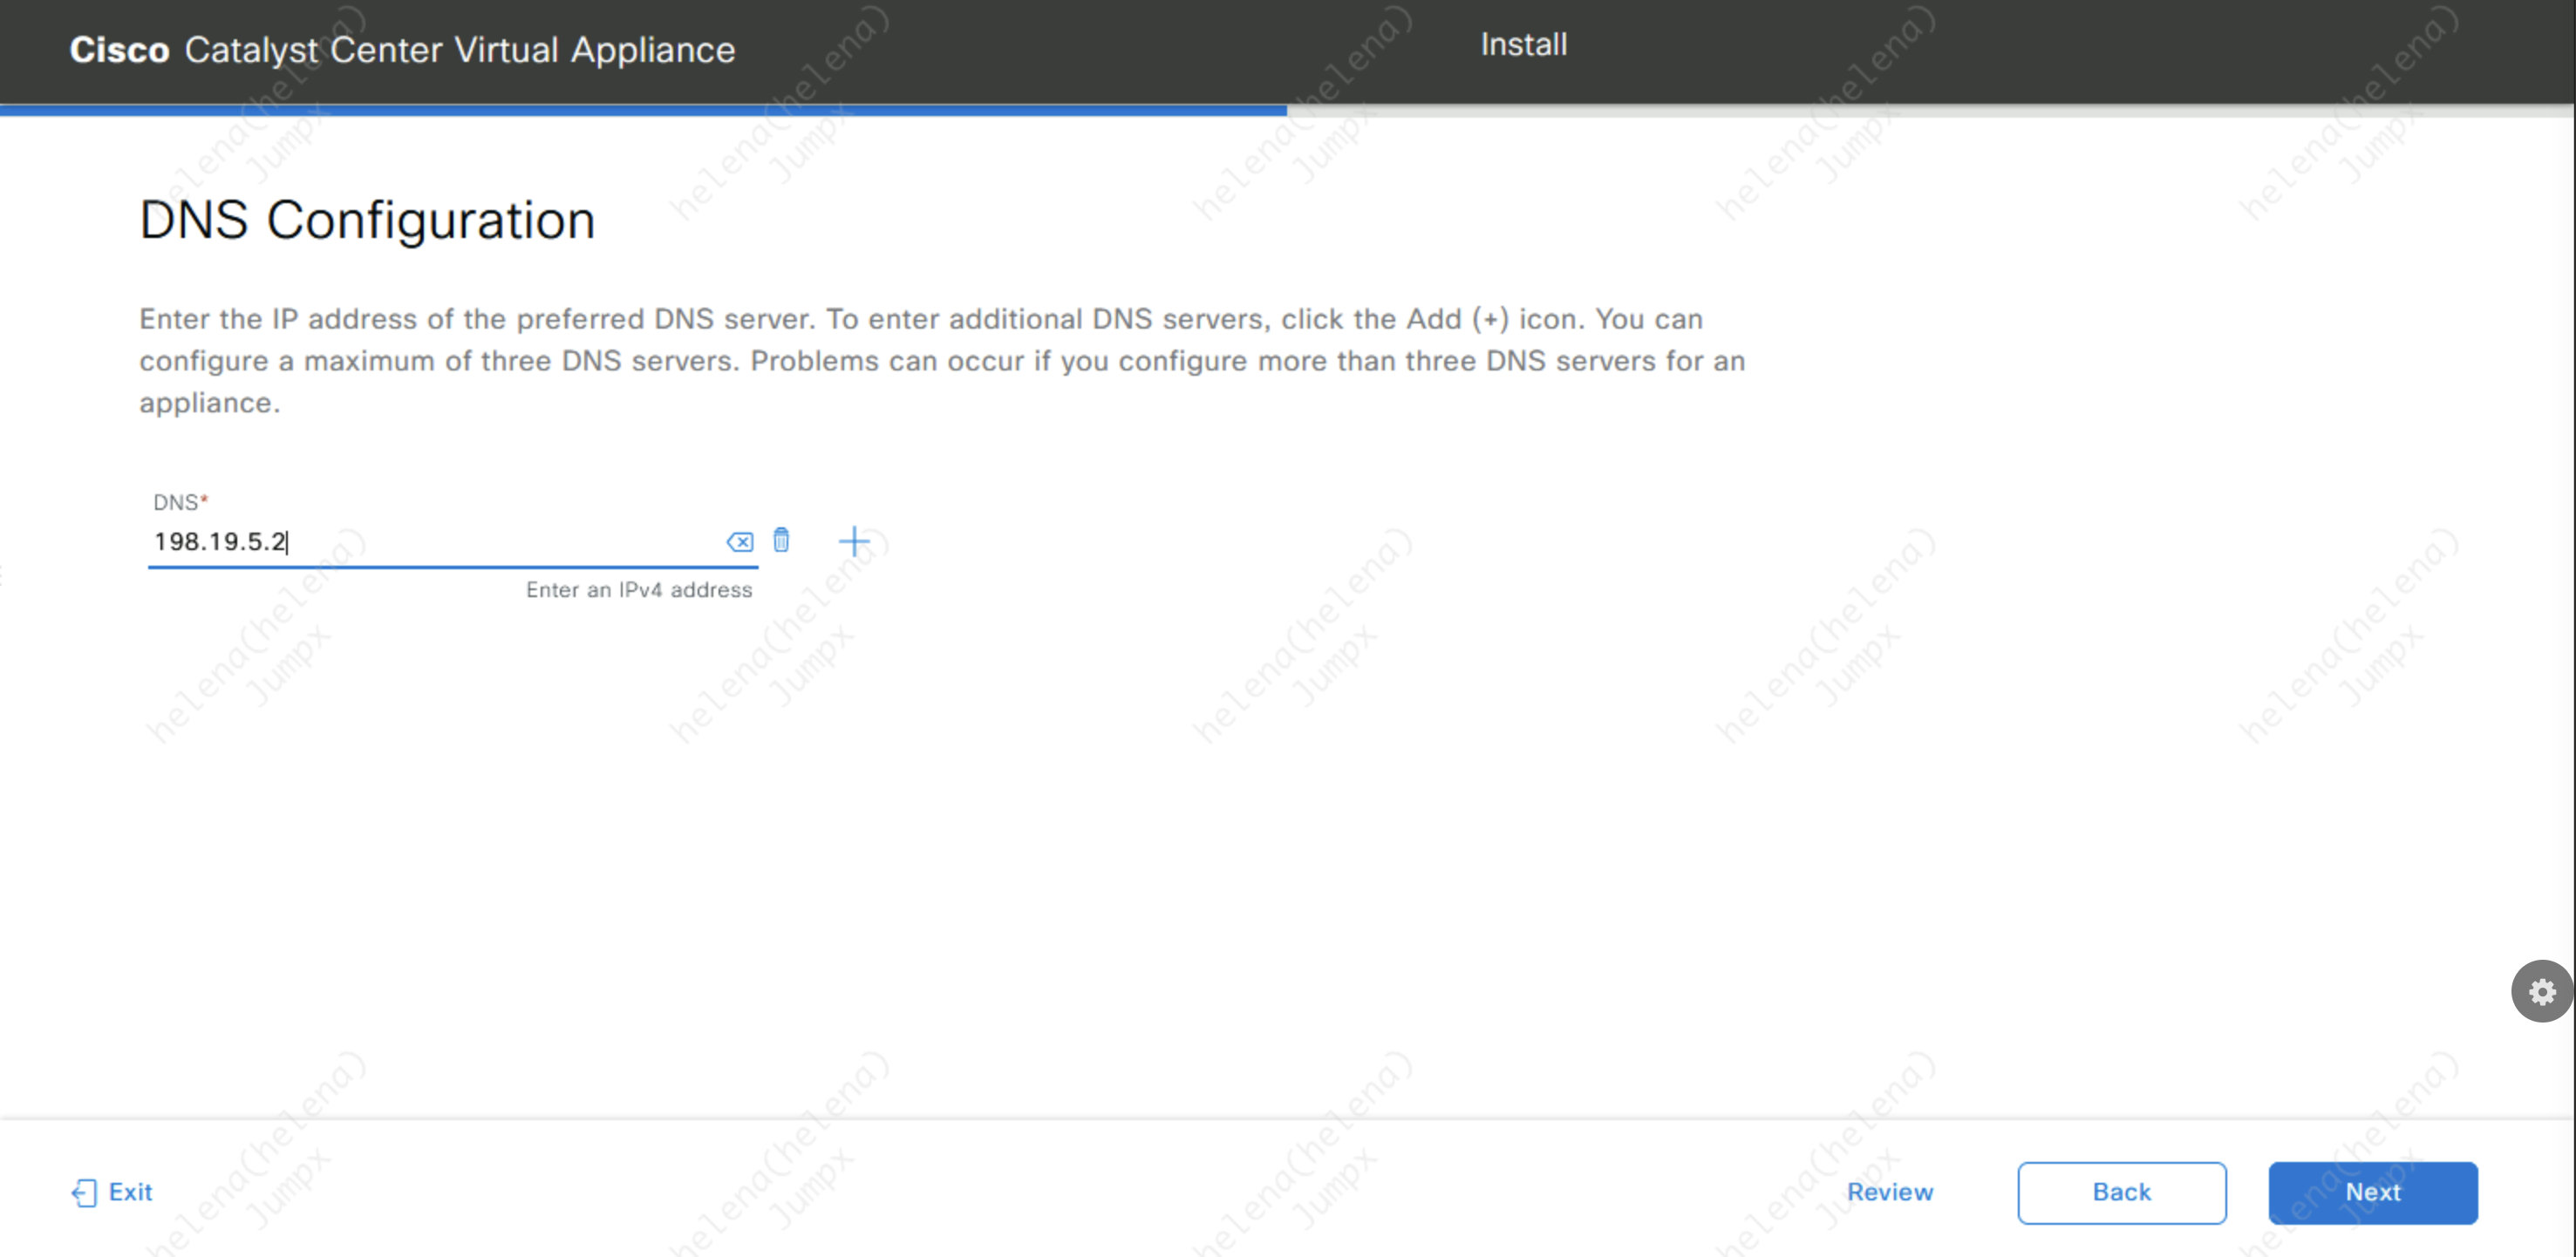
Then configure the DNS Server, make sure this can resolve internal domain as well as internet
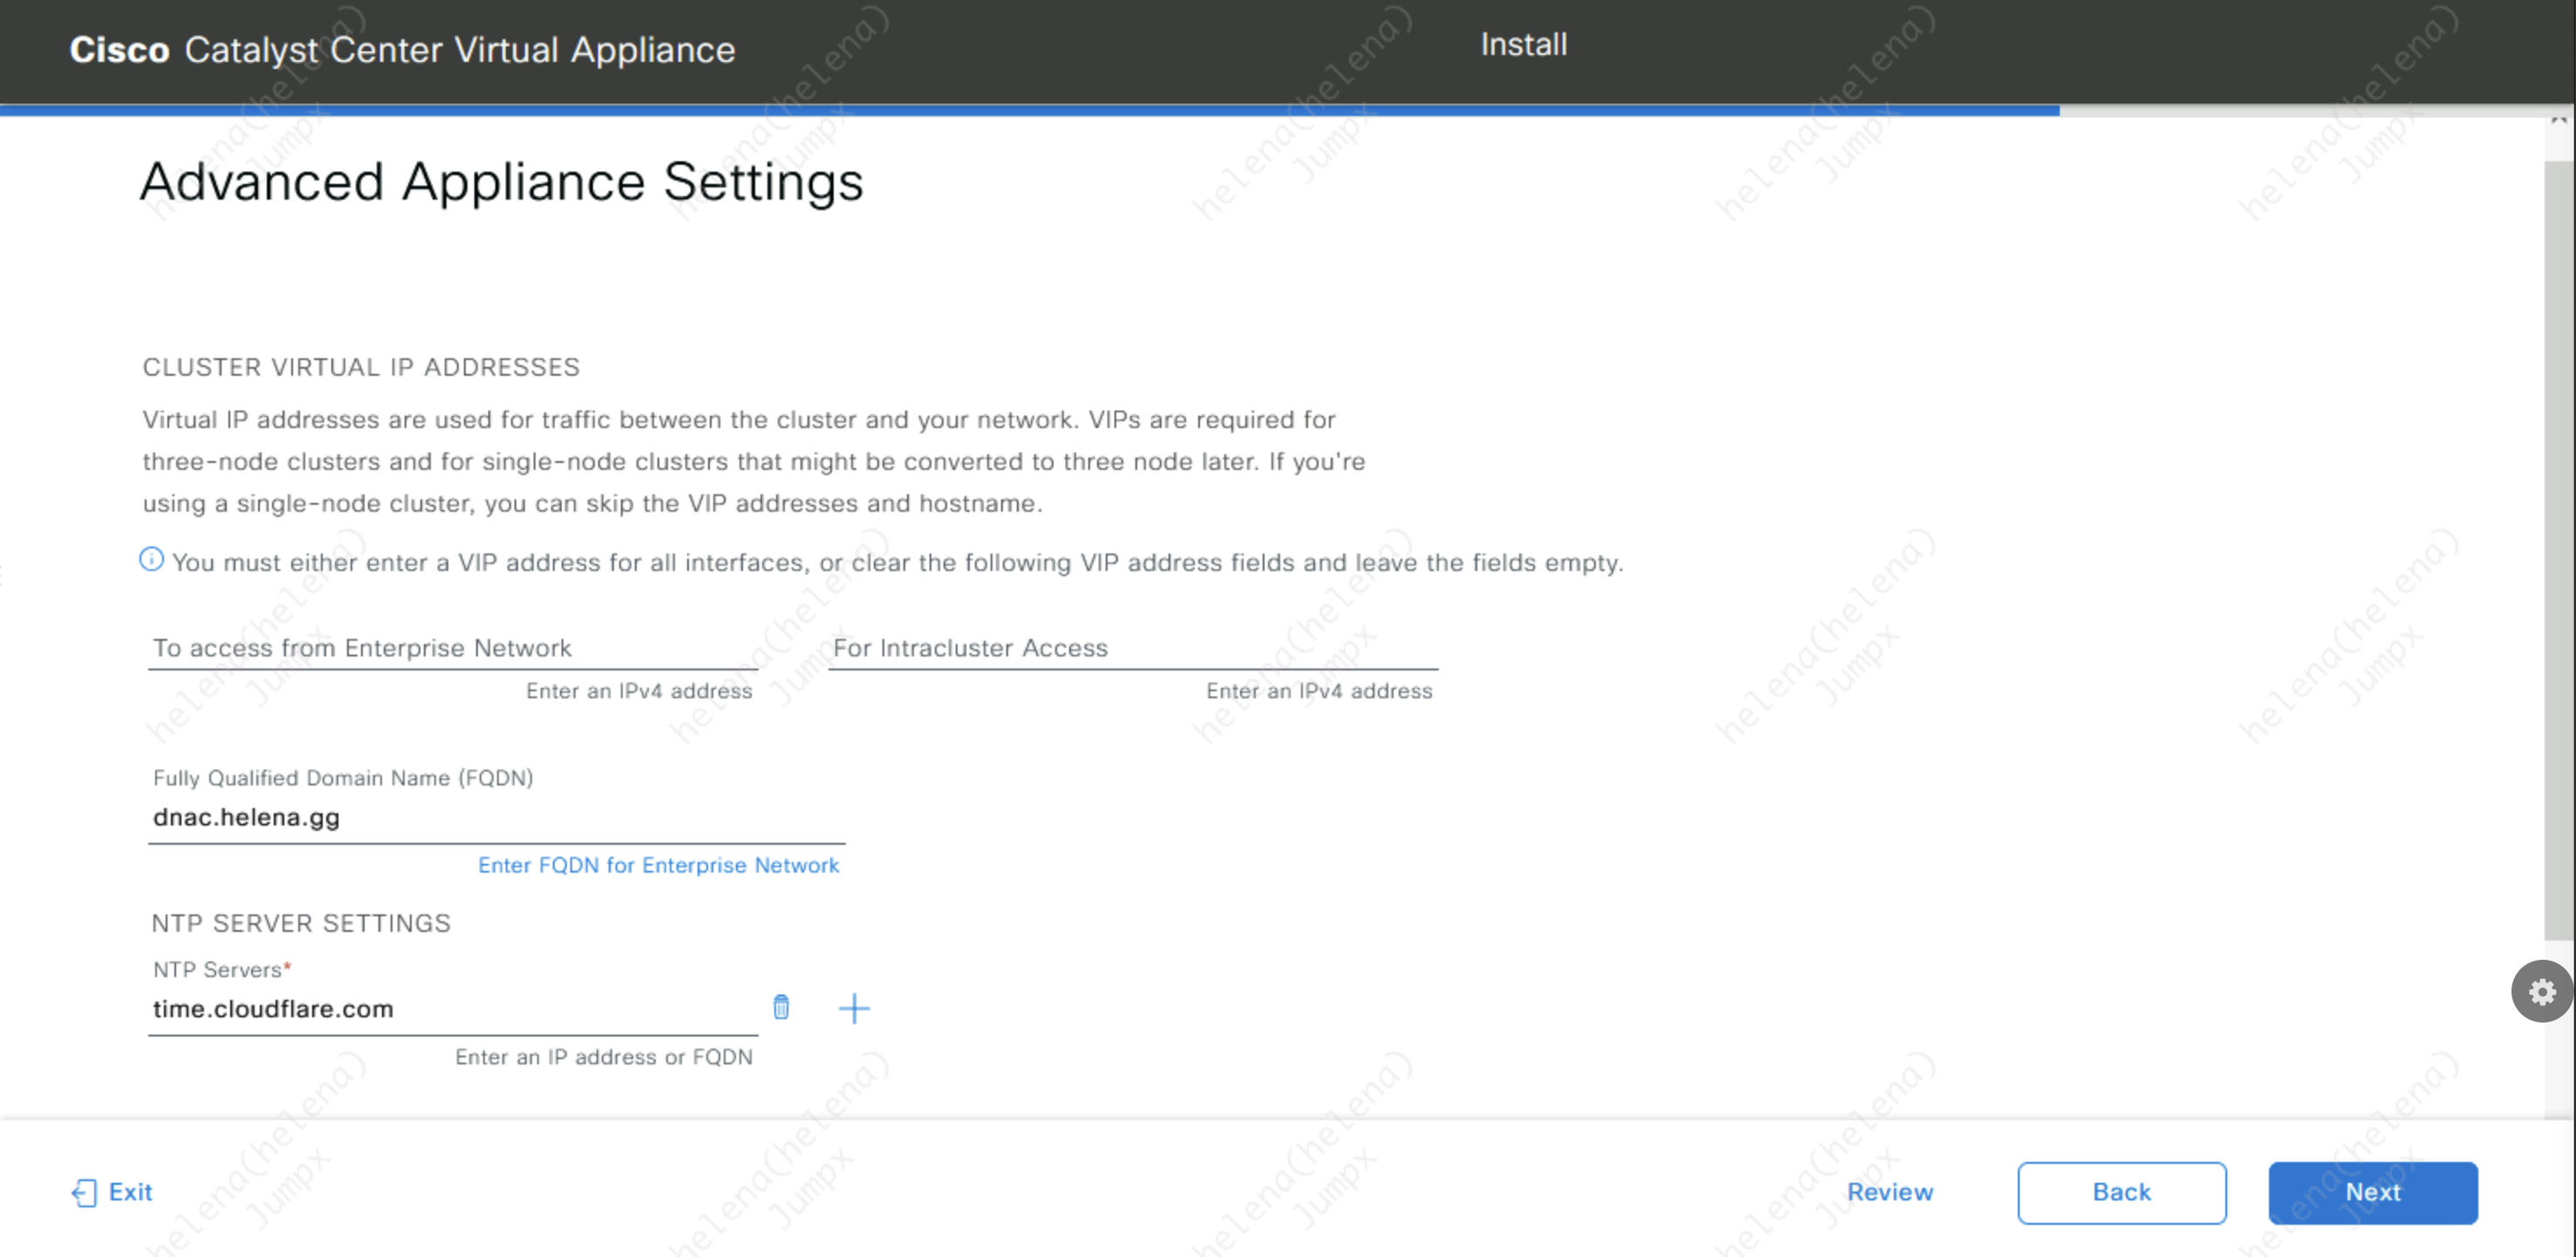
And configure the FQDN and NTP
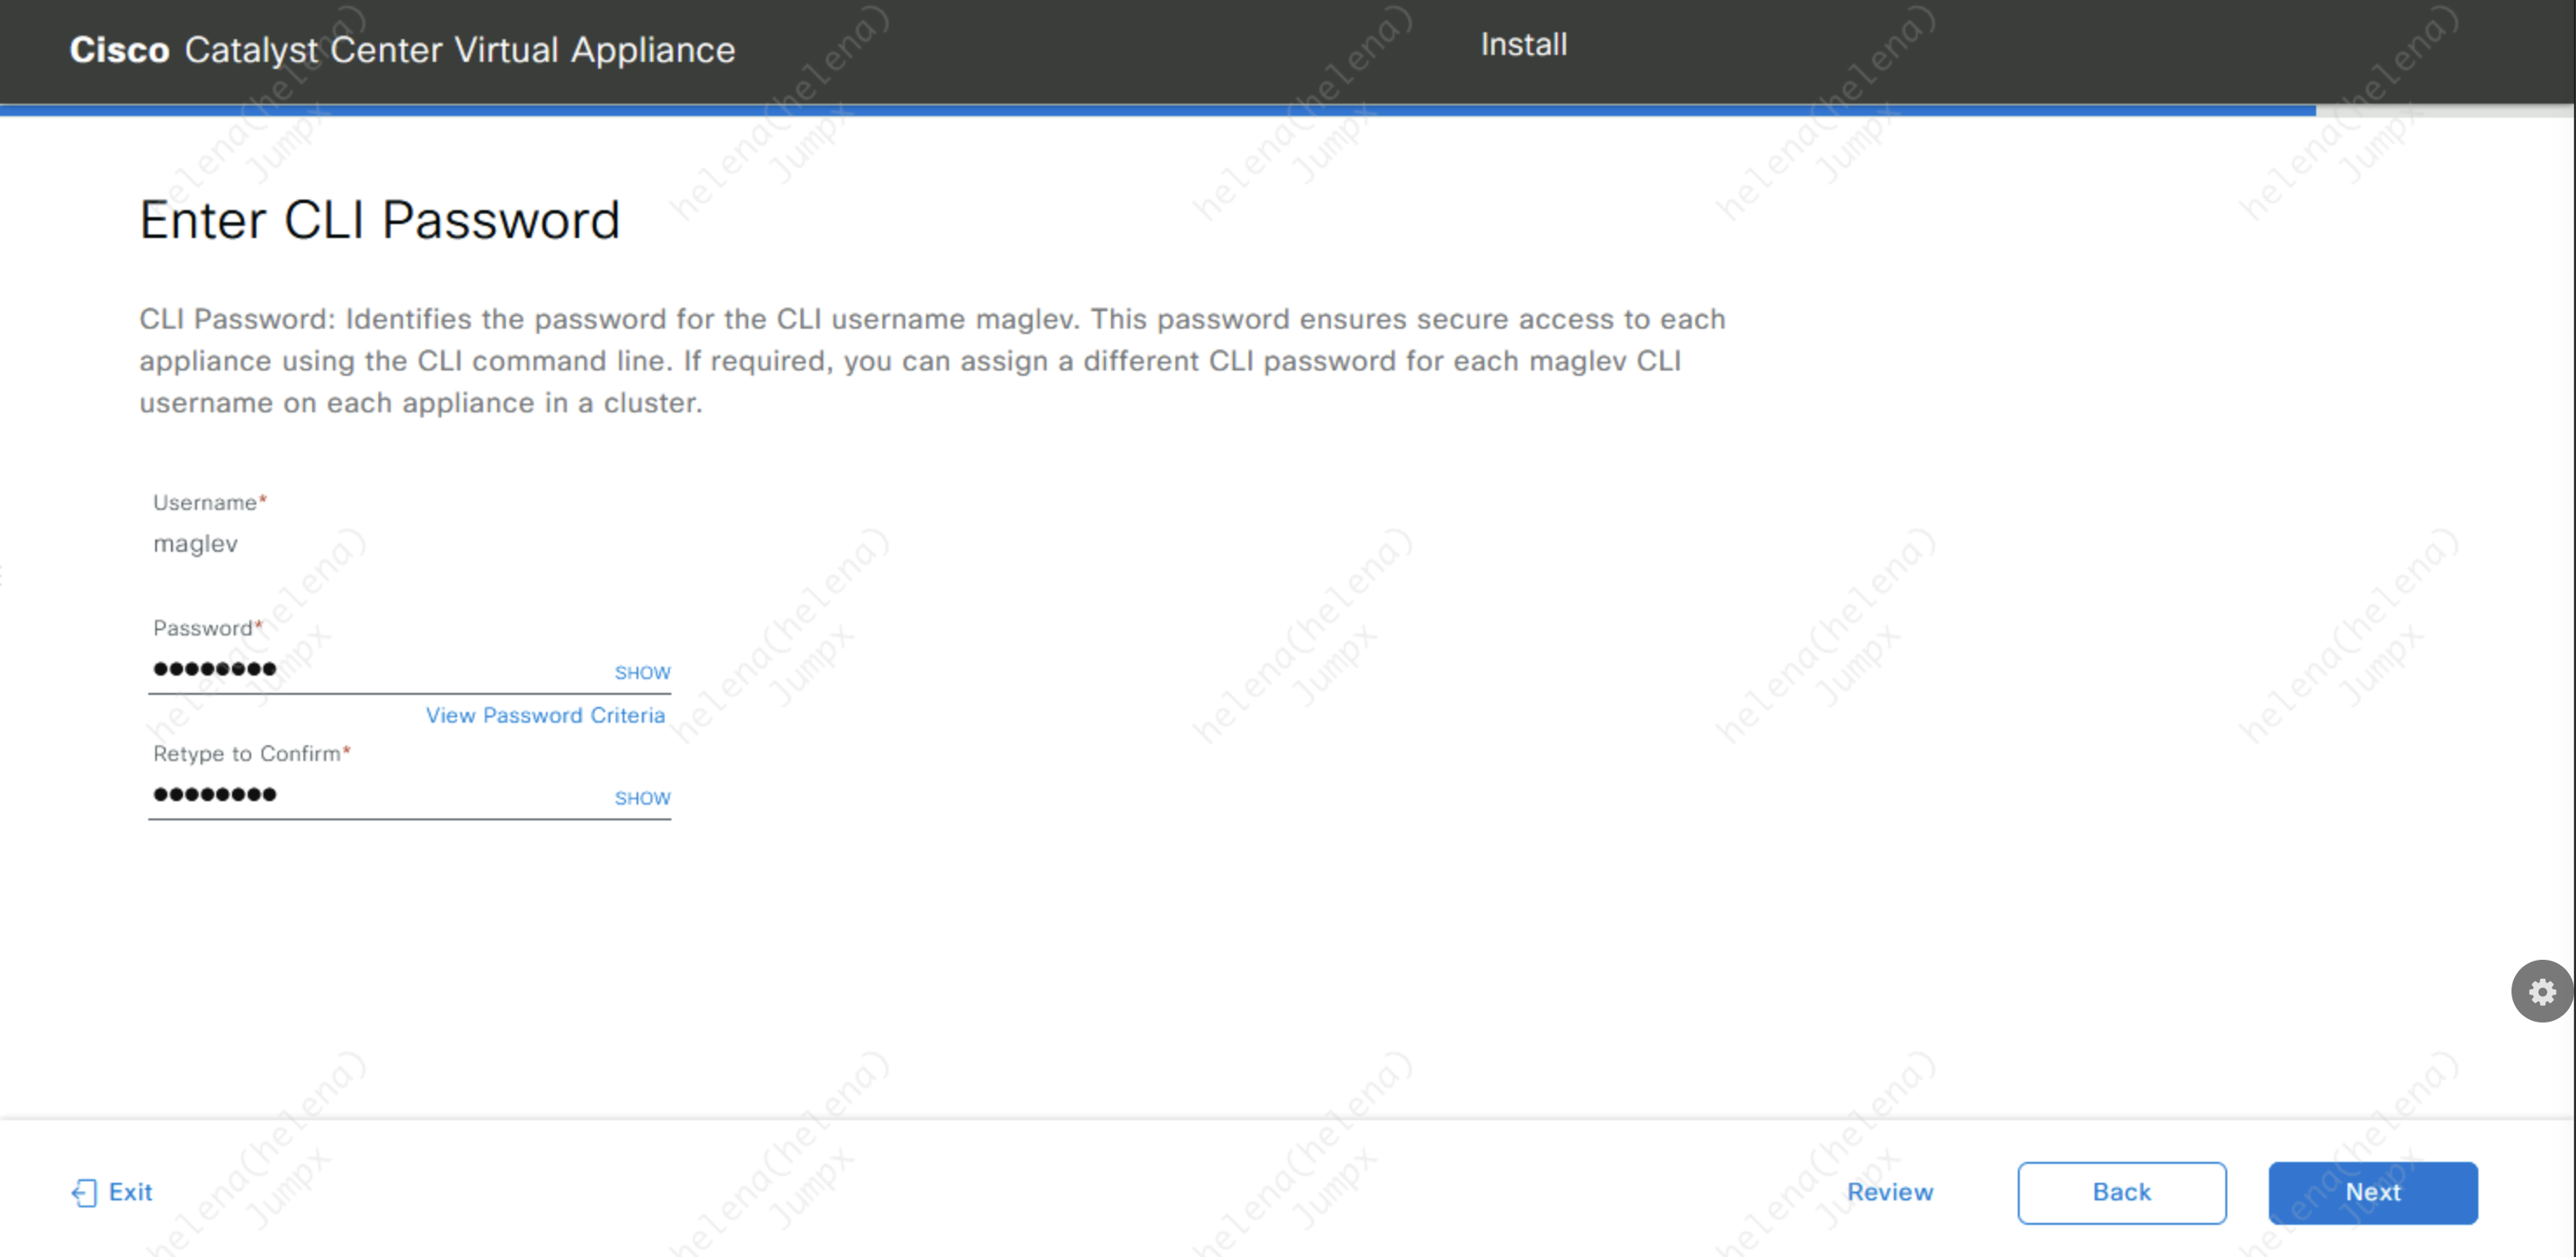
Next configure the CLI password for user “maglev”
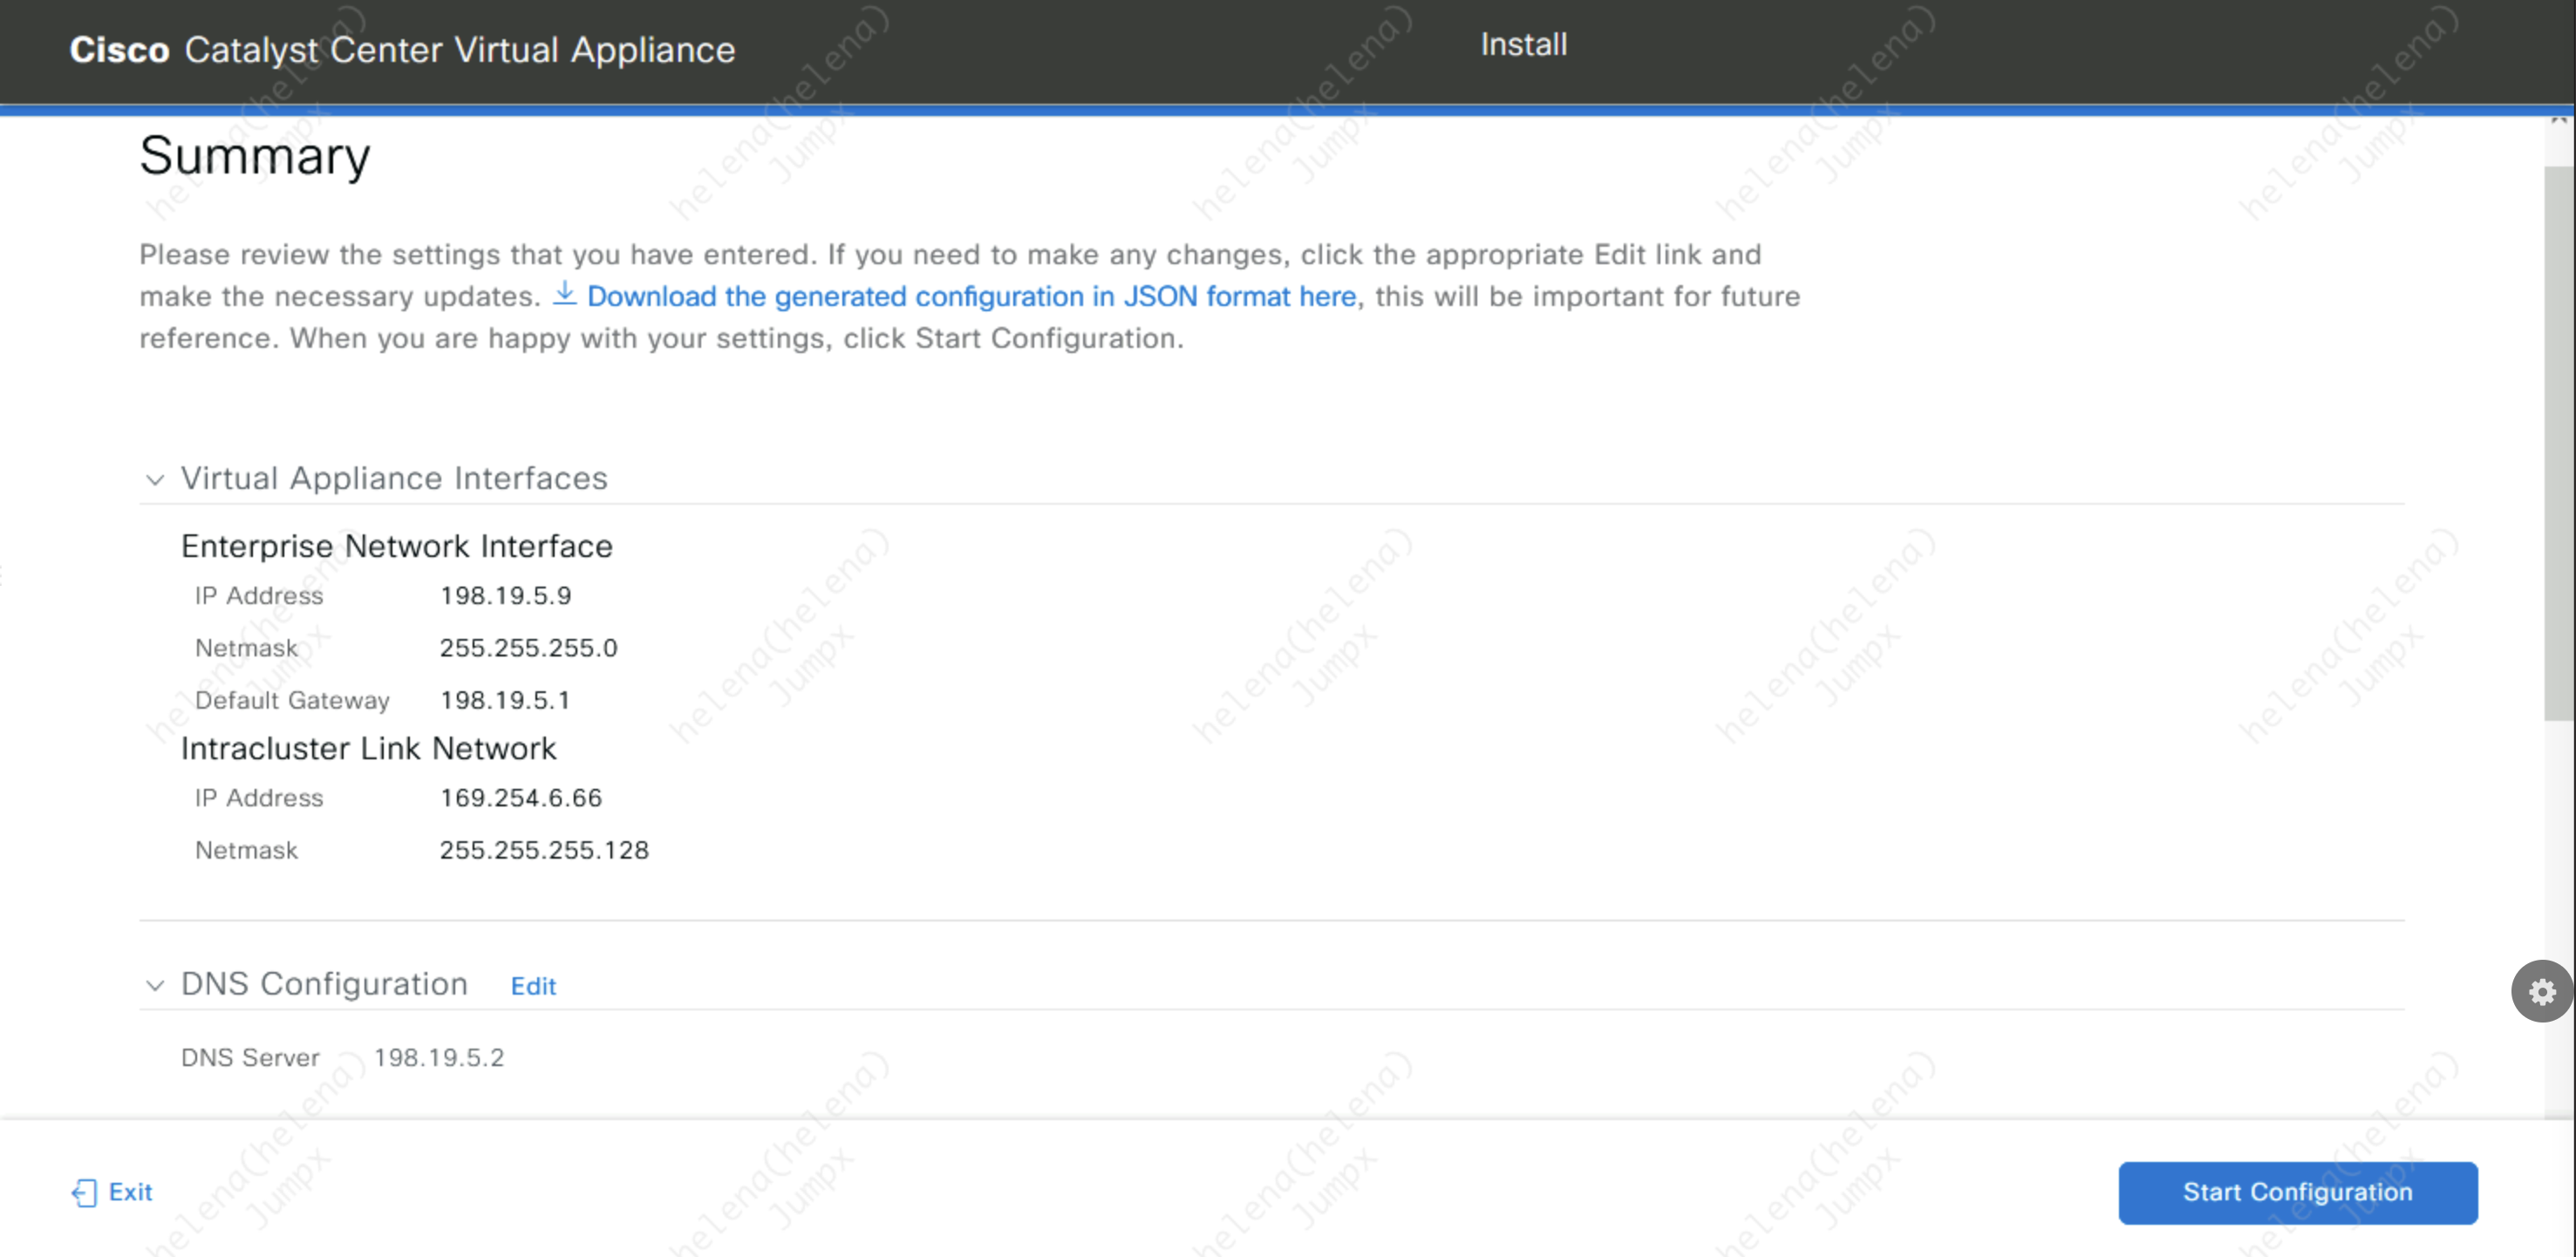
Review the configuration and hit Start
Then wait for the installation to finish, this usually takes around 30 mins
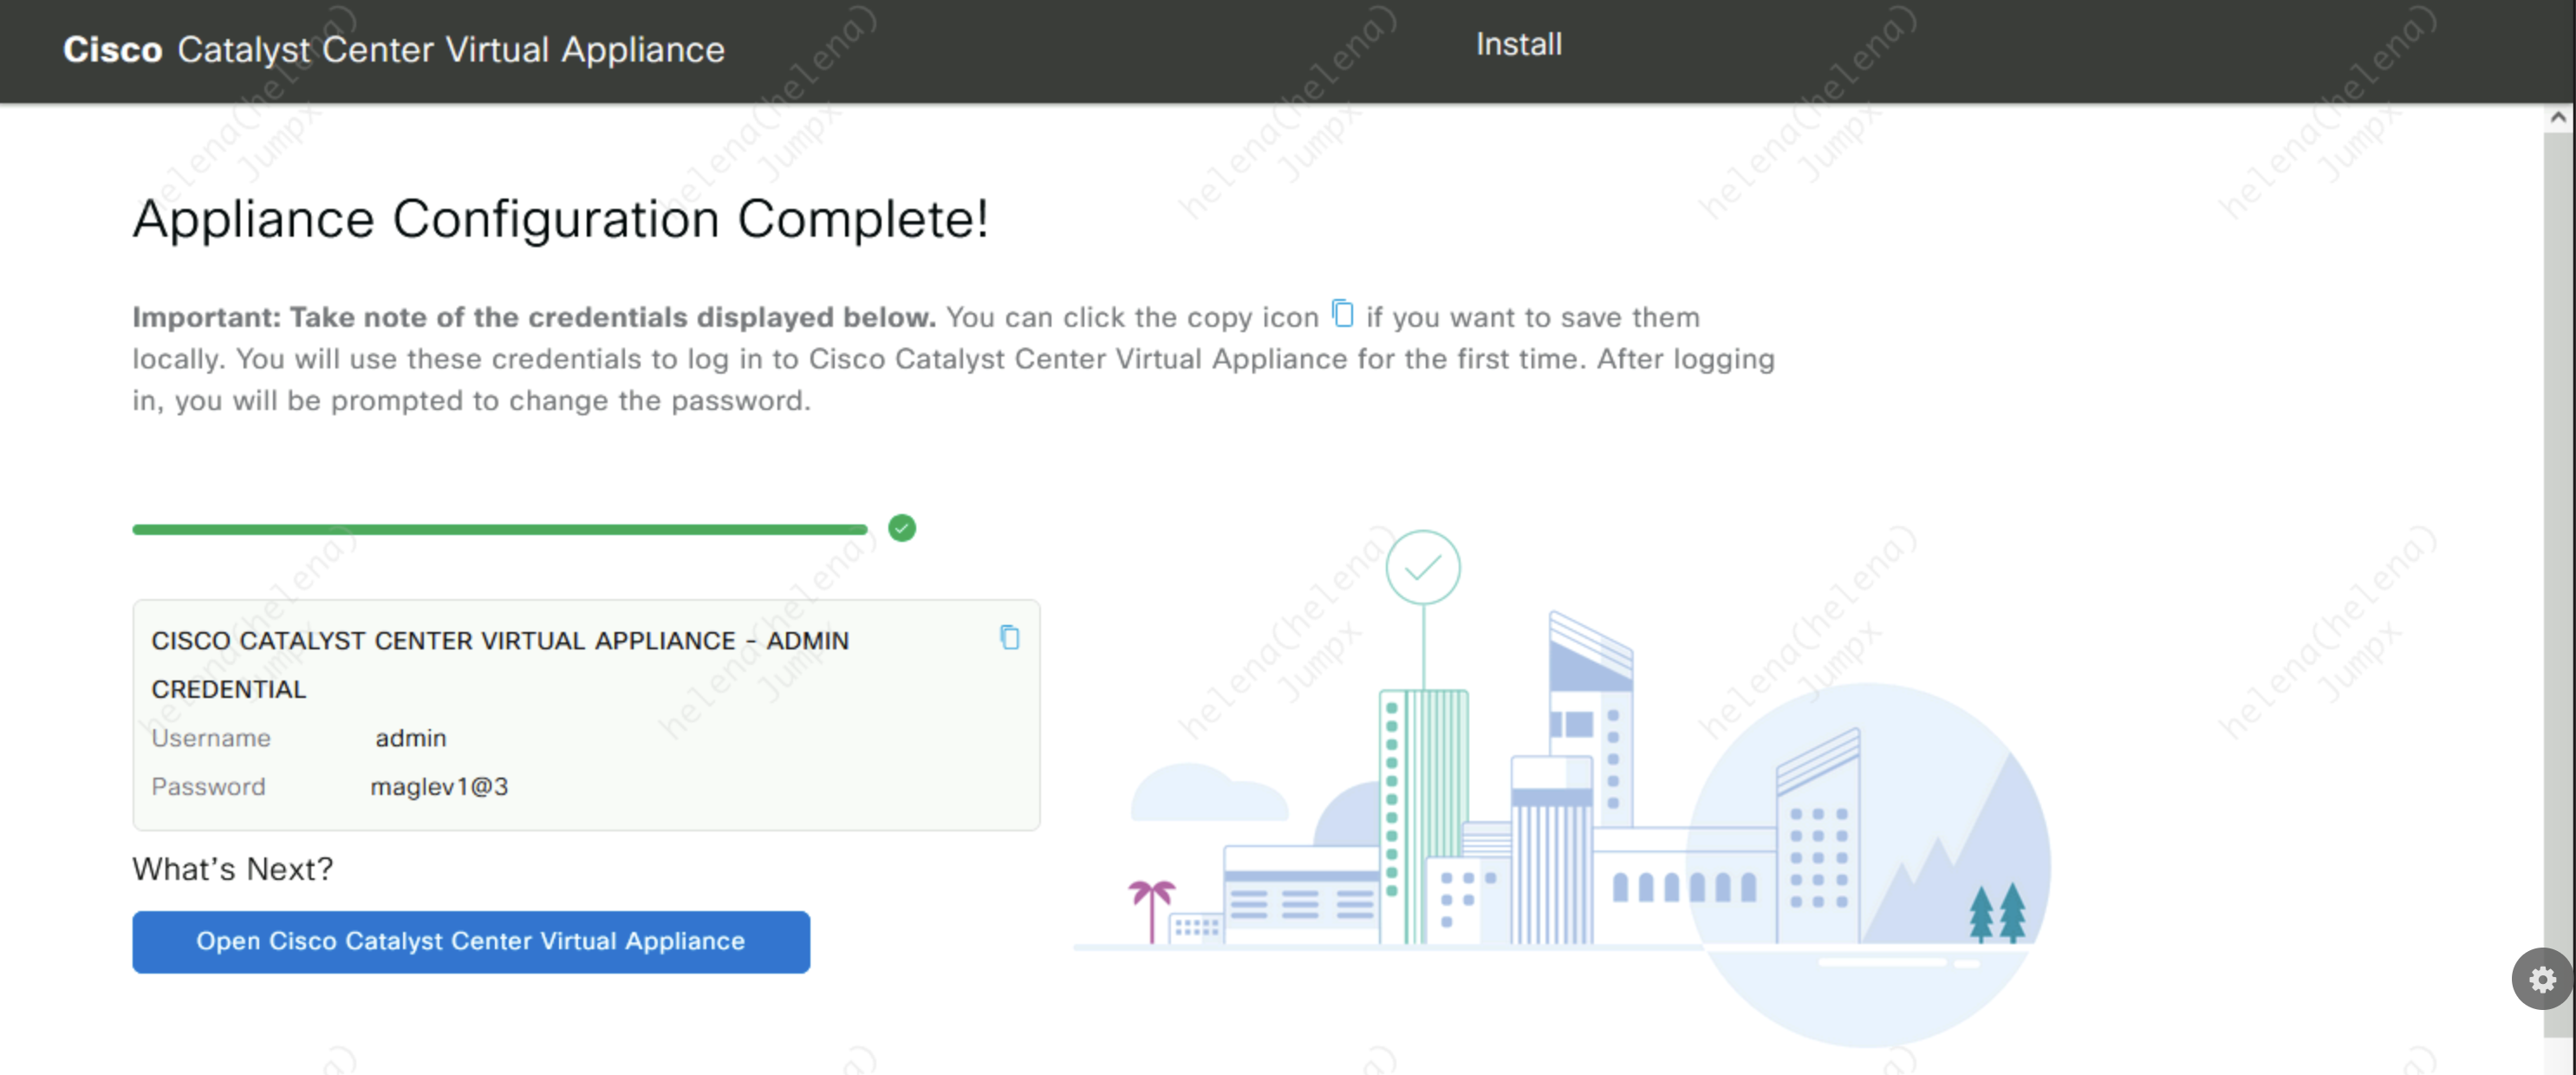
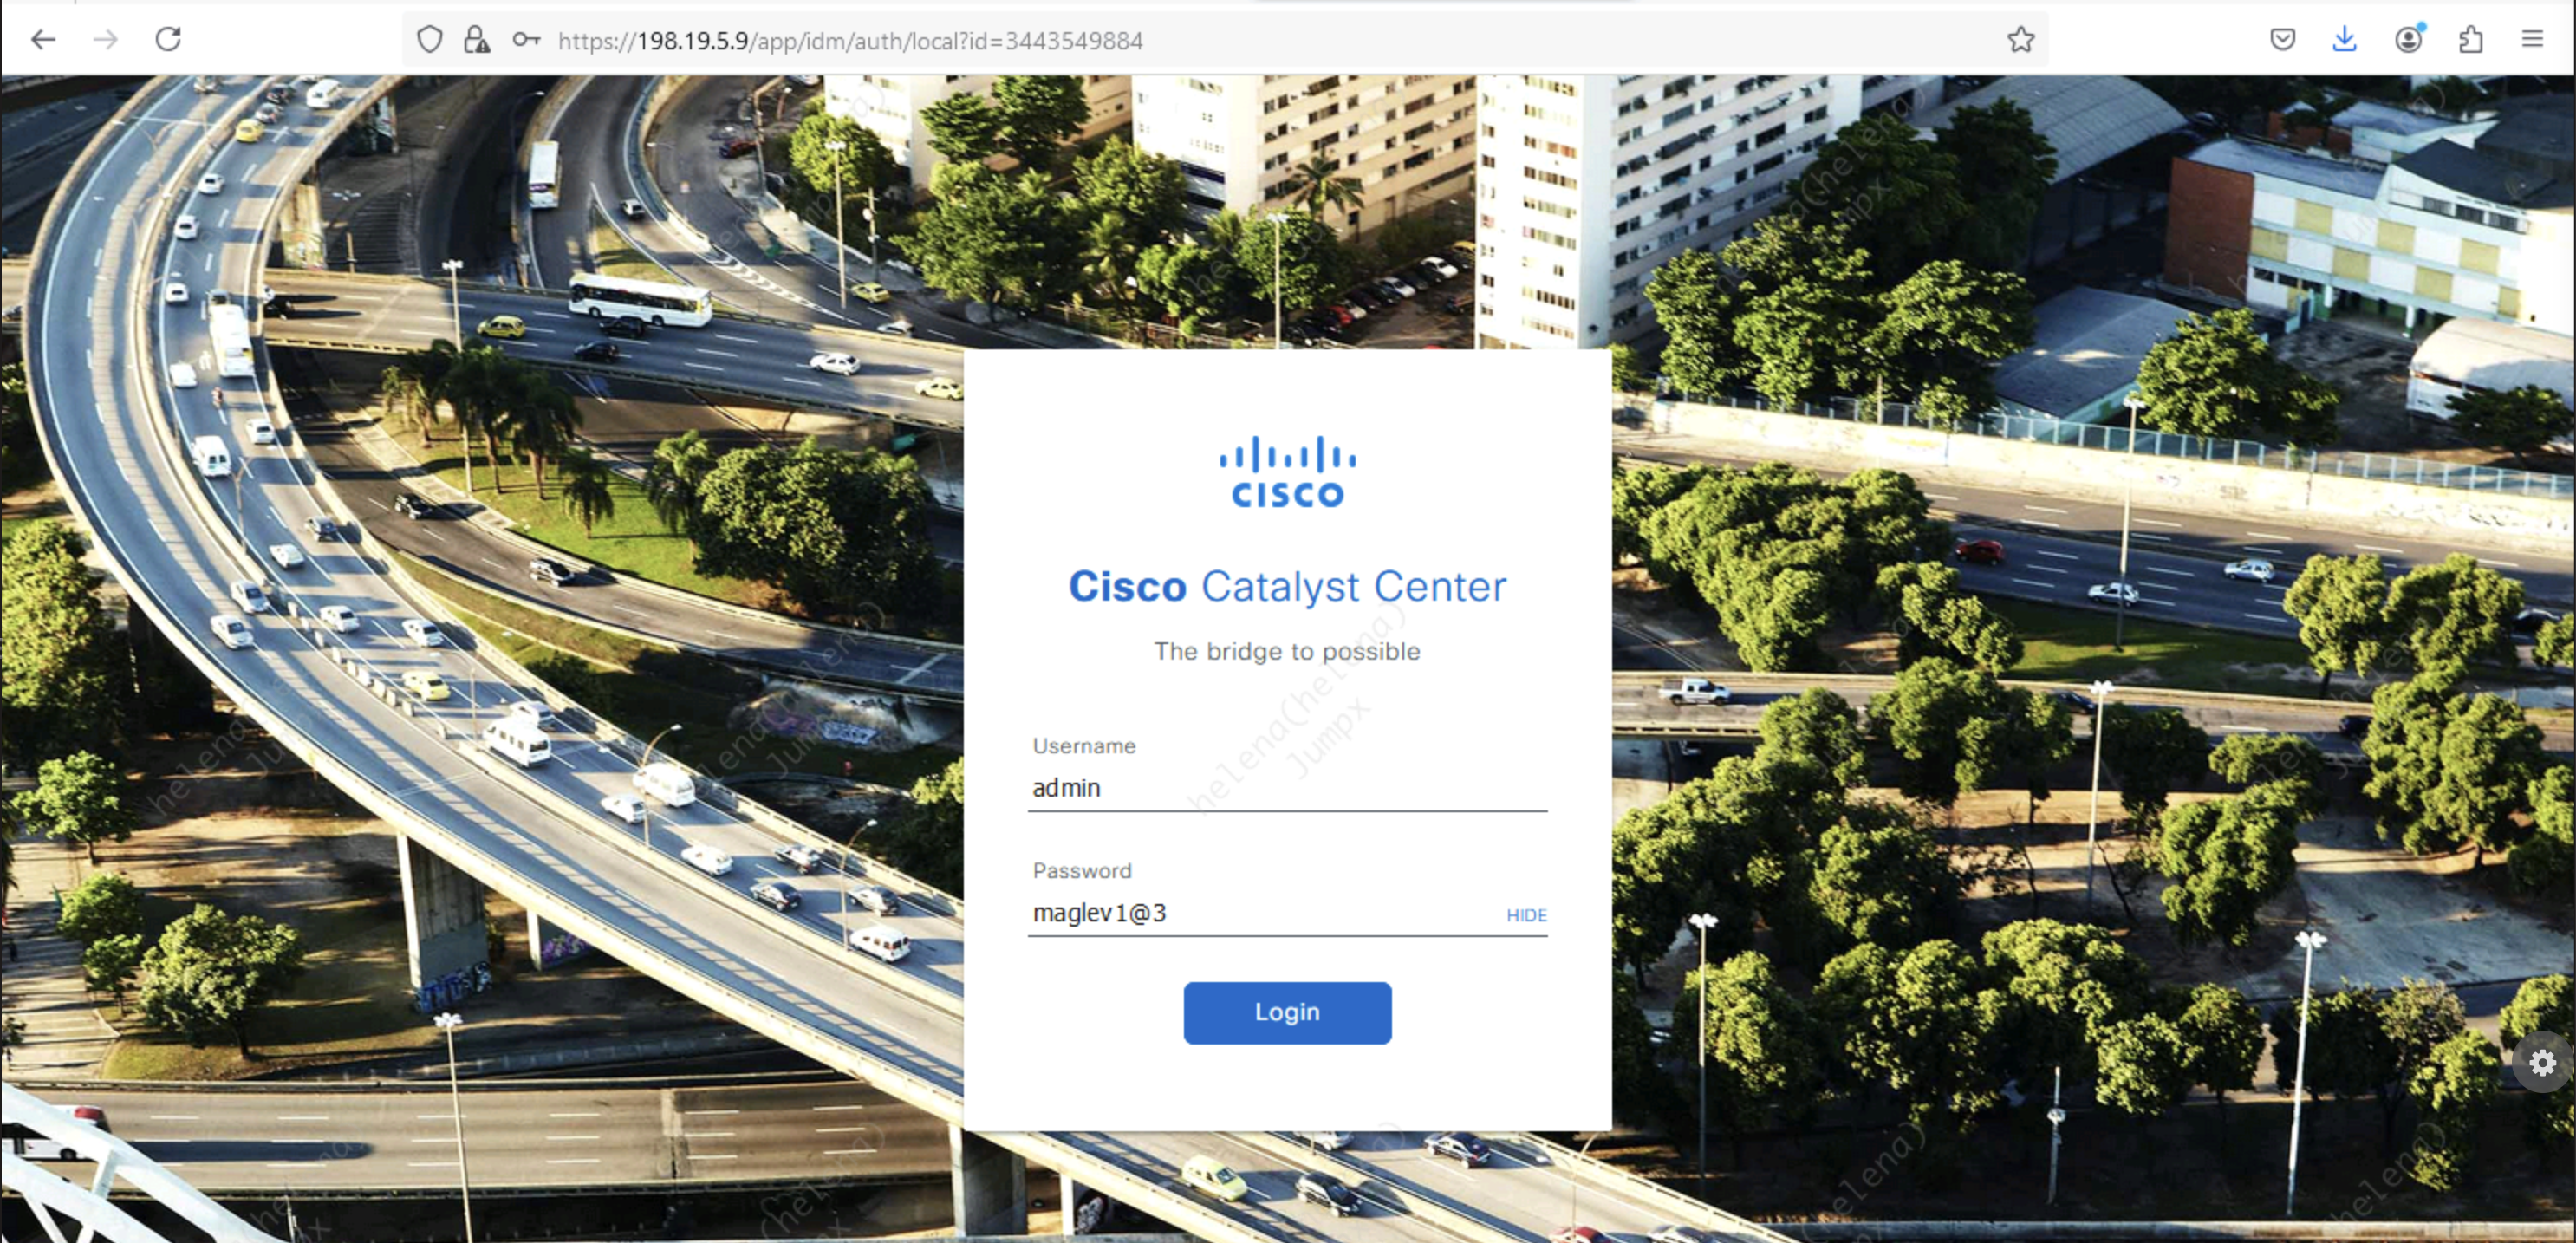
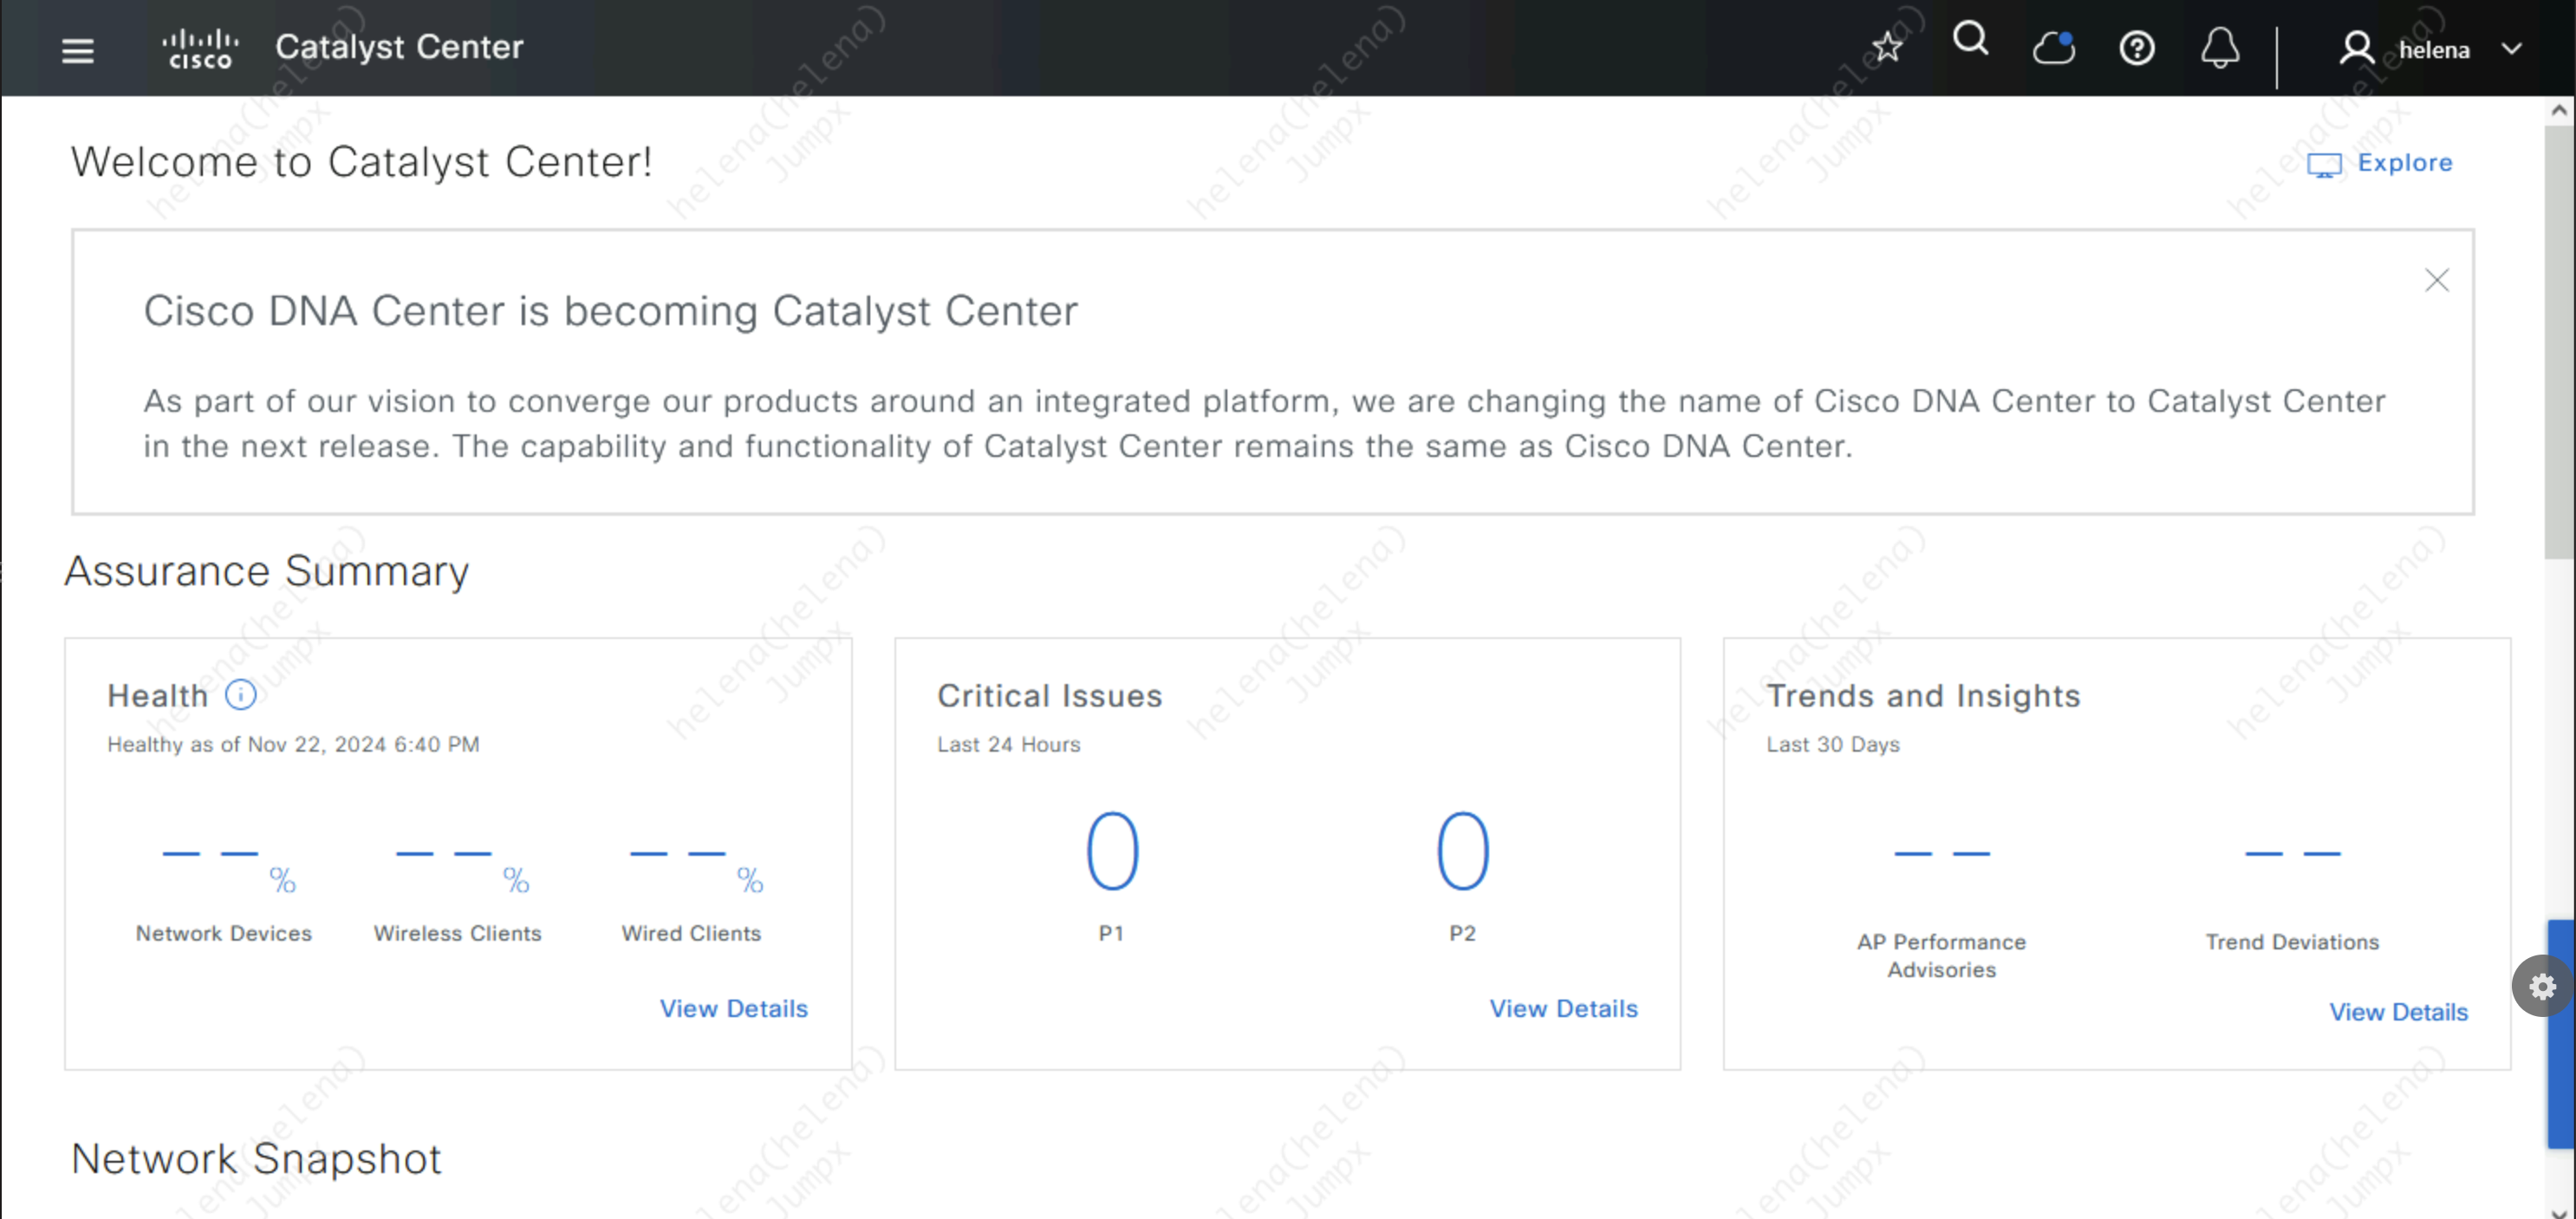
After that, wait again for another 8 hours (no kidding, this thing requires a full work day to finish setting up) and then we can access the Web UI on default https port
Configuring ISE
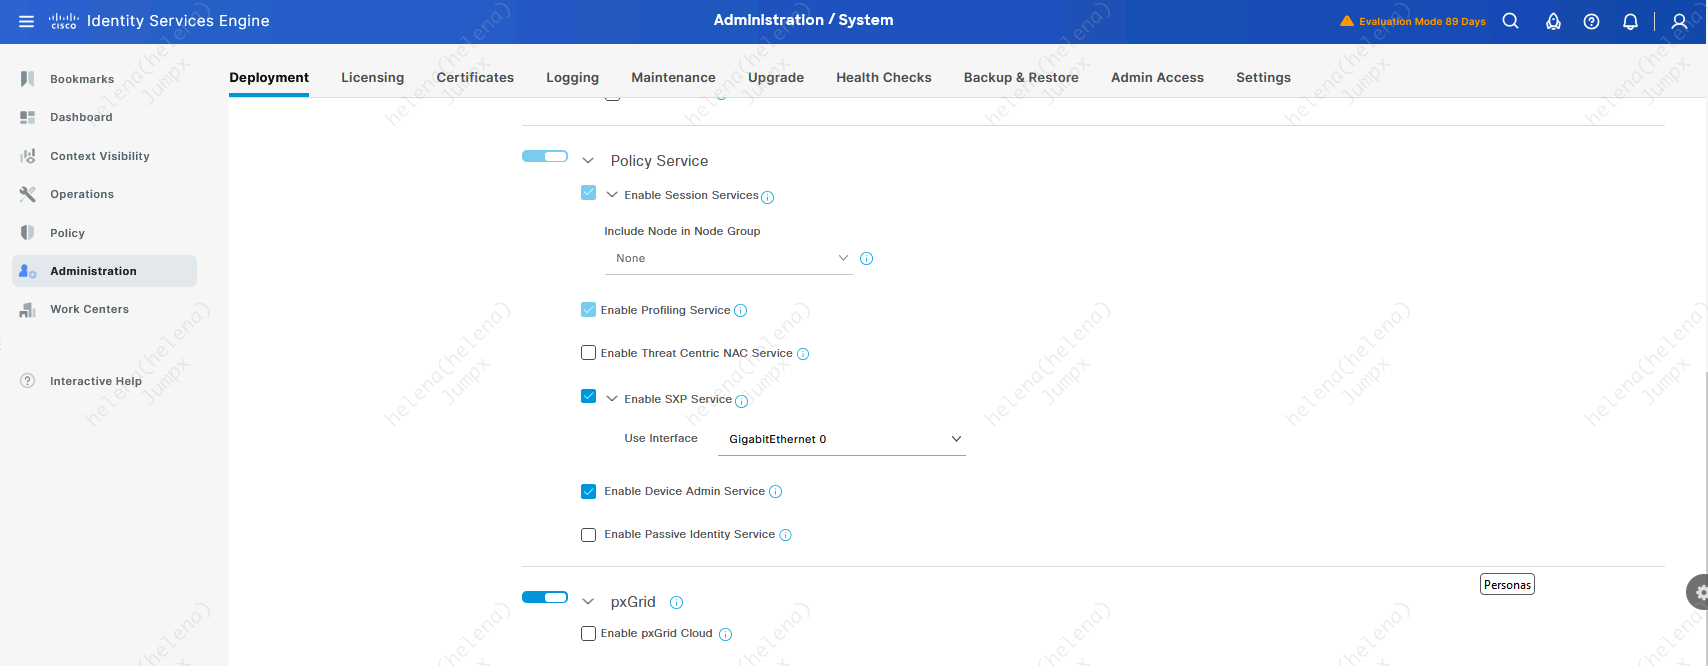
On ISE make sure Device Admin, SXP, and PXGrid is enabled on the PSN
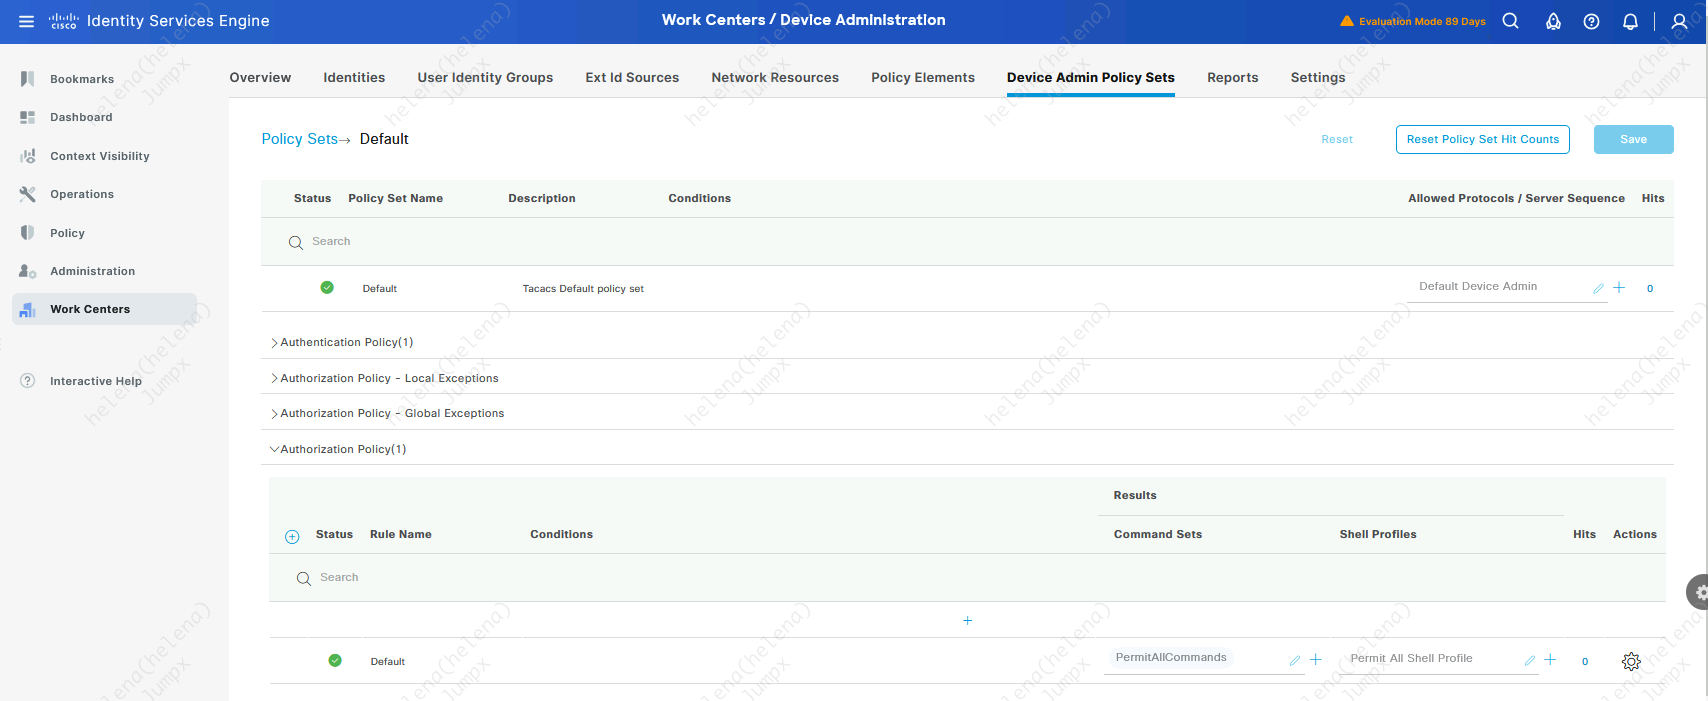
Next we create a tacacs user that we’ll use to login to network devices

Then we set up a tacacs policy so this helena user can login to NAD
Integrating DNAC to ISE
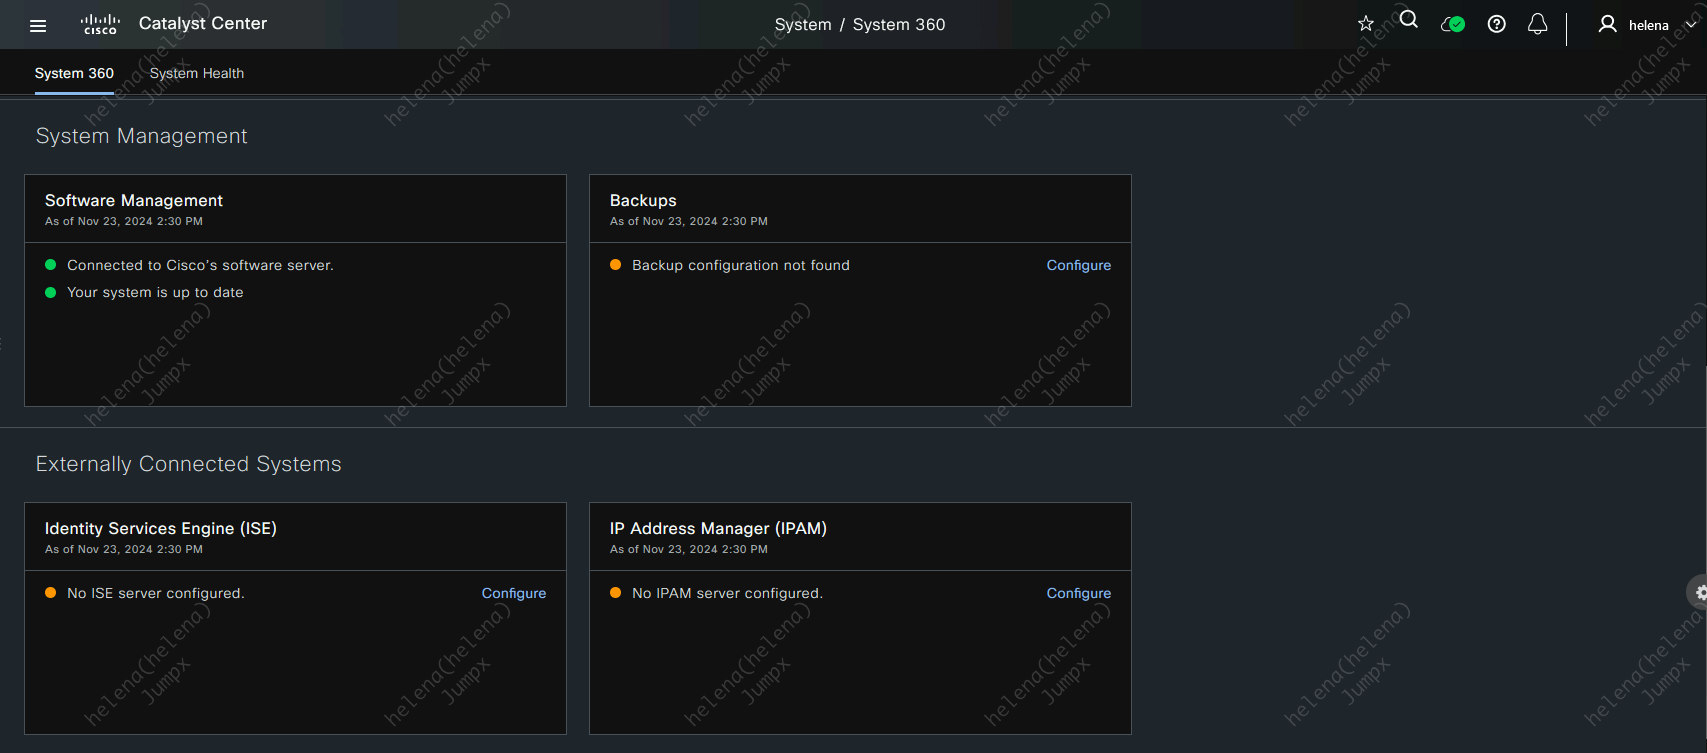
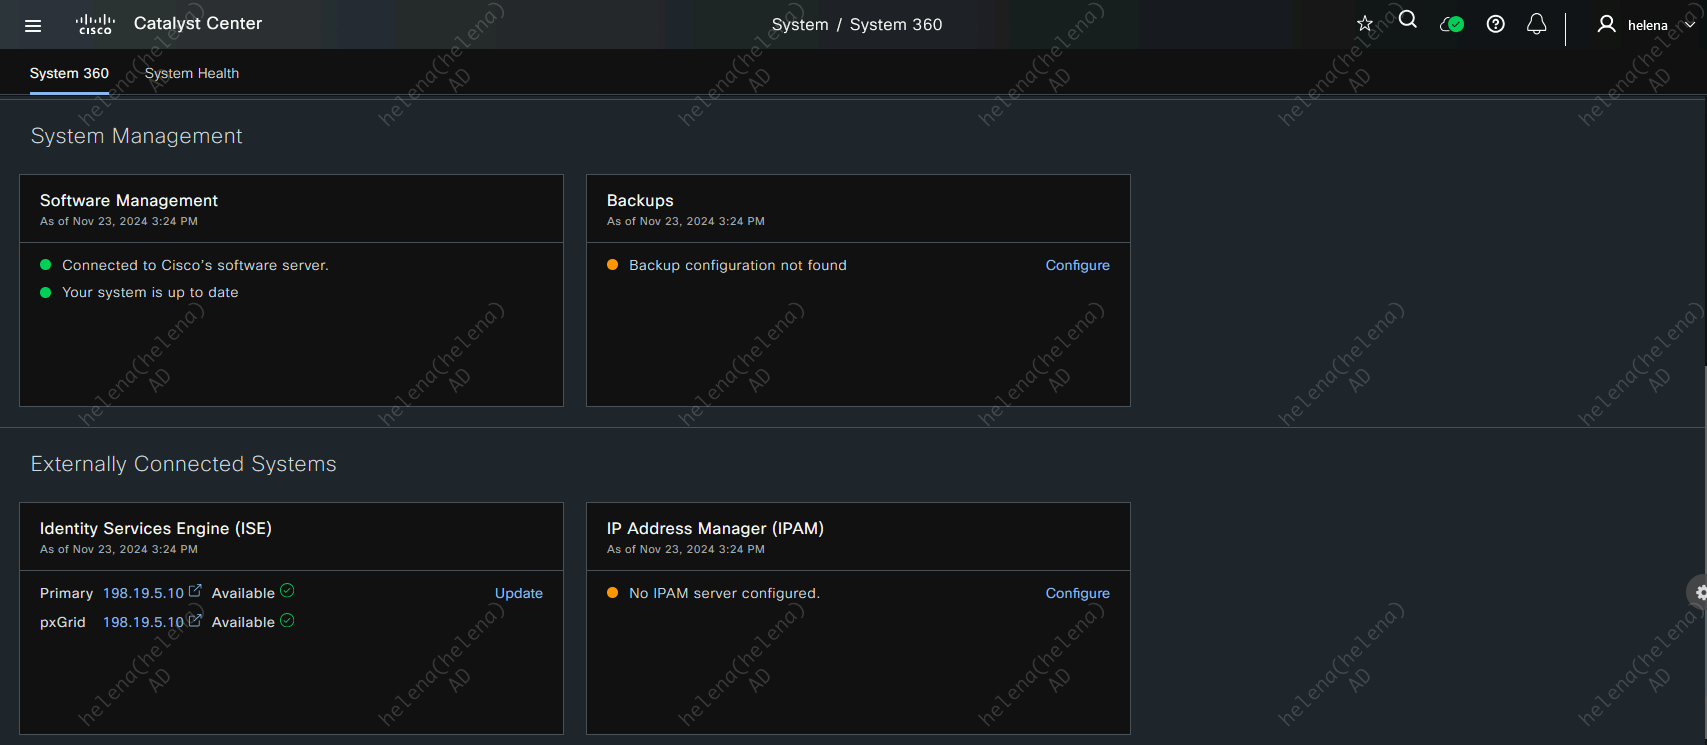
Back on DNAC, on System » System 360, hit configure on ISE Server
Fill up the ISE details and select both RADIUS and TACACS

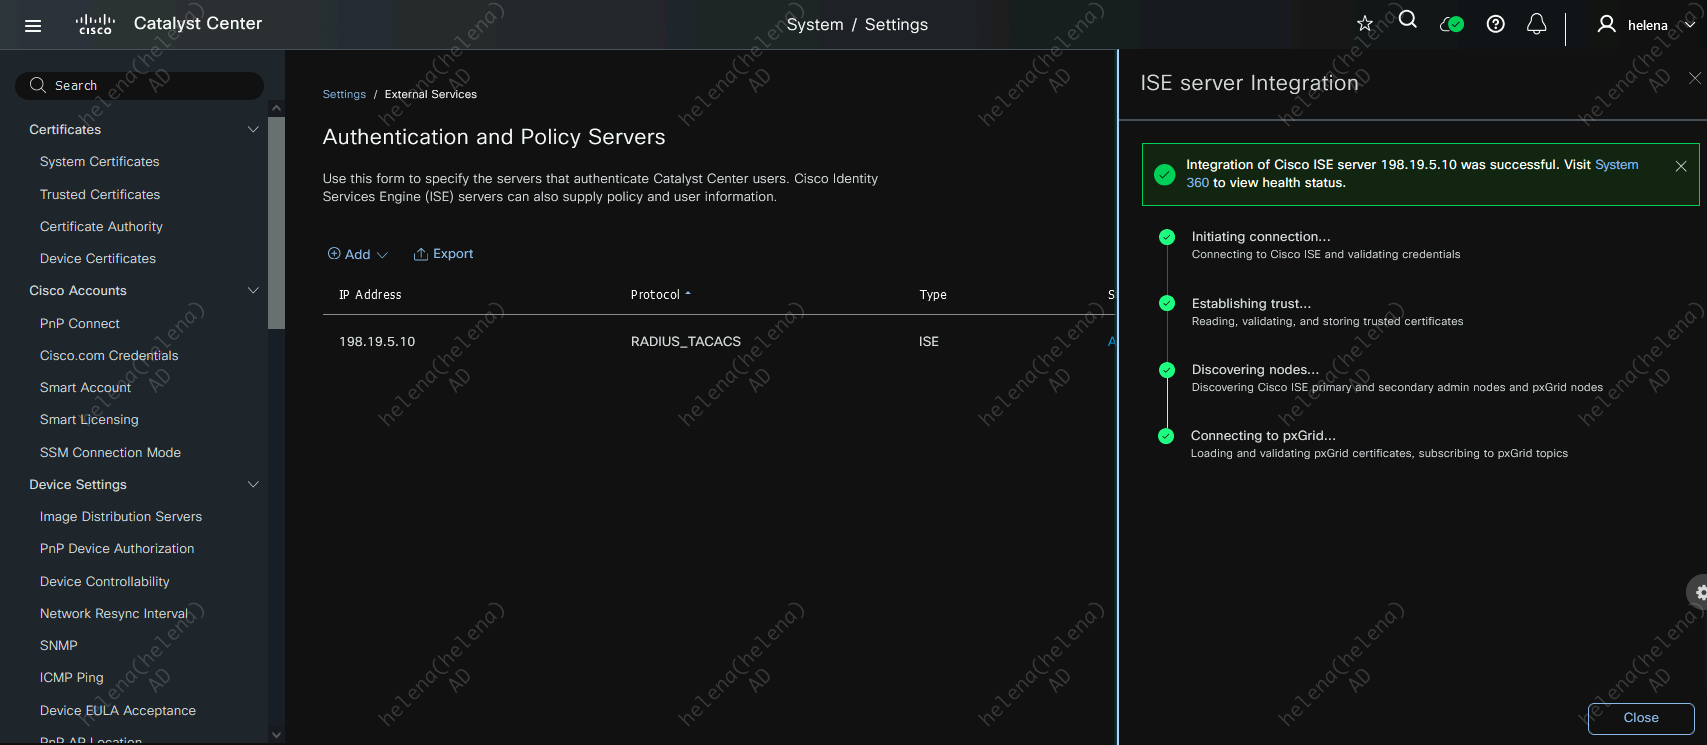
And now the ISE has been successfully integrated
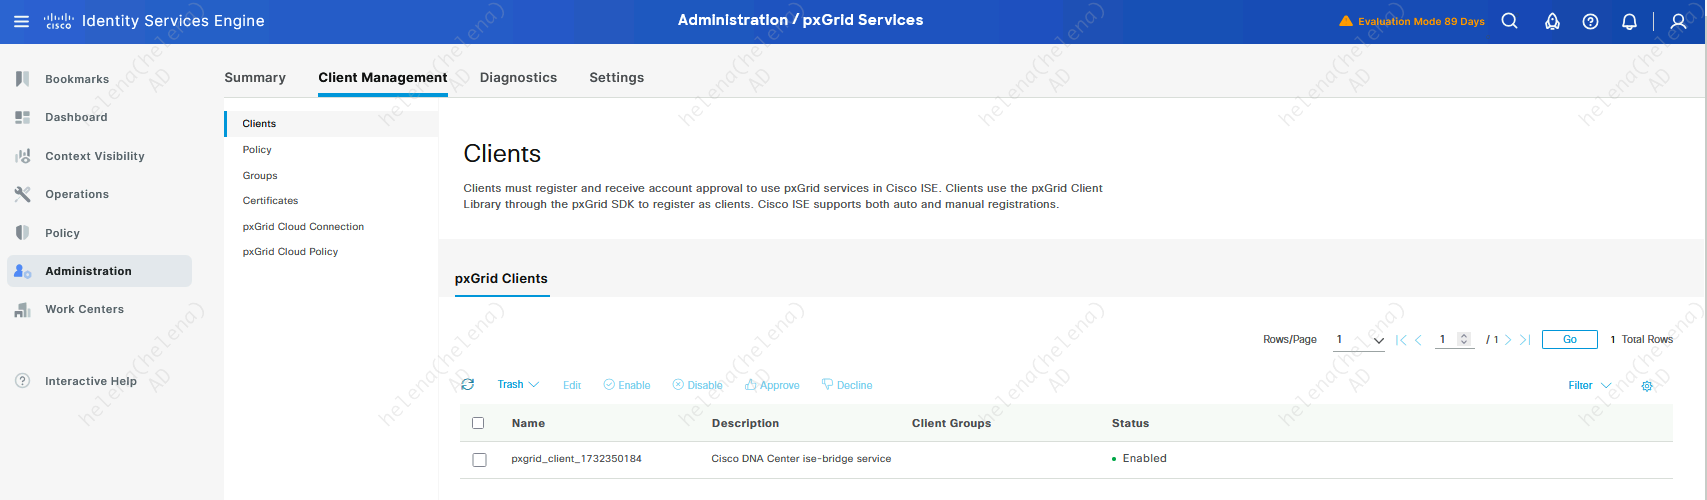
On ISE PxGrid Clients we can also see the DNAC integration
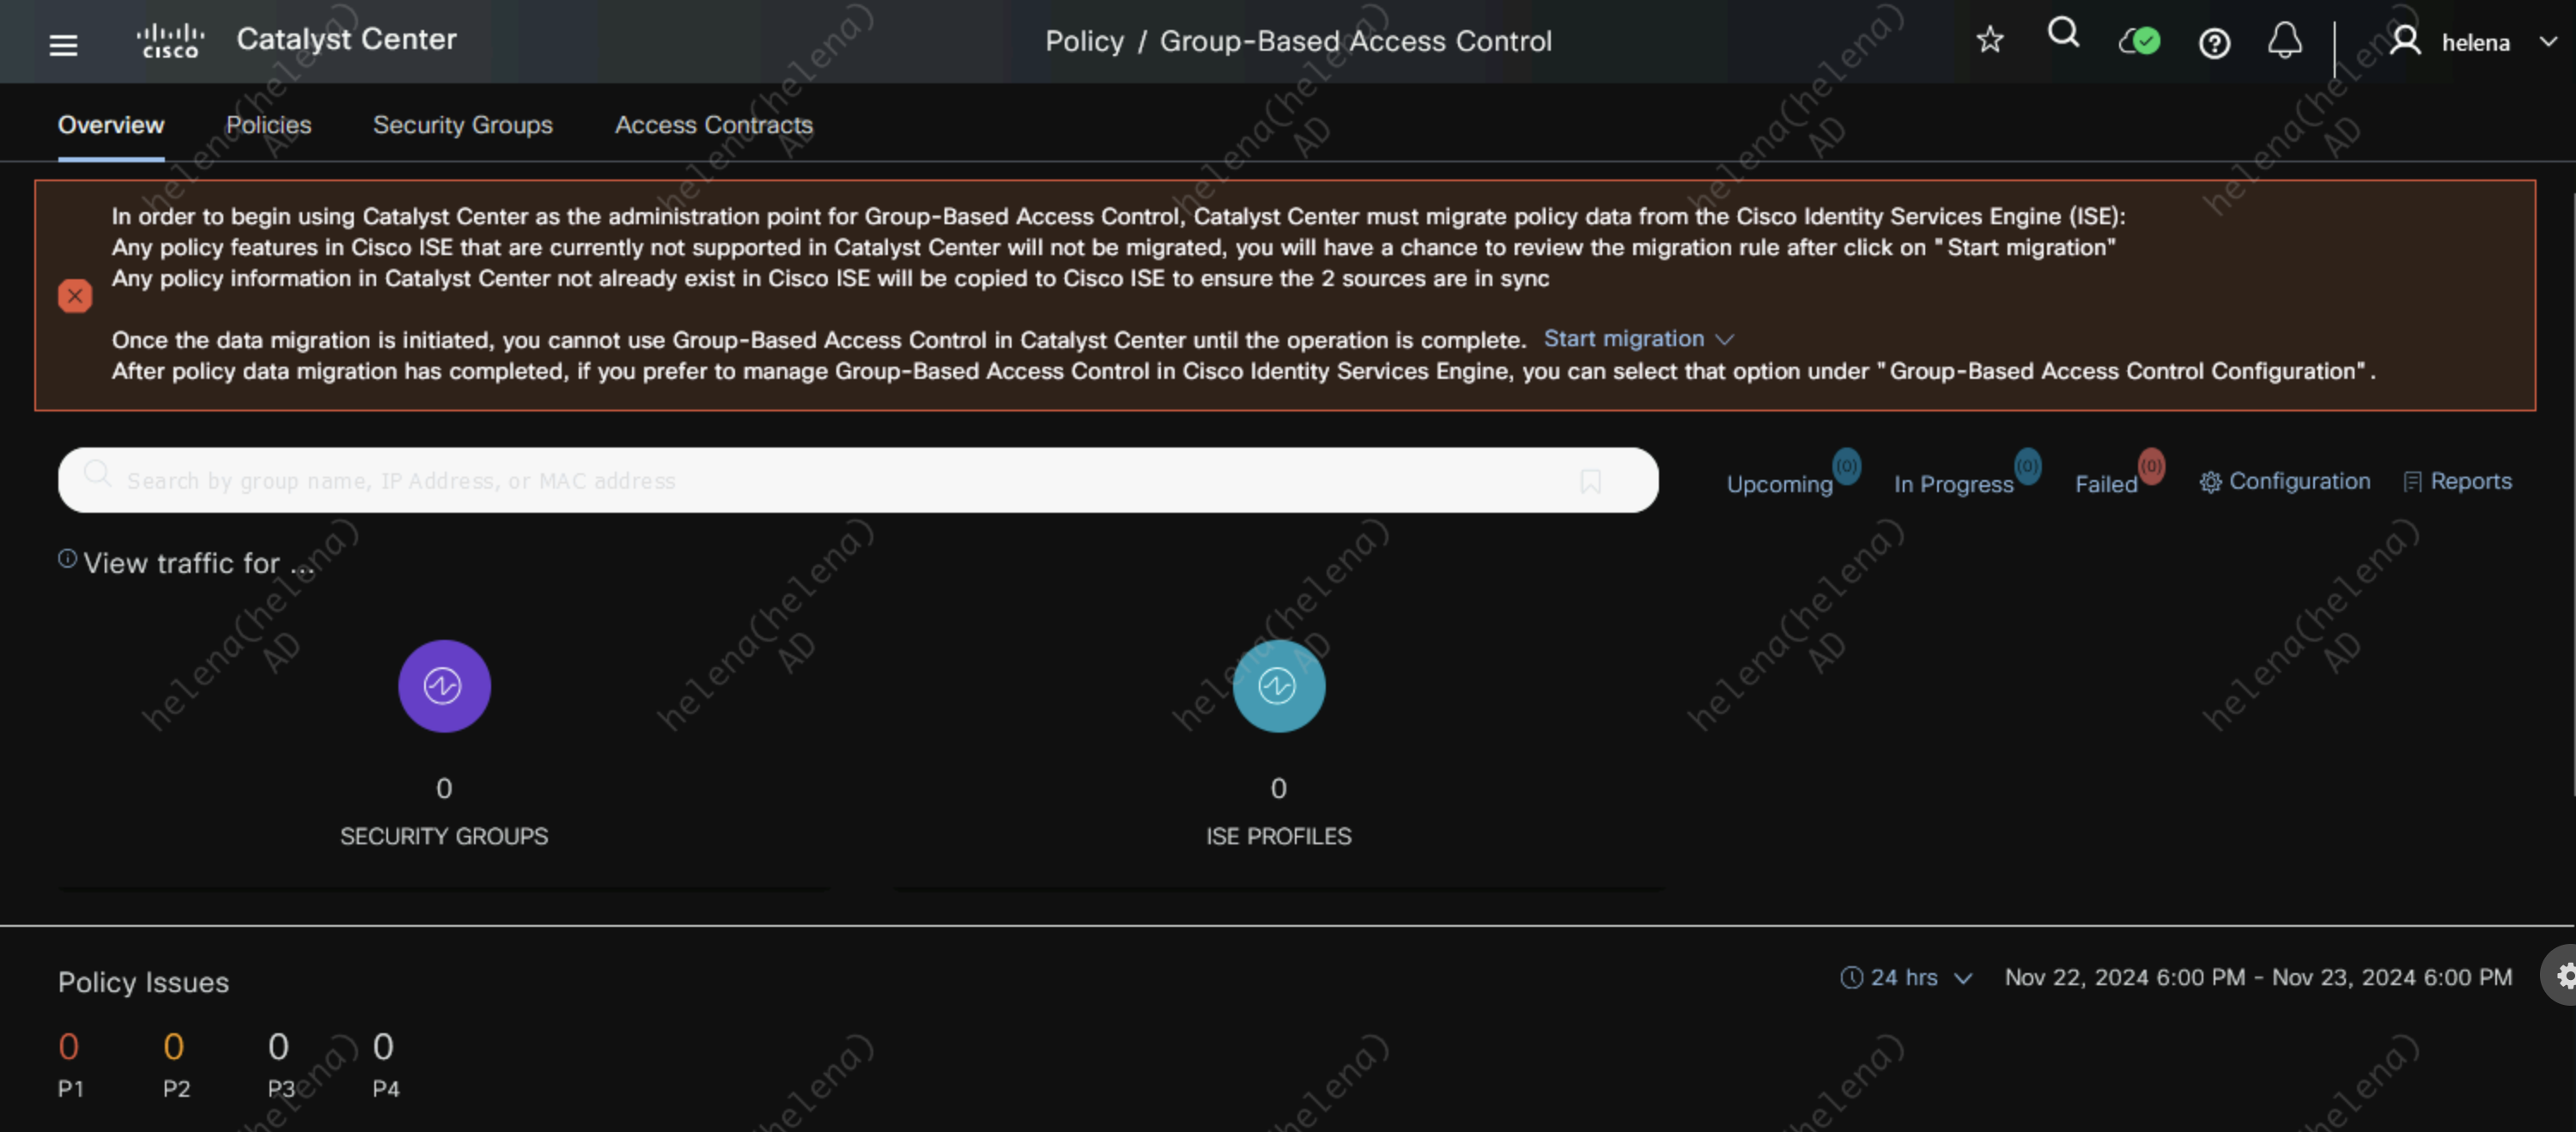
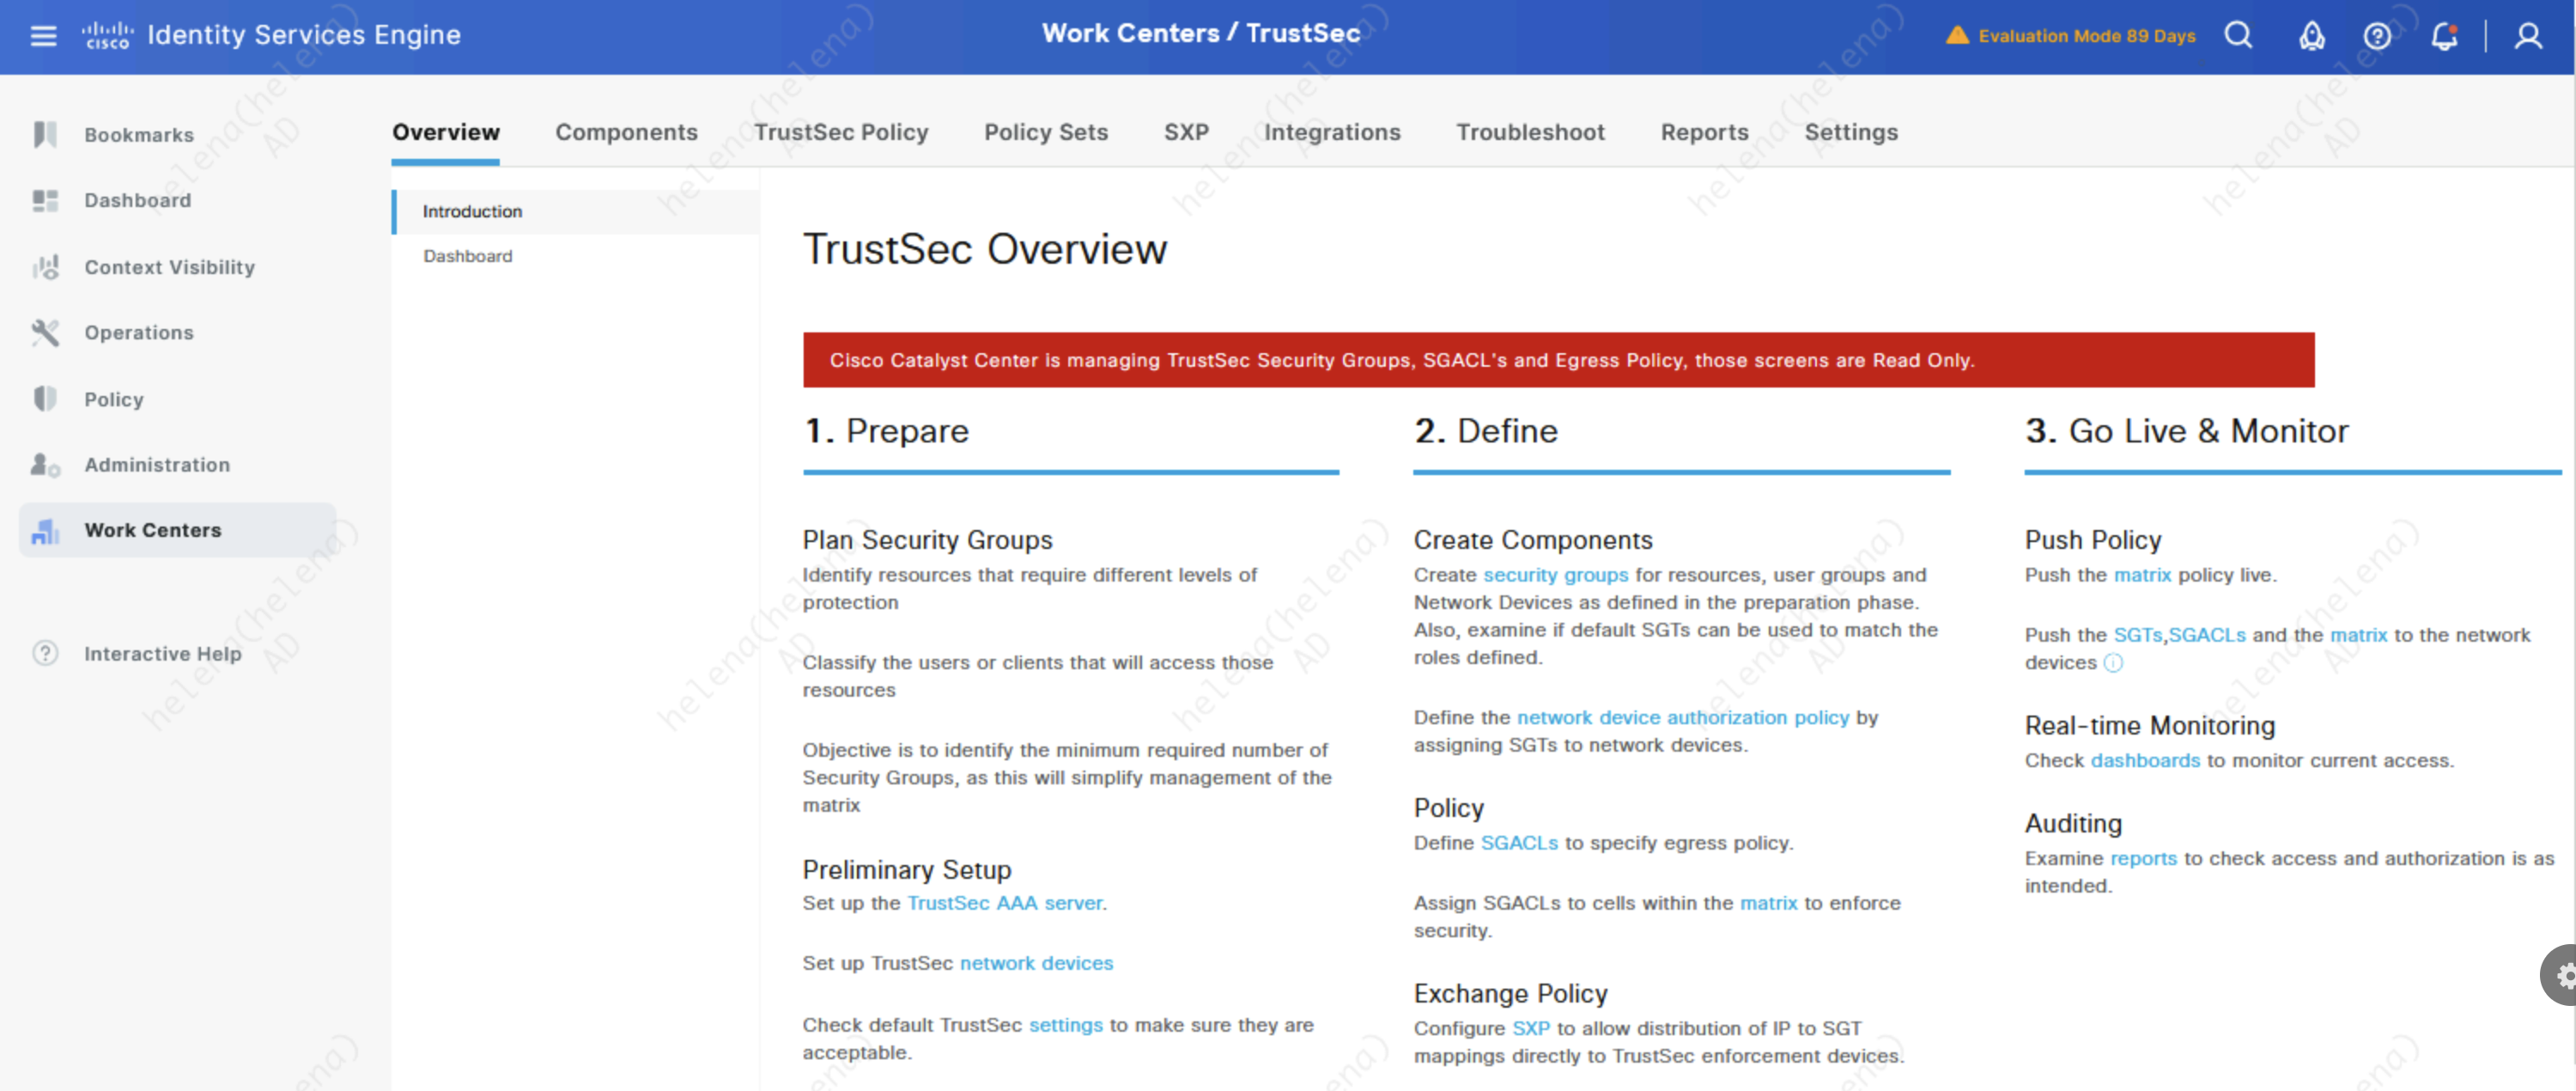
Next we’ll import TrustSec settings from ISE, on DNAC » Policy » Group-Based Access Control, hit start migration
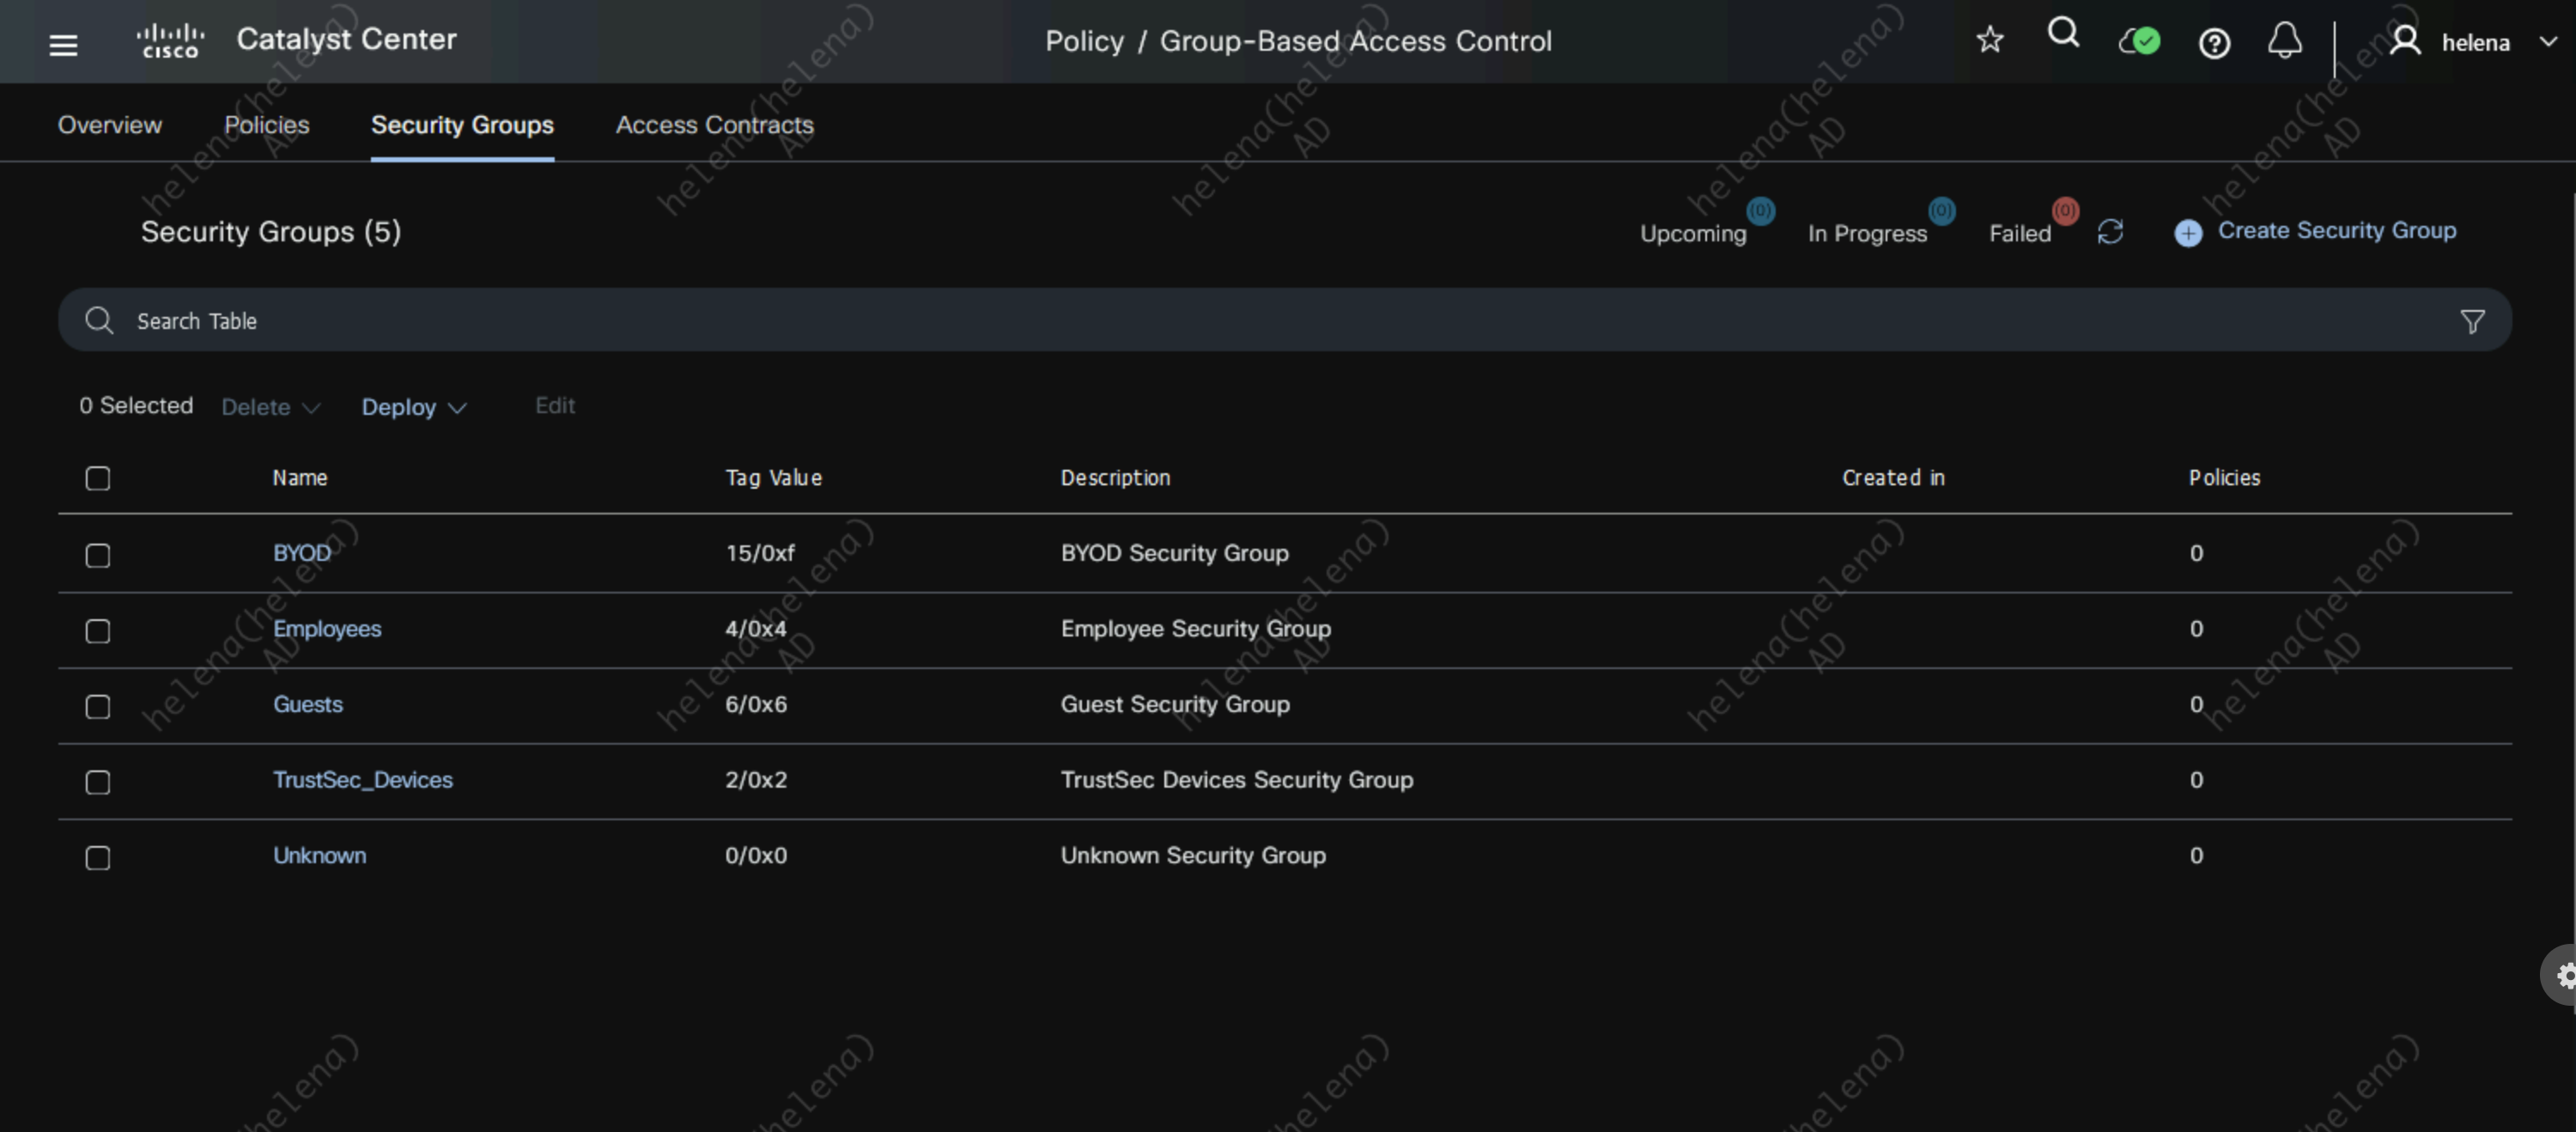
After migration is done, we can now see the SGTs and Policies are present on DNAC

On the ISE side, a warning shows that notifies that TrustSec is now managed by DNAC
Configuring SD-Access
Creating Sites
First lets create 2 sites, Jakarta and Bali on Design » Nettwork Hierarchy

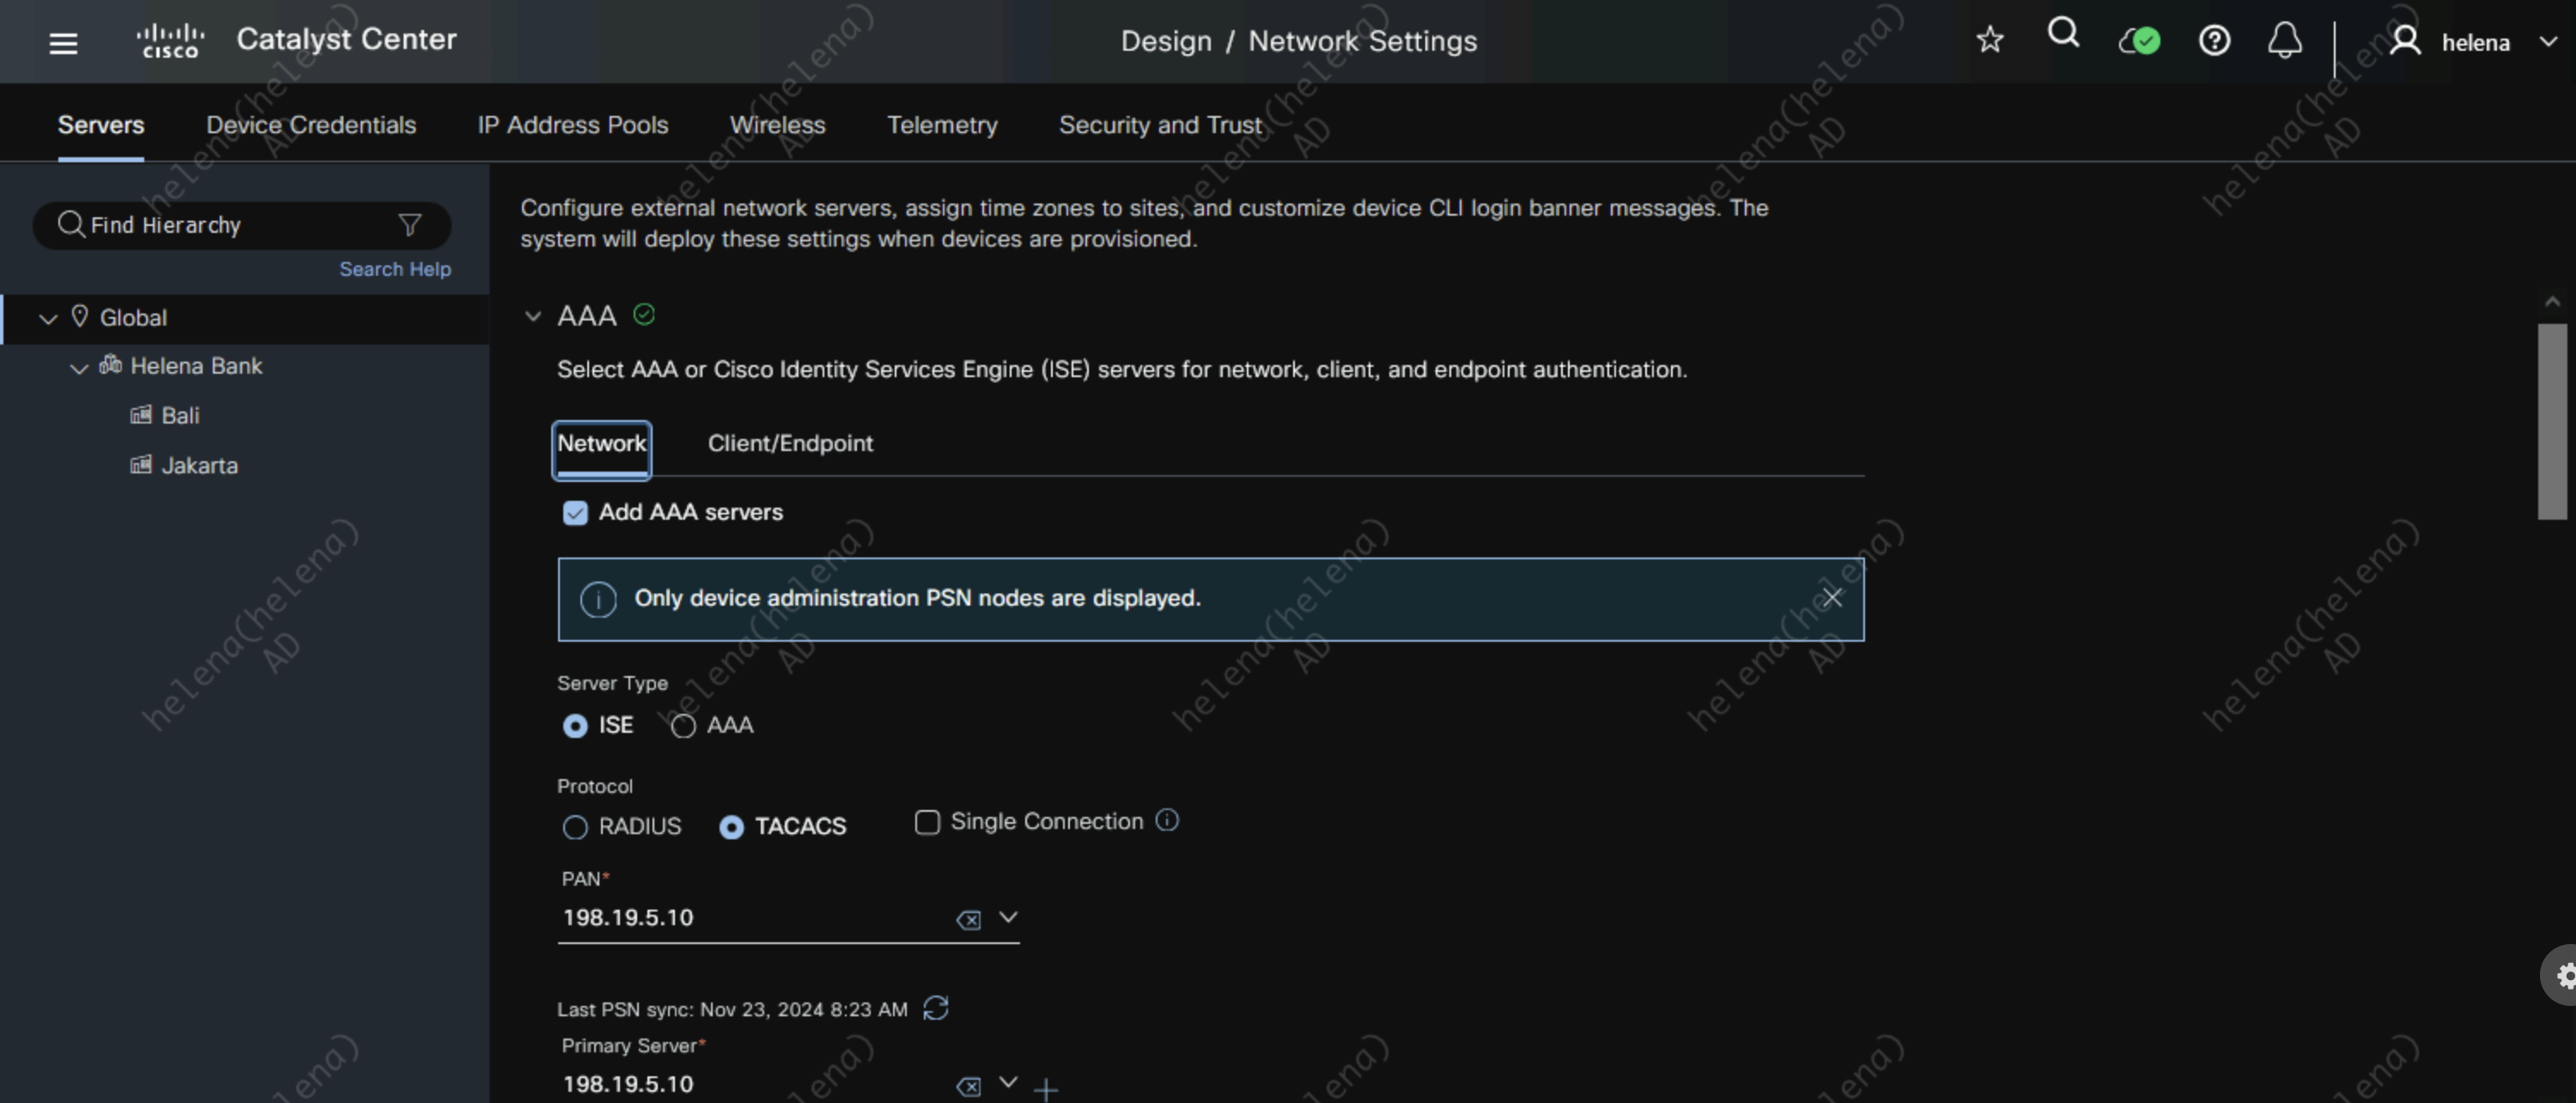
Then on Global Site, configure the ISE as the AAA Server. For network device we select TACACS
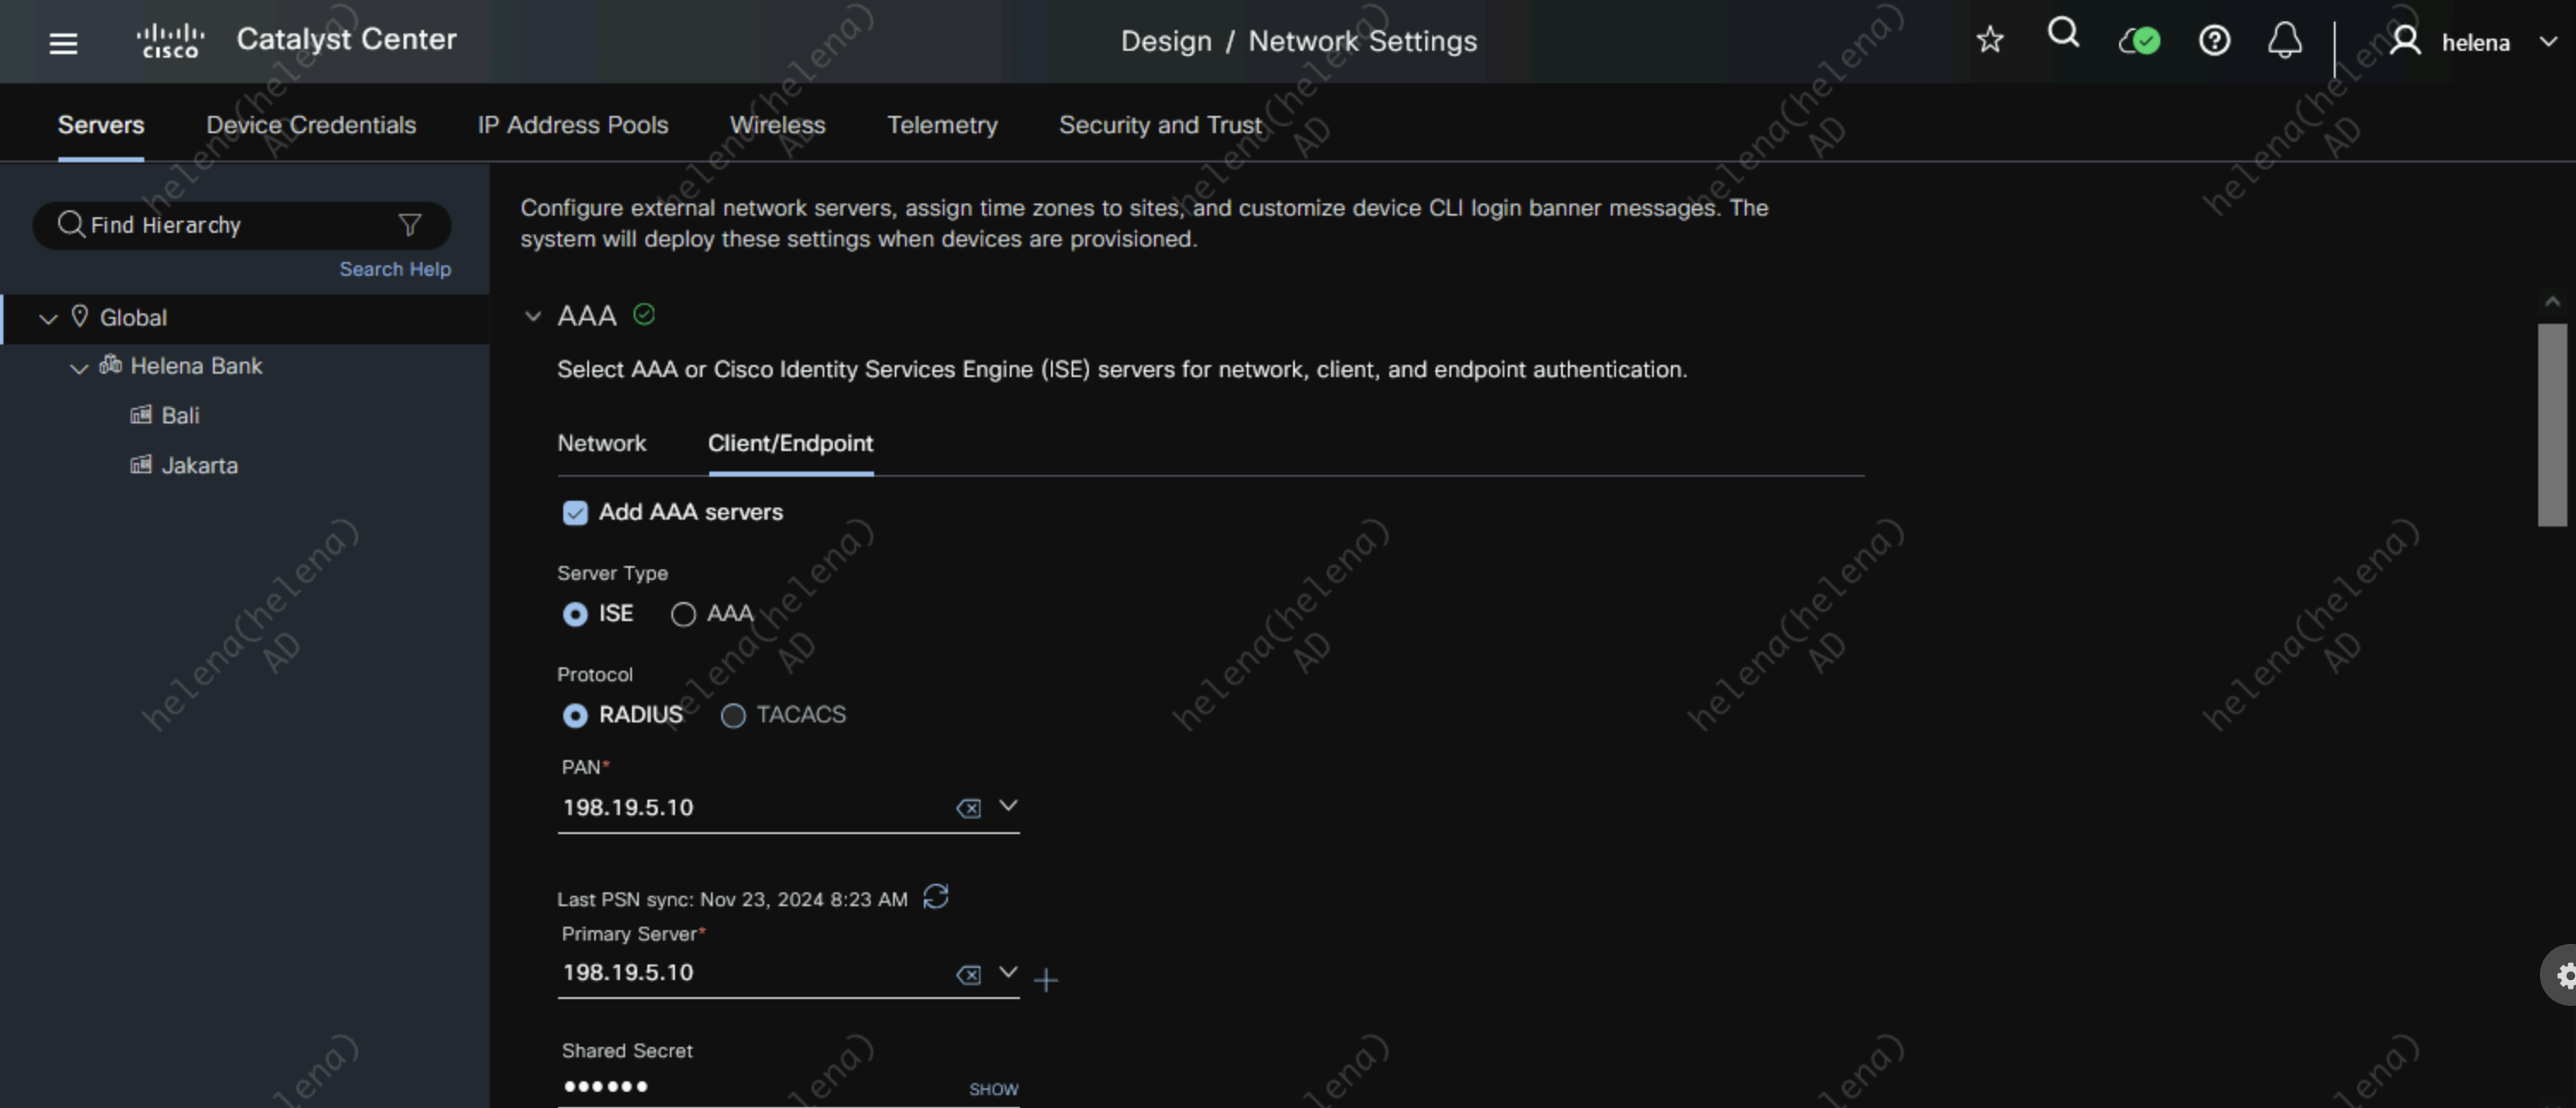
And for Client/Endpoint we select RADIUS
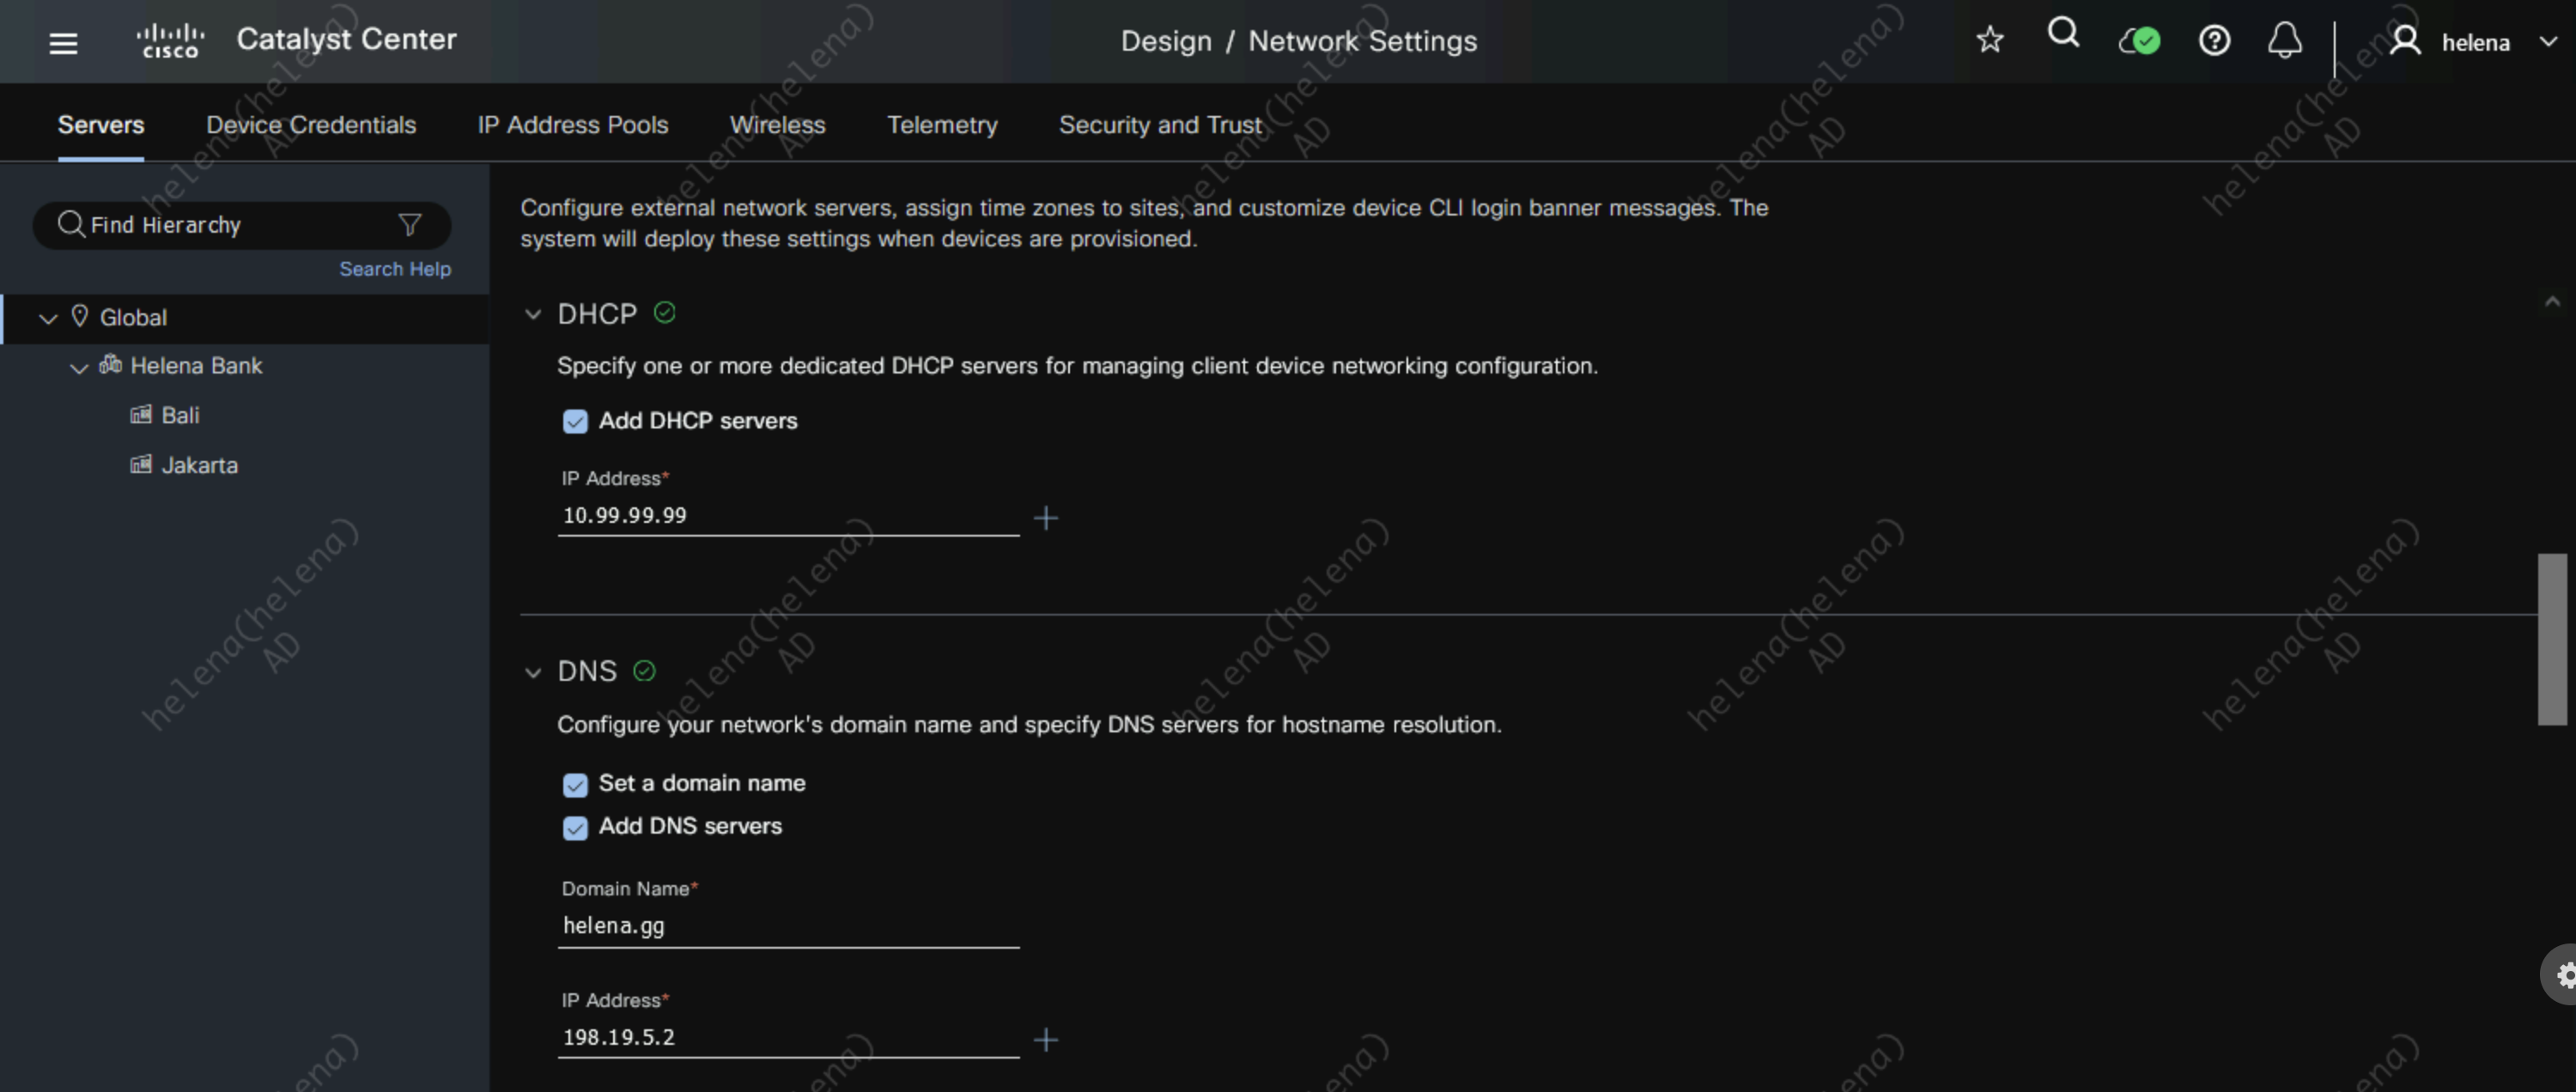
Then configure the DHCP and DNS Servers
Next on Device Credentials, we configure the default CLI and SNMP credentials to access our NAD

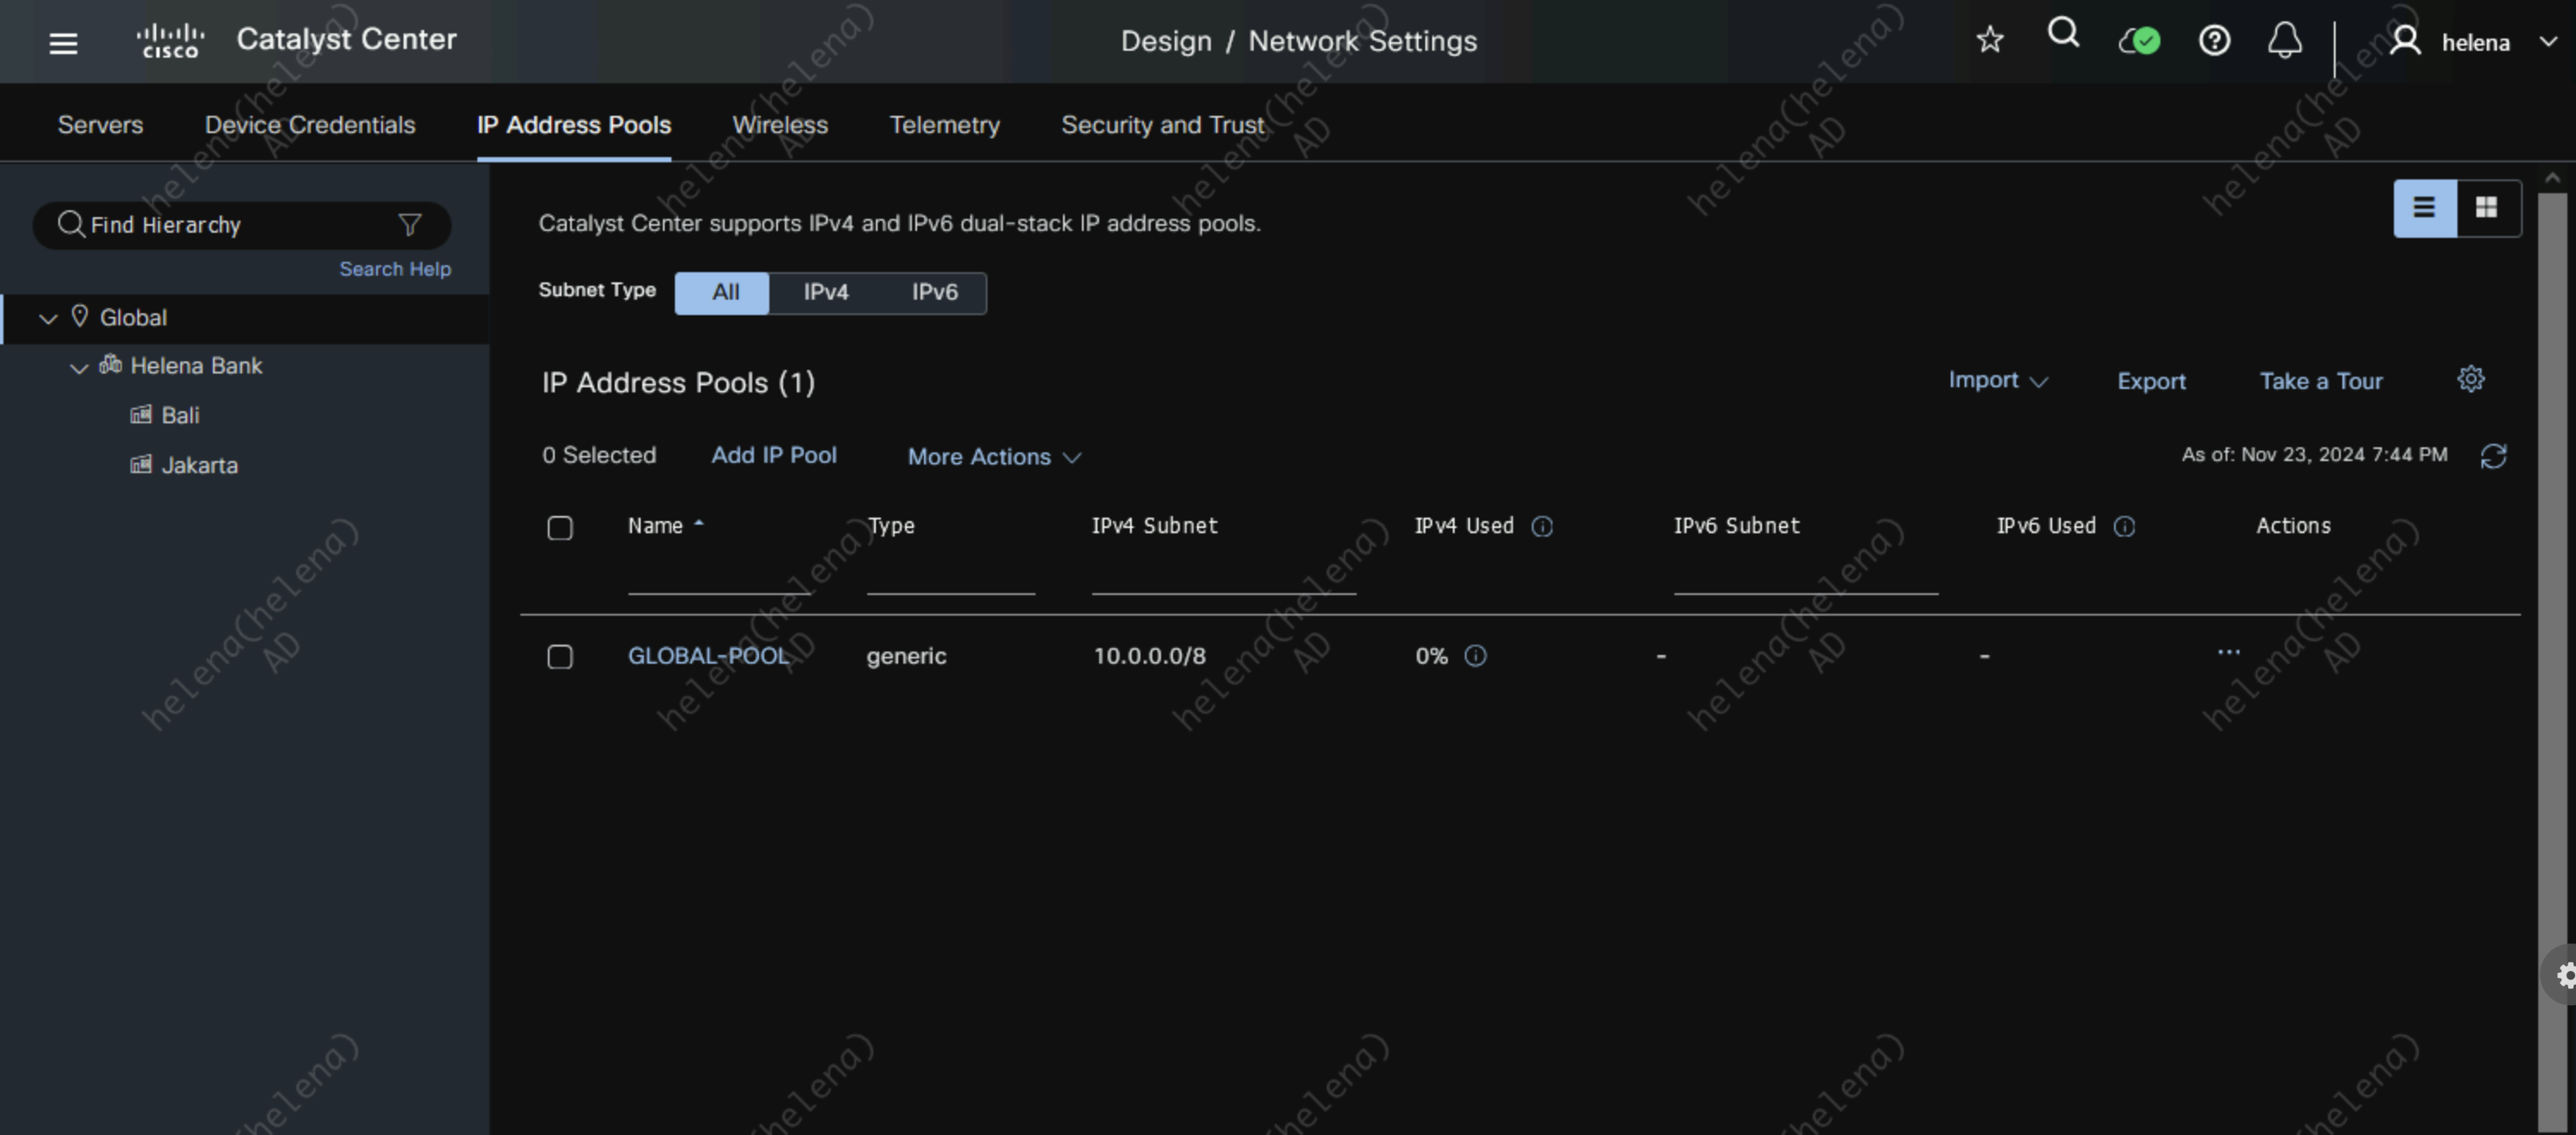
Next on IP Address Pools, we create a 10.0.0.0/8 global pool that we will later reserve for each site
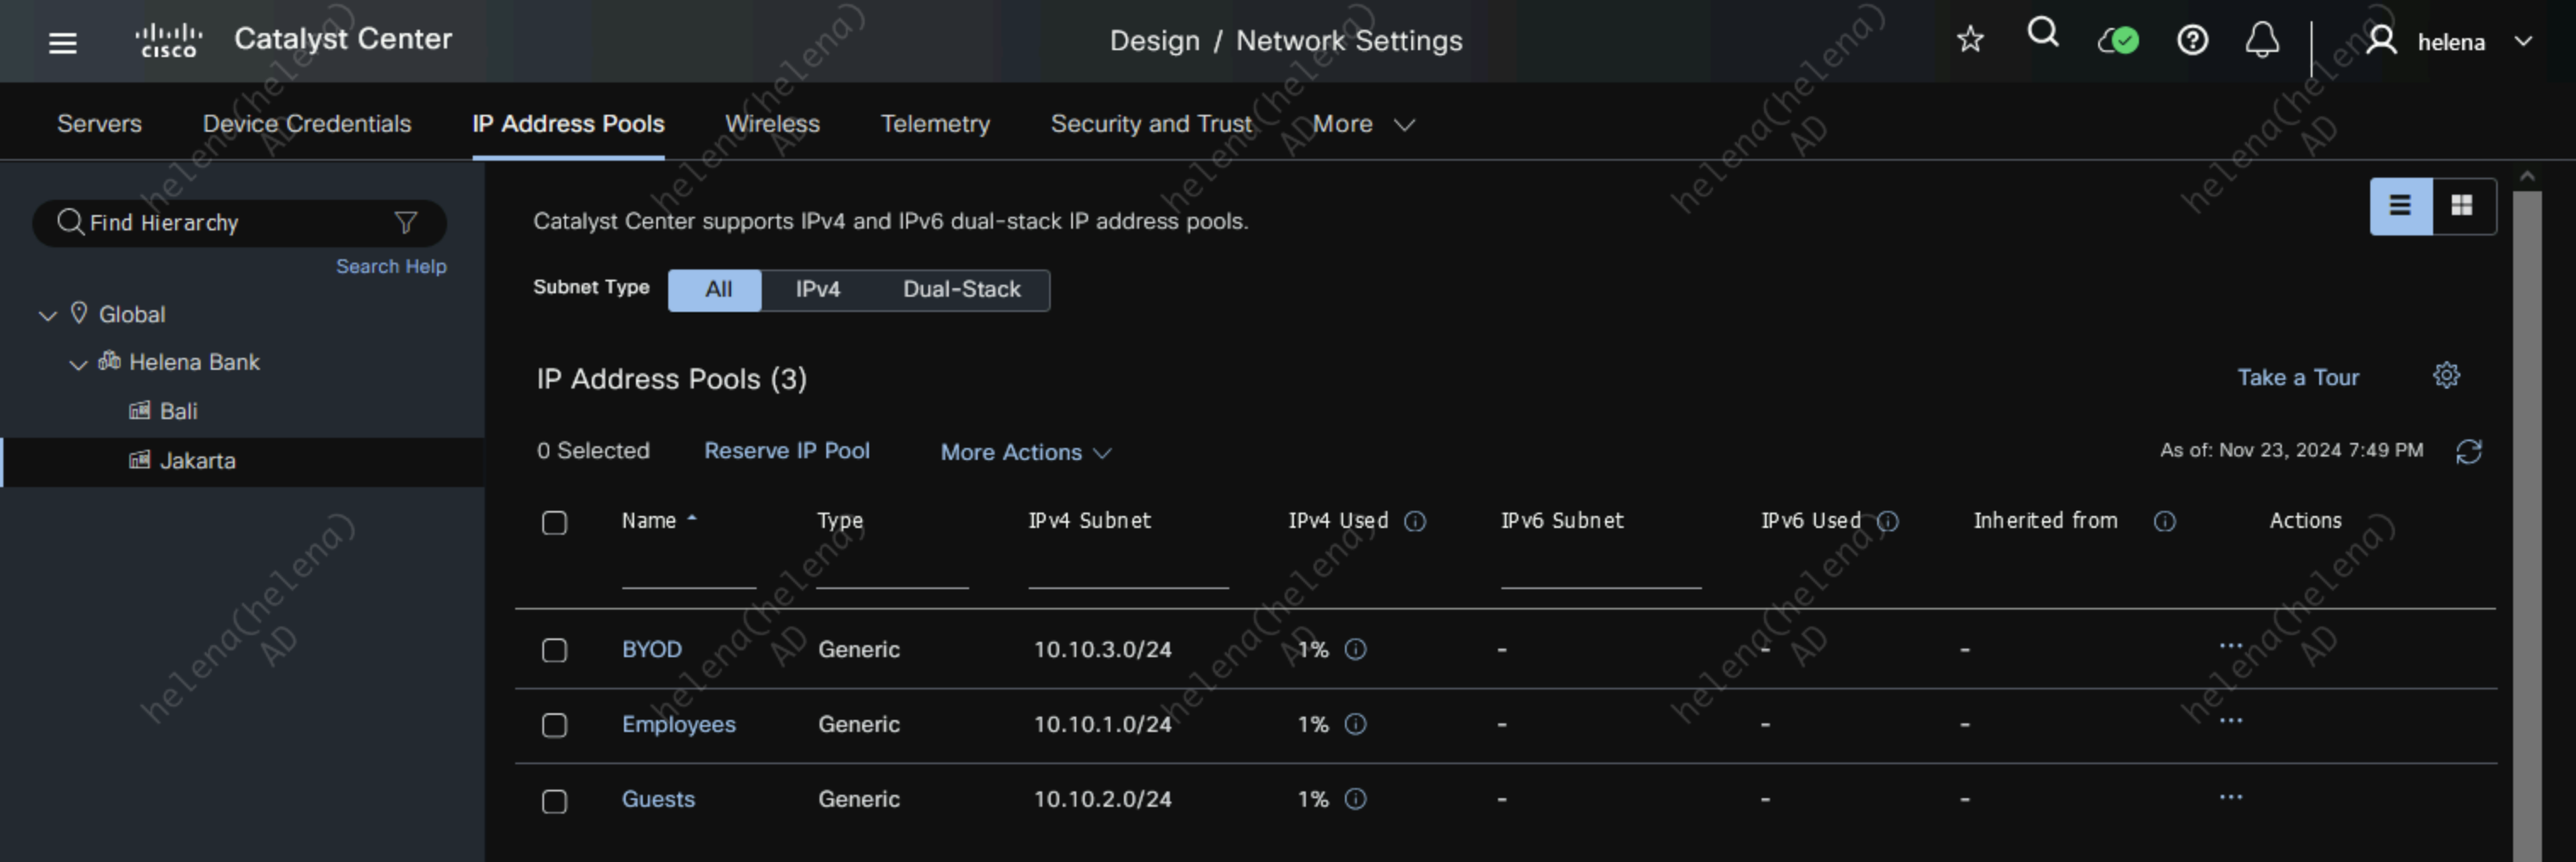
Now on Jakarta Site, here we create 3 IP Address Reserve Pools for this site
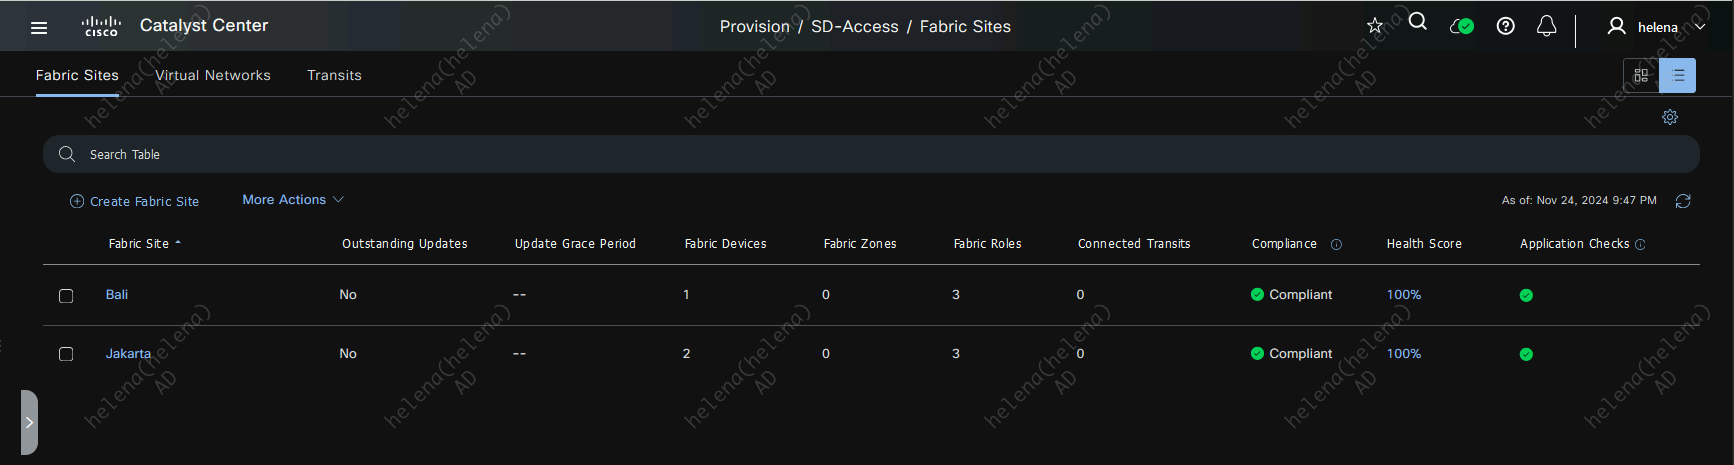
Creating Fabrics
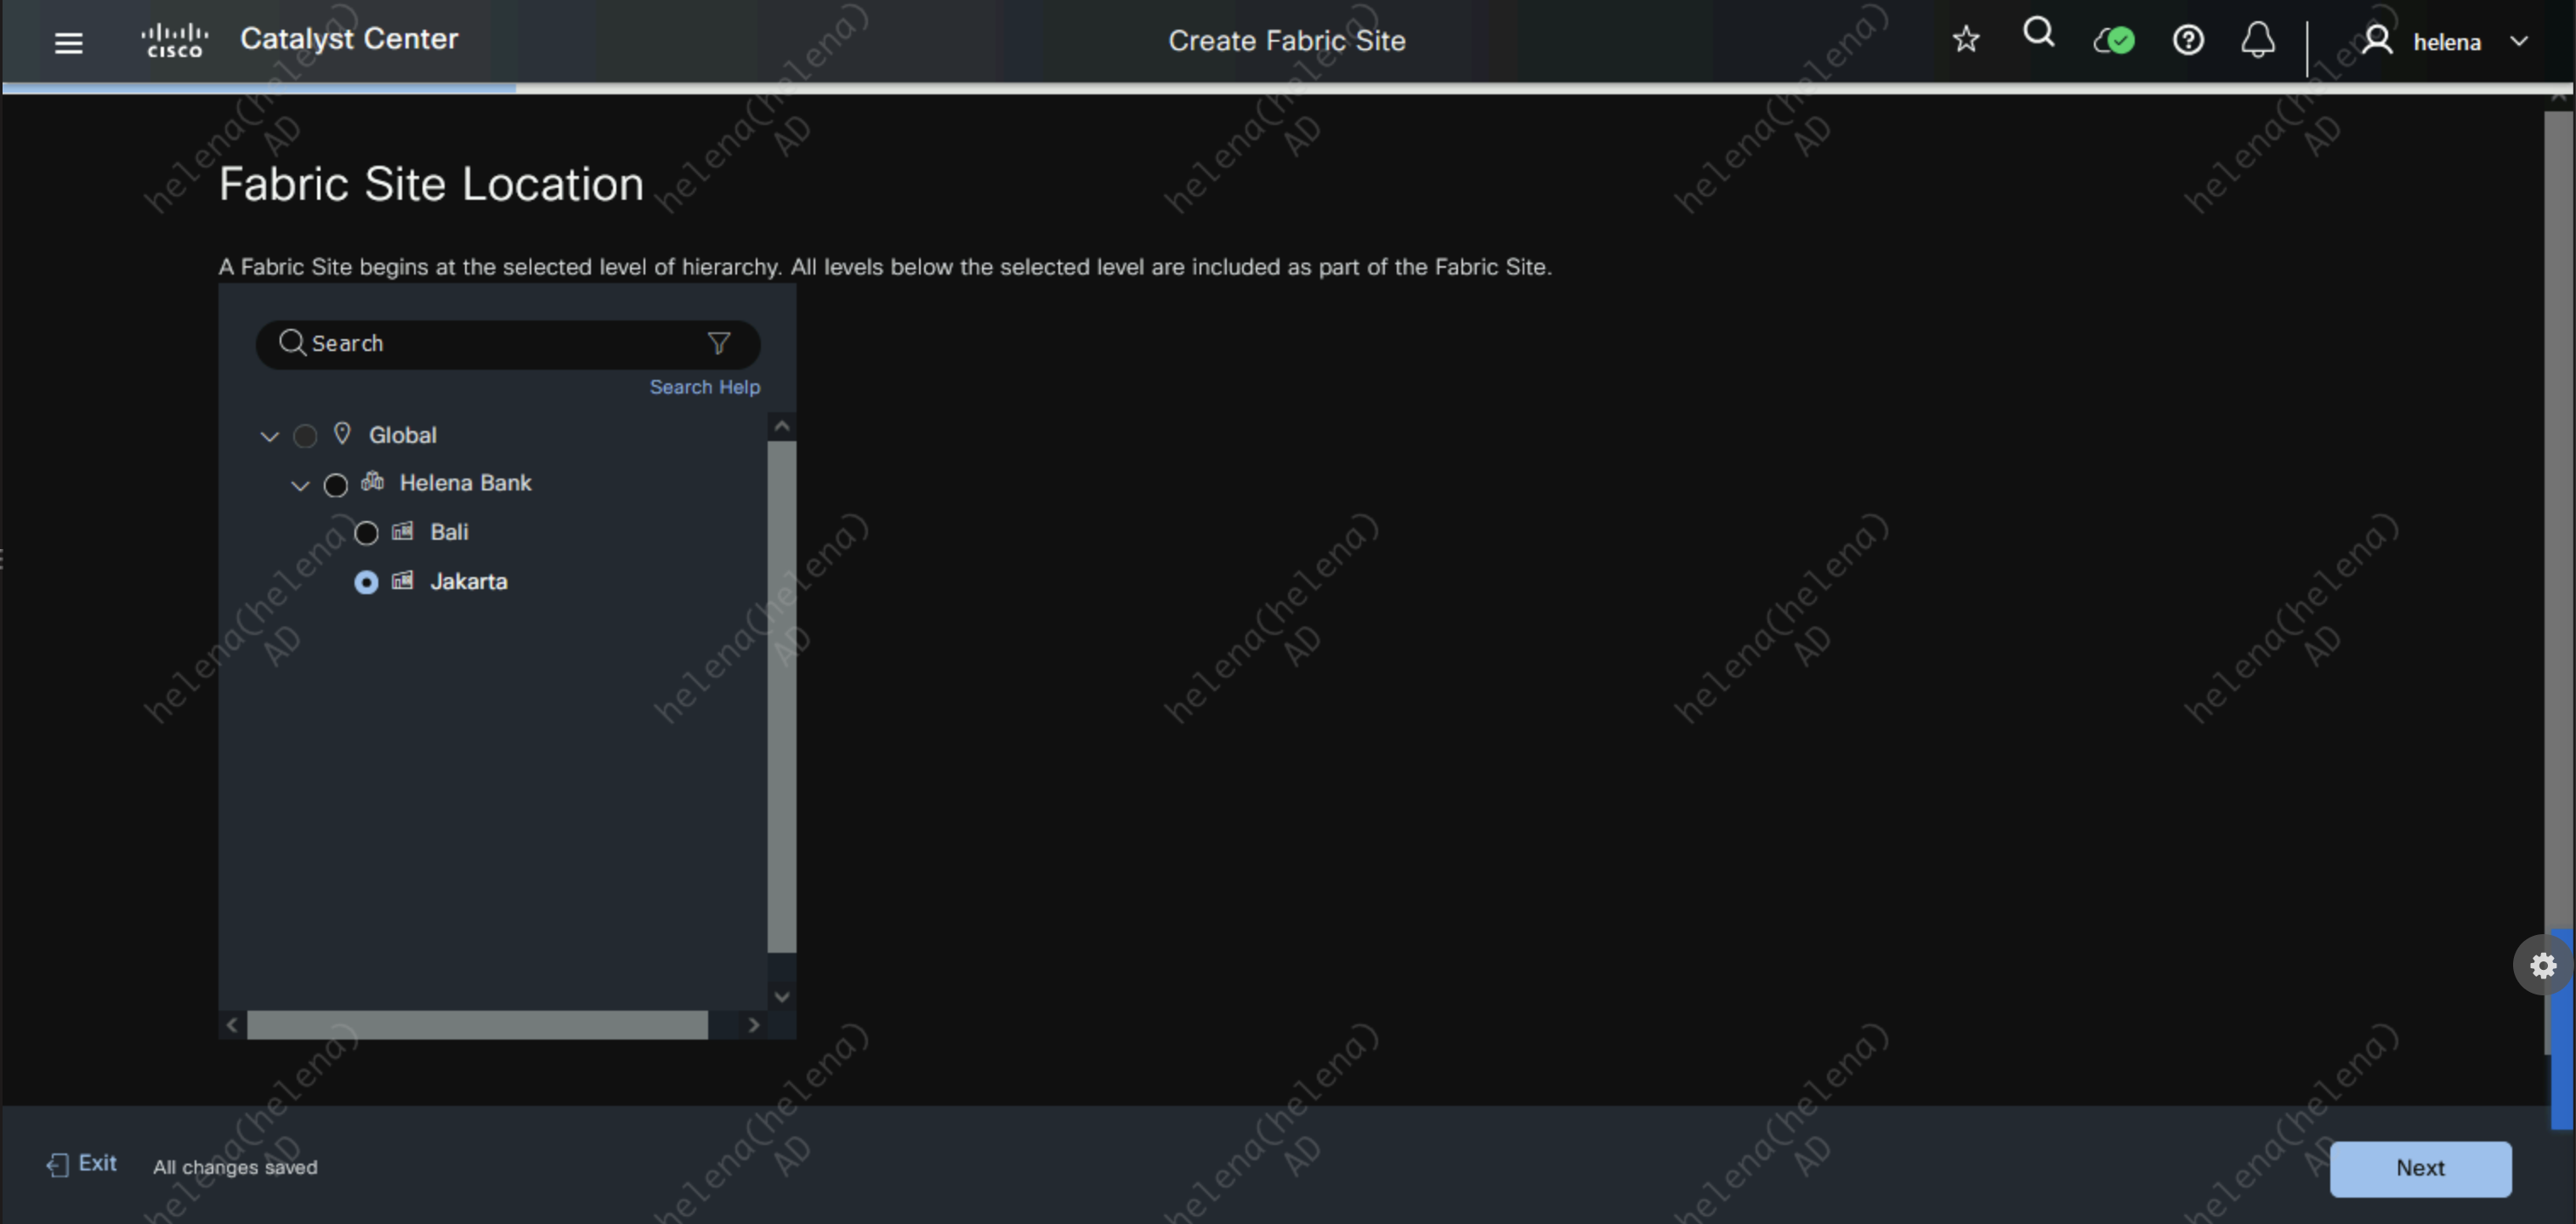
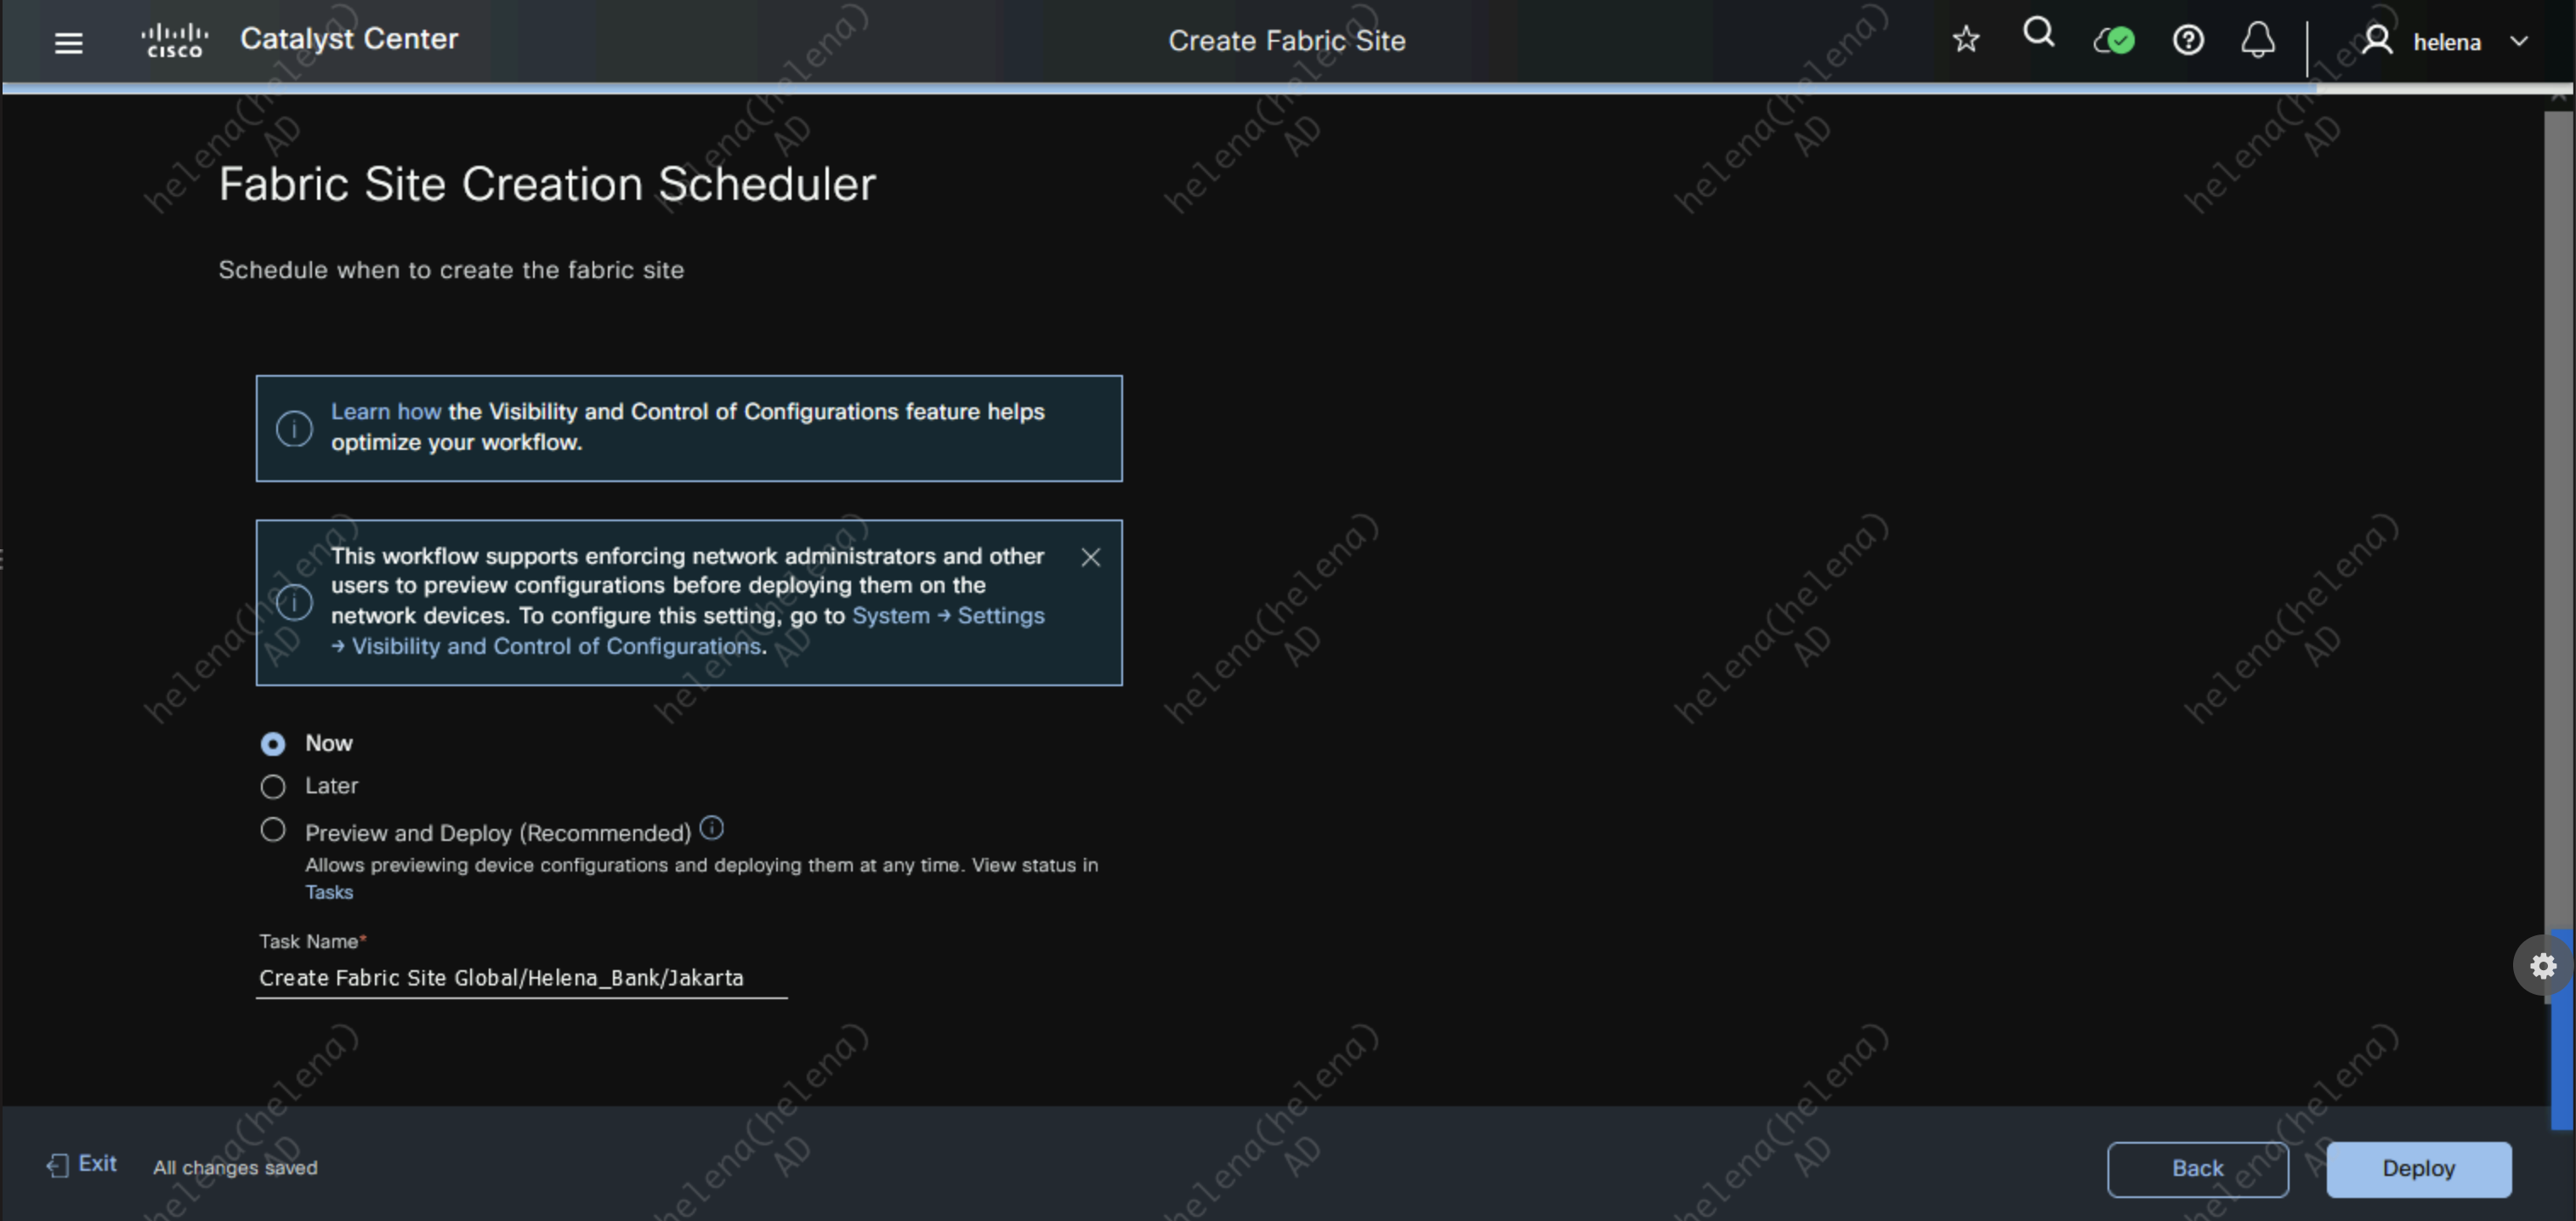
On Provision » Fabric Sites, hit create fabric on Jakarta Site
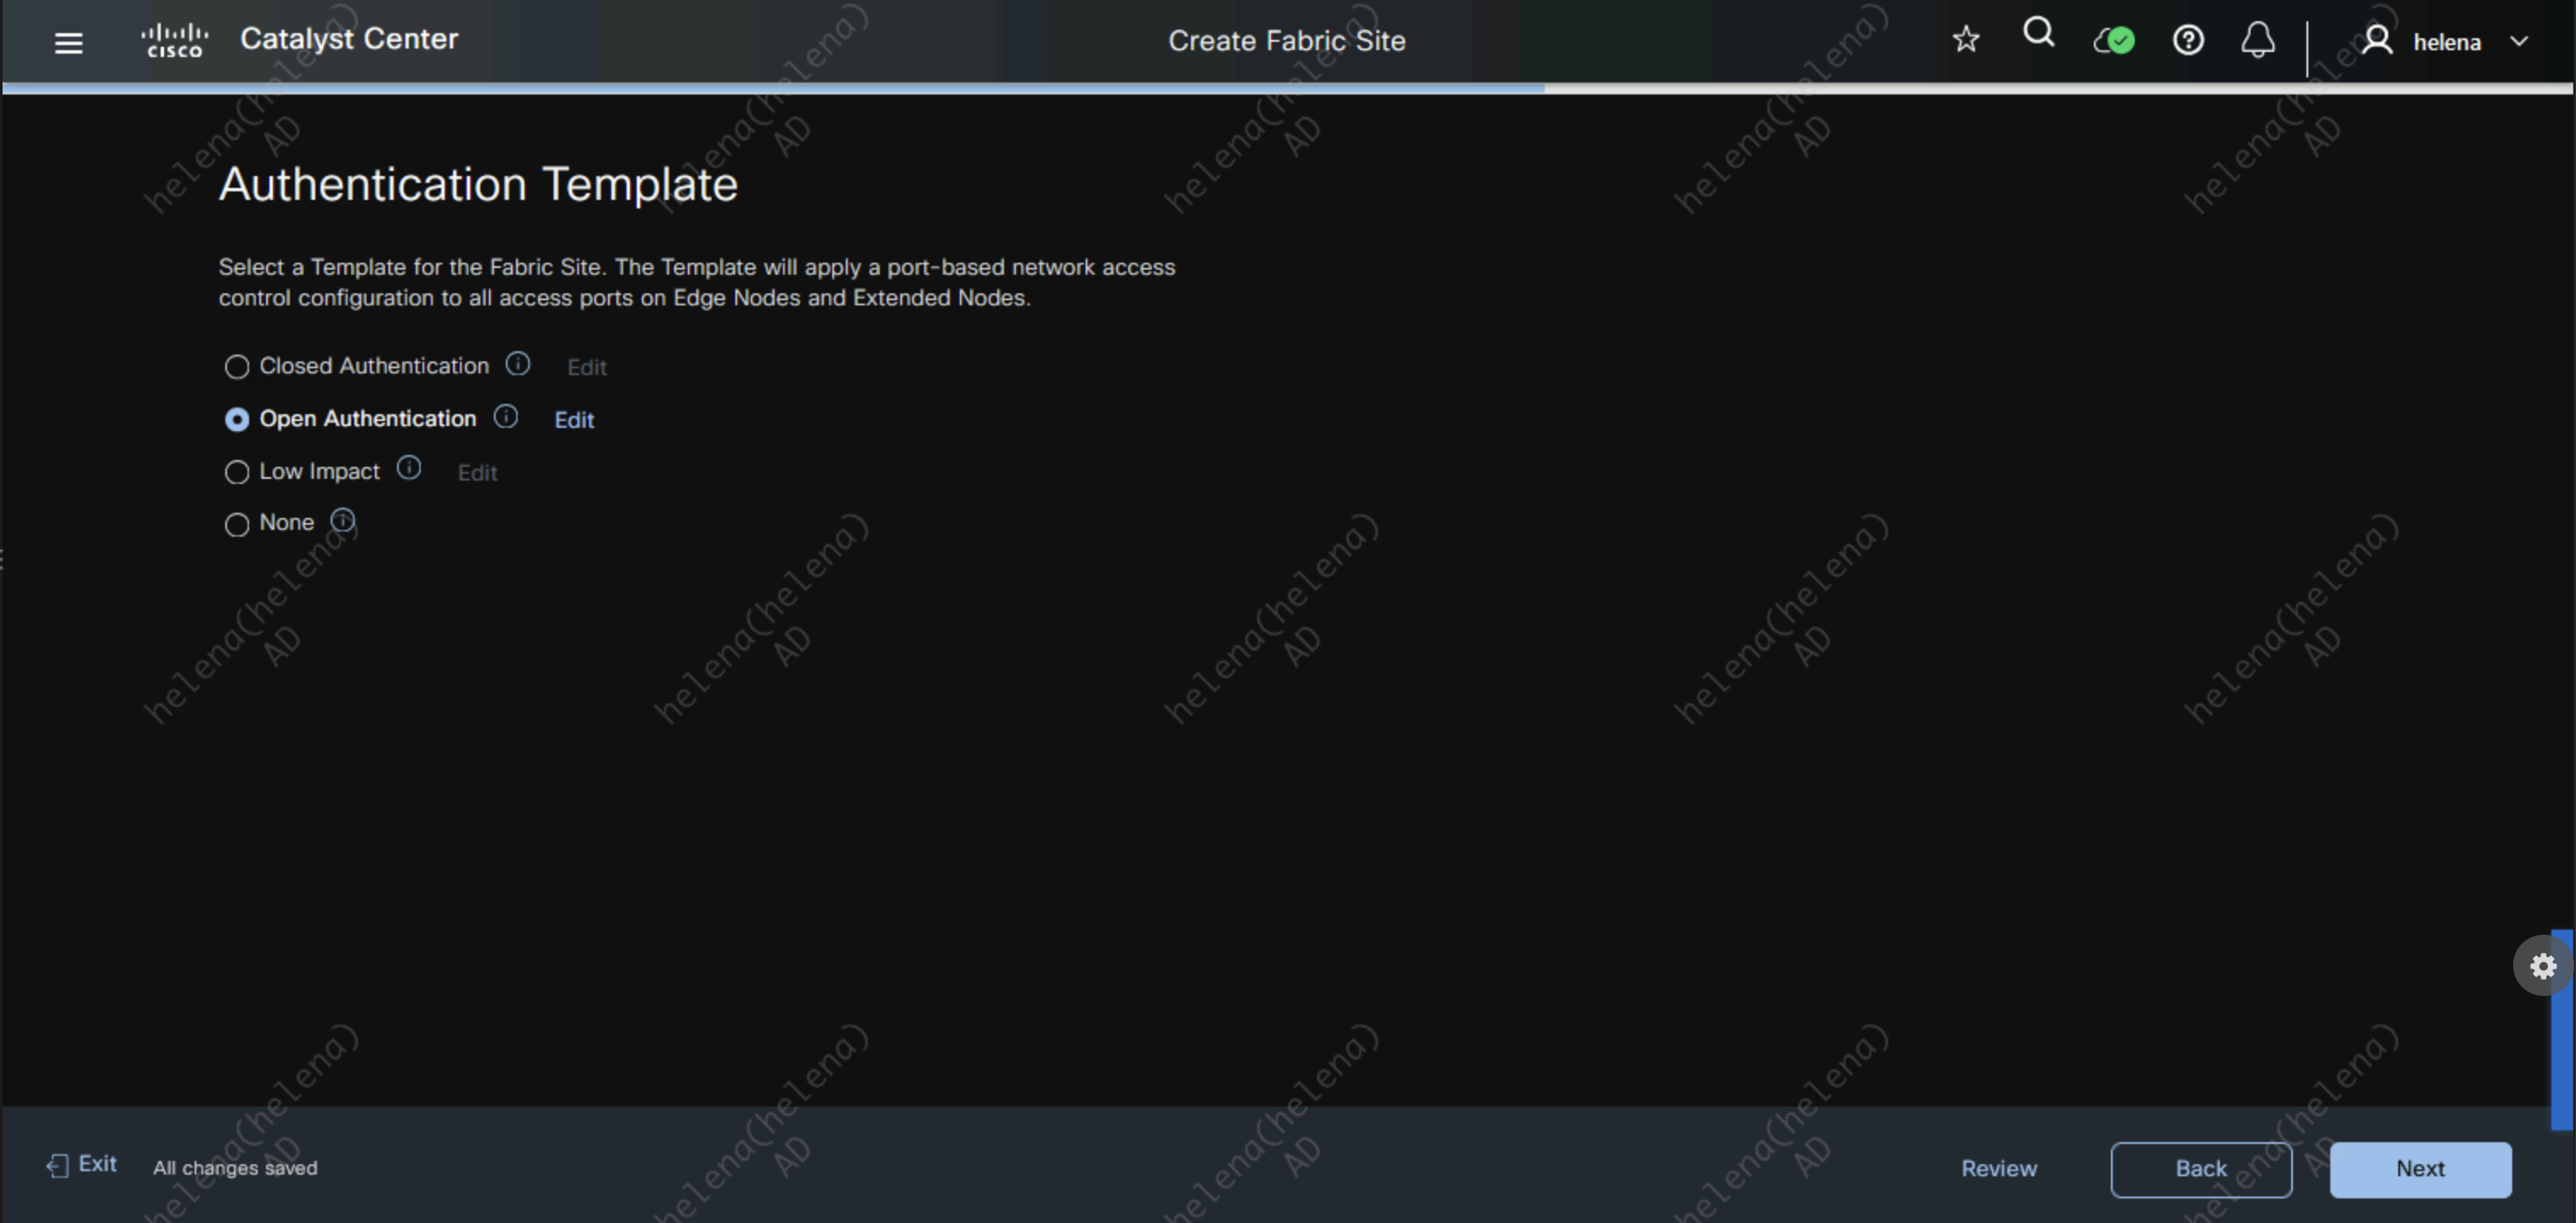
Select the Open Authentication so all edge ports are set to authenticate using Dot1x but still being able to get limited network access before like DHCP and DNS
For Fabric Zone, we’ll skip because we dont need it yet

Then hit deploy to create the fabric
Creating Virtual Networks
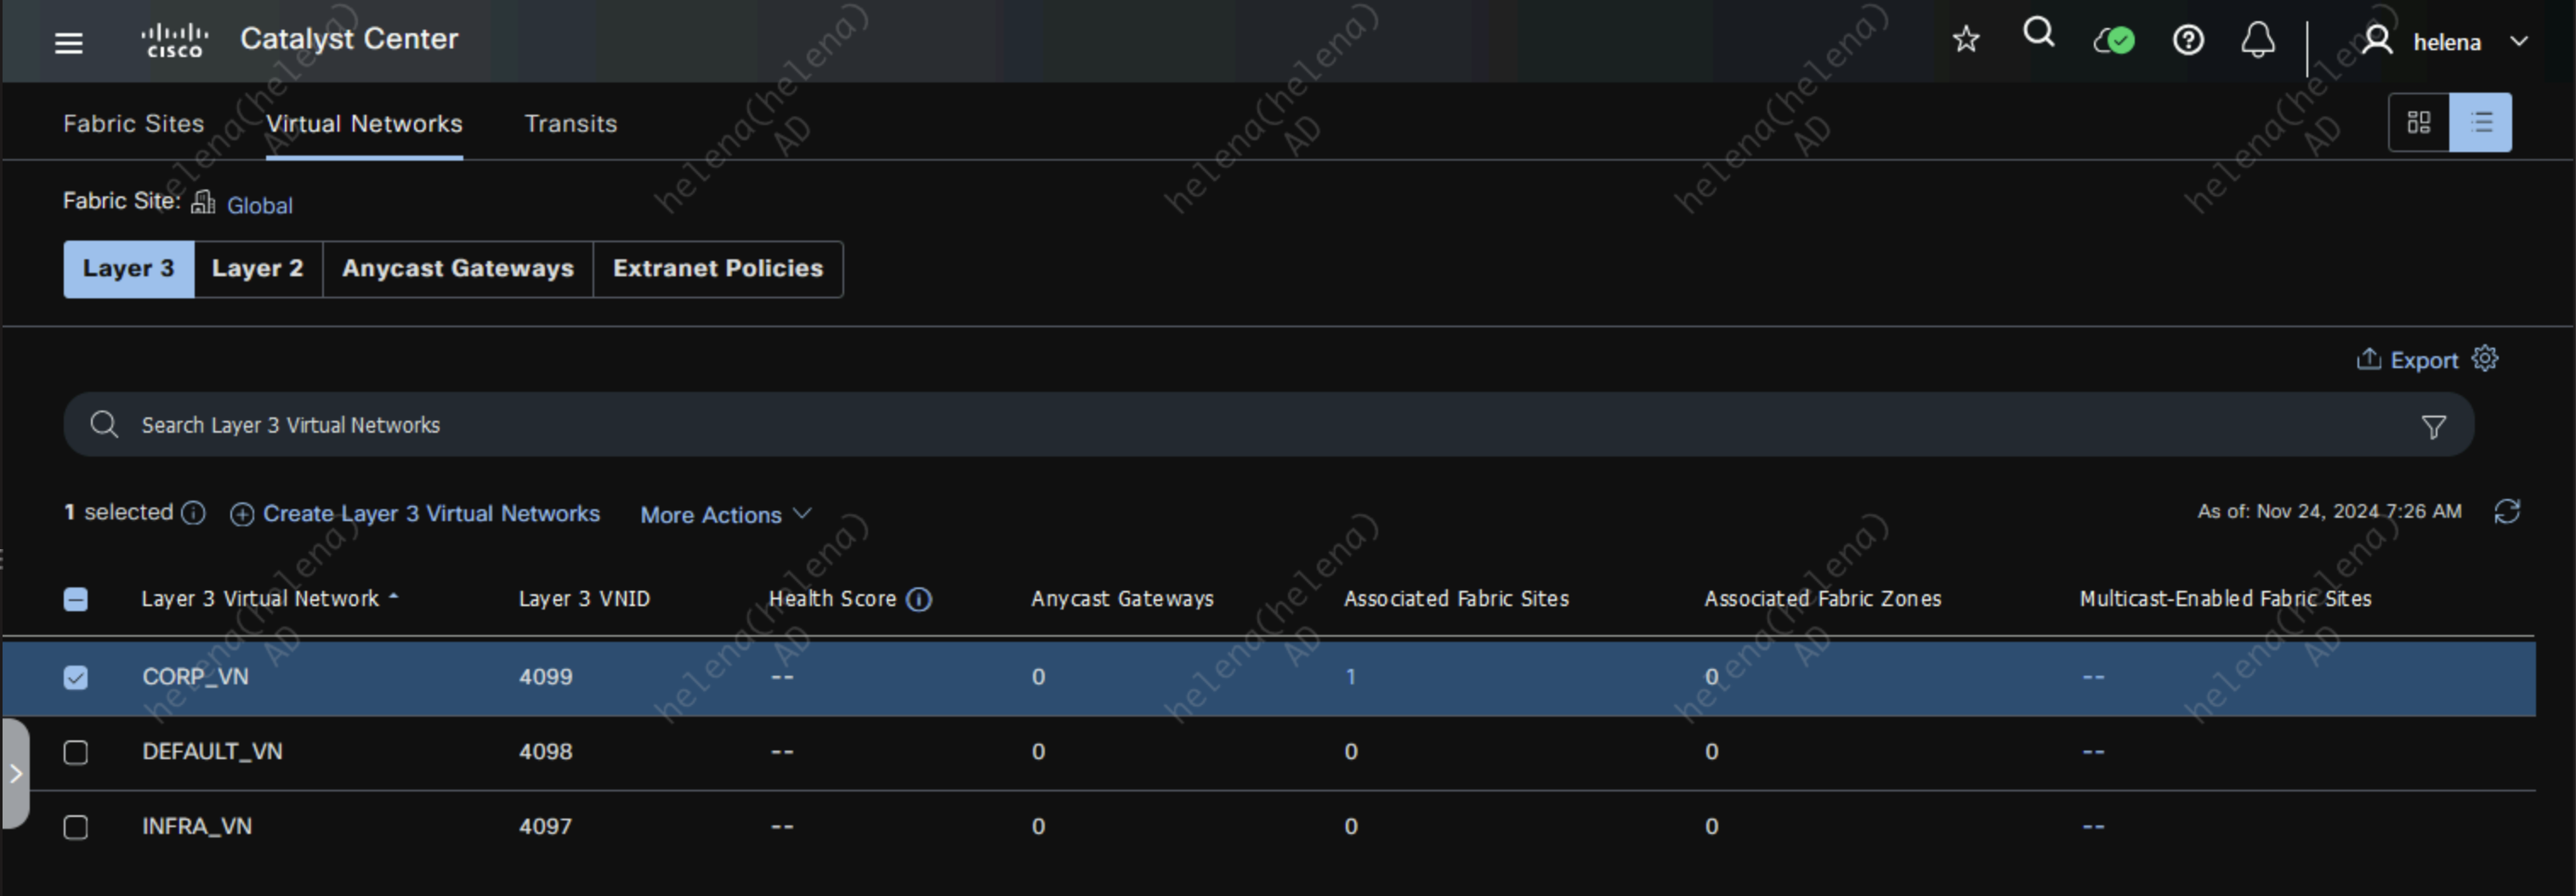
On Provision » Virtual Networks, lets create a Layer 3 Virtual Network (VRF)
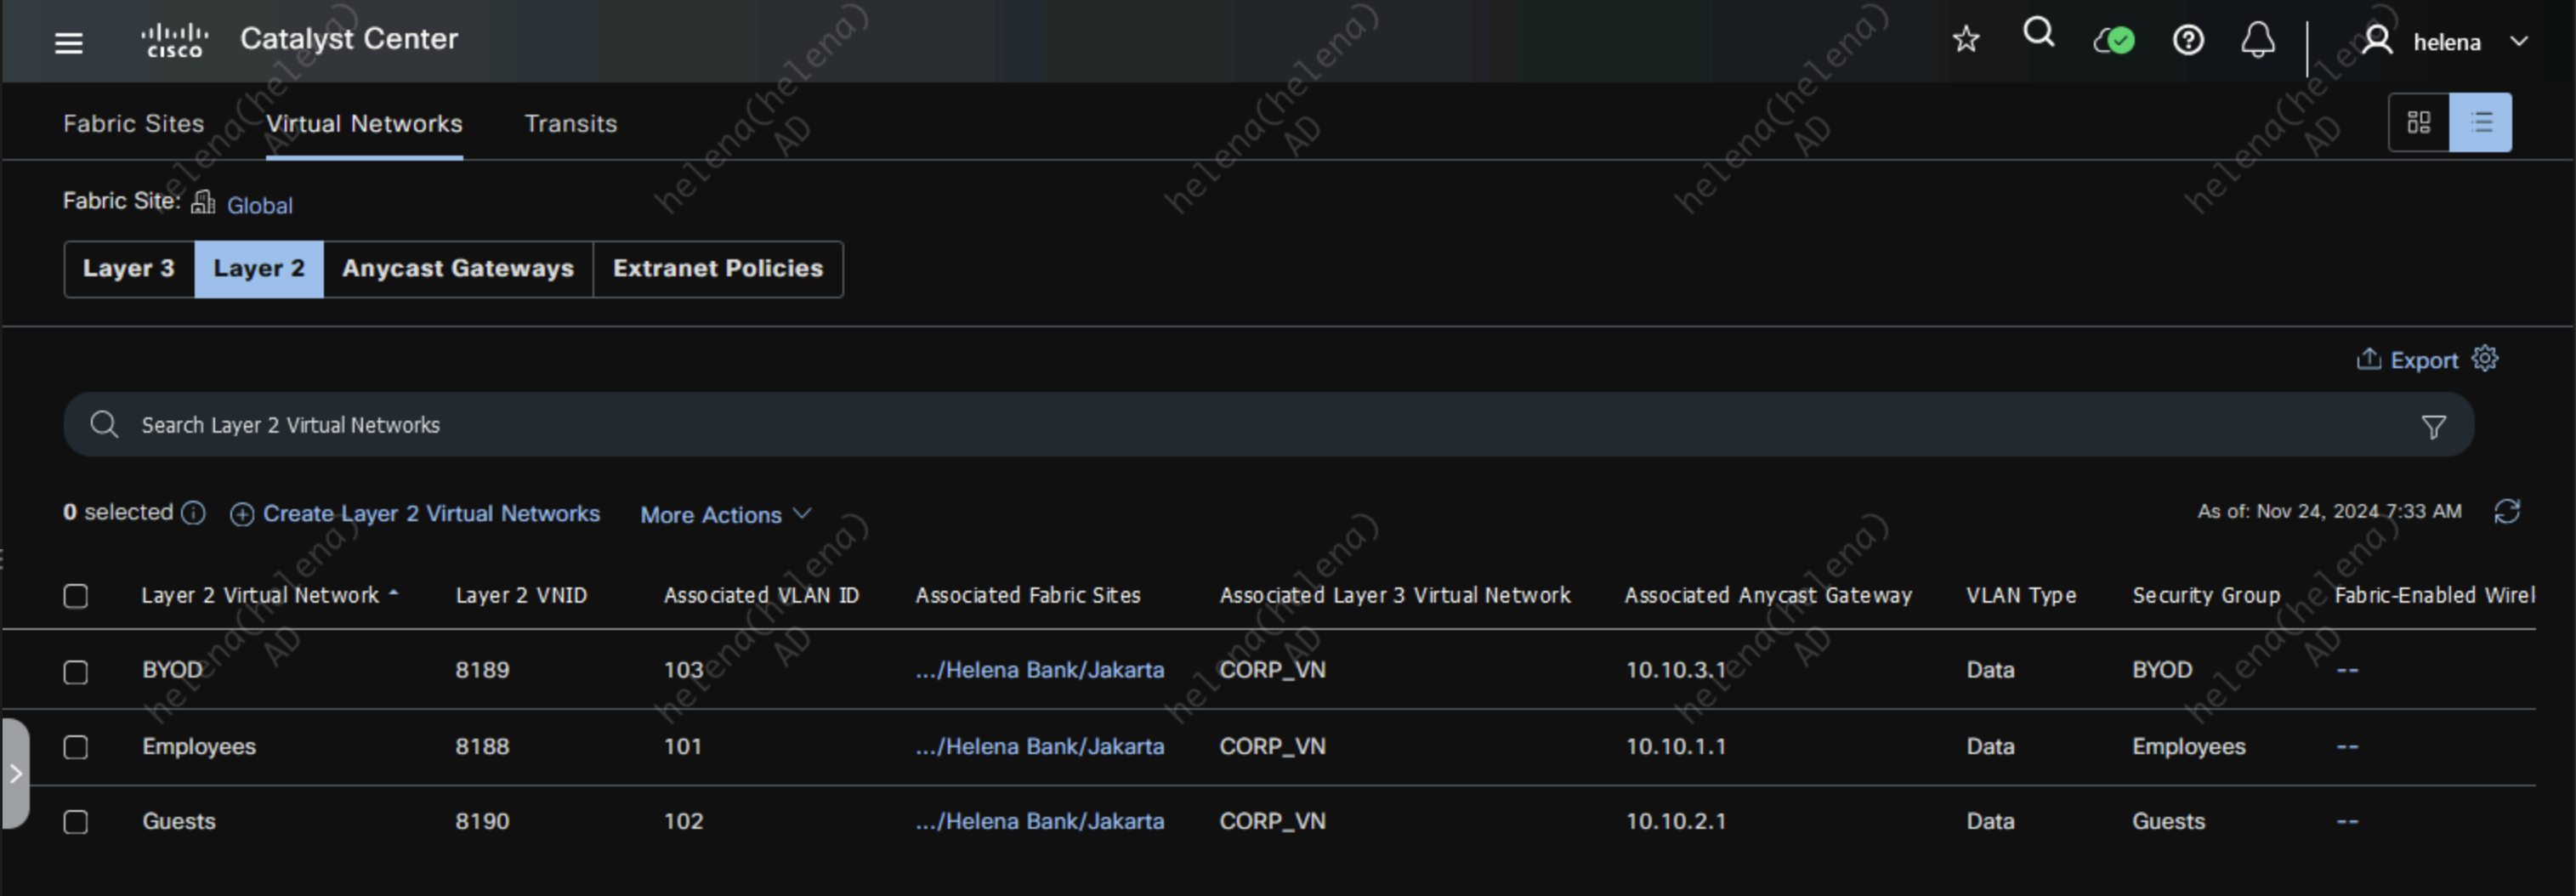
Next we create an Anycast Gateway that’s bond to a Layer 2 Virtual Network, this is so we have a Layer 2 Virtual Network Interface along with the VLAN created on the NAD. Here each Layer 2 network is mapped with the reserved IP Address Pool created earlier
Discovering Devices
Firstly make sure all NADs can access the DNAC and ISE

Here is the minimum configuration needed for NAD before joining DNAC
1
2
3
4
5
6
7
8
9
10
11
12
13
14
15
16
17
18
19
20
21
22
23
24
25
26
27
28
29
30
## Enable Loopback0
int loopback0
 ip add 10.100.100.2 255.255.255.255

## Enable Uplink Interface
int vlan 1001
 ip add 10.100.2.1 255.255.255.0

int Gi1/0/1
 switchport trunk allowed vlan 1001

## Local User
username helena privilege 15 secret helena
enable secret helena

## Enable SSH
ip domain name helena.gg
crypto key generate rsa modulus 1024

## Enable OSPF
ip routing
router ospf 1
 network 0.0.0.0 255.255.255.255 area0

## Enable SNMP
snmp-server community helena rw
snmp-server community helenaro ro

## Enable Netconf
netconf-yang
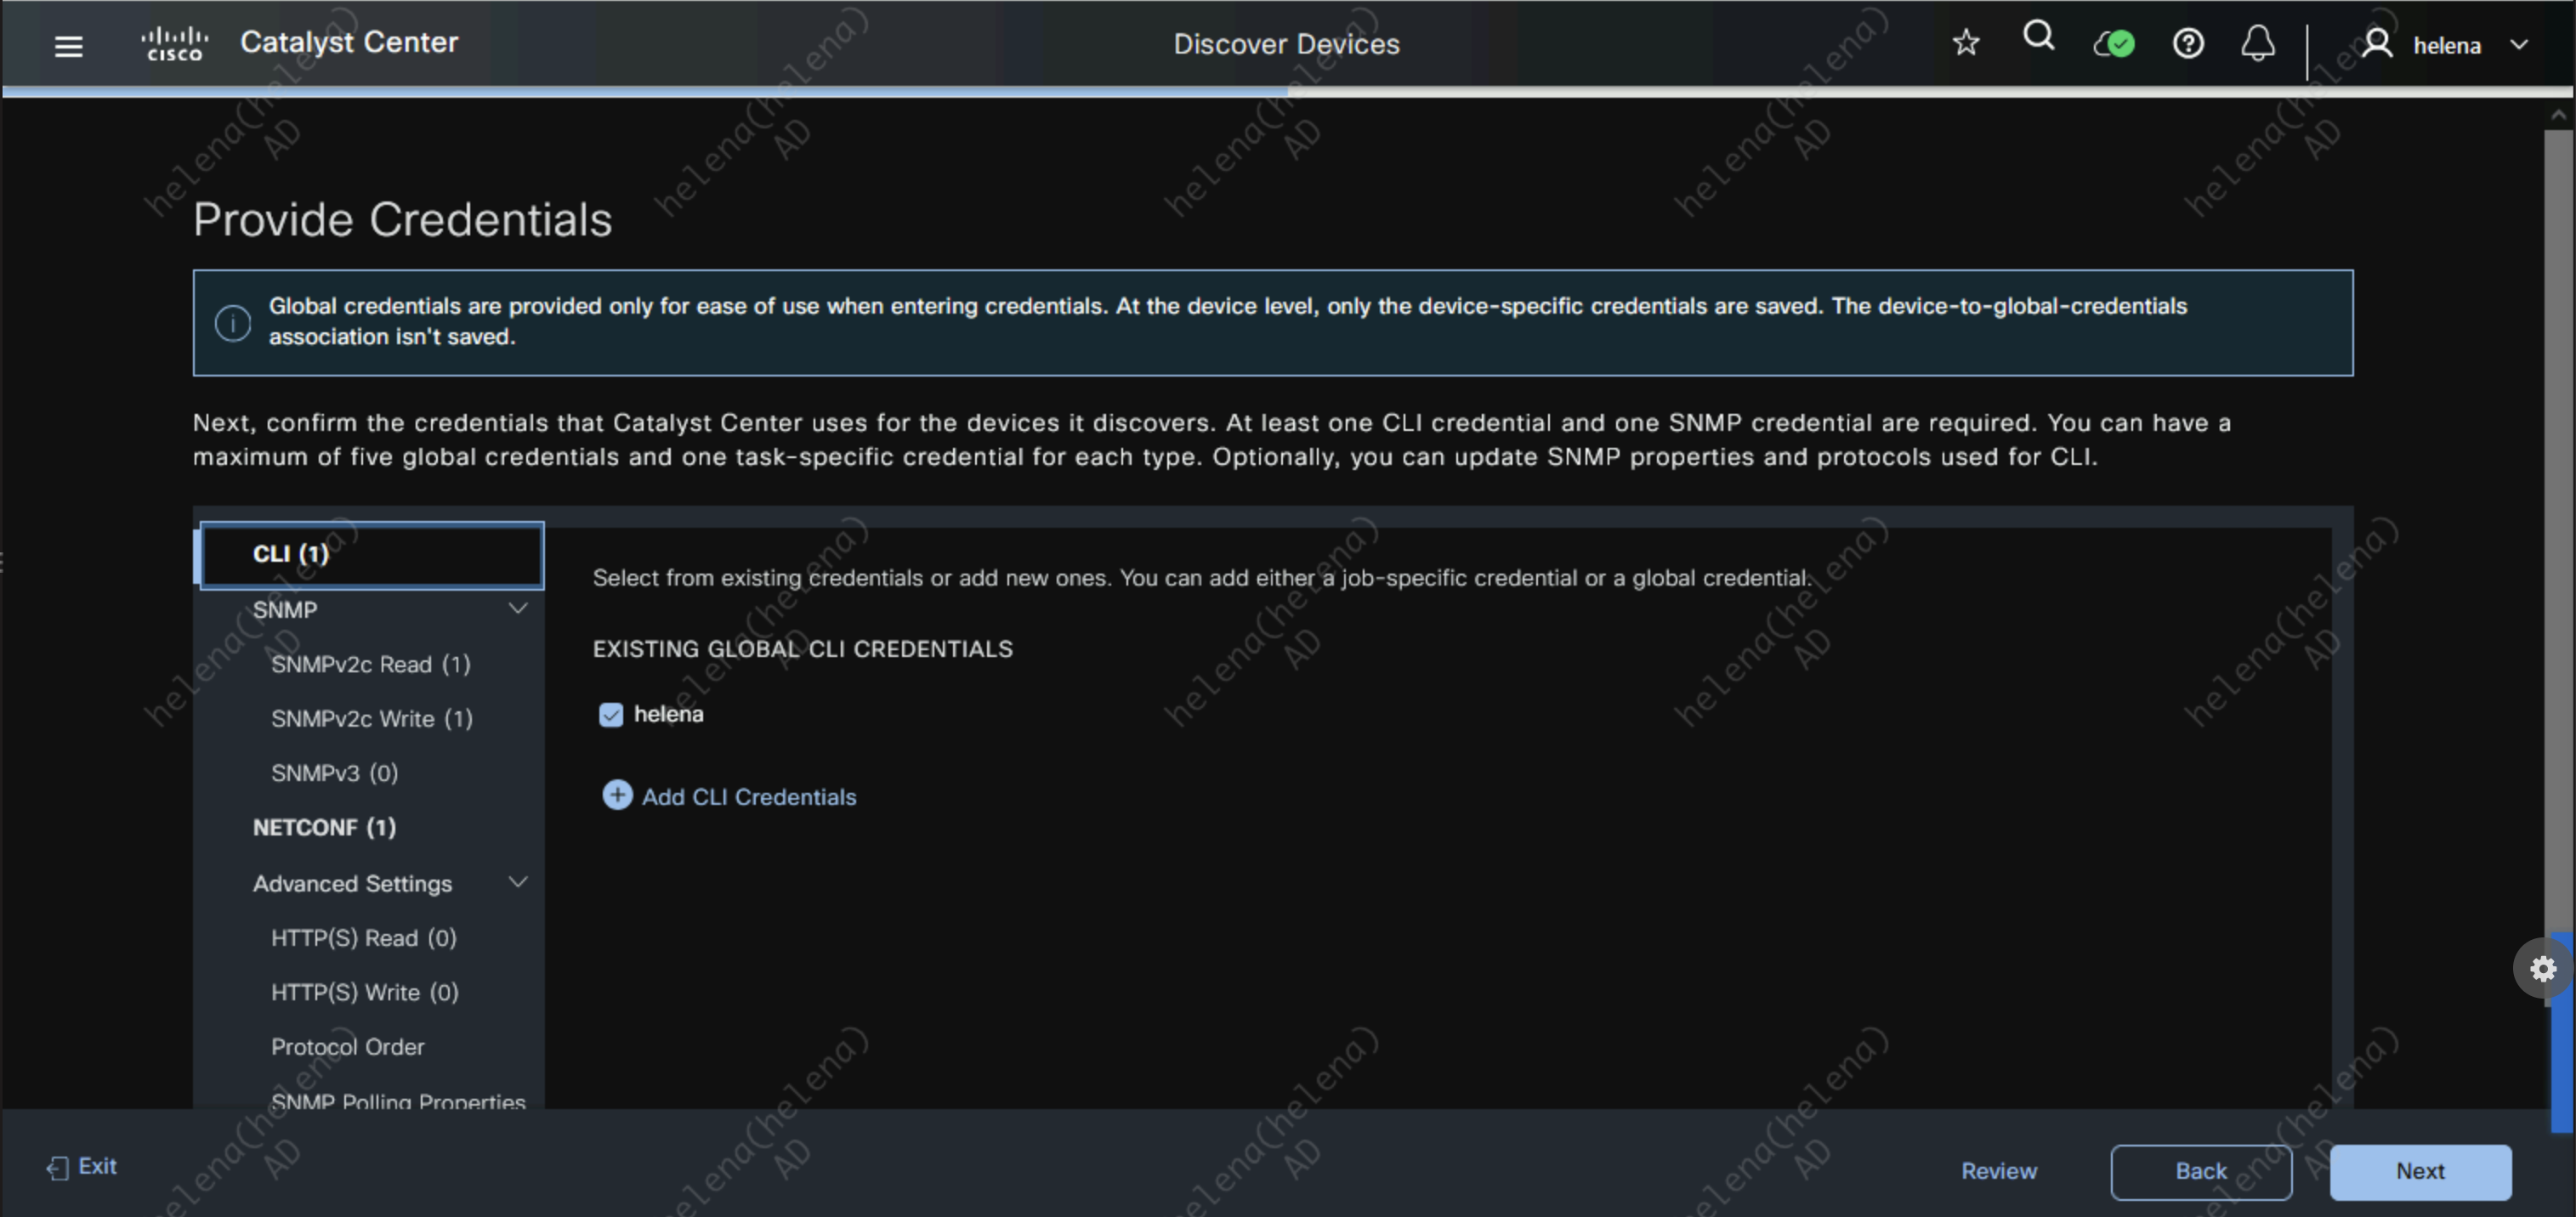
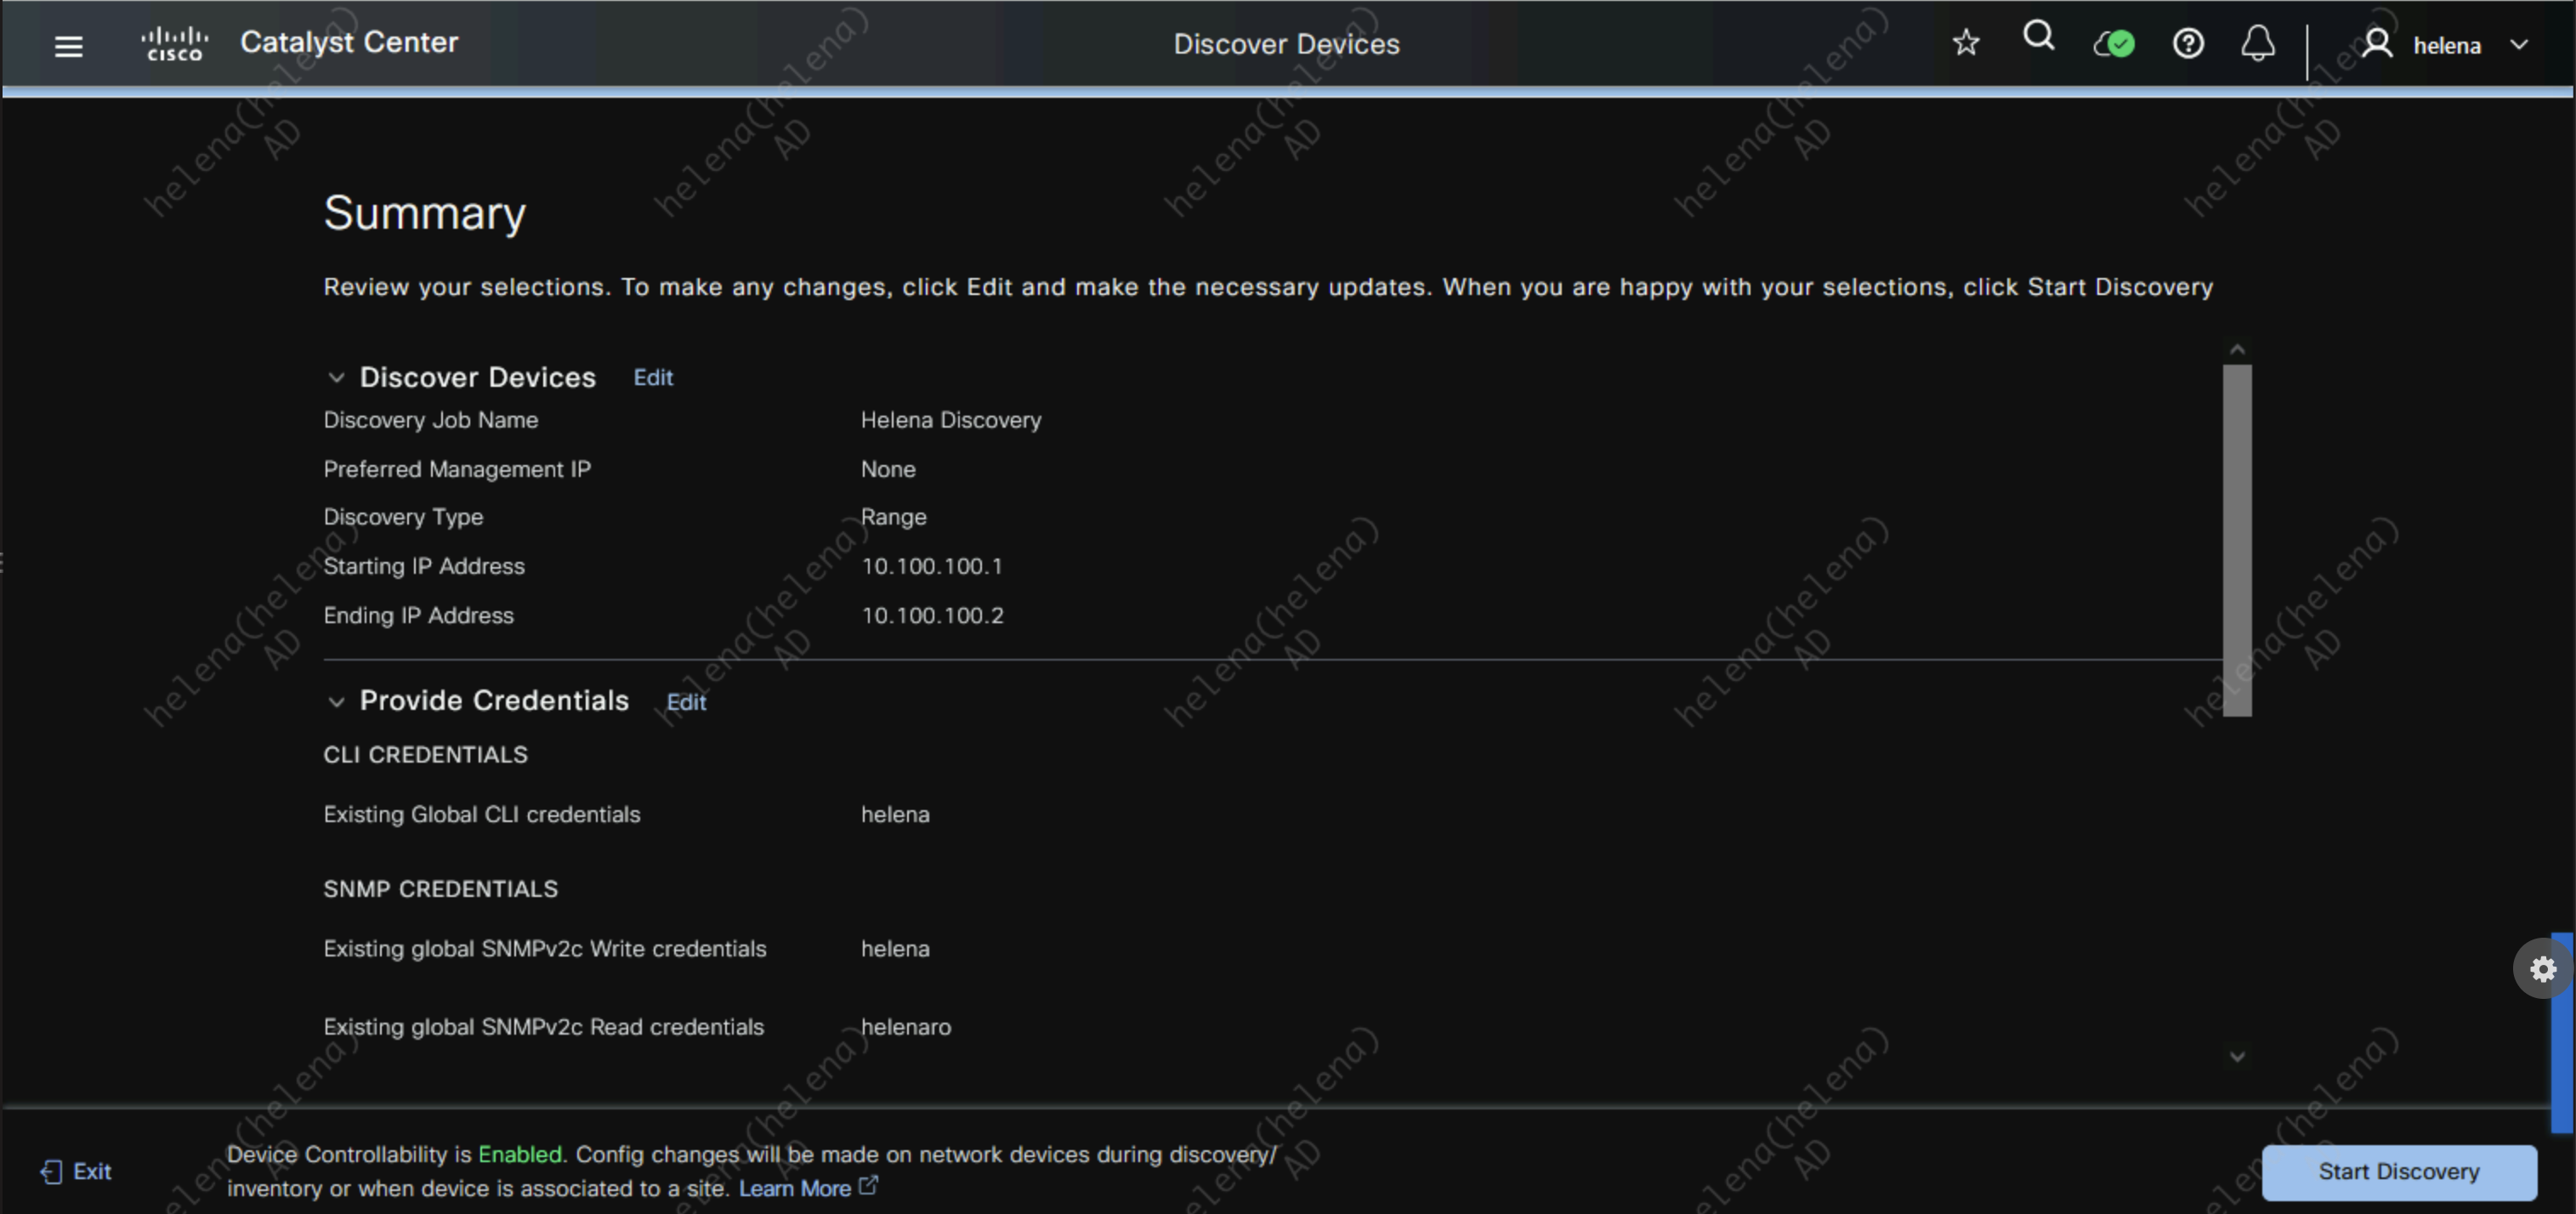
On Tools » Discovery, create a new Discovery Entry to discover 10.100.100.1 & 10.100.100.2

Then use the Credentials configured earlier for CLI and SNMP
Review then hit start
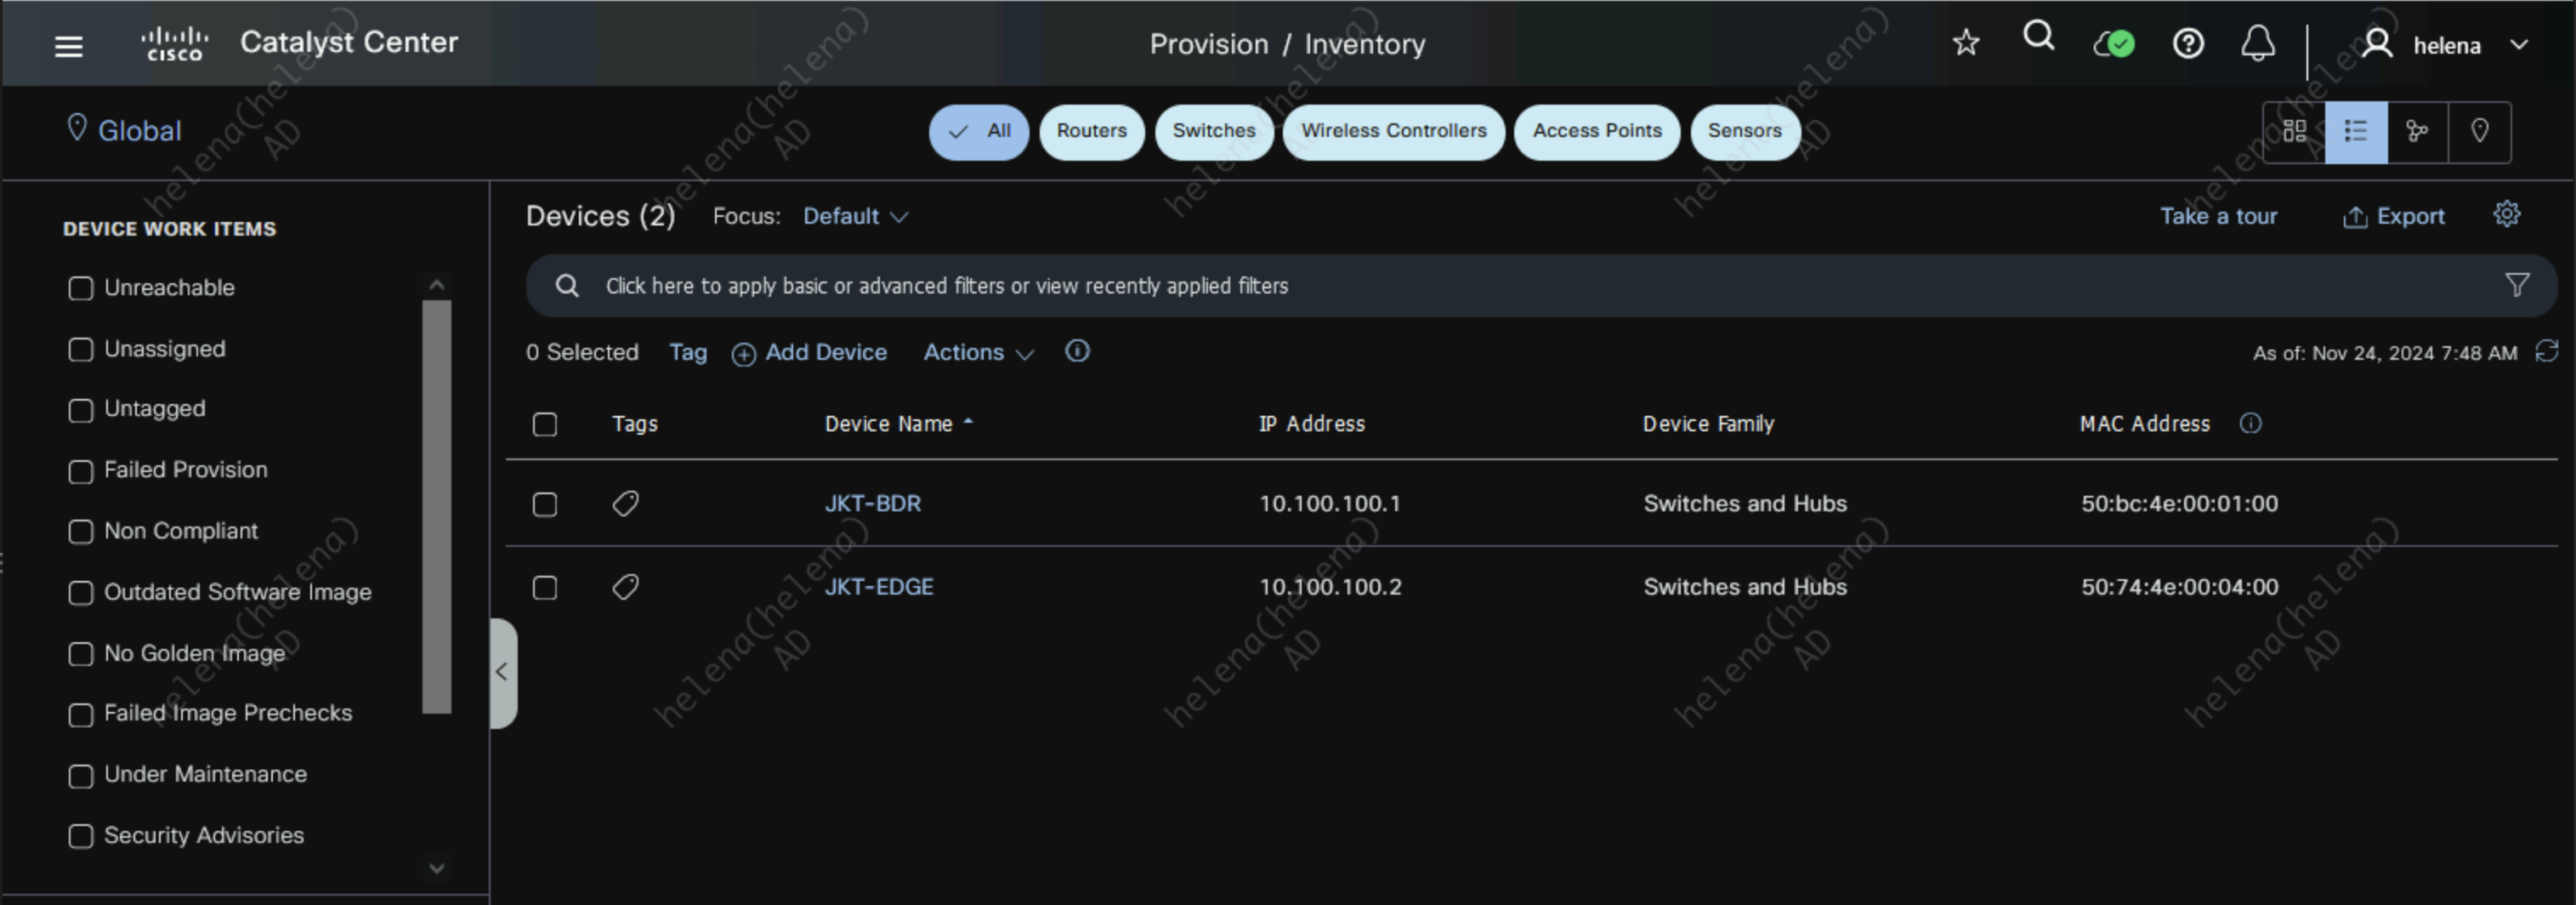
After a minute DNAC has successfully discovered these 2 devices

These devices now can be seen on Provision » Inventory
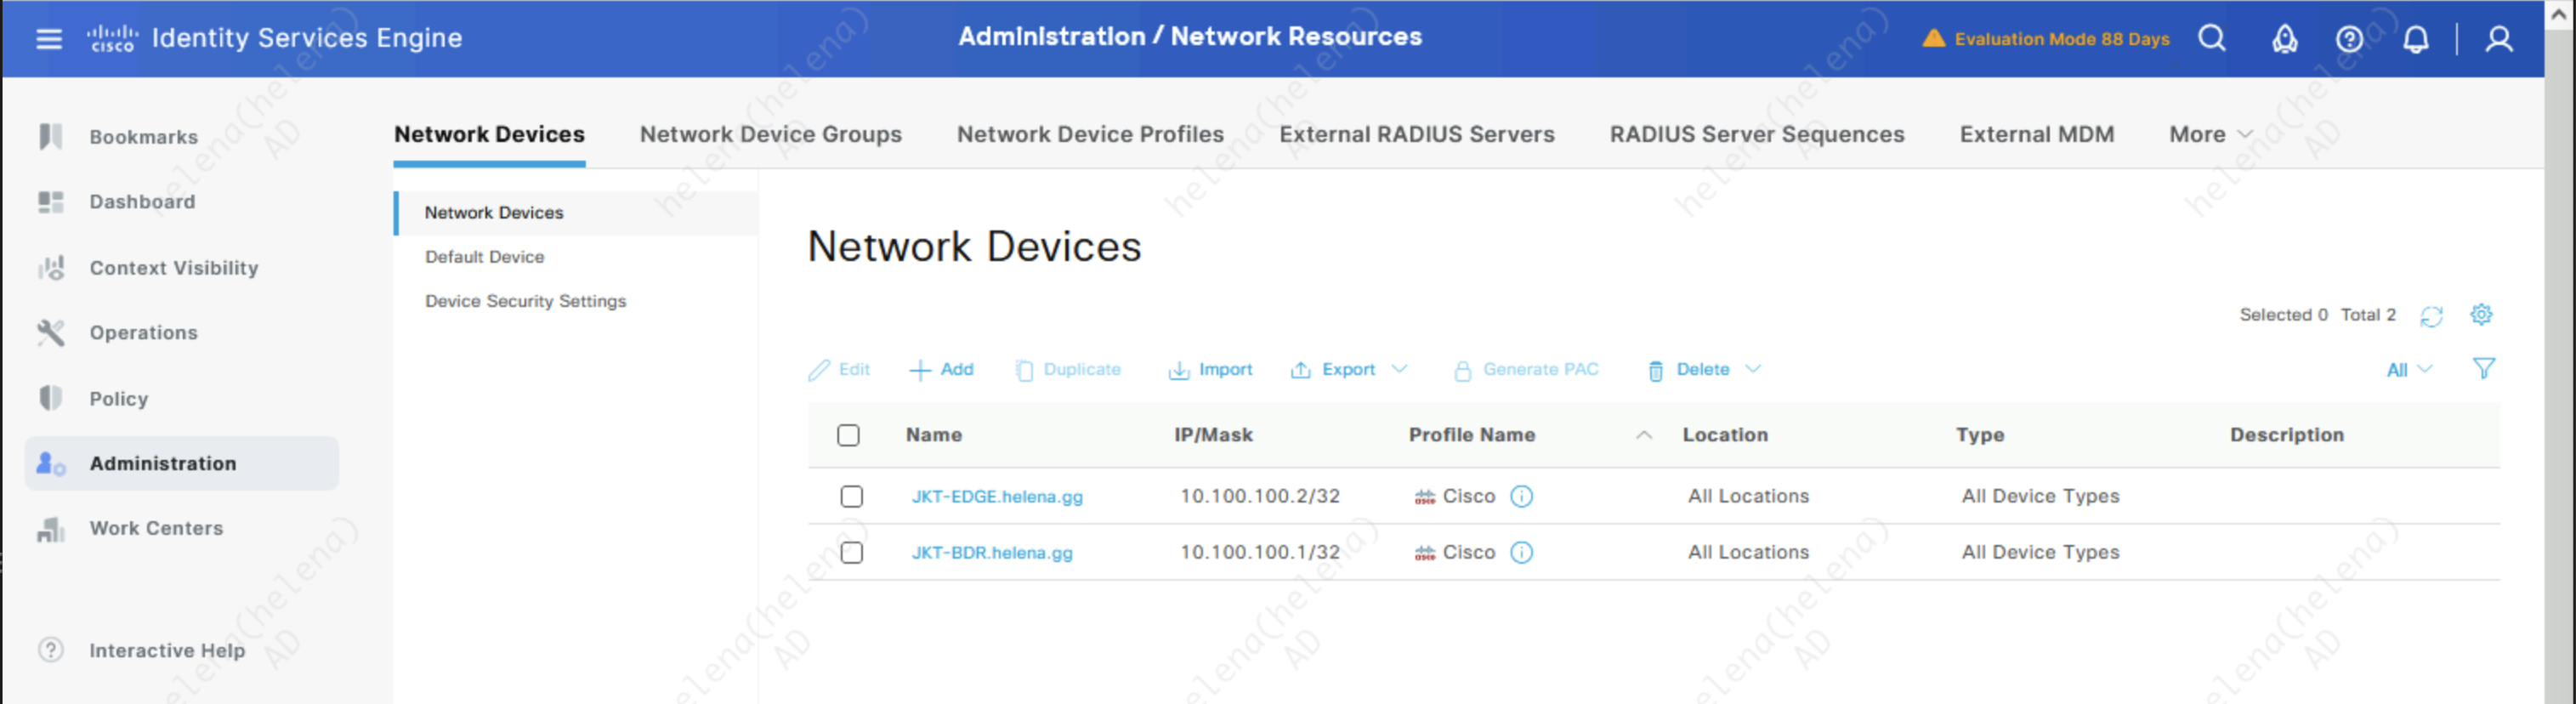
With that process, NADs are also automatically created on the ISE side
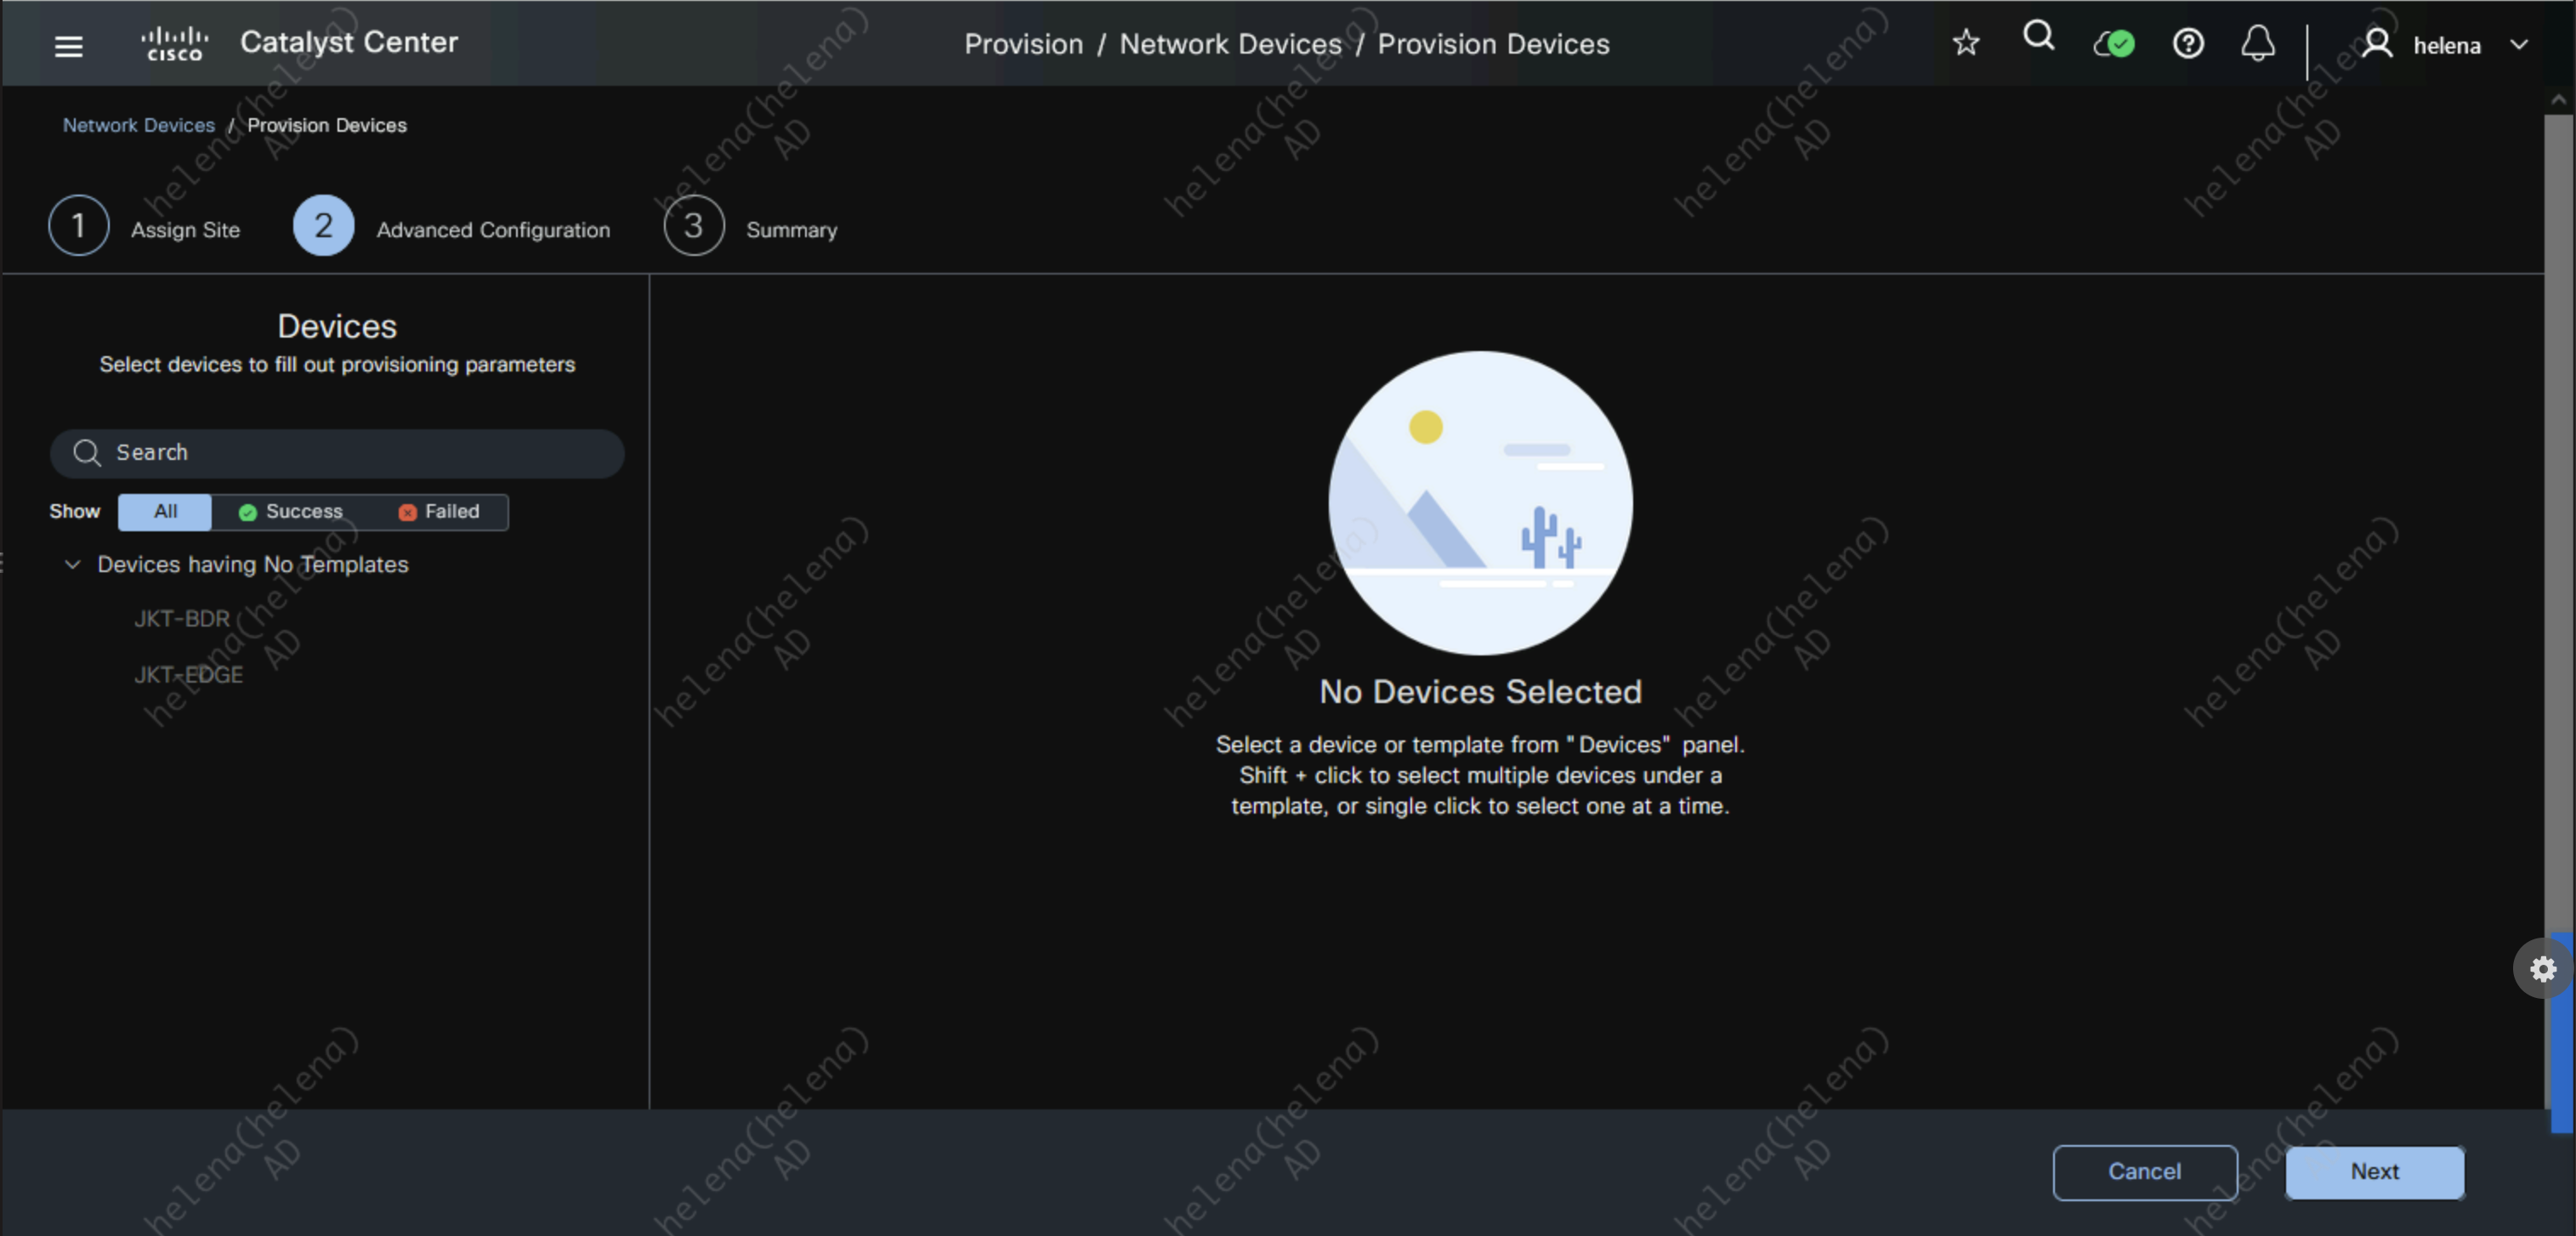
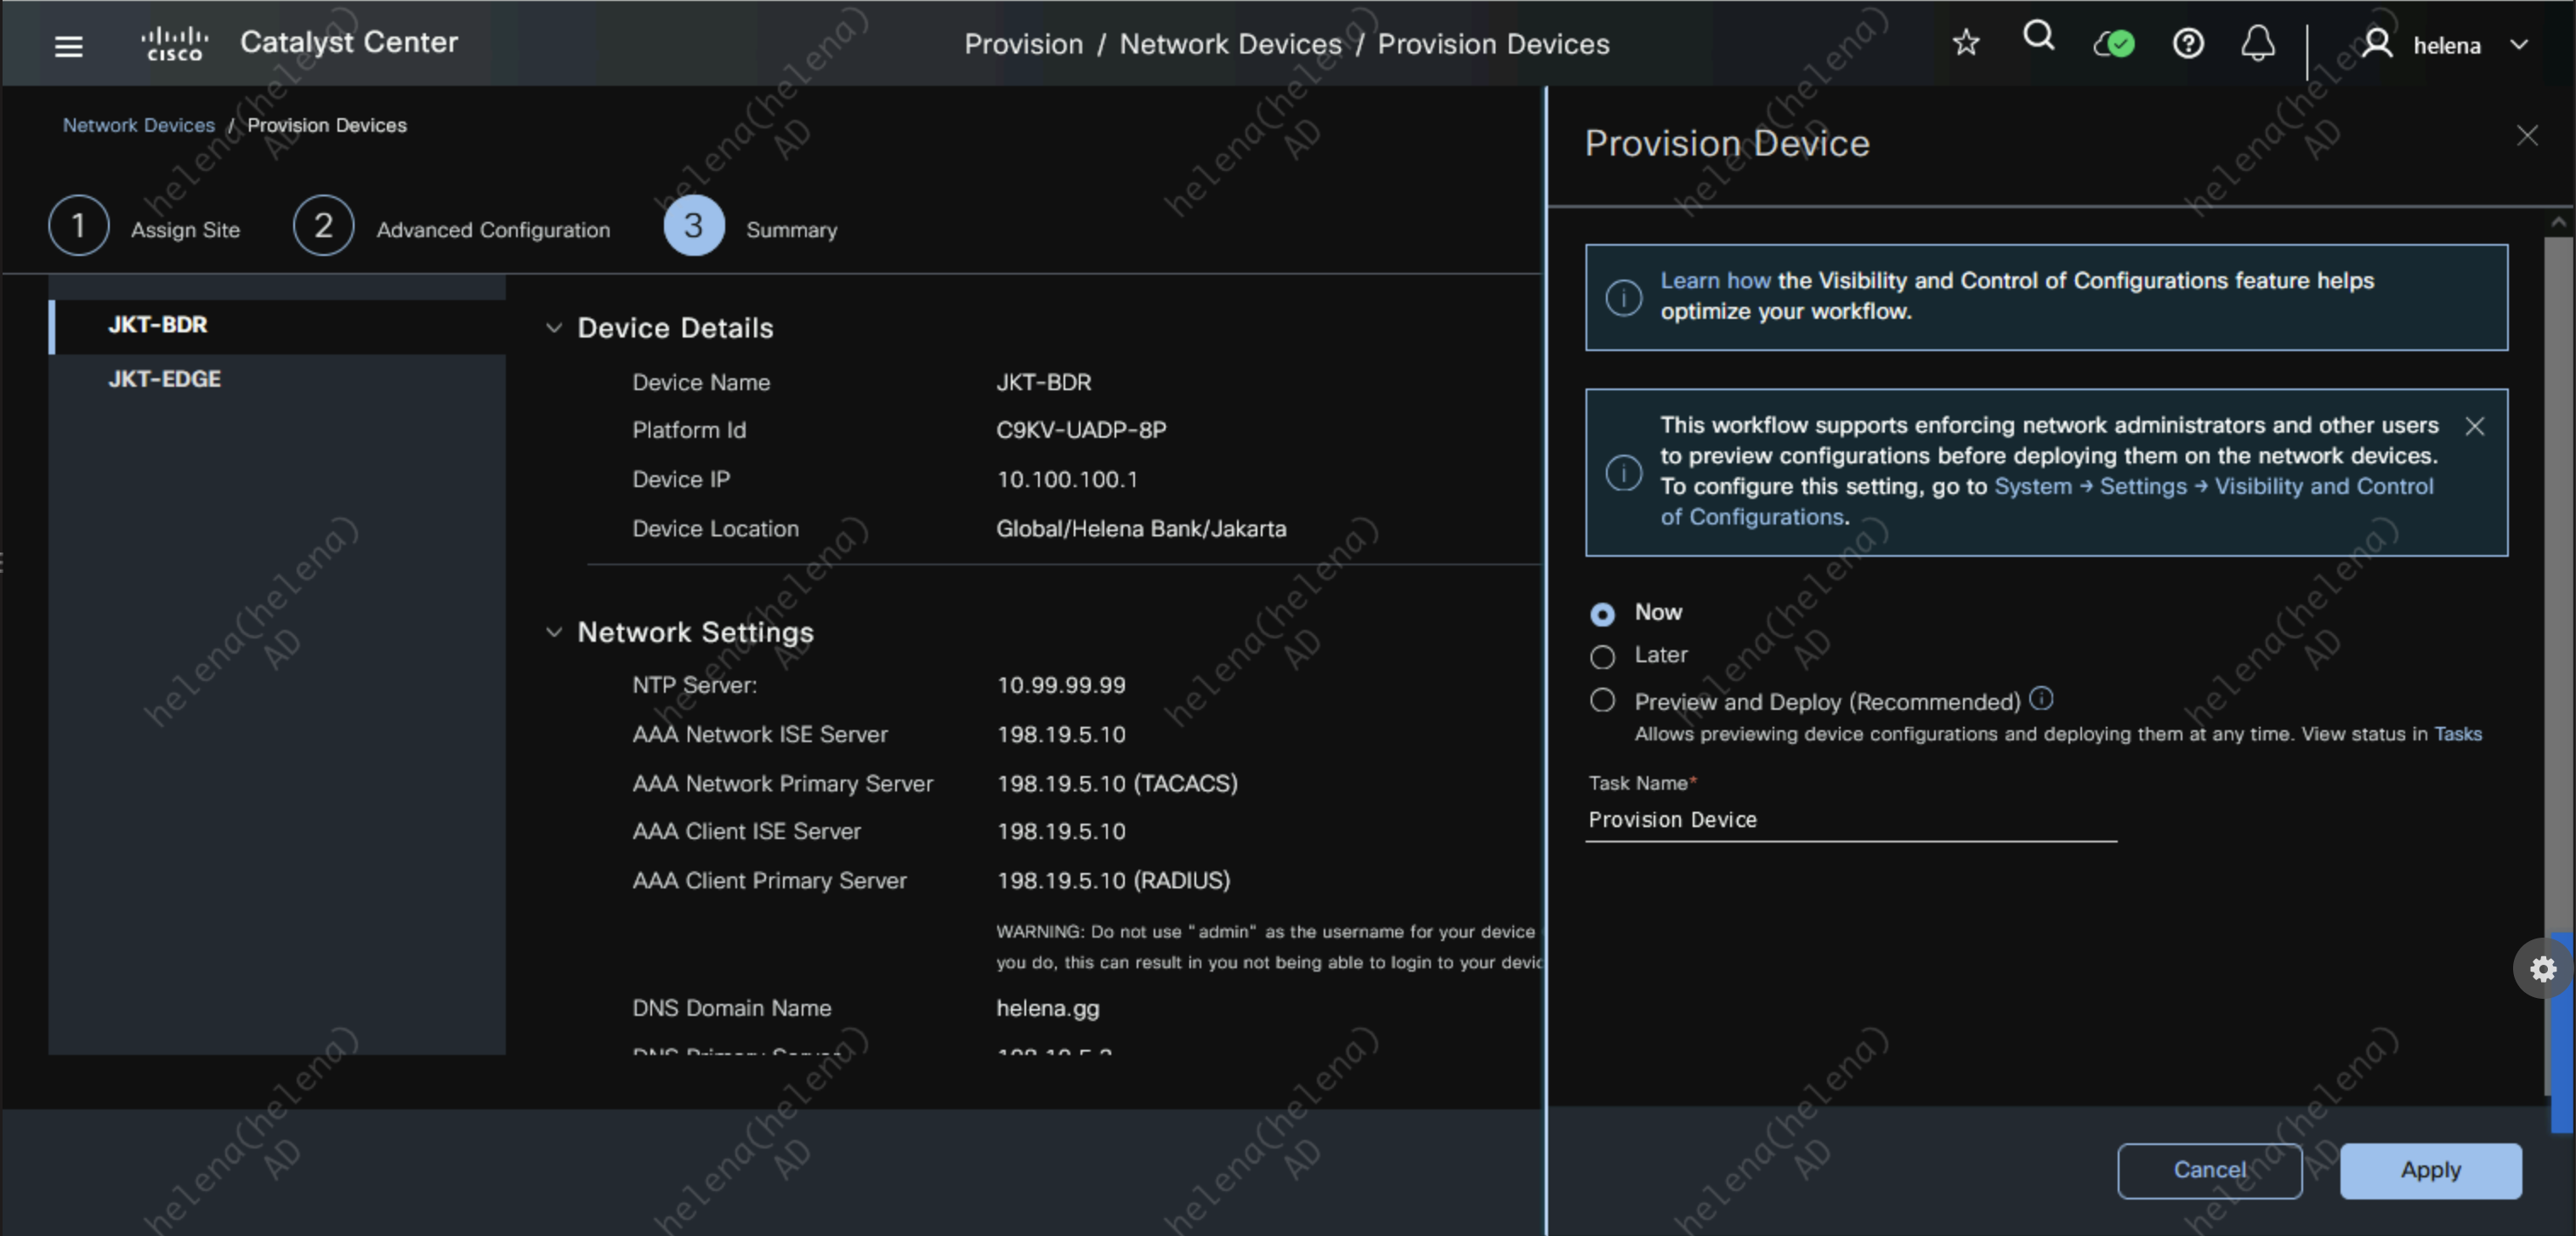
Provisioning
Provison both devices and assign them to Jakarta Site

For device templates we will skip
Review the summary then hit apply to start the provisioning process
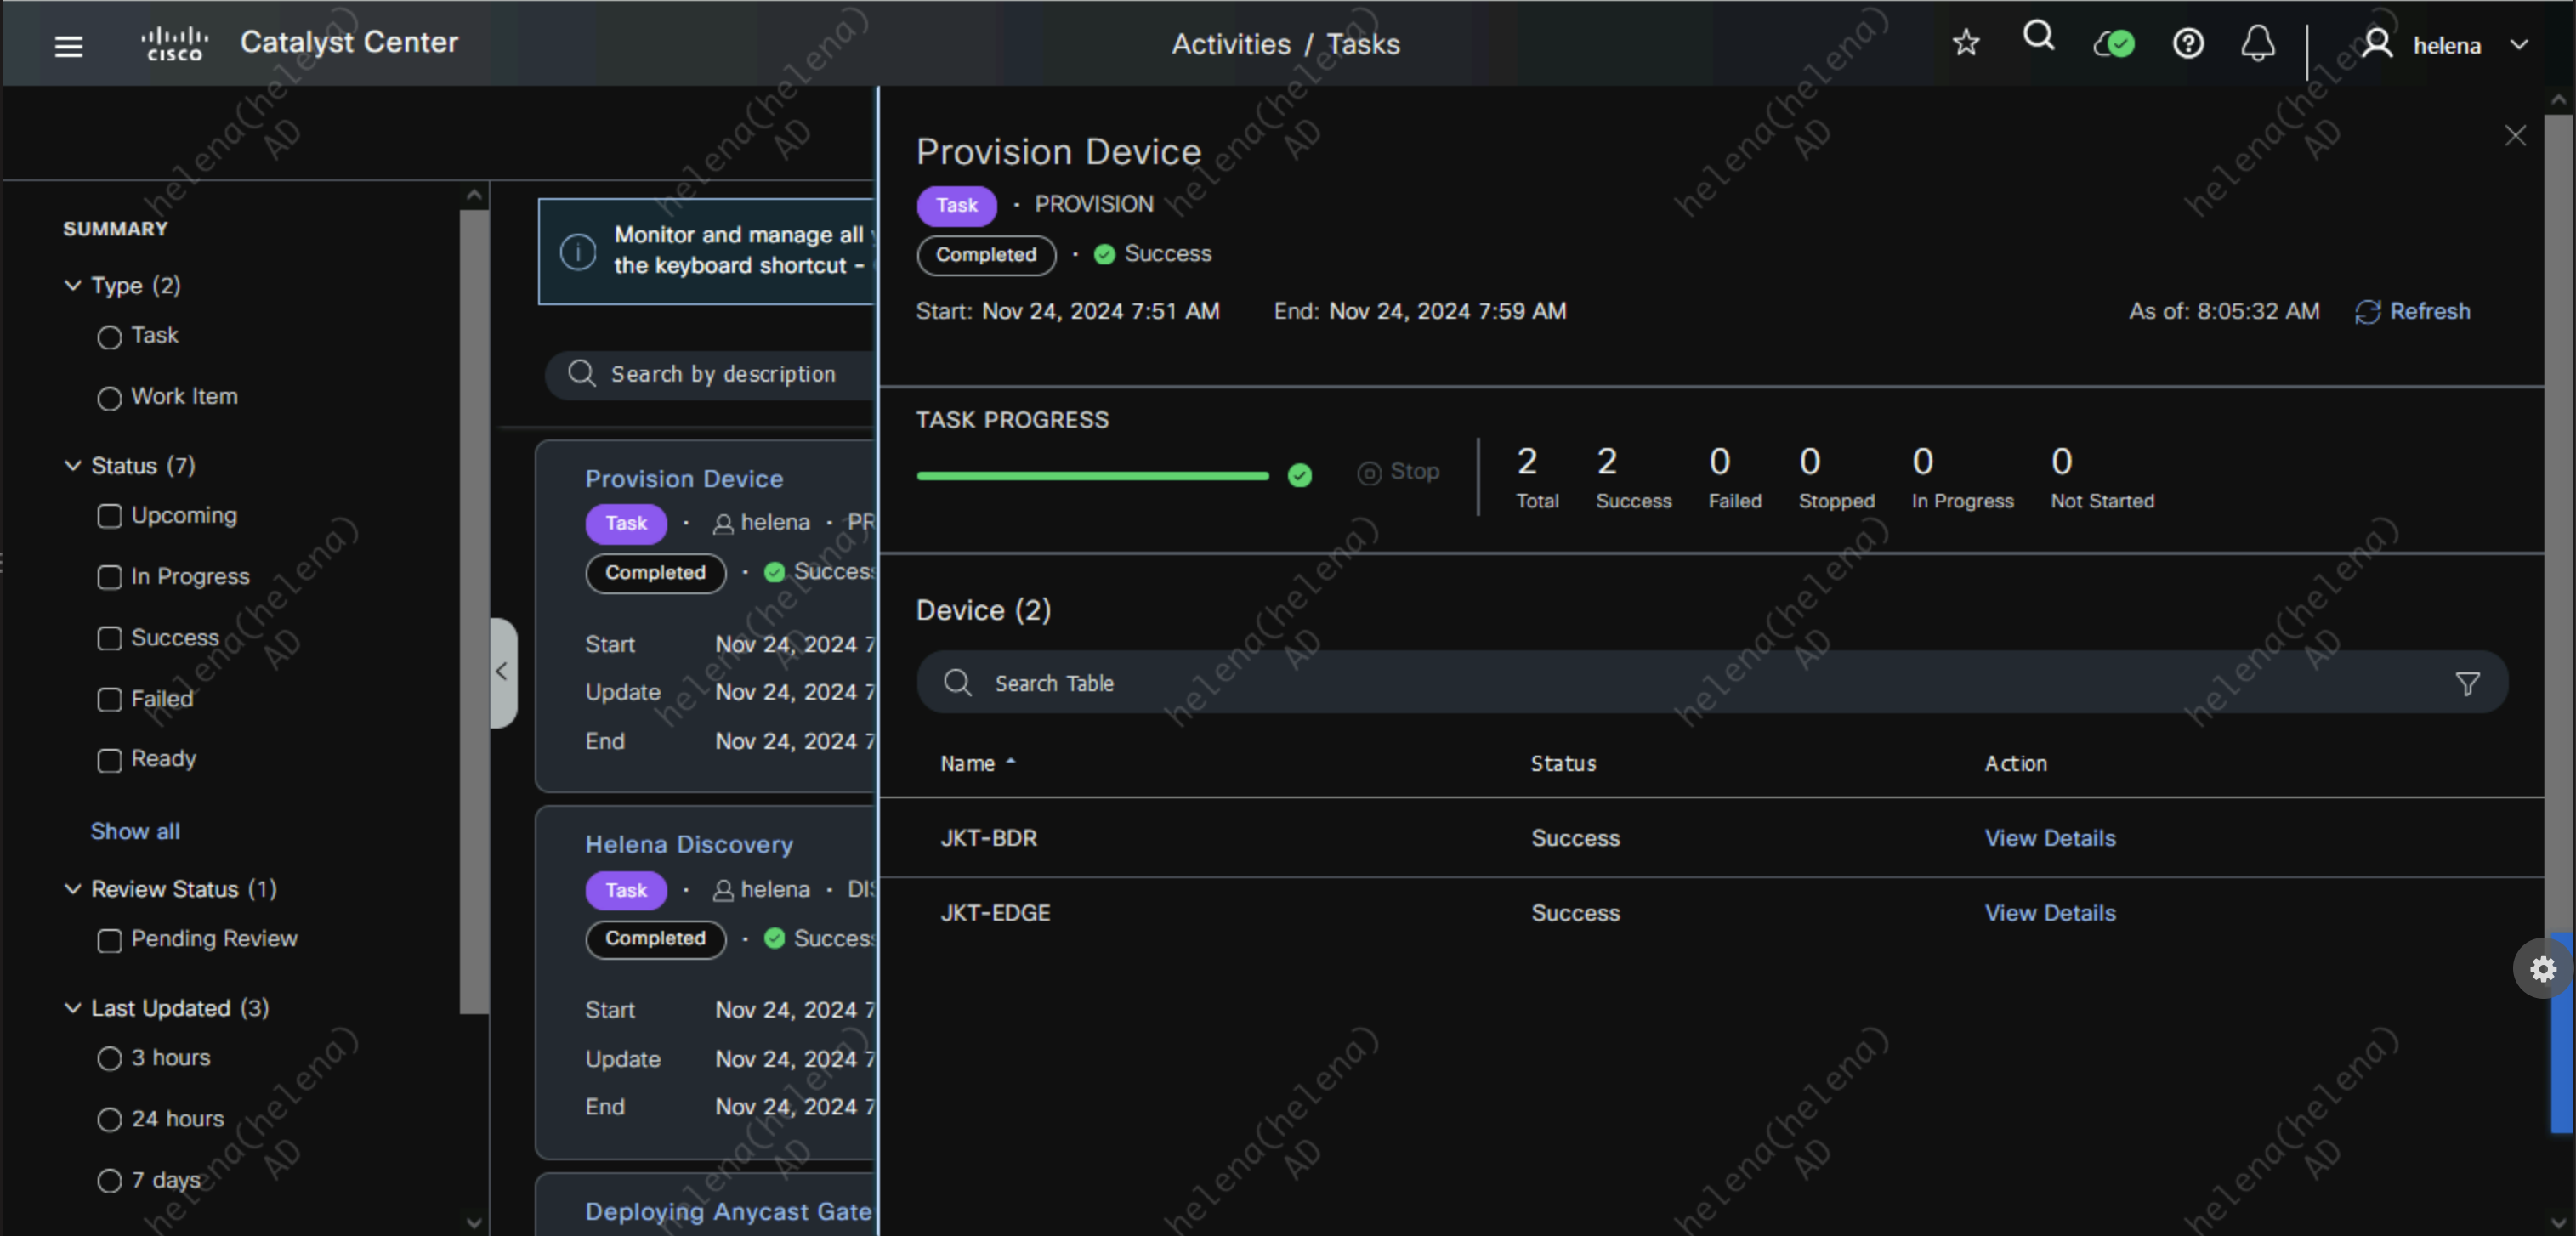
On Activities » Tasks, here we can see the provisioning progress
Joining Fabric
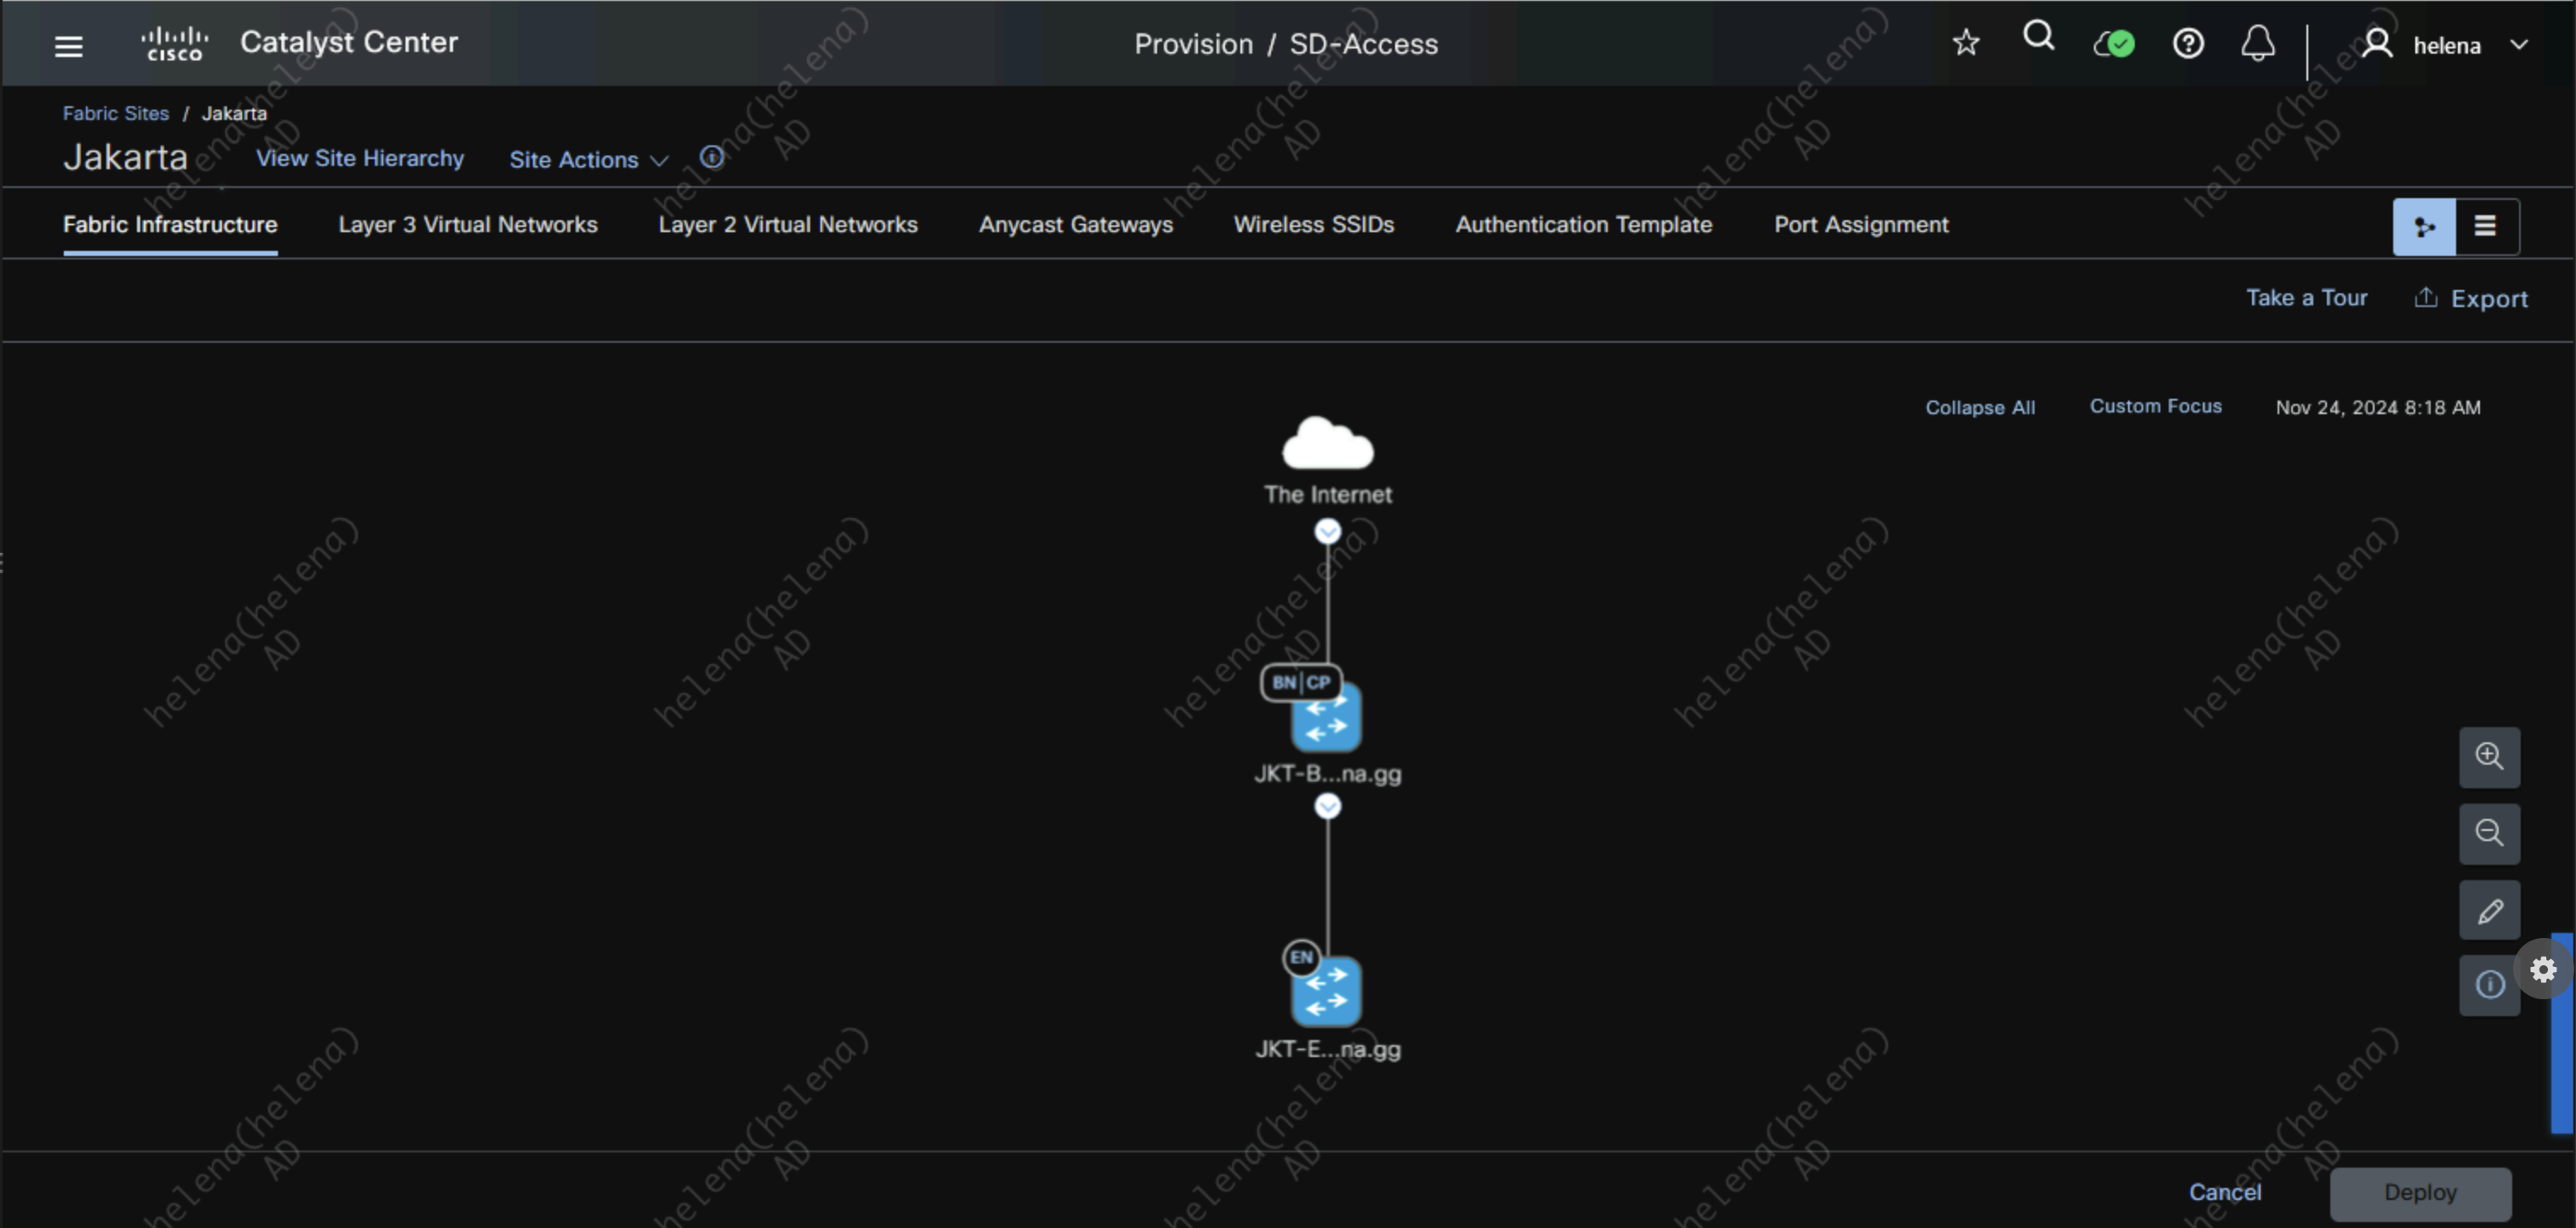
Now we can see that both devices are in the Jakarta site, but they still dont have roles in the SDA Fabric

Lets assign JKT-BDR as Border and Control Plane Node

And assign JKT-EDGE as the Edge Node
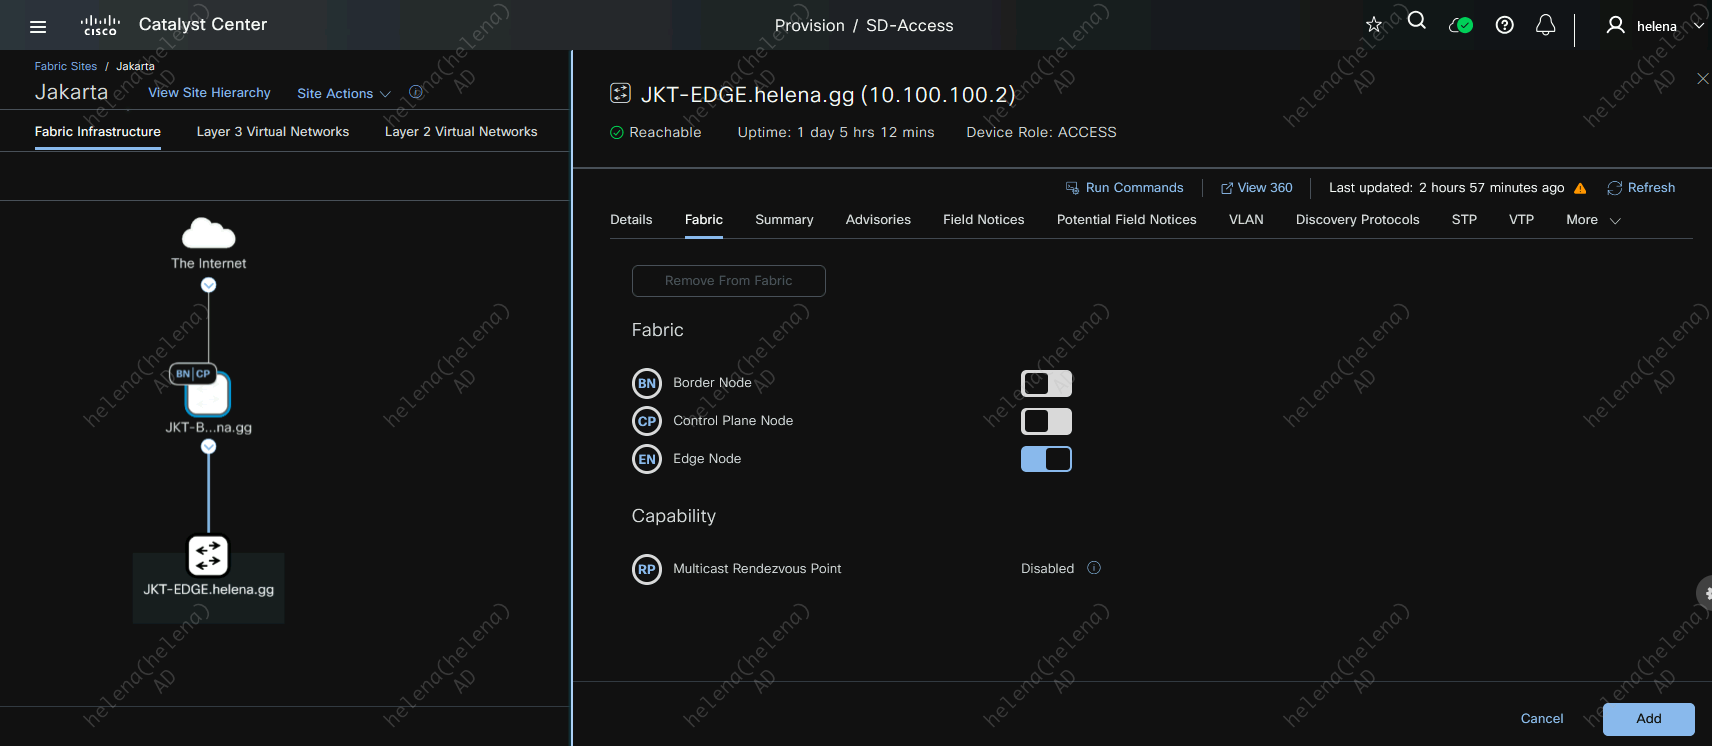
They glow blue when the roles are assigned
Validating SDA
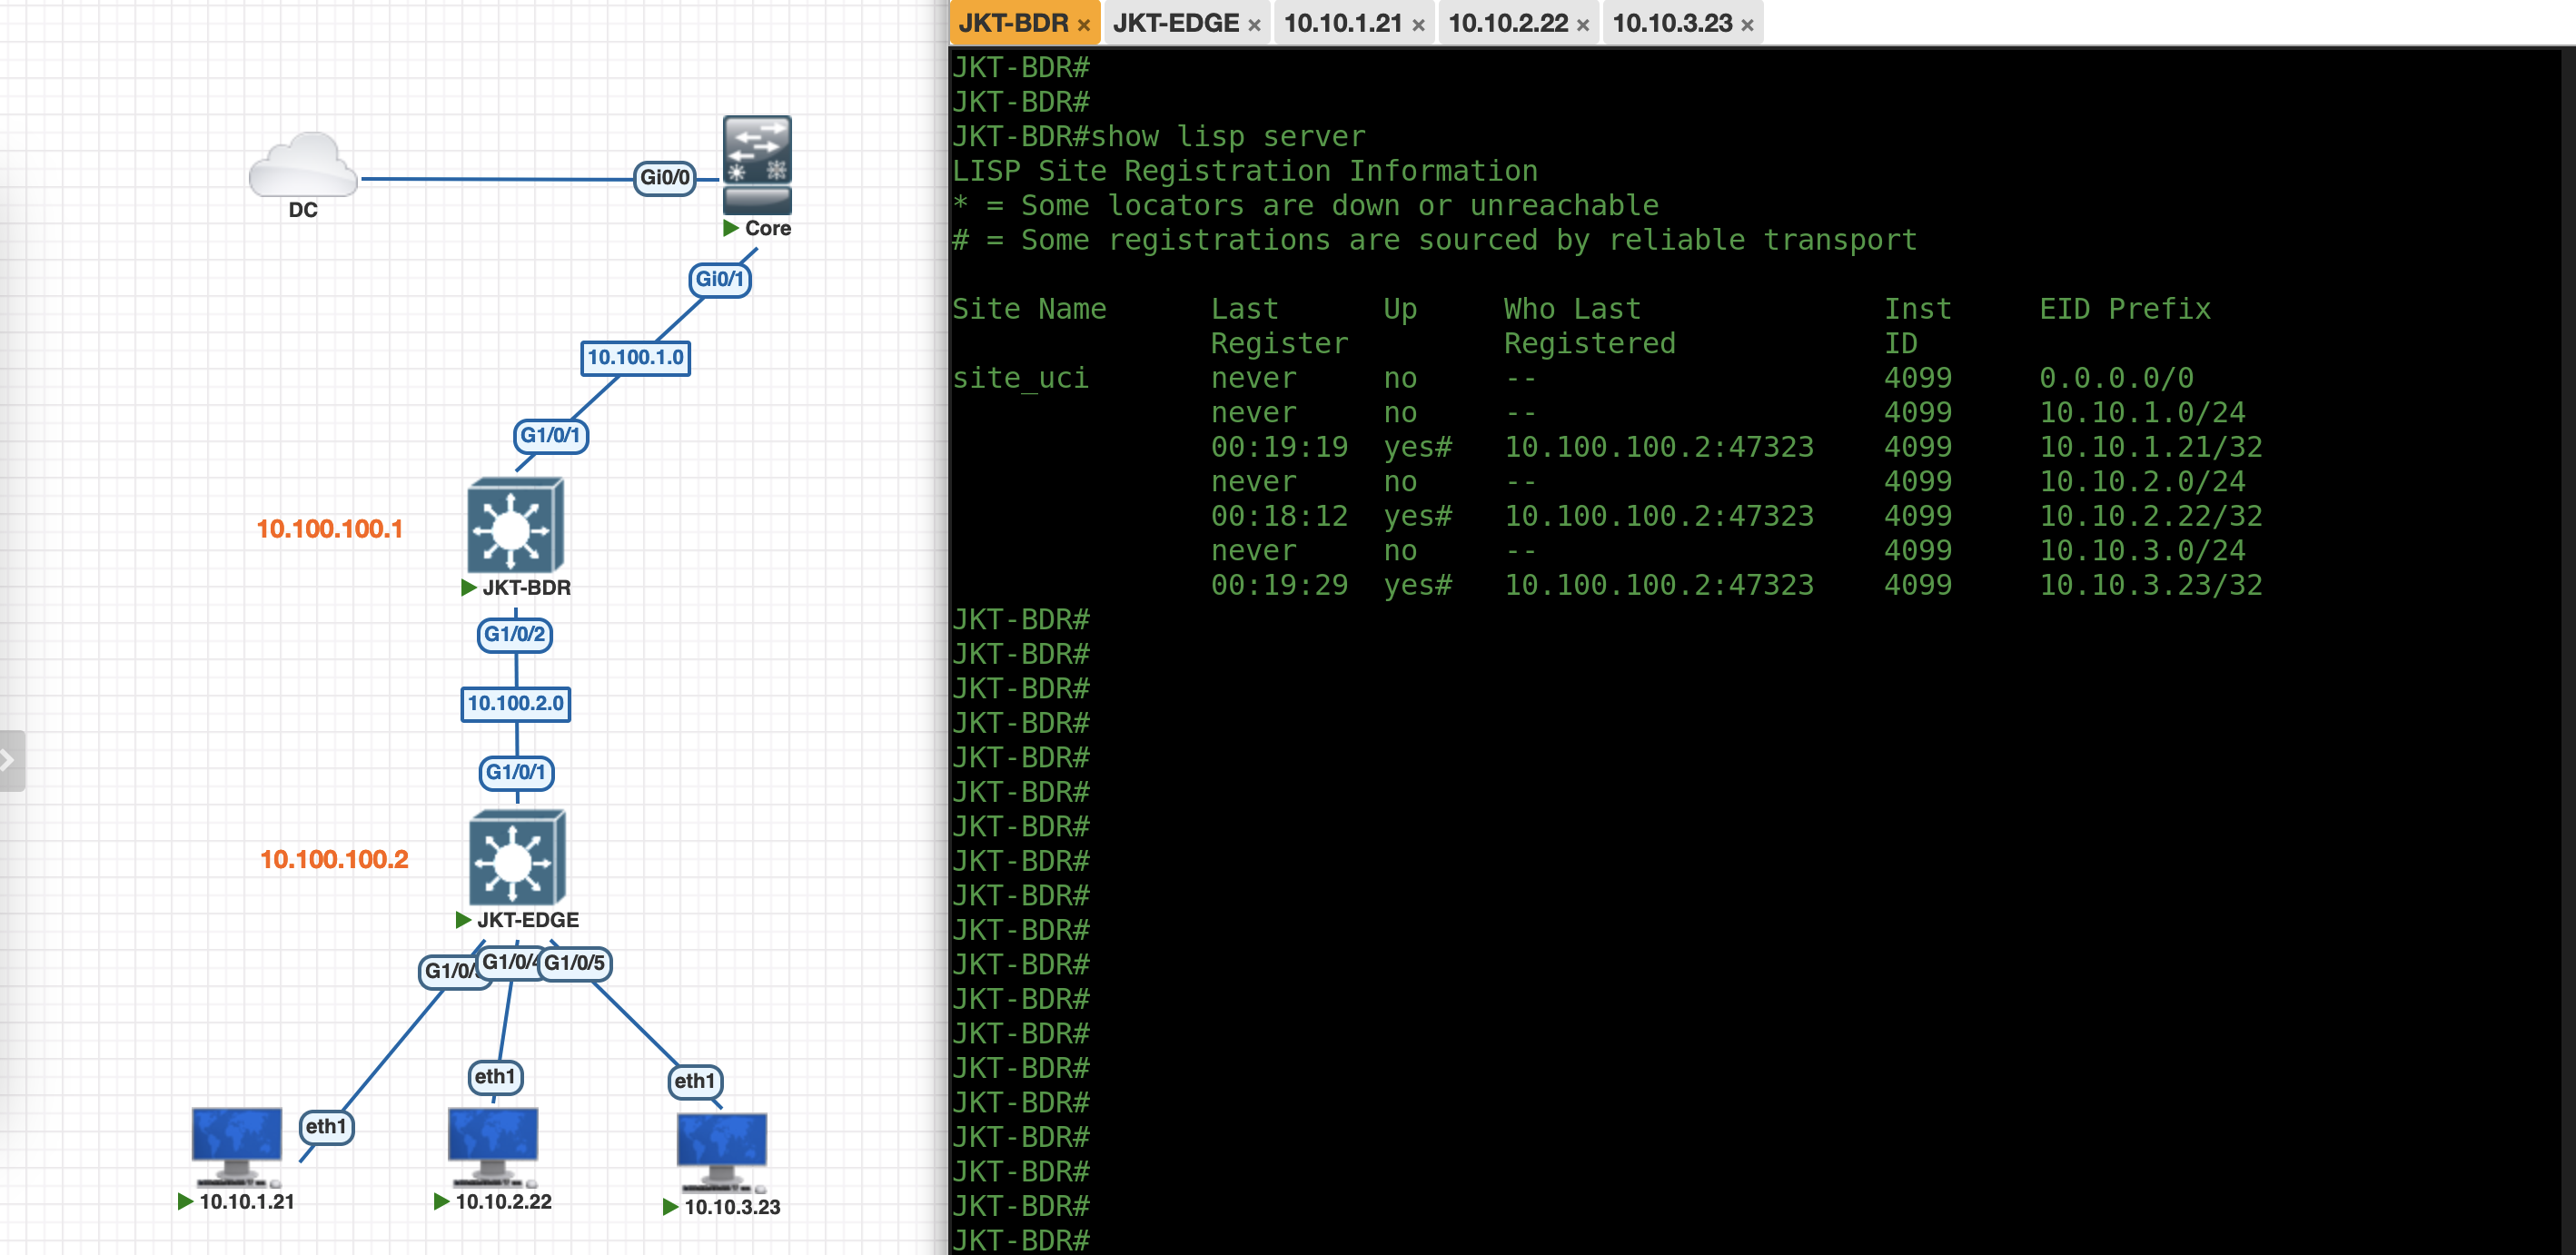
On JKT-BDR running “show lisp server” shows that the Locator/ID Separation Protocol (LISP) configuration is running and it displays the registration status of End-Point Identifiers (EIDs) to the Map-Server/Map-Resolver (MS/MR) within the fabric.
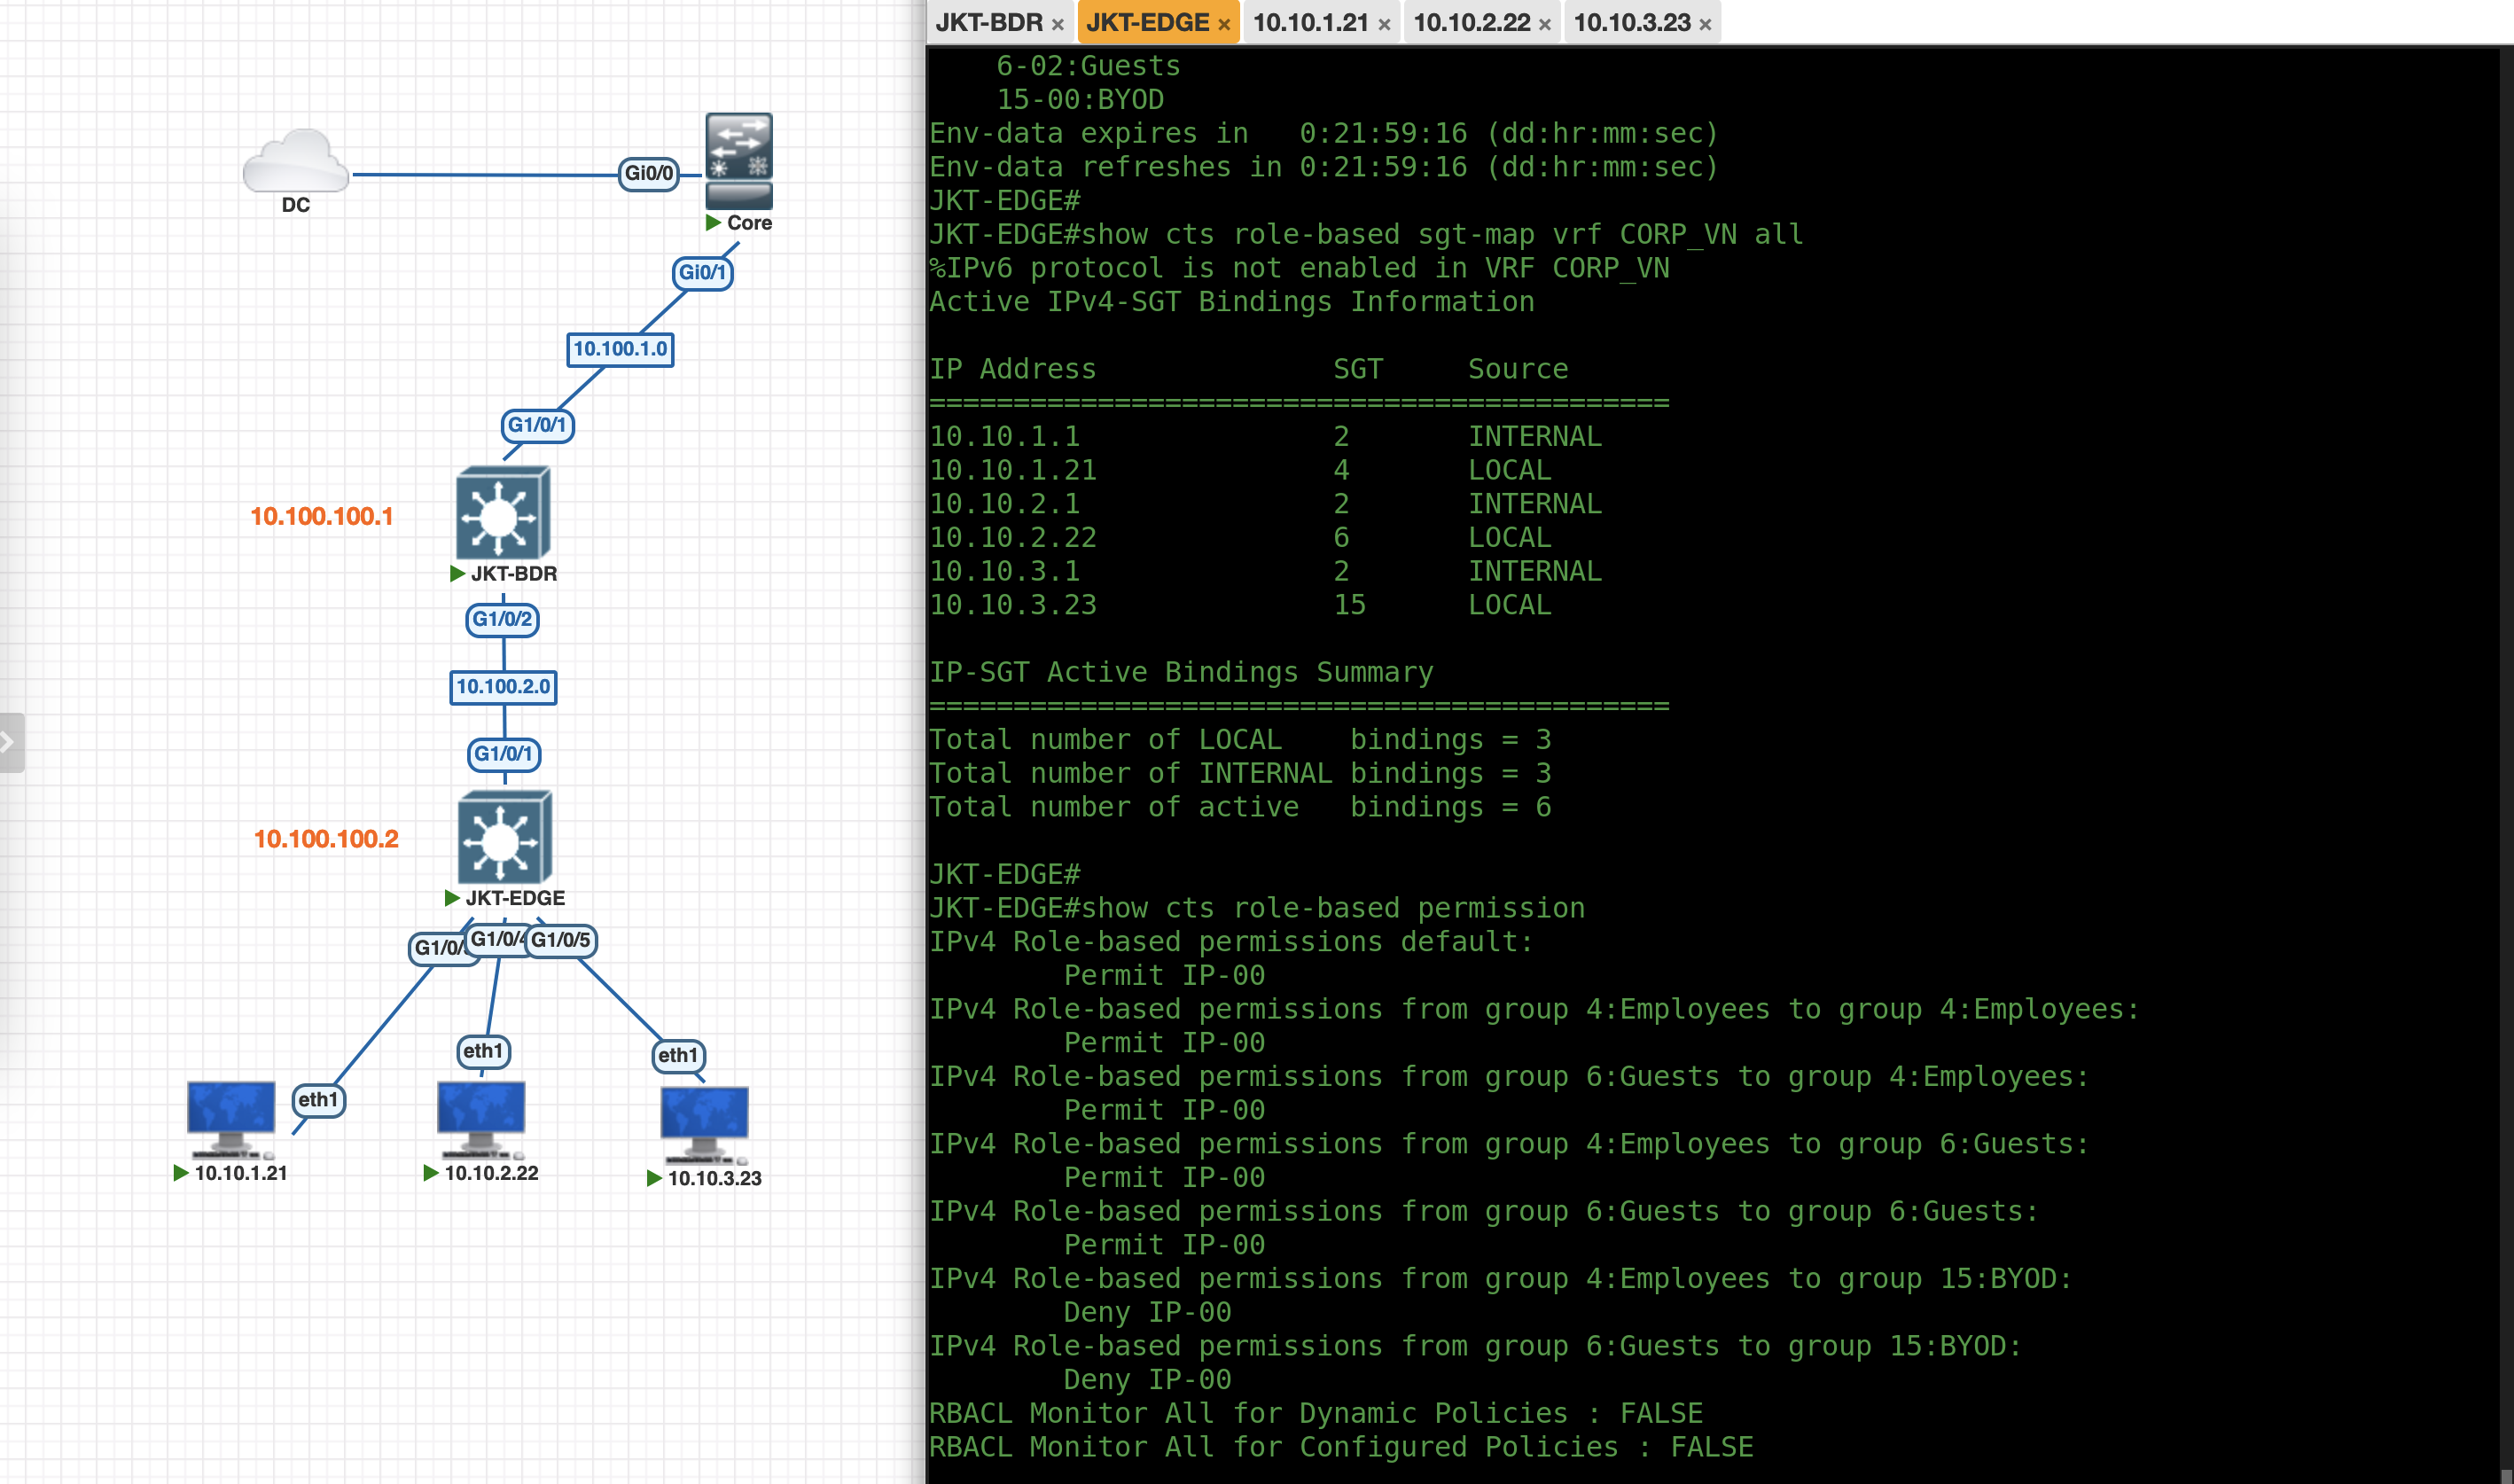
And on JKT-EDGE, running TrustSec commands verify that this node has been onboarded as the Fabric Edge Device
“show auth sessions” shows that each port is now authenticated against ISE for network access
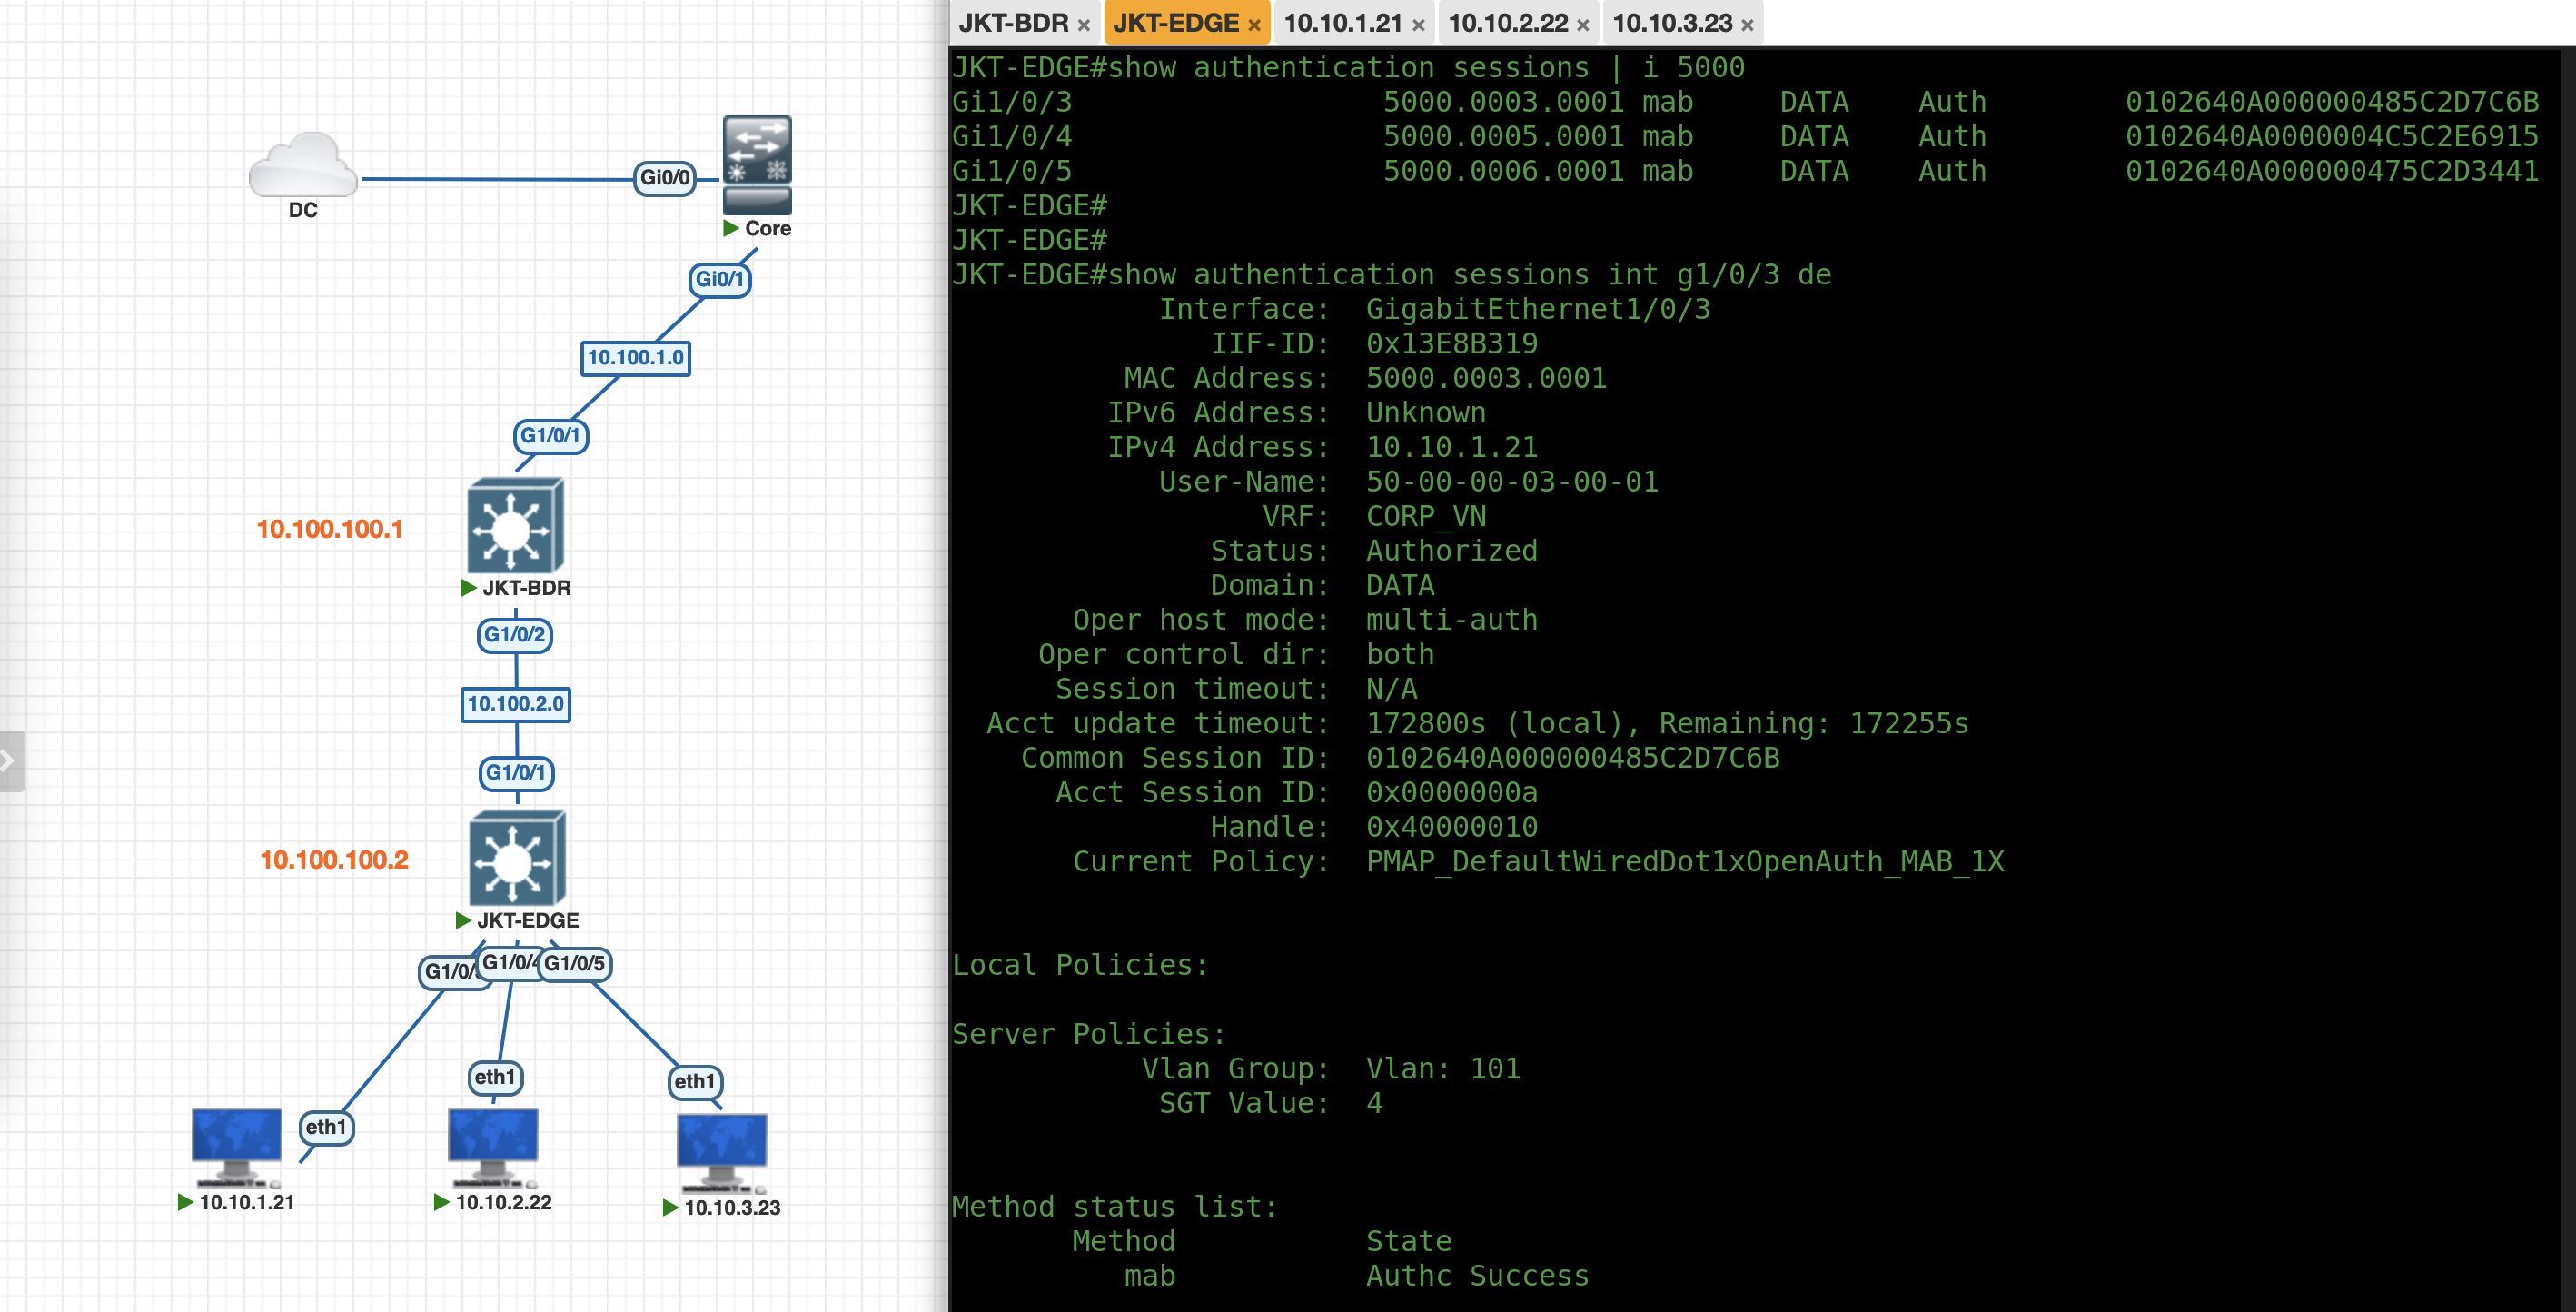
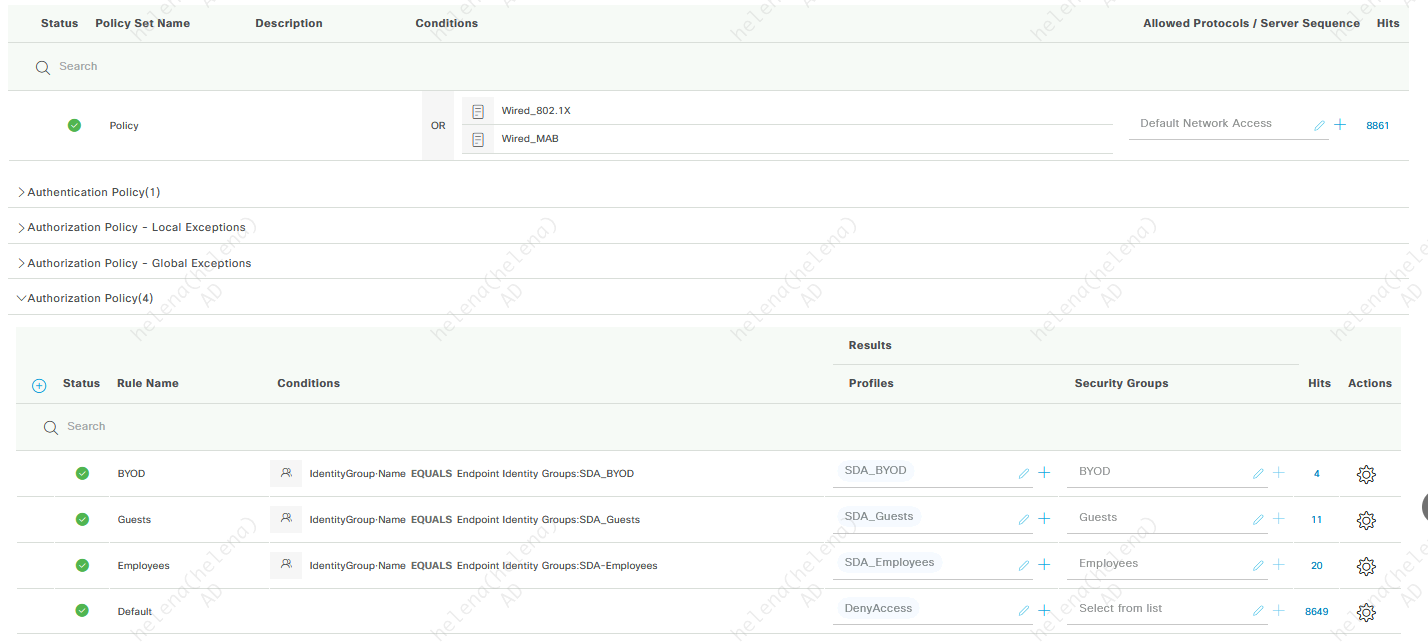
Where on ISE we have a Policy Set handing out VLANs and SGTs based on client’s mac address
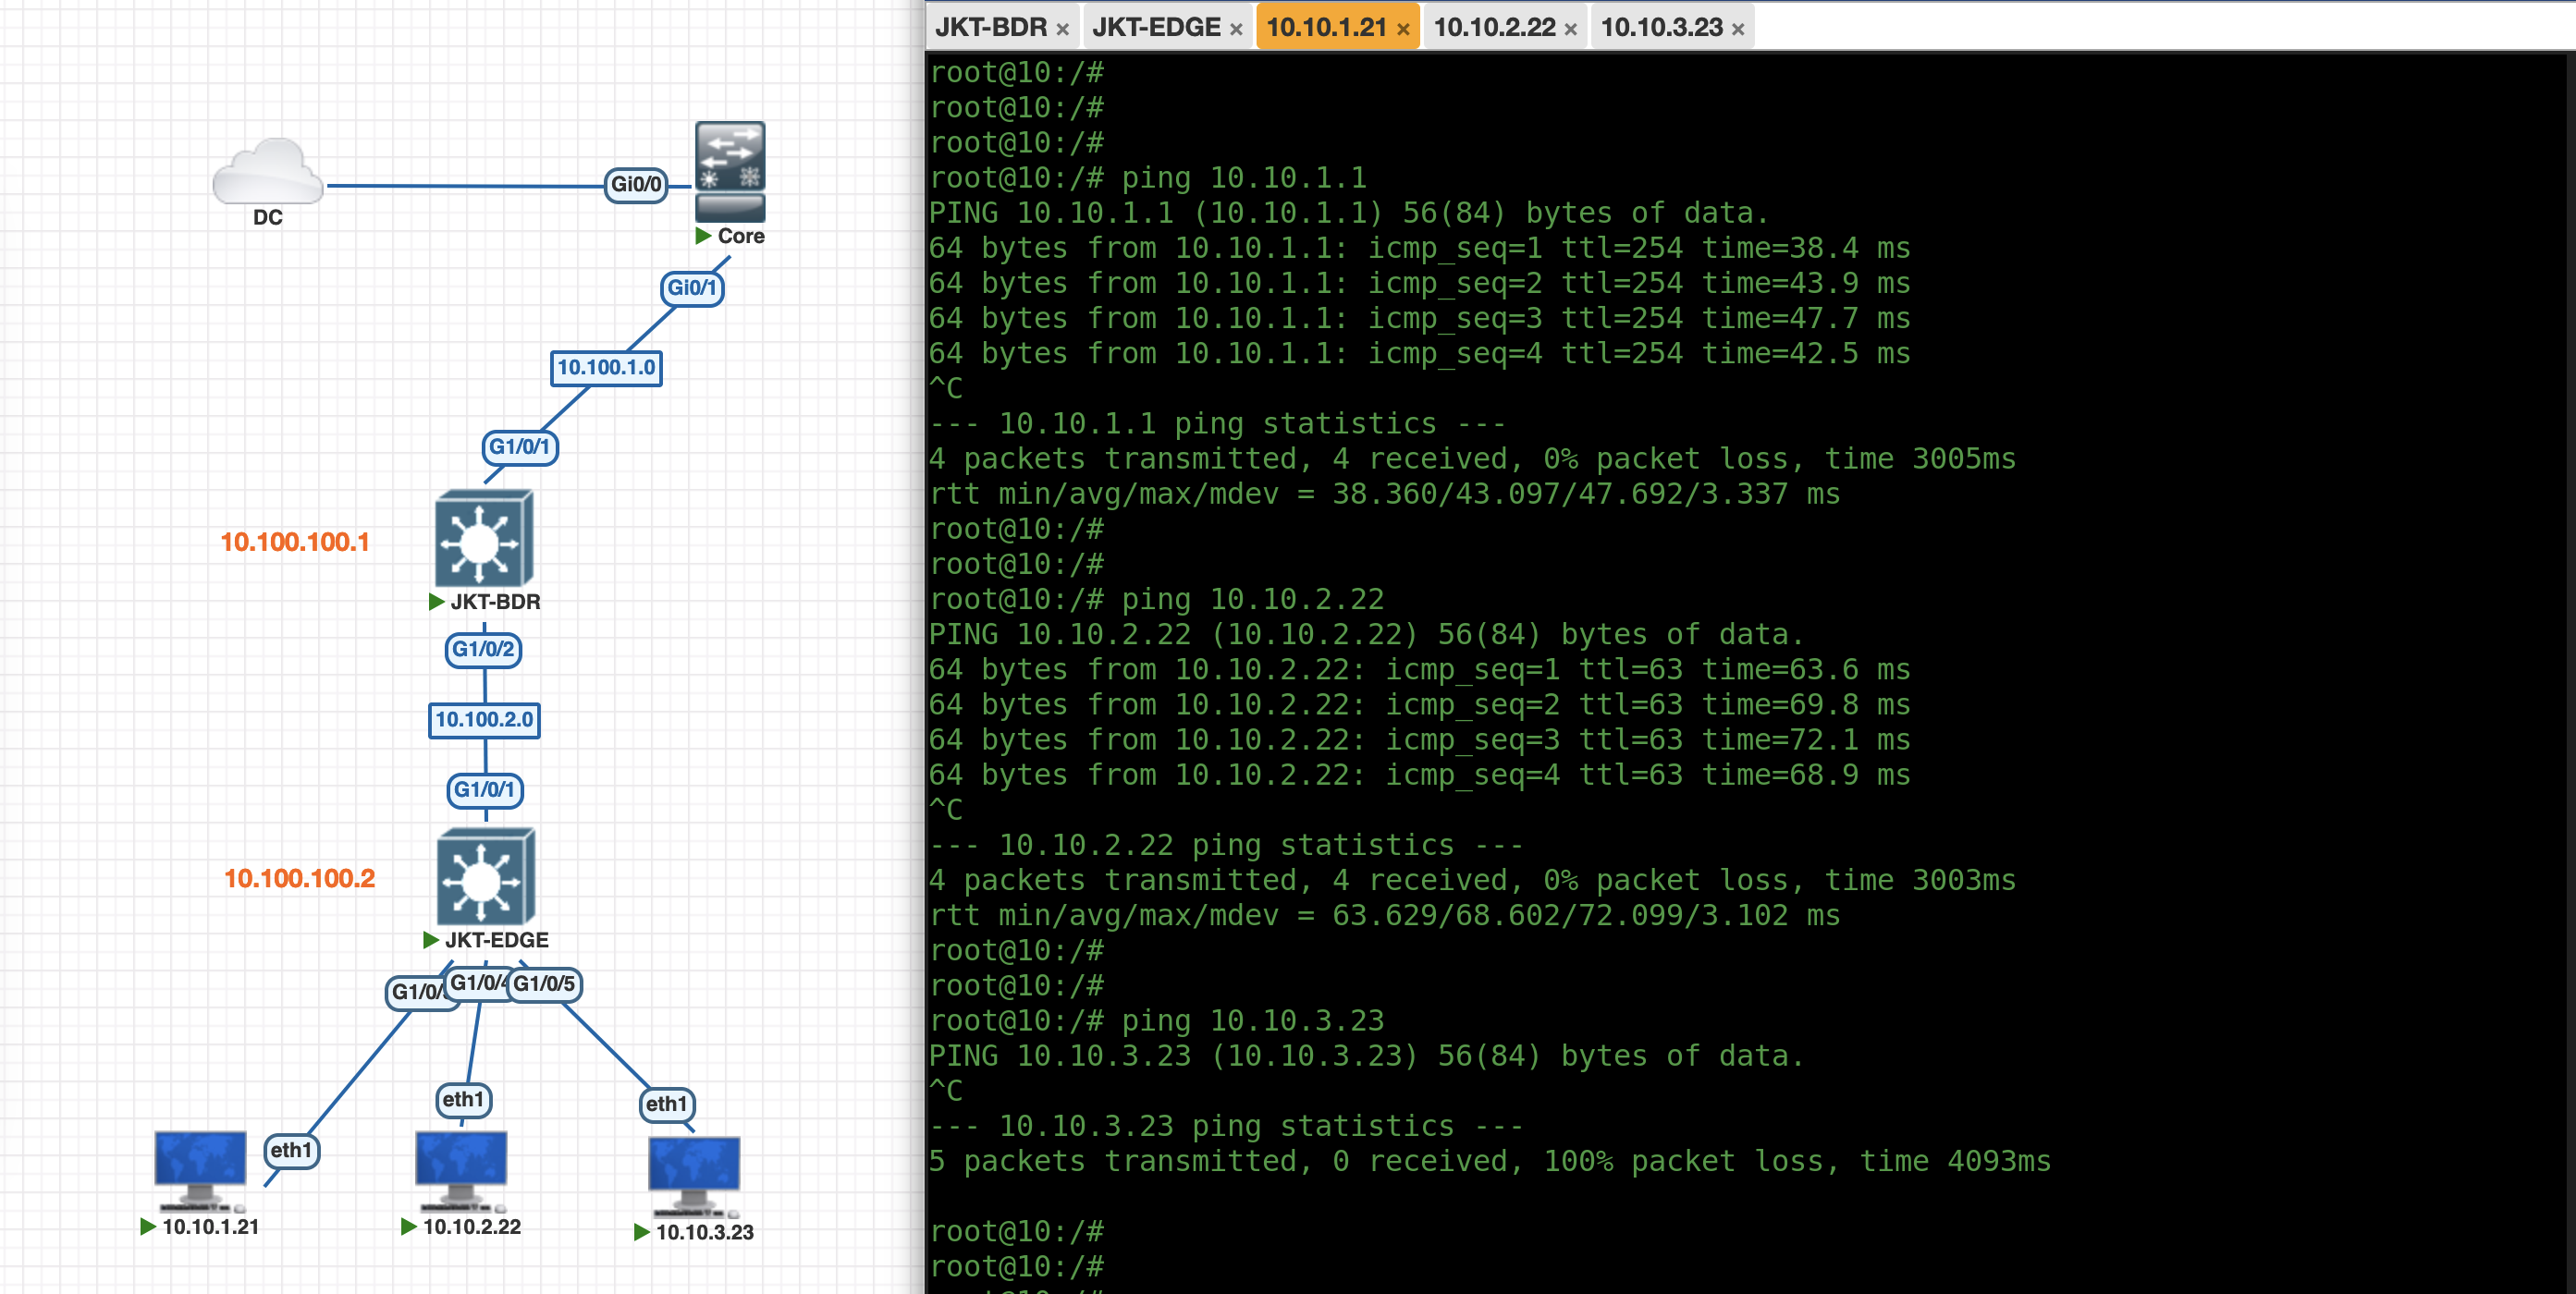
And on the client with Employee SGT, we can confirm we have network access and we can connect to other client with Guests SGT, but not to BYOD SGT
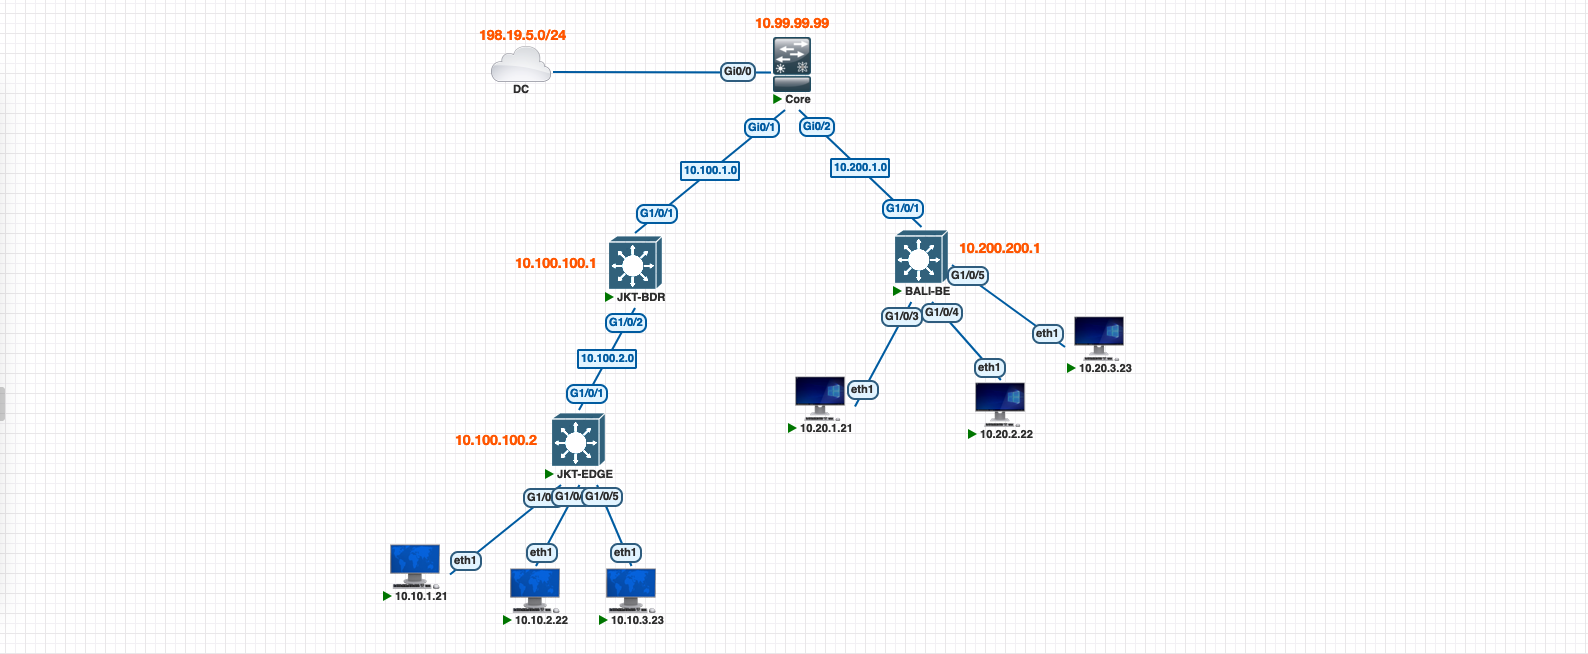
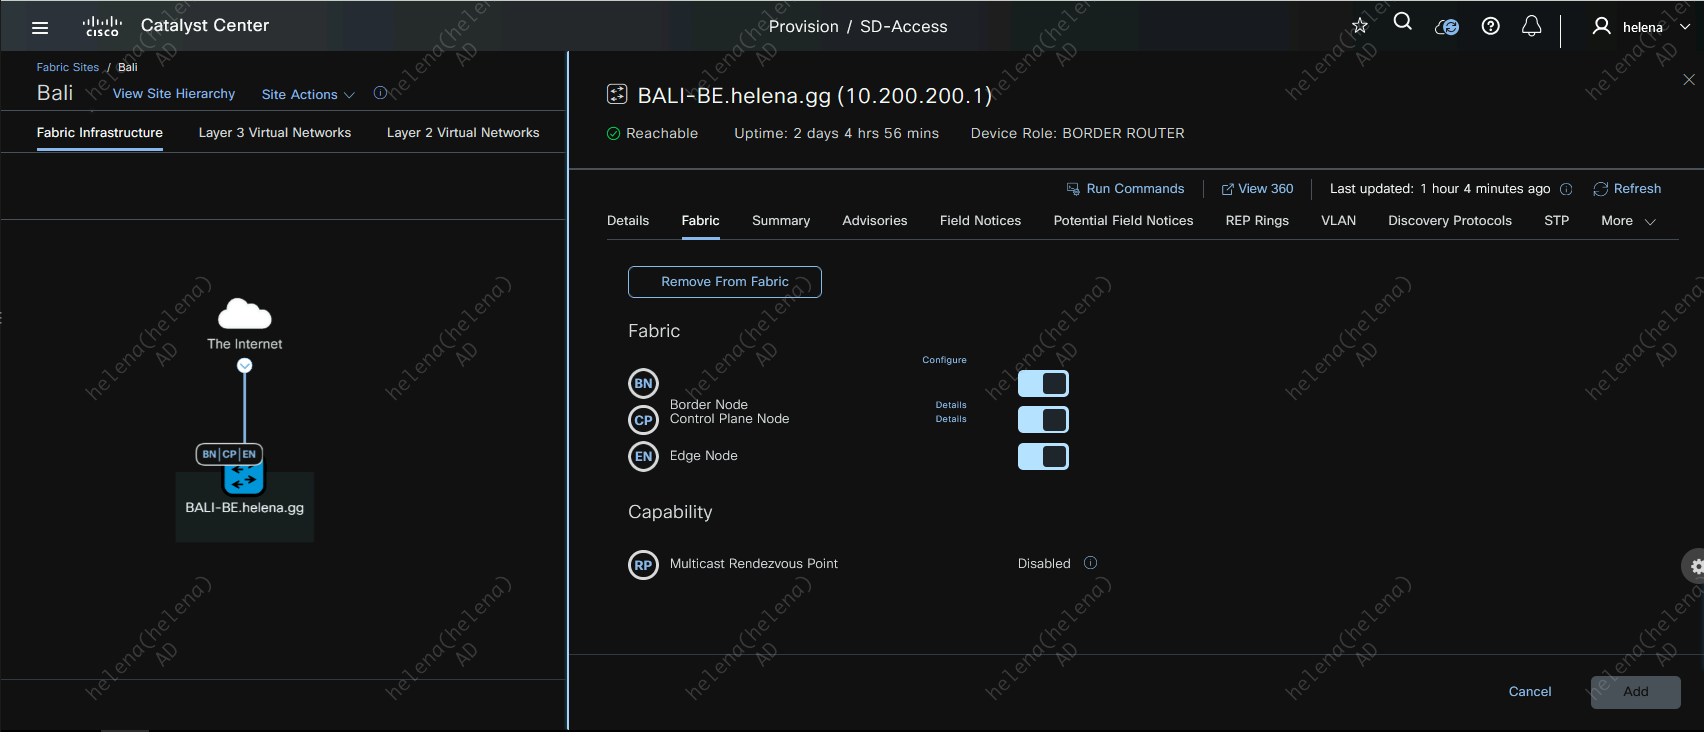
Adding Second Site
Lets add a new site named “Bali Site”, this site is a Fabric-In-a-Box because we only use one device as Border, Control Plane, and also Edge node
Same drill as before, here we create a new site
We discover, provision and assign role to this device in the fabric
And now this second fabric is up and running, clients in this Bali Site can reach each other, but connectivity to other sites and to internet is still not available
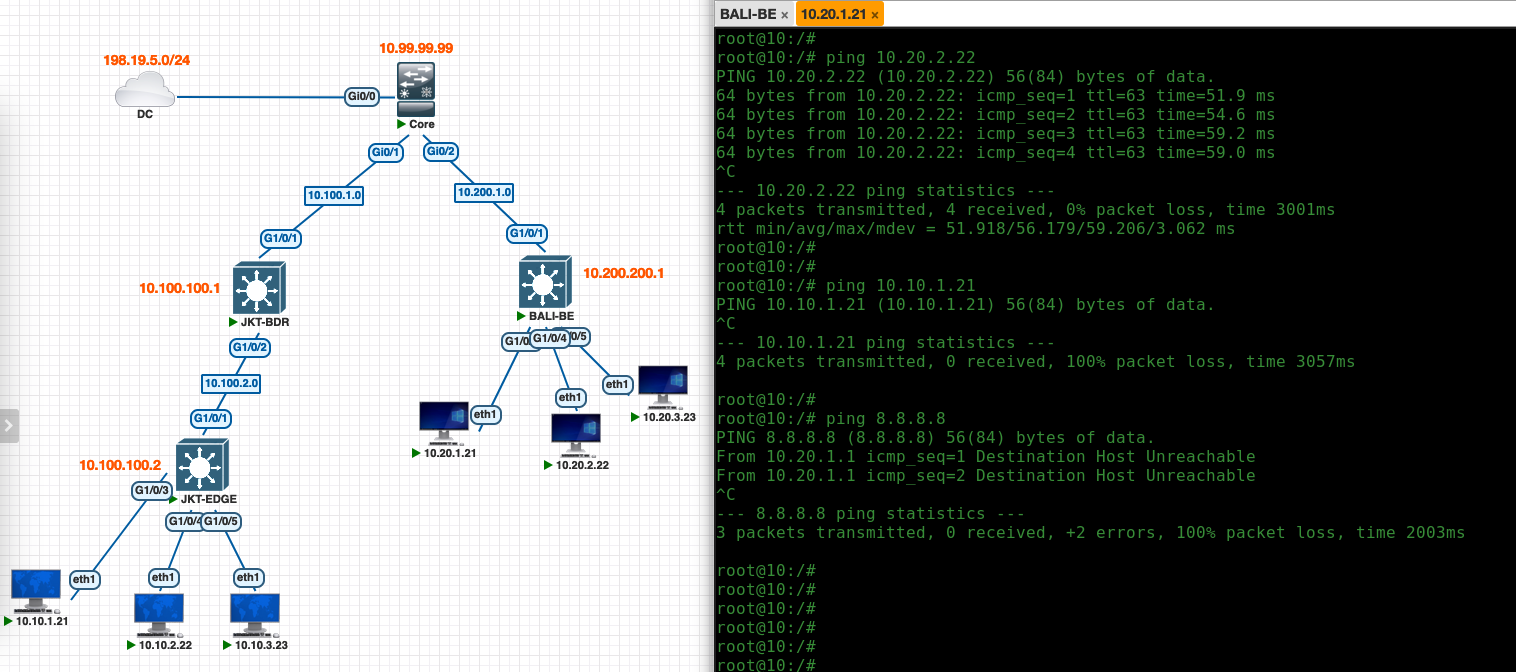
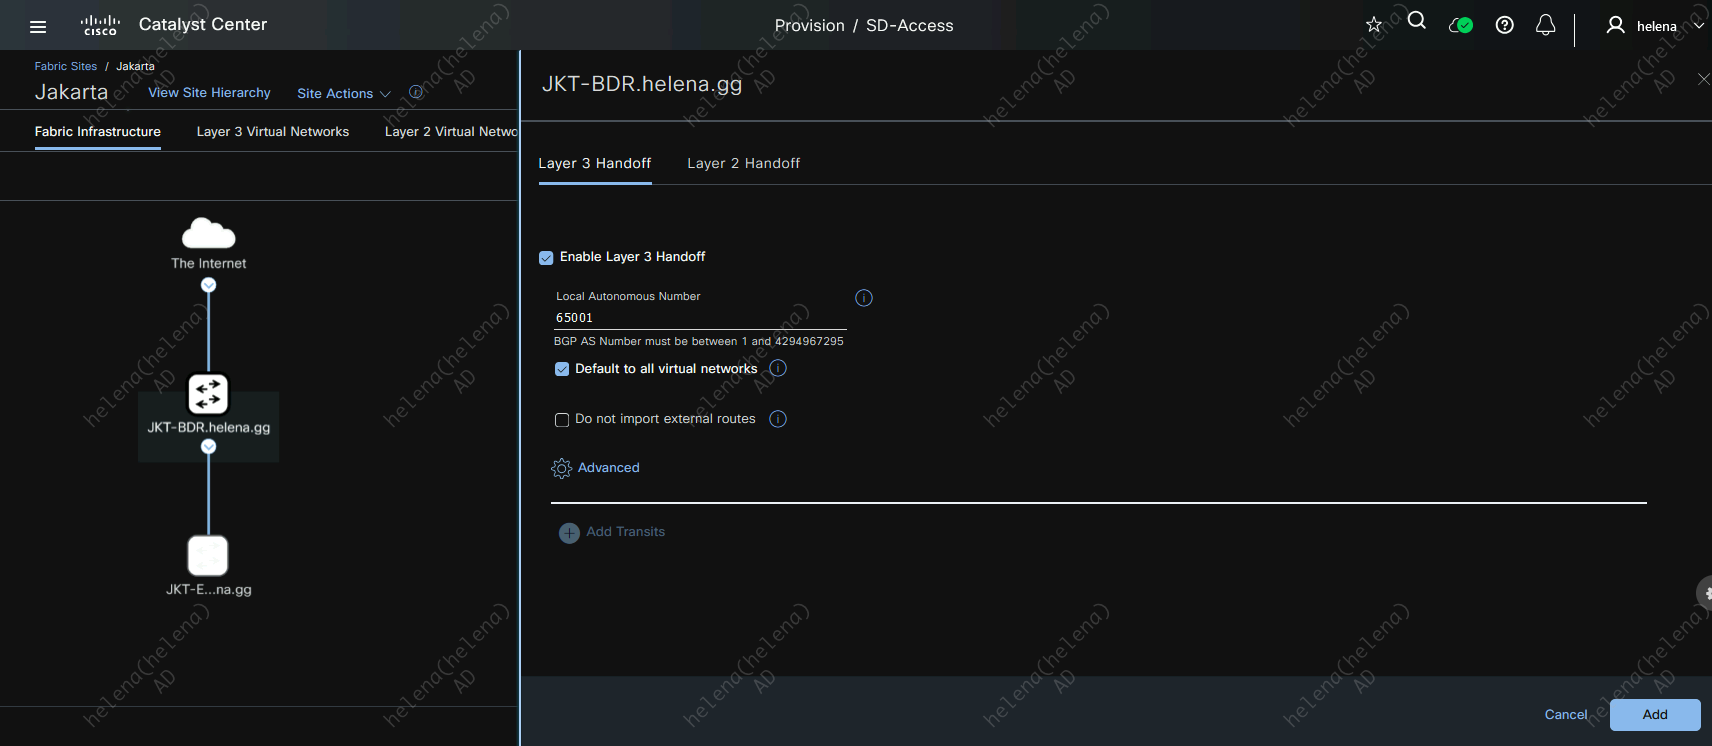
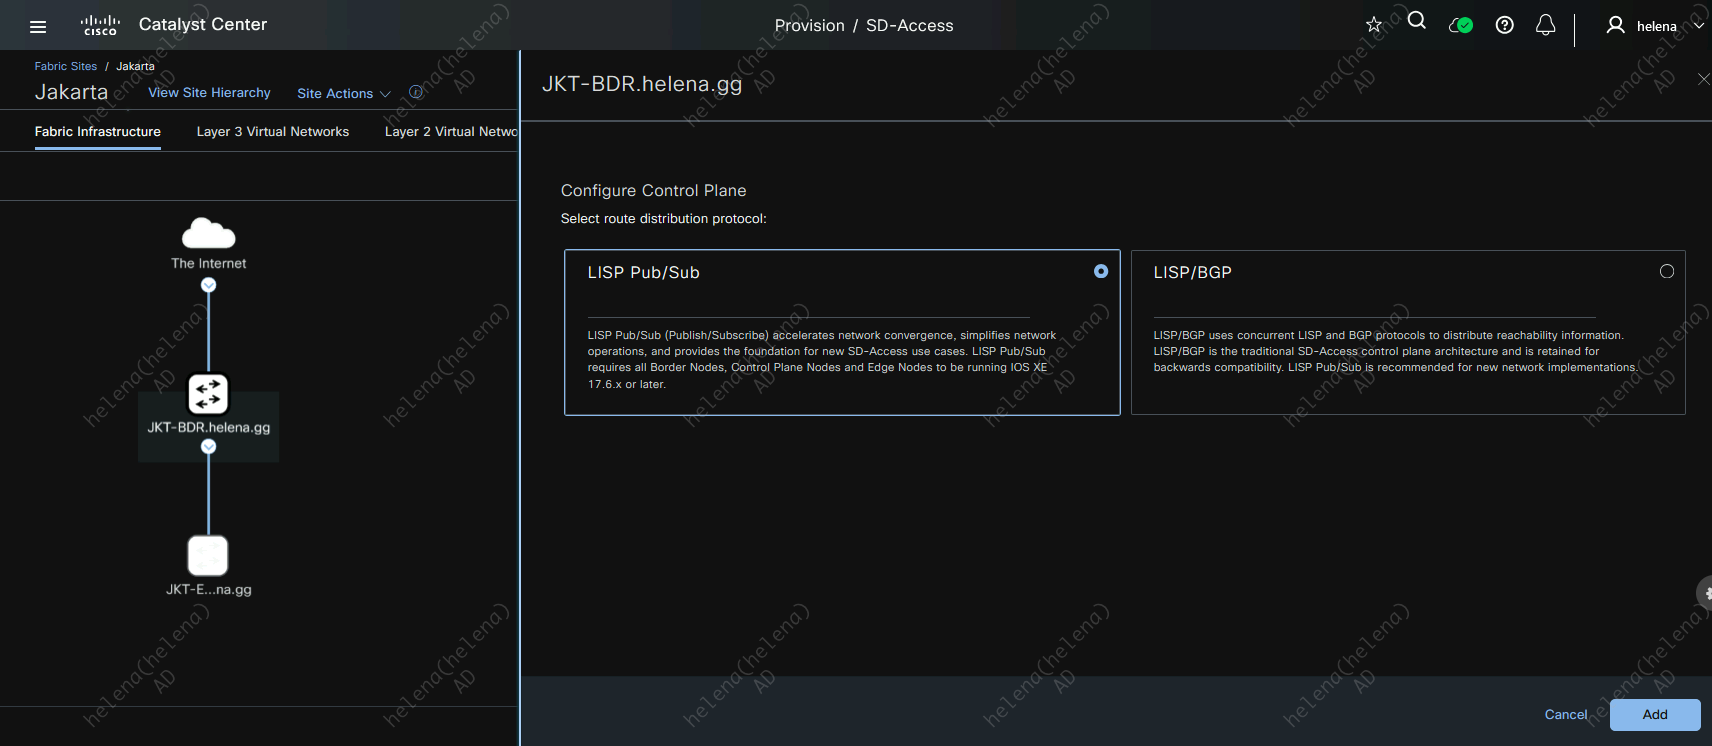
To allow external connectivity between sites, to datacenter or to internet, we have to configure IP Transit