Cisco SD-WAN Deployment
Whats Cisco SD-WAN?
Cisco SD-WAN (Software-Defined Wide Area Network) is a technology that enables organizations to optimize and manage their wide area network connections more efficiently. It uses software-defined networking principles to dynamically route and prioritize network traffic, making it easier to connect and manage various branch offices, data centers, and cloud services.
SD-WAN helps improve network performance, reduce costs, and enhance security by intelligently directing traffic over different connection types, such as MPLS, Metro-ethernet, or Internet, based on application and network conditions.
Deployment Topology
This is the overall topology for this SD-WAN Deployment, where there will be vManage, vBond and vSmart as the central controllers, and there will be 2 Edge Routers with 3 WAN Networks.
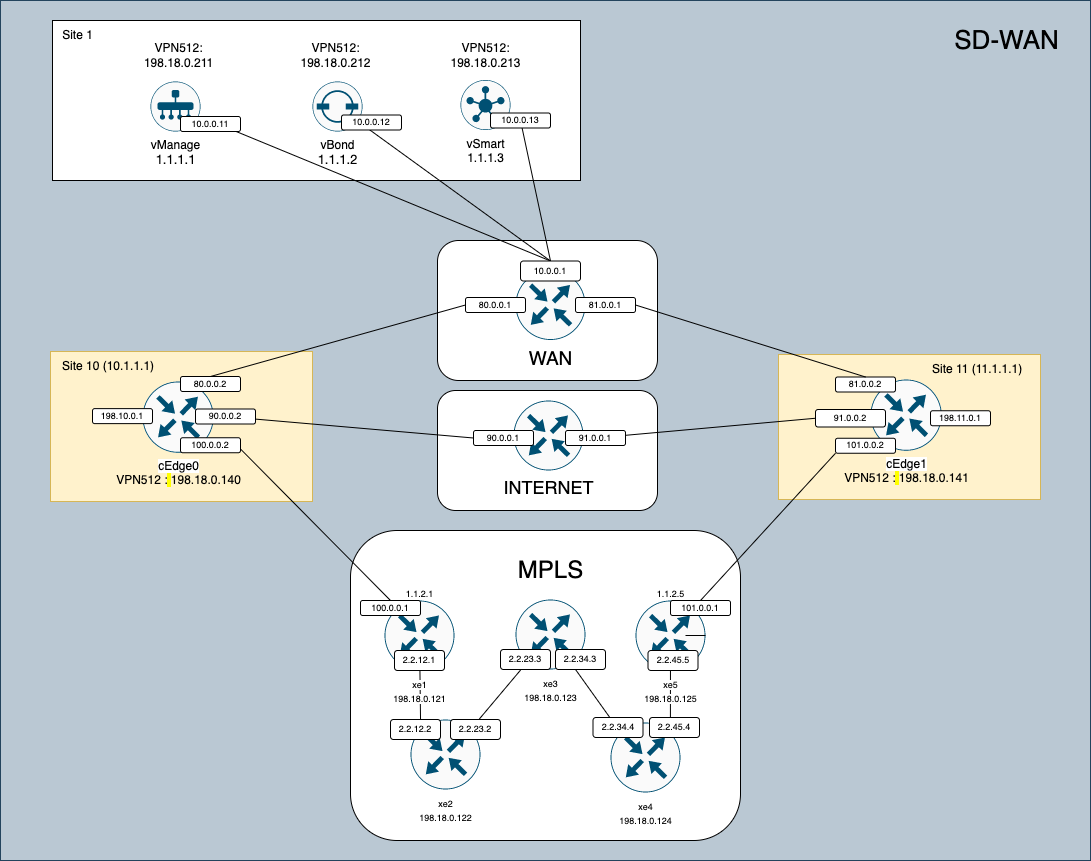
- vManage: vManage is the centralized management and orchestration platform for Cisco SD-WAN. It provides a graphical interface for configuring, monitoring, and troubleshooting the SD-WAN network.
- vSmart: vSmart controllers are responsible for making intelligent routing decisions within the SD-WAN network. They use policies and real-time network conditions to determine the optimal path for application traffic to take through the network.
- vBond: vBond acts as the orchestrator for the initial setup and authentication of SD-WAN devices. It establishes secure connections between SD-WAN edge routers and the rest of the SD-WAN components.
Preparing the Installation
First, download the OVA installers on Cisco’s Website

After that deploy it just like a regular OVA file.
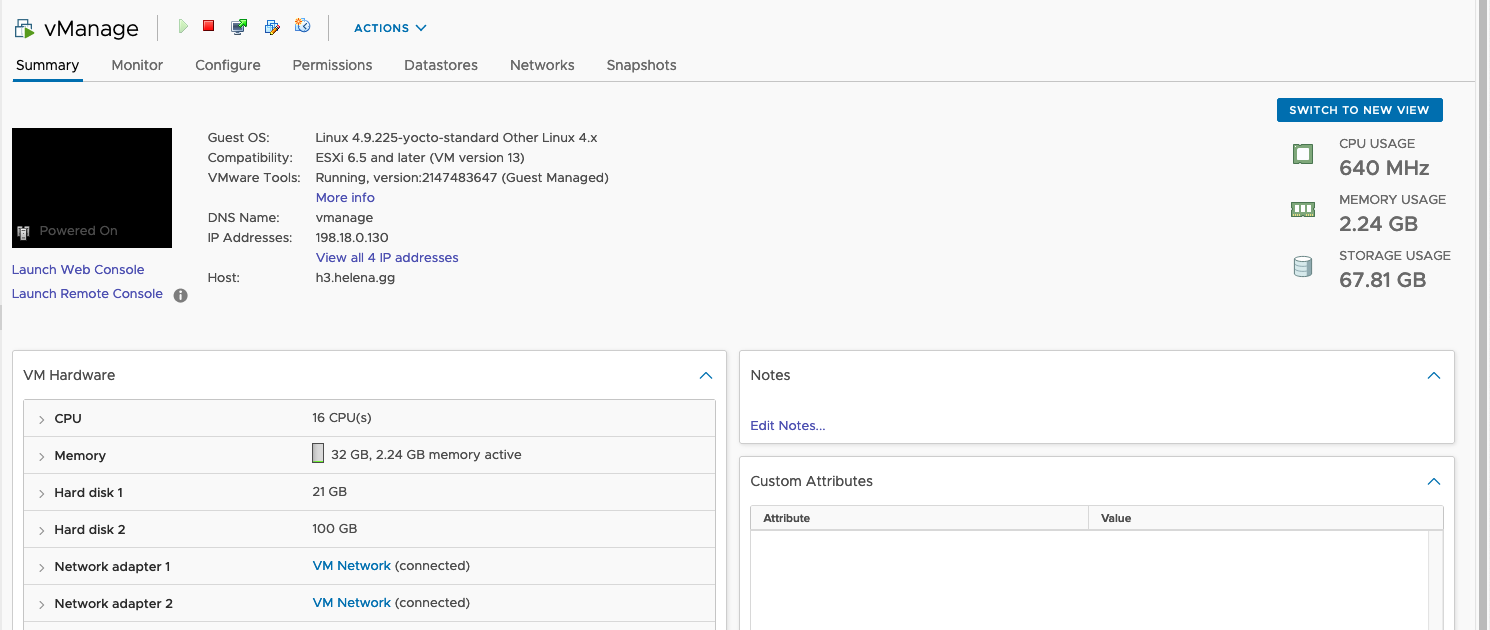
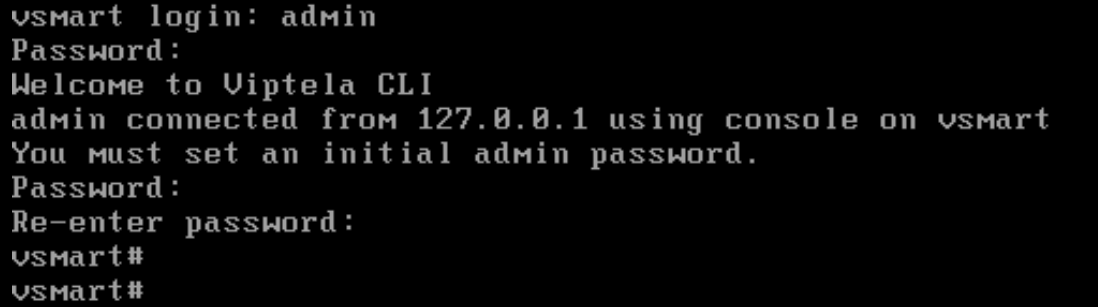
And then access the VMs through console, the default credentials are admin/admin.
Initial Configuration
Now we will configure VPN0 and VPN512 interface on these, VPN0 handles control plane communication between SD-WAN components, while VPN512 facilitates data plane communication between different VRFs within the SD-WAN architecture.
1. vManage
1
2
3
4
5
6
7
8
9
10
11
12
13
14
15
16
17
18
19
20
21
22
23
24
25
26
27
28
29
30
config terminal

system
system-ip 1.1.1.1
site-id 1
organization-name helena
vbond 10.0.0.12
exit

vpn 512
 interface eth1
  ip address 198.18.0.211/24
  no shutdown
  exit

 ip route 0.0.0.0/0 198.18.0.1
 exit
commit

vpn 0
 interface eth0
 ip address 10.0.0.11/24
 no shutdown
 tunnel-interface
  allow-service all
  allow-service netconf
  exit
 exit
ip route 0.0.0.0/0 10.0.0.1
commit and-quit
2. vBond
1
2
3
4
5
6
7
8
9
10
11
12
13
14
15
16
17
18
19
20
21
22
23
24
25
26
27
28
29
30
31
config terminal

system
 host-name vbond
 system-ip 1.1.1.2
 site-id 1
 organization-name helena
 vbond 10.0.0.12 local
 exit
commit

vpn 0
 interface ge0/0
  ip address 10.0.0.12/24
  no shutdown
  tunnel-interface
   allow-service all
   allow-service netconf
   exit
  exit
 ip route 0.0.0.0/0 10.0.0.1
 exit
commit

vpn 512
 interface eth0
  ip address 198.18.0.212/24
  no shutdown
  exit
 ip route 0.0.0.0/0 198.18.0.1
commit and-quit
3. vSmart
1
2
3
4
5
6
7
8
9
10
11
12
13
14
15
16
17
18
19
20
21
22
23
24
25
26
27
28
29
30
31
32
config terminal

system
 system-ip 1.1.1.3
 site-id 1
 organization-name helena
 vbond 10.0.0.12
 exit
commit

vpn 0
 interface eth0
  ip add 10.0.0.13/24
  no shut
  tunnel-interface
   allow-service all
   allow-service netconf
   exit
  exit

 ip route 0.0.0.0/0 10.0.0.1
 exit
commit

vpn 512
 interface eth1
  ip address 198.18.0.213/24
  no shutdown
  exit

 ip route 0.0.0.0/0 198.18.0.1
 commit and-quit
Now the vManage’s Web UI should be accessible through its VPN512’s IP Address, open it on web browser

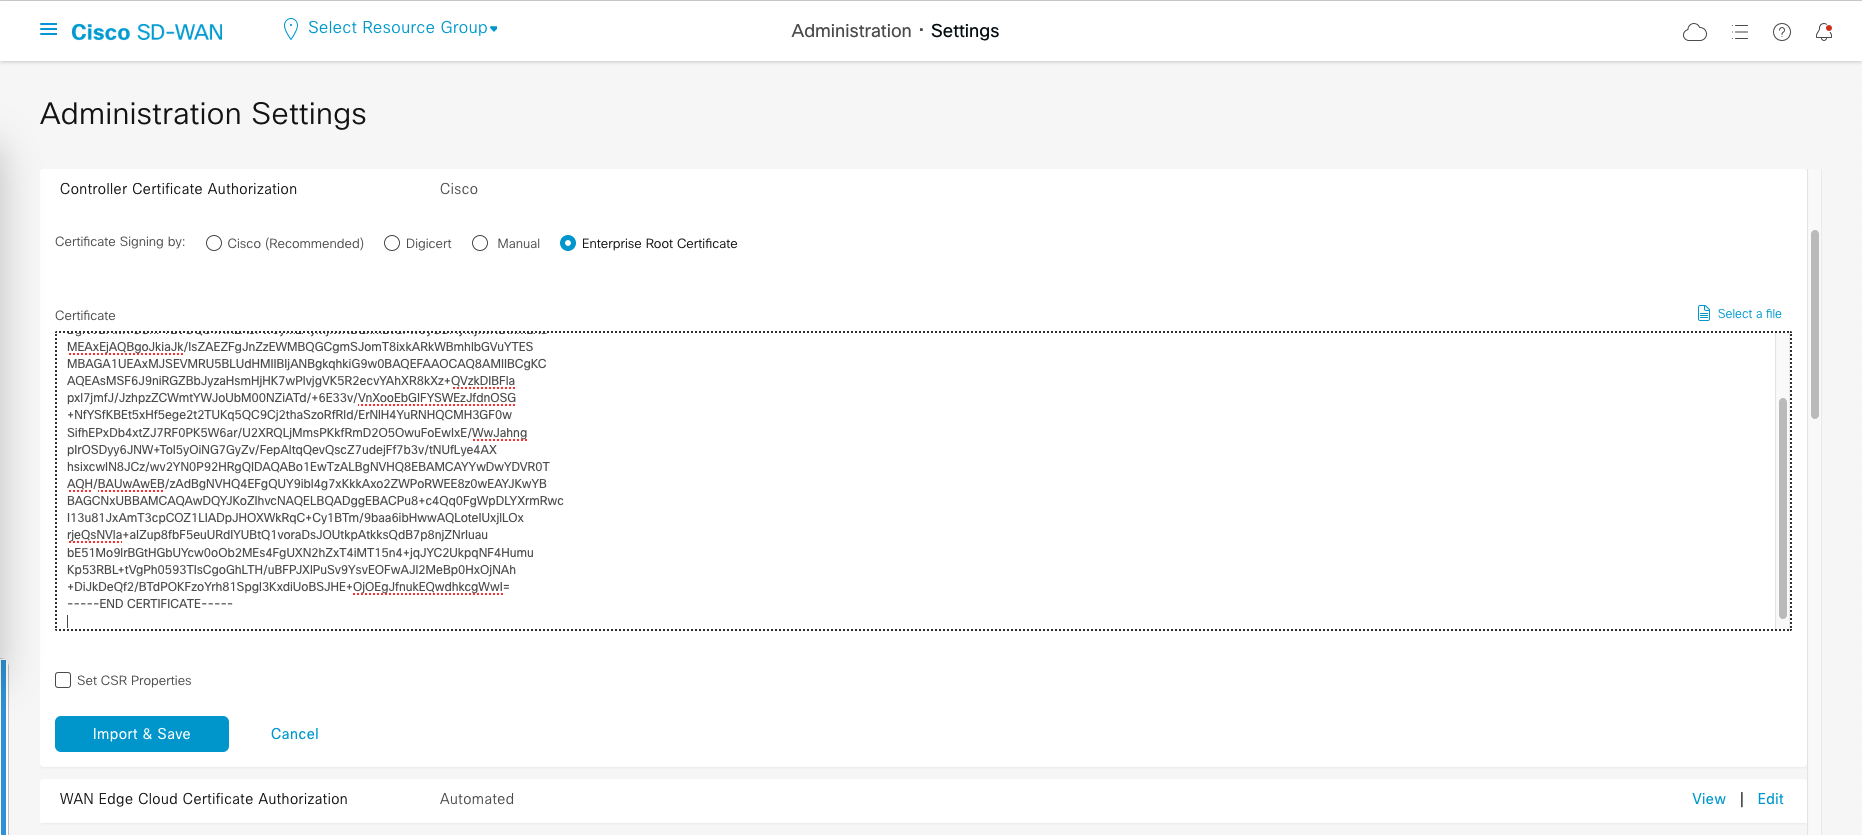
Go to Administration » Settings, fill out the organization name and vbond’s IP Address

Then on Controller Certificate Authorization, we’ll use Enterprise because we happen to manage our own CA (Certificate Authority) server
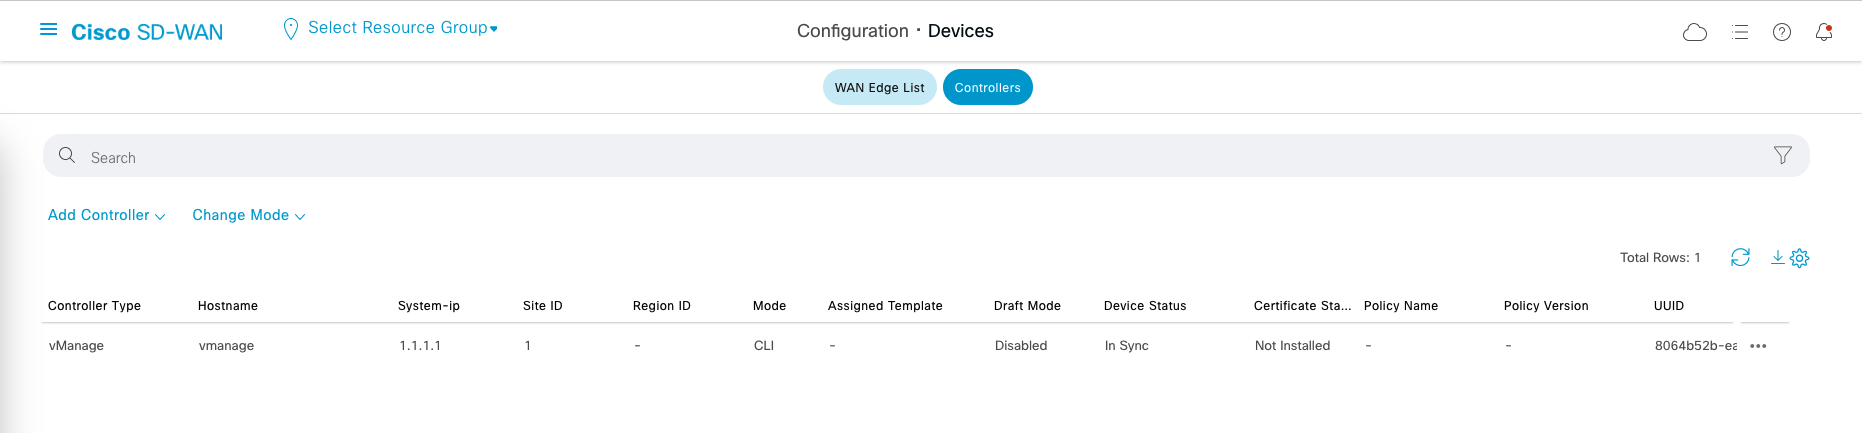
Adding Controllers to vManage
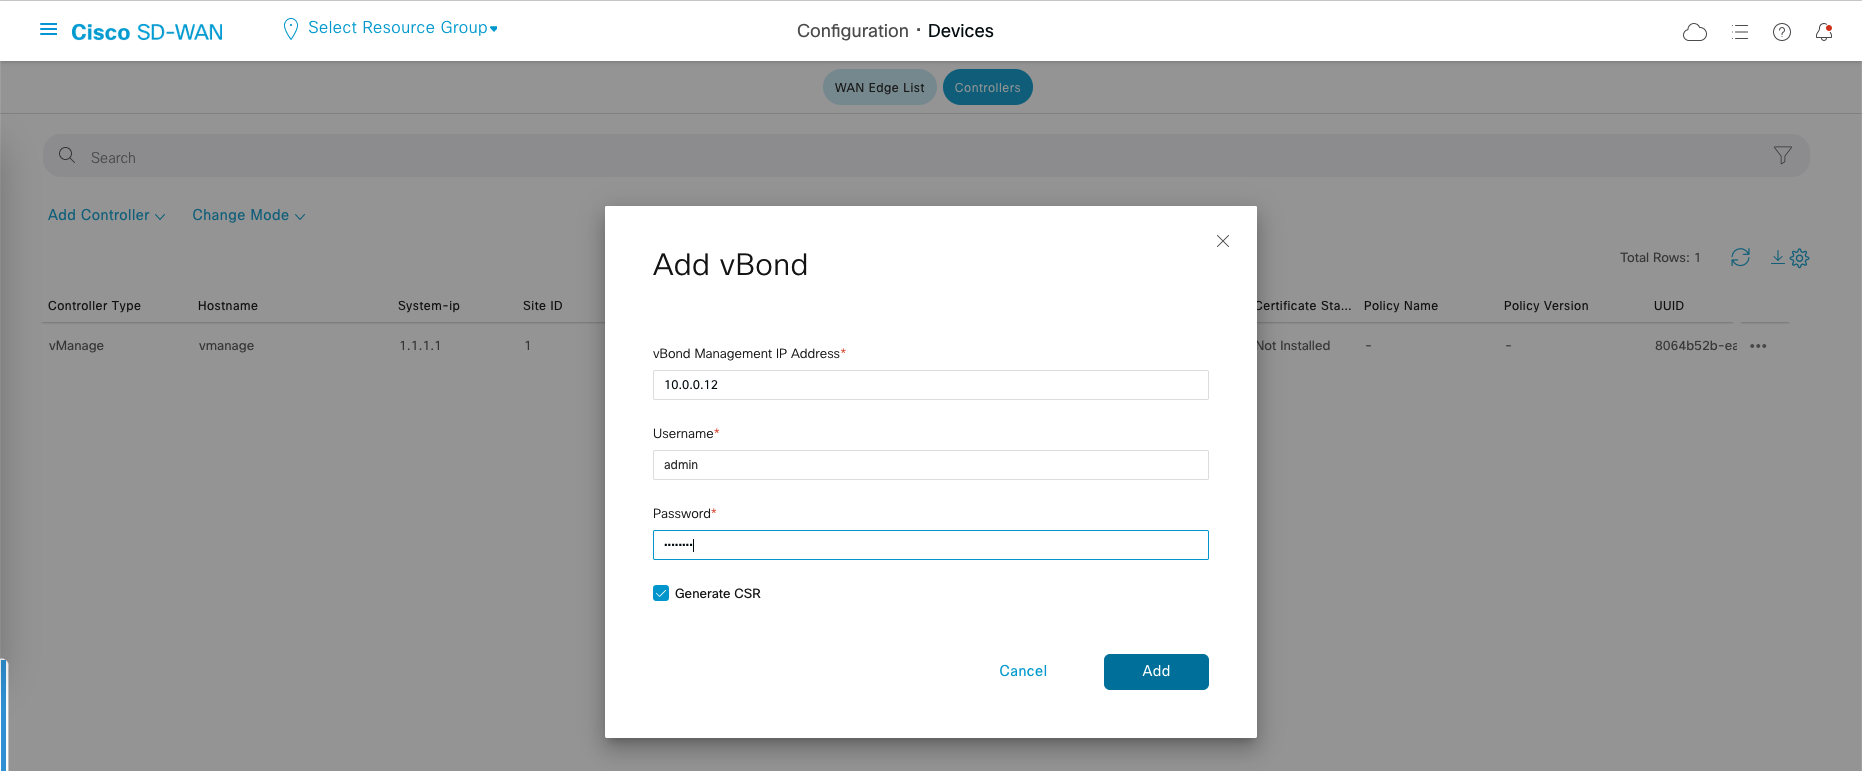
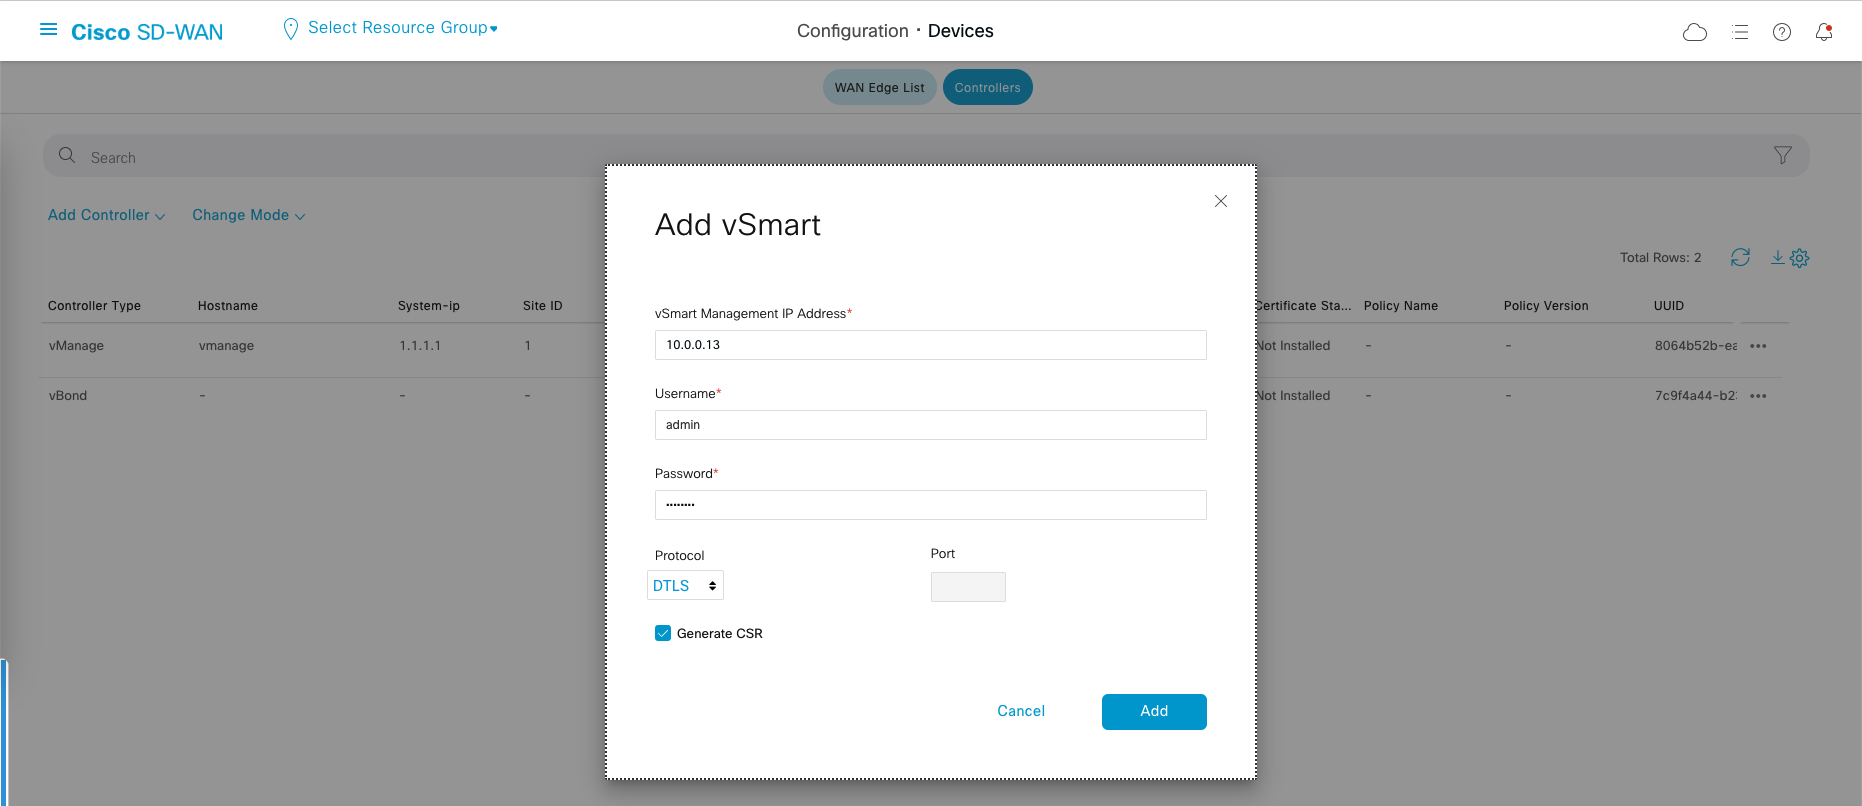
Now we’ll onboard both vBond and vSmart to become our controllers, go to Configuration » Devices » Controllers
Choose Add Controller » vBond, fill out vBond’s IP Address and credentials
Same goes with vSmart
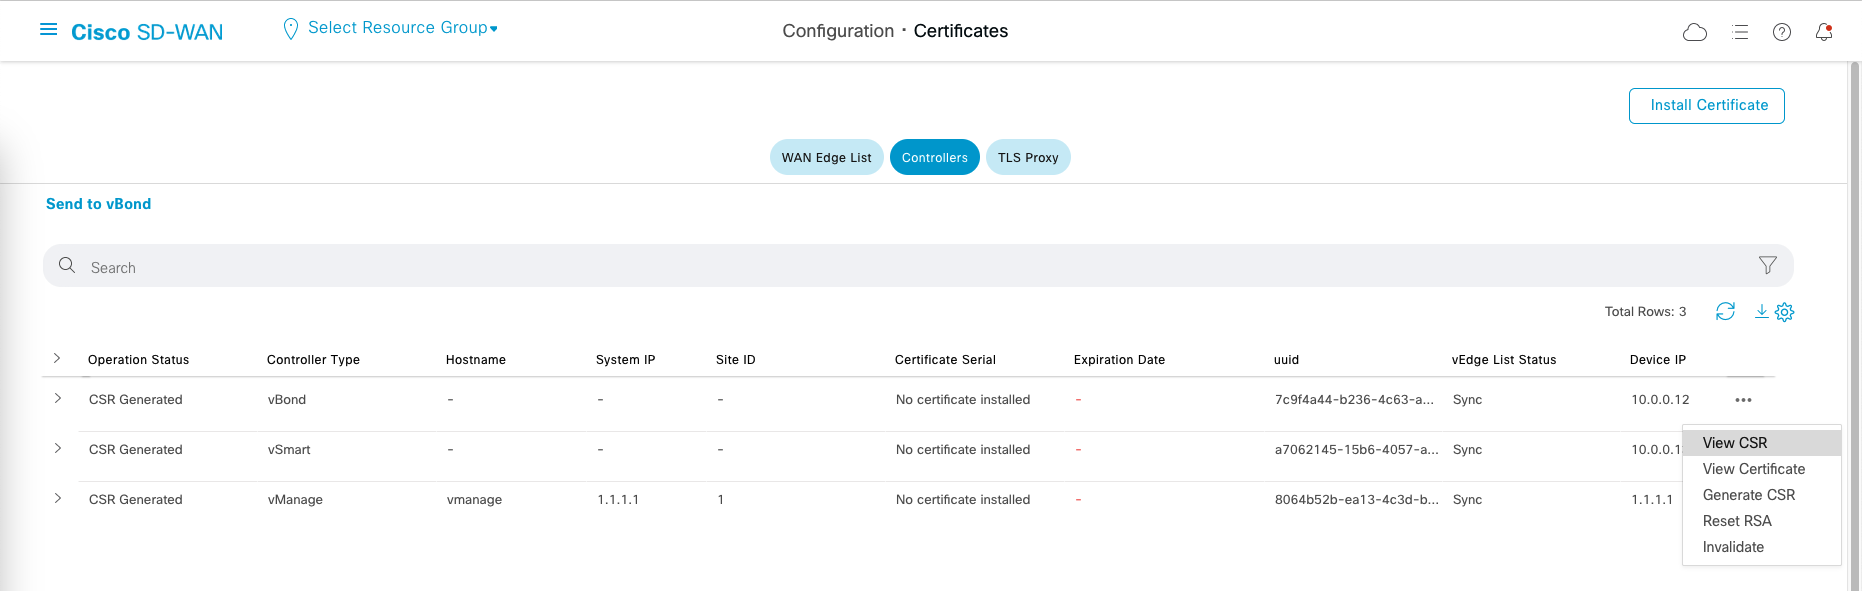
Signing Controller’s Certificate
After all controllers are onboarded, now we sign their certificates.
Go to Configuration » Certificates » Controllers,
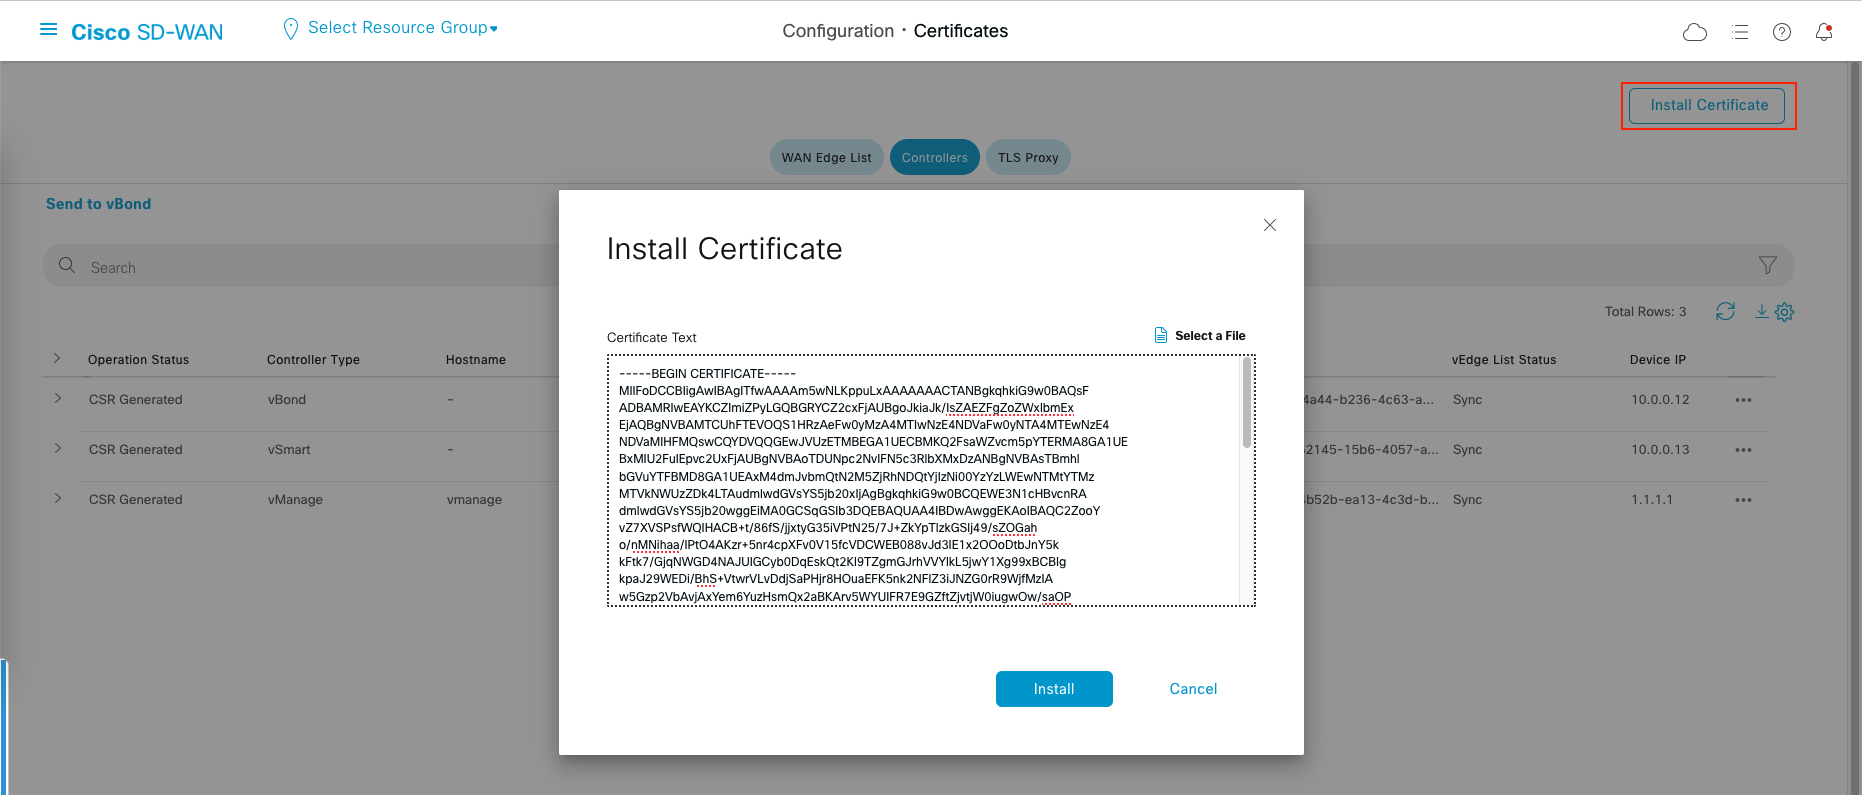
And then just view the CSR and Sign in on the CA Server.
After signing the CSR, install the certificate
Repeat for the rest, the we end up with this
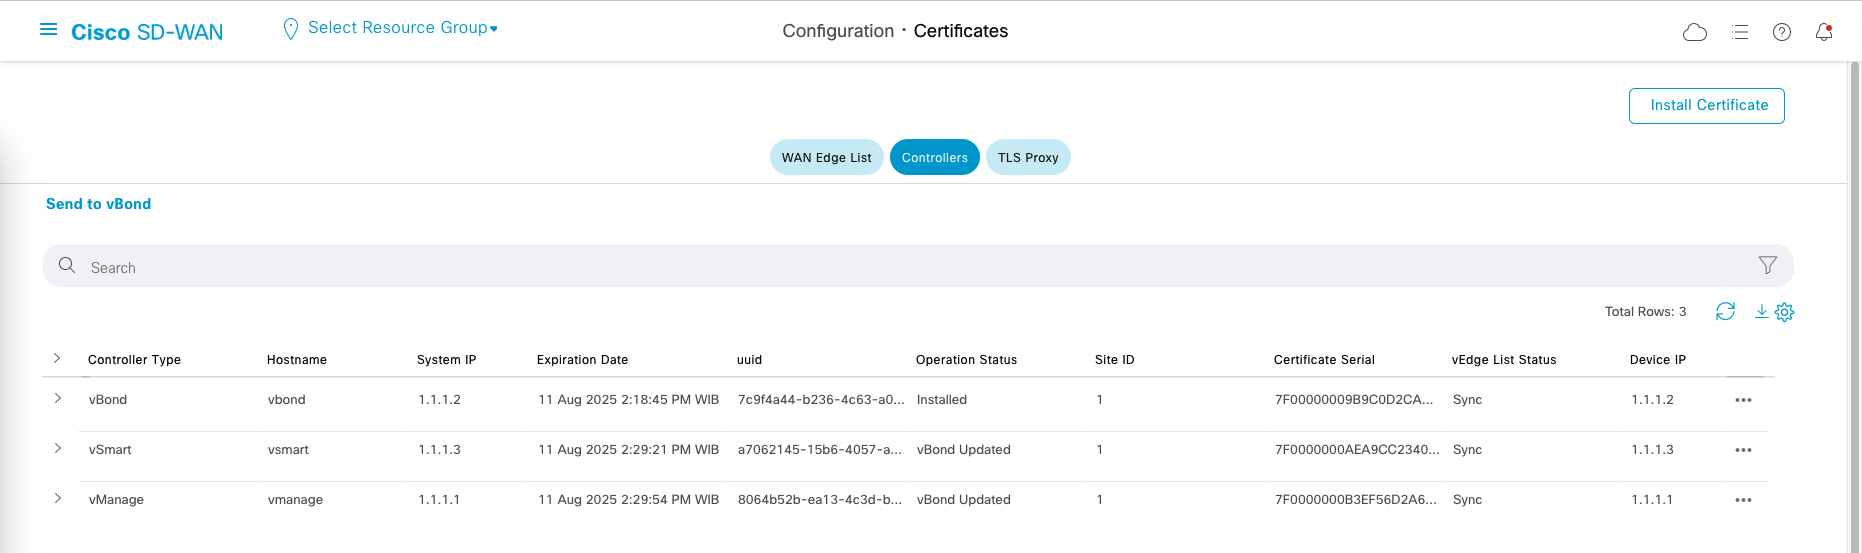
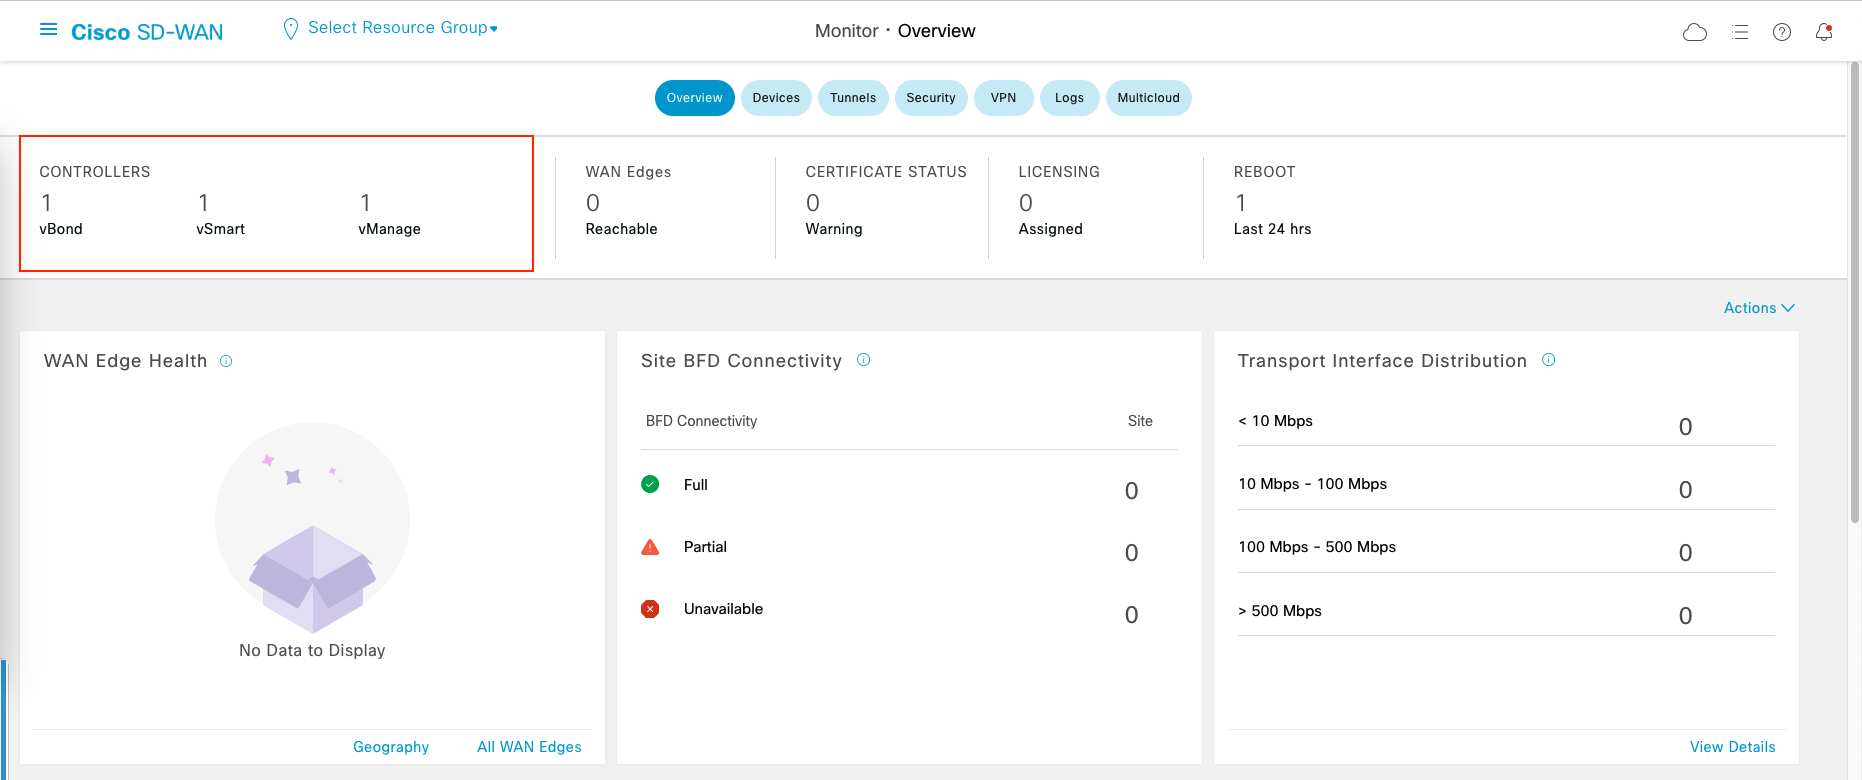
And on vManage Dashboard, we should see the vBond and vSmart are recognized