VMware vCenter
What is vCenter?
vCenter is a centralized management platform that is used to manage and administer virtualized data centers and servers.
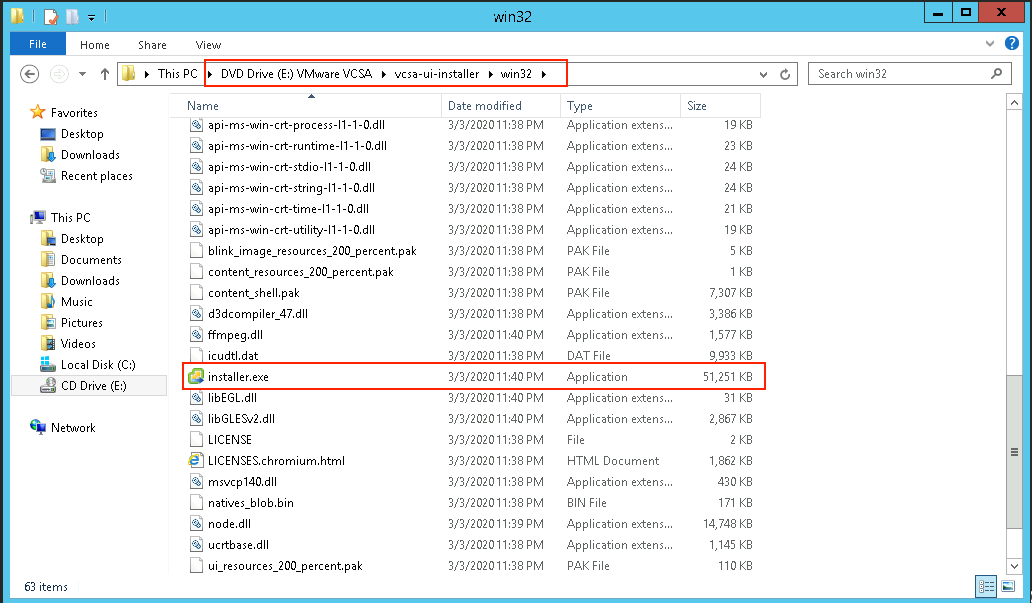
Preparing the Installer
Download the vCenter installer and mount the ISO

Run the windows installer
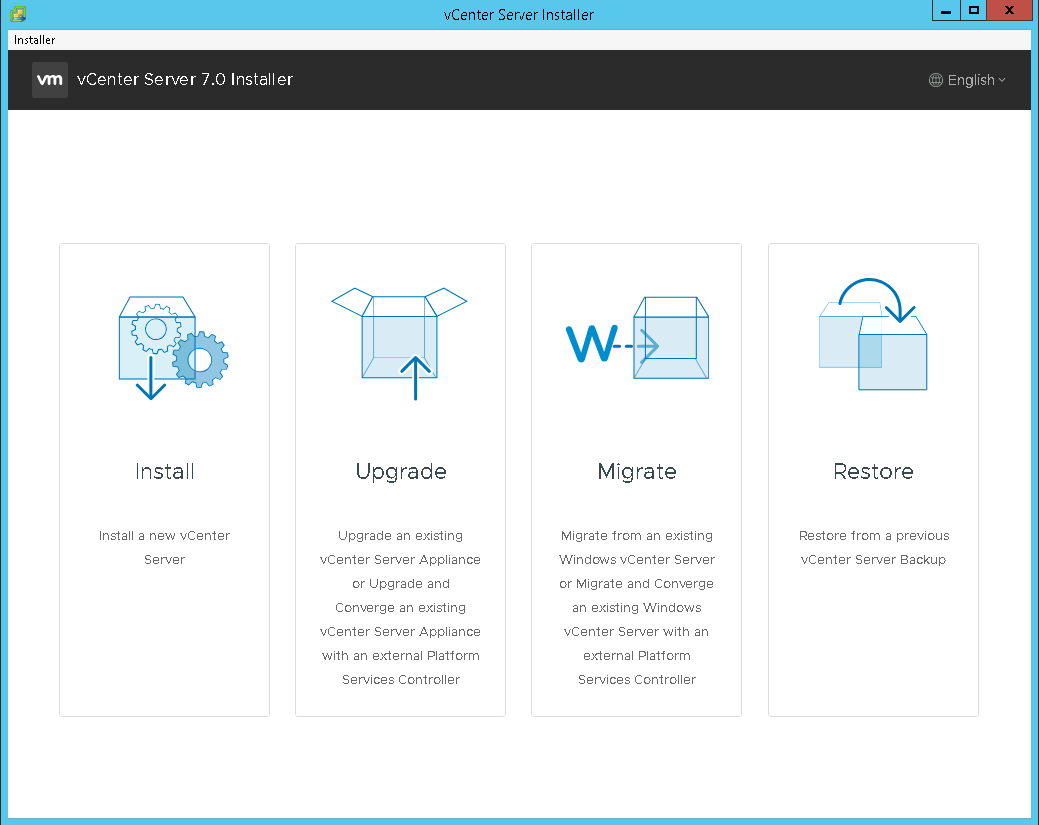
Running the Stage 1 Installer
Select install
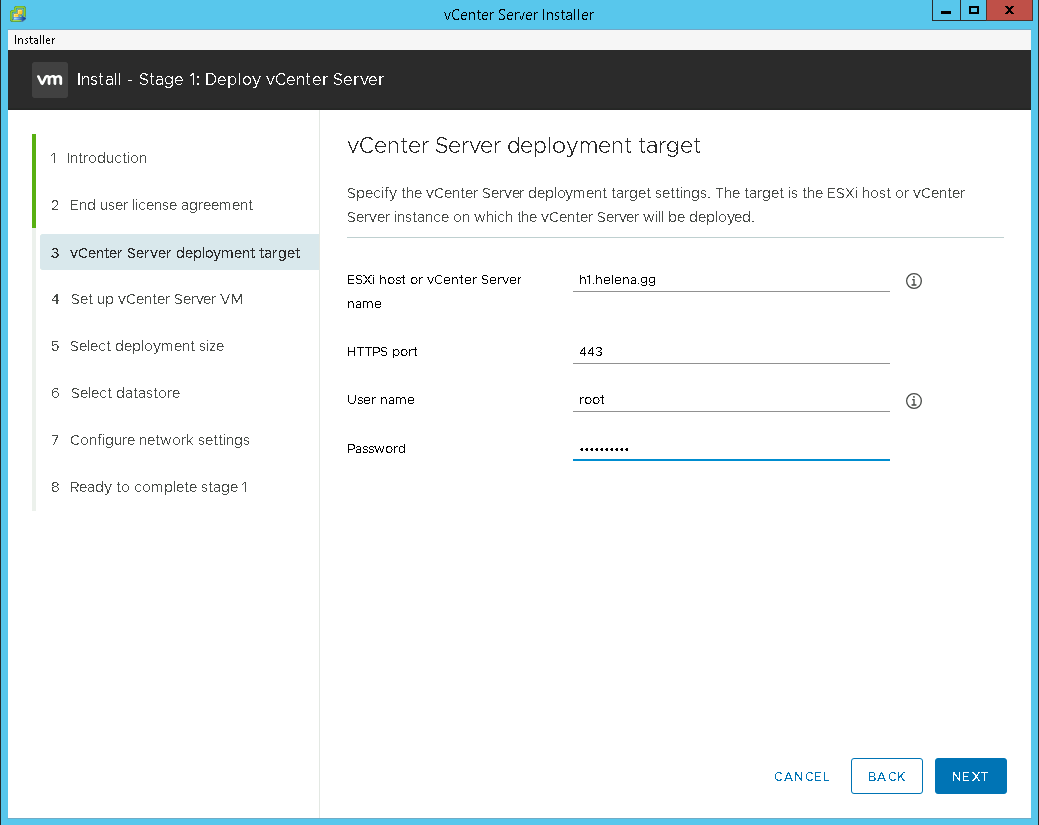
Input the IP or FQDN of the target host where vCenter will be installed
Give the VM a name and password

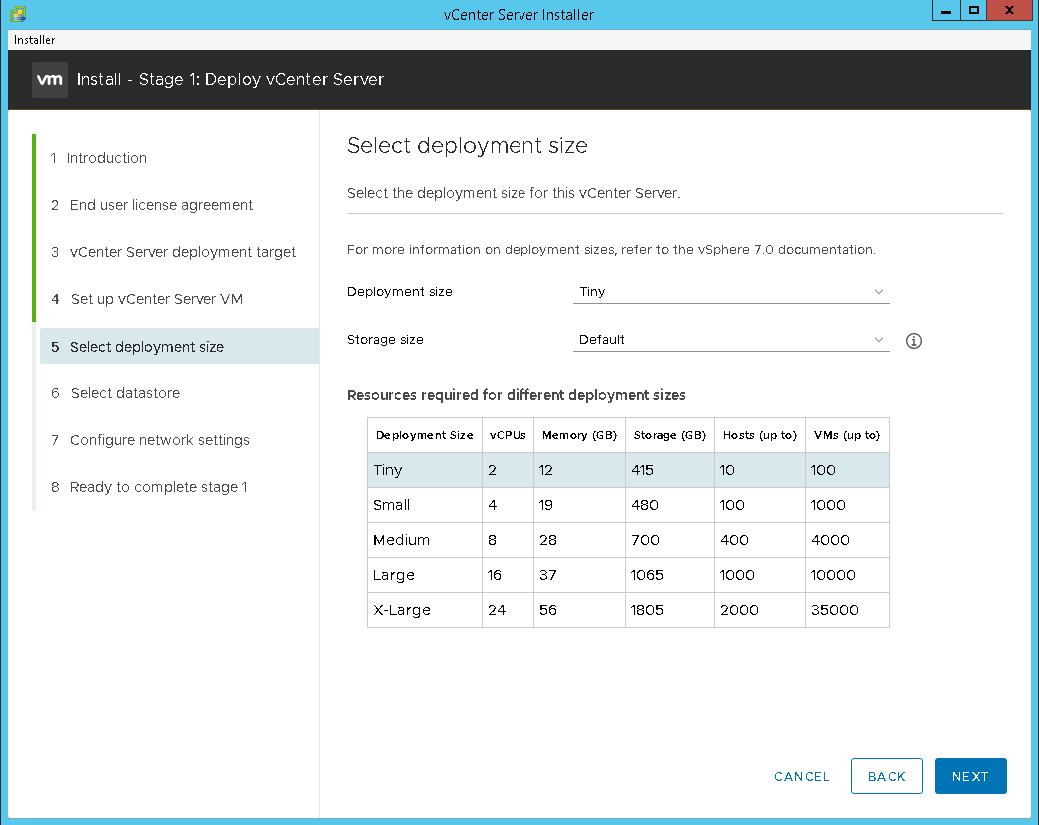
Select the deployment size
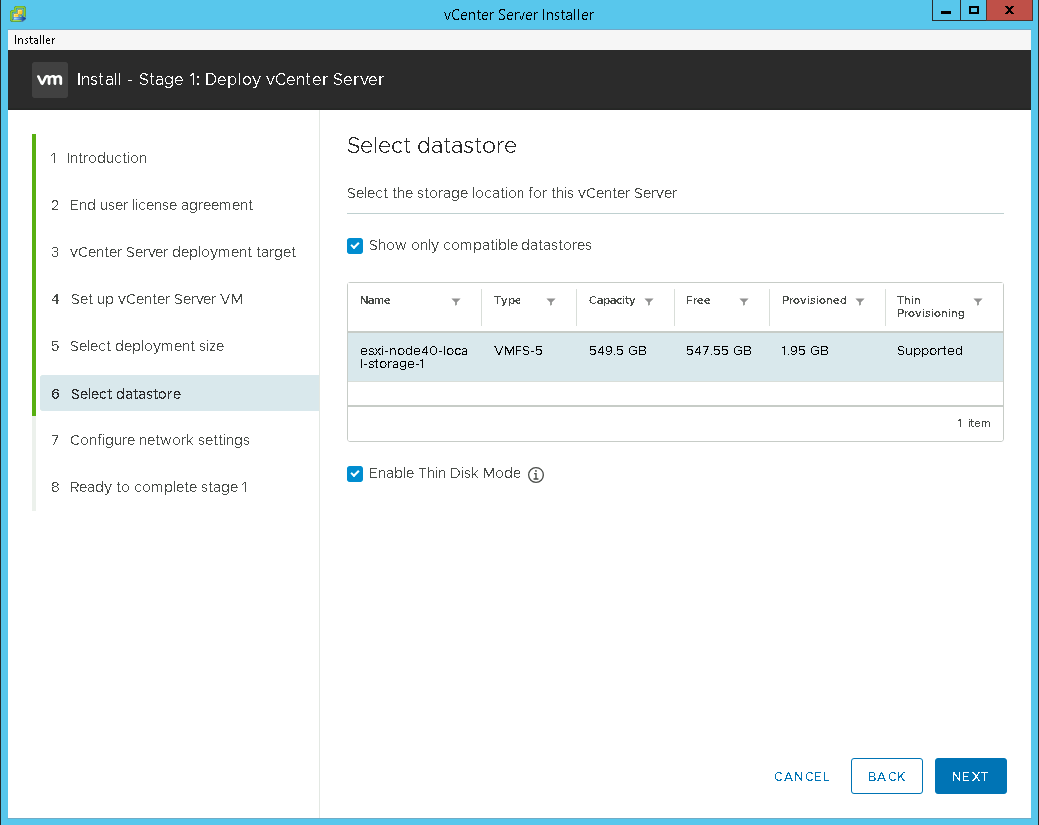
Select the datastore, select Thin if you wish for the vcenter to not allocate all the disk right away
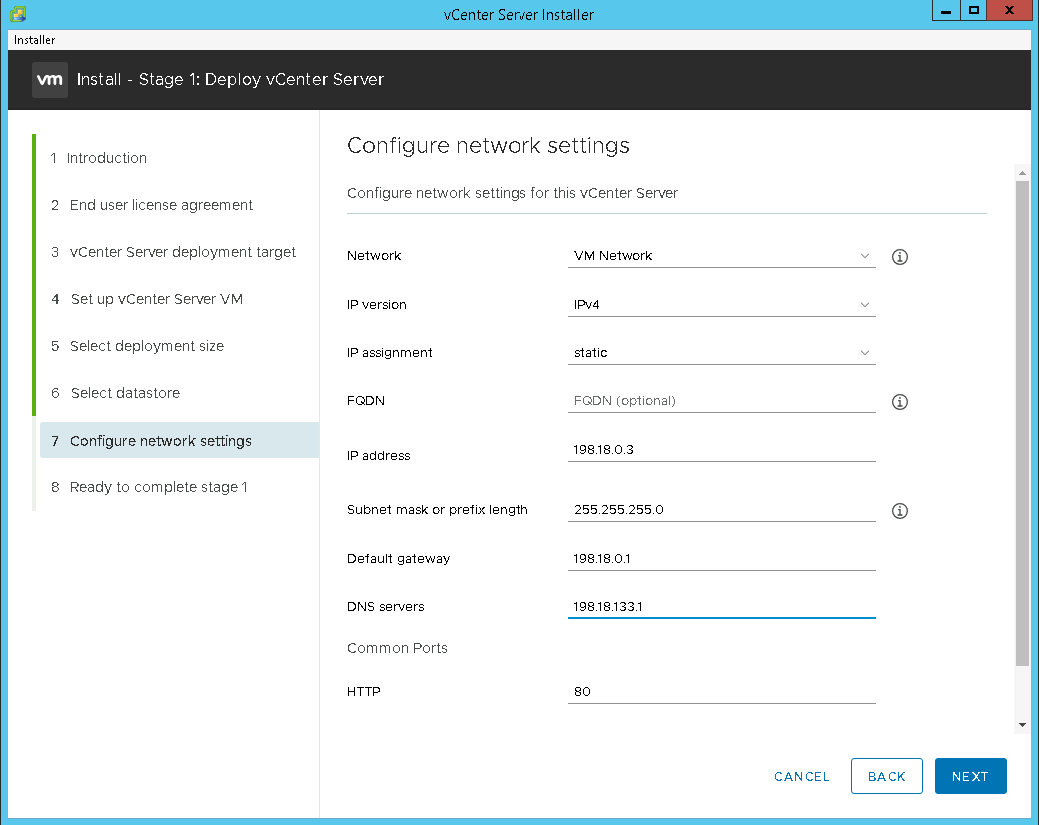
Give it network configuration
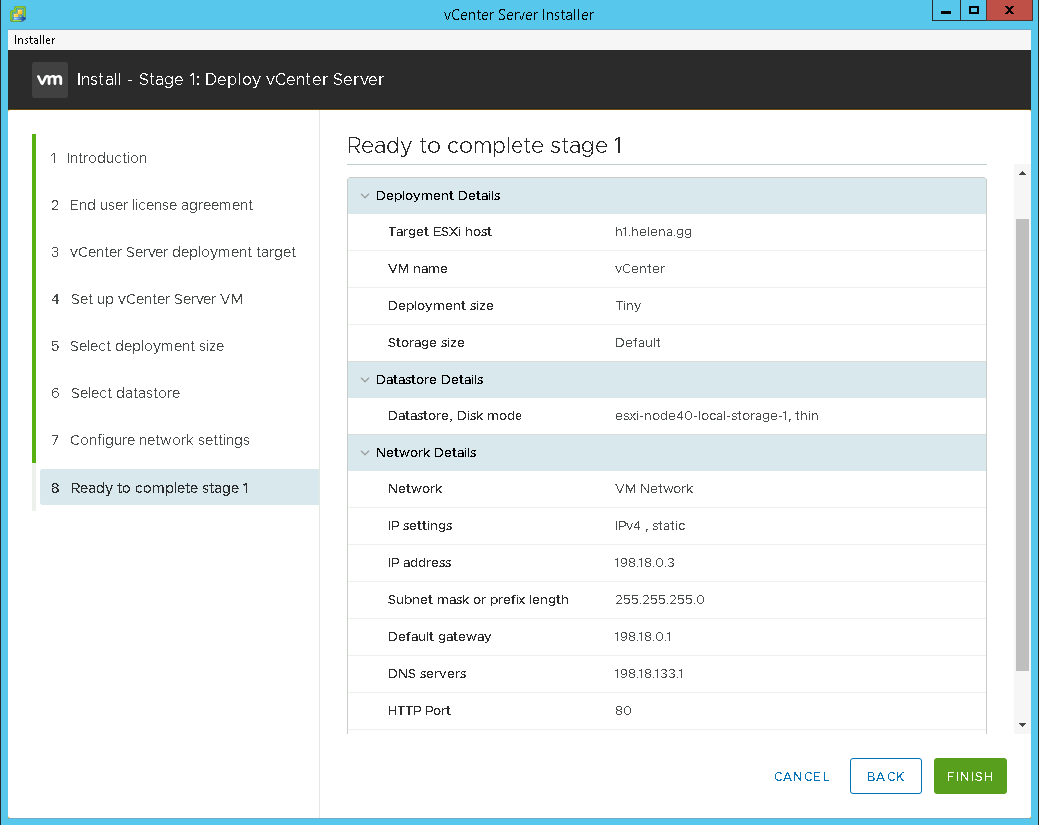
Review it and click finish
After it finishes, click continue to proceed with stage 2

Completing the Stage 2 Installer
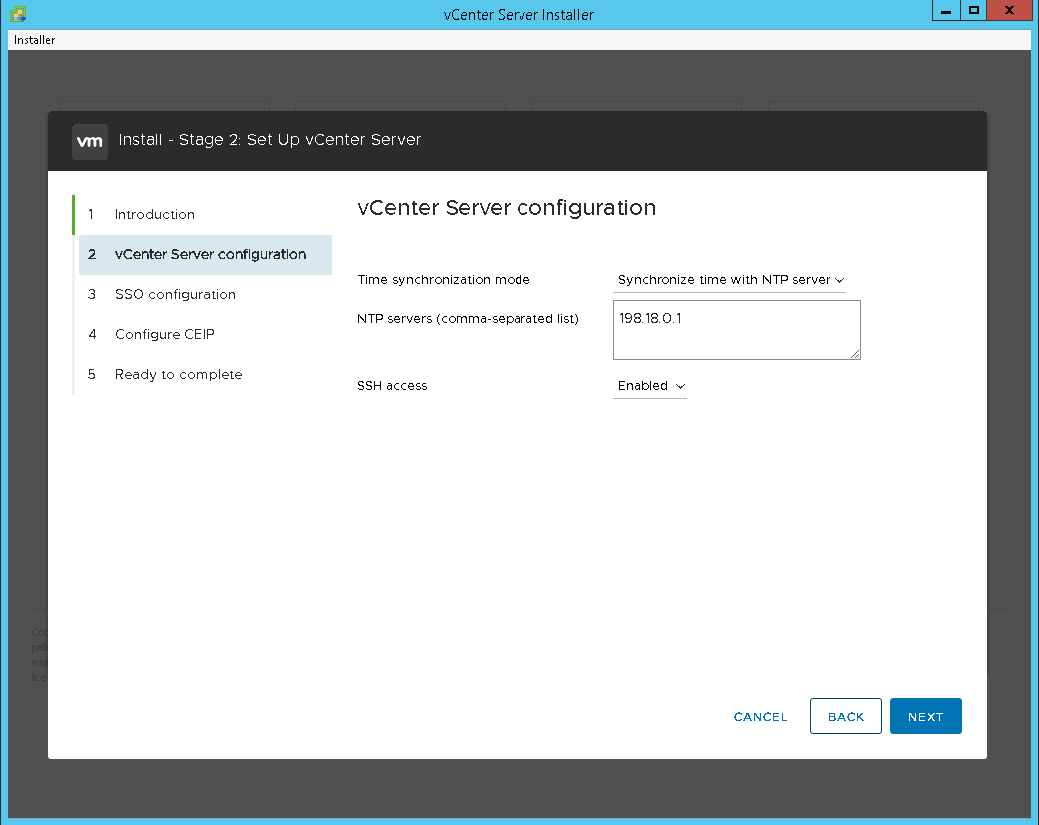
Configure NTP and enable SSH
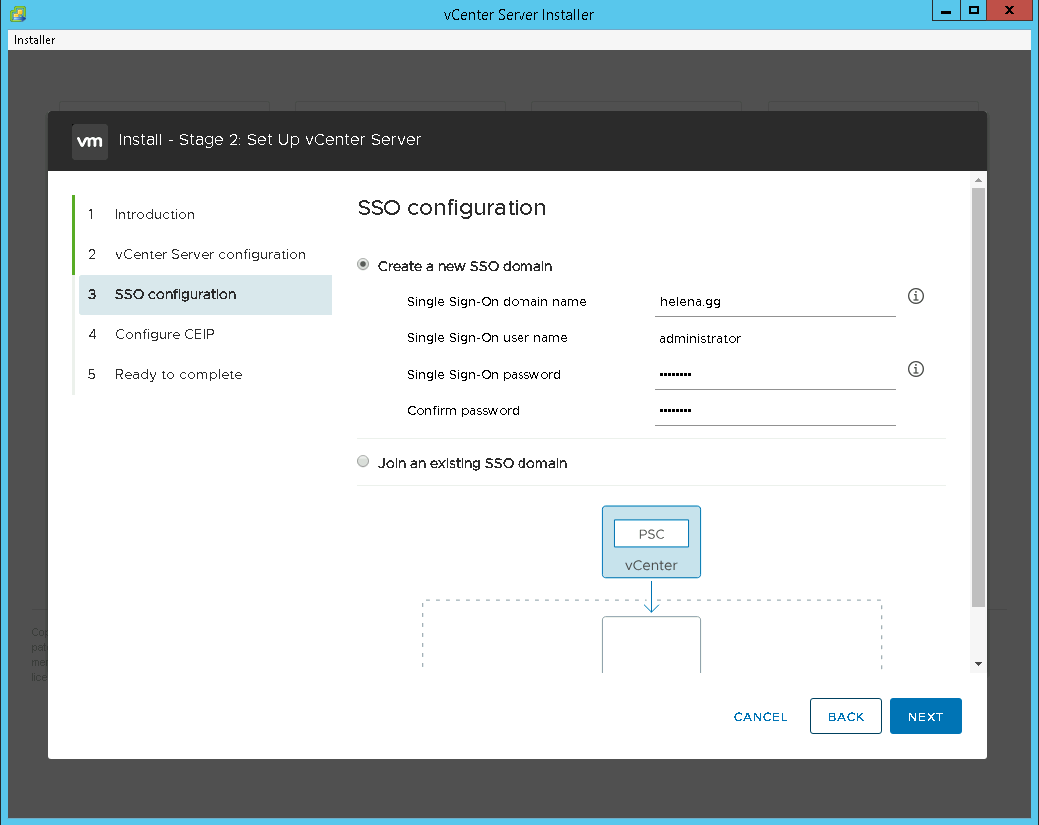
Create domain admin user and the password
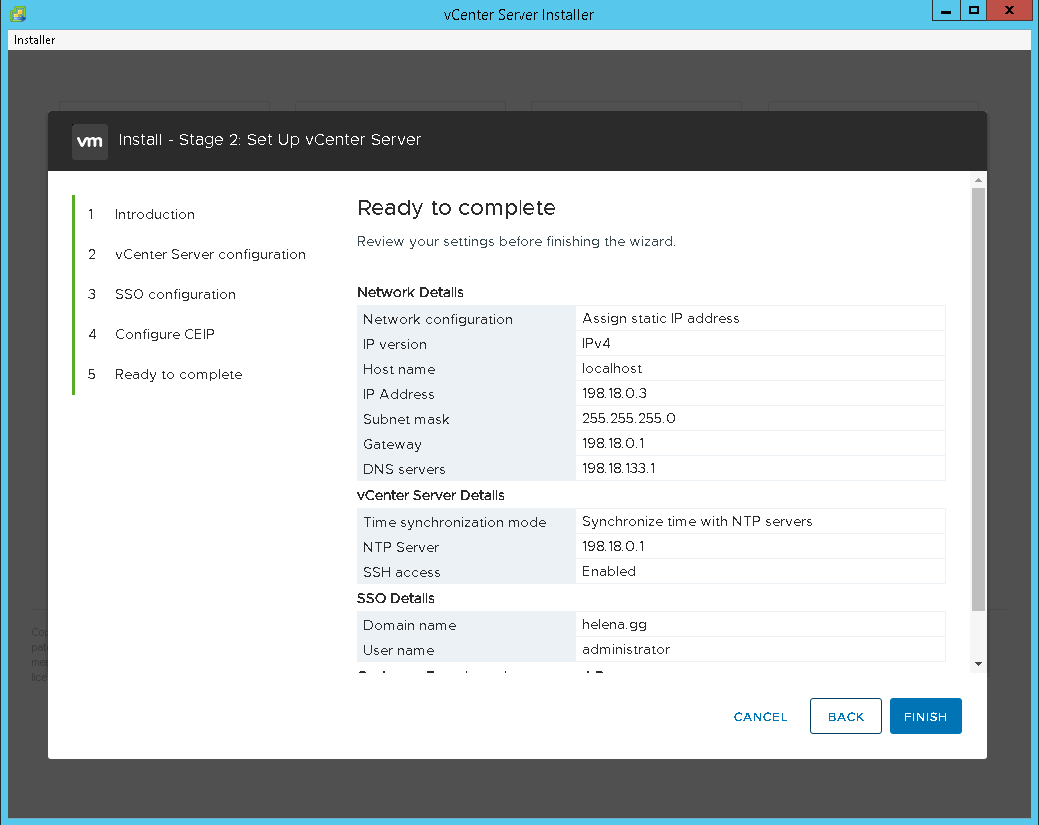
Review and finish
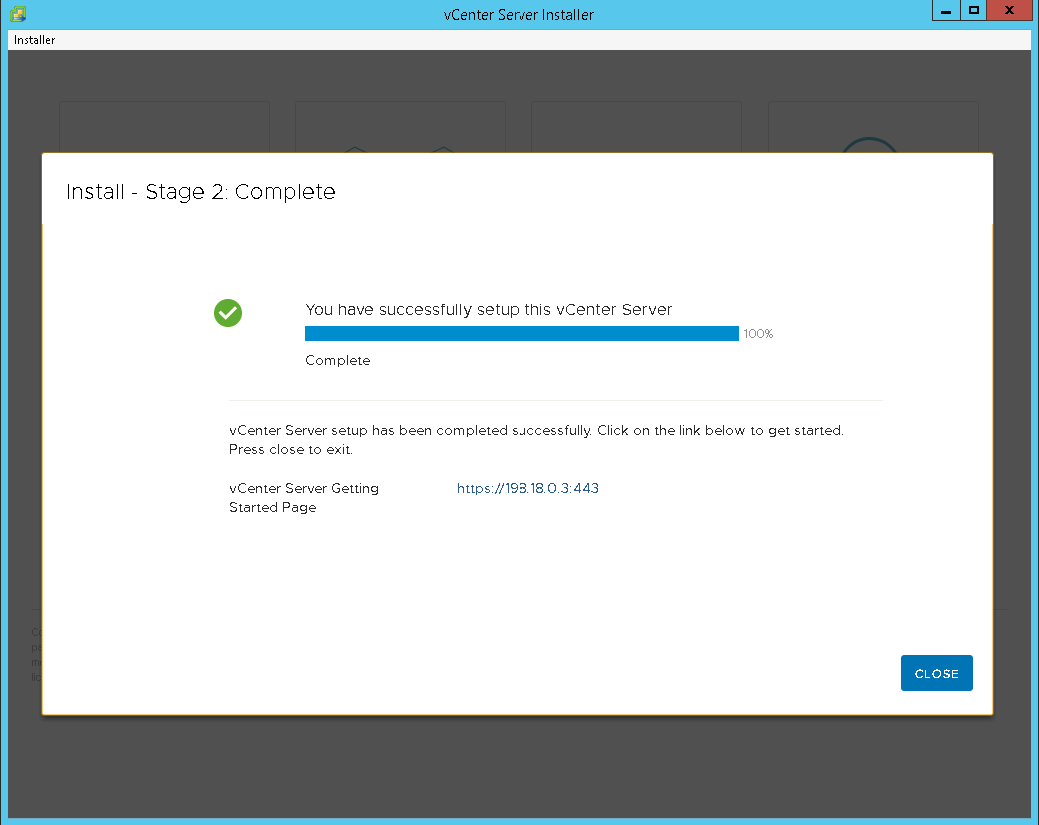
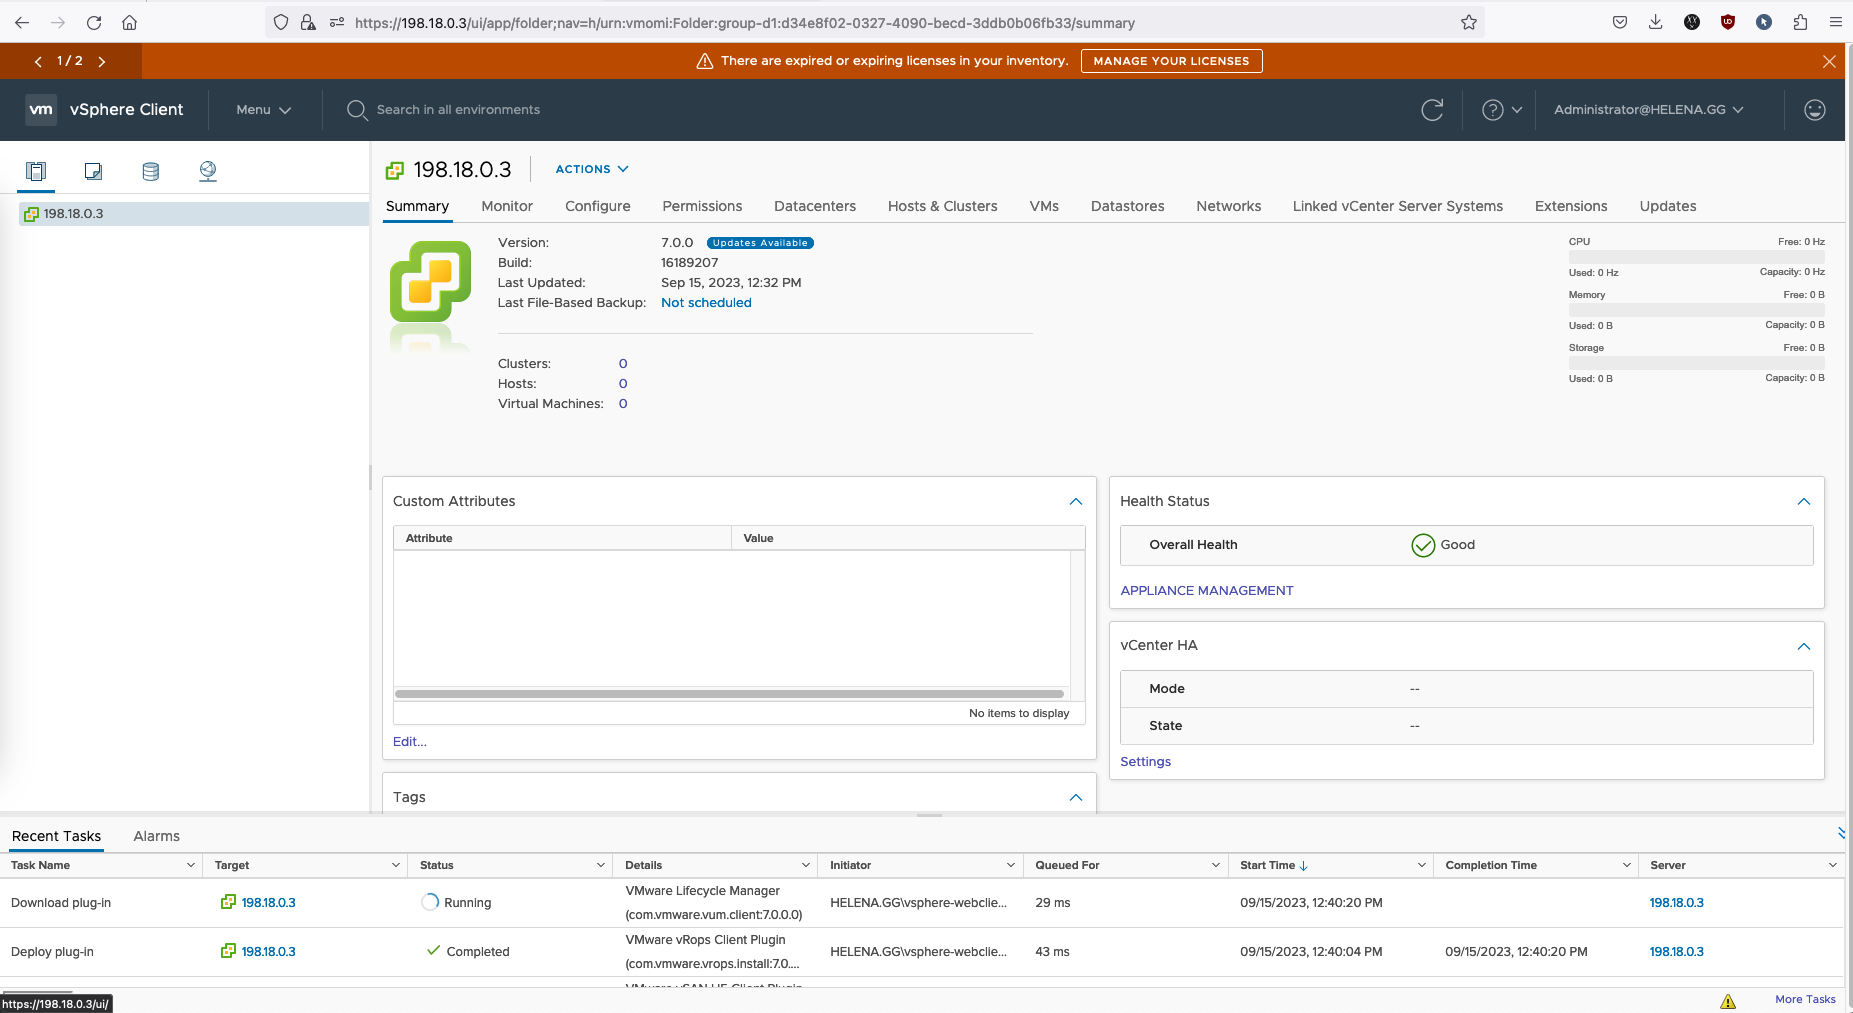
After some time, it’ll complete and the vCenter Web UI should be accessible
Accessing vCenter
Access it on default port 443
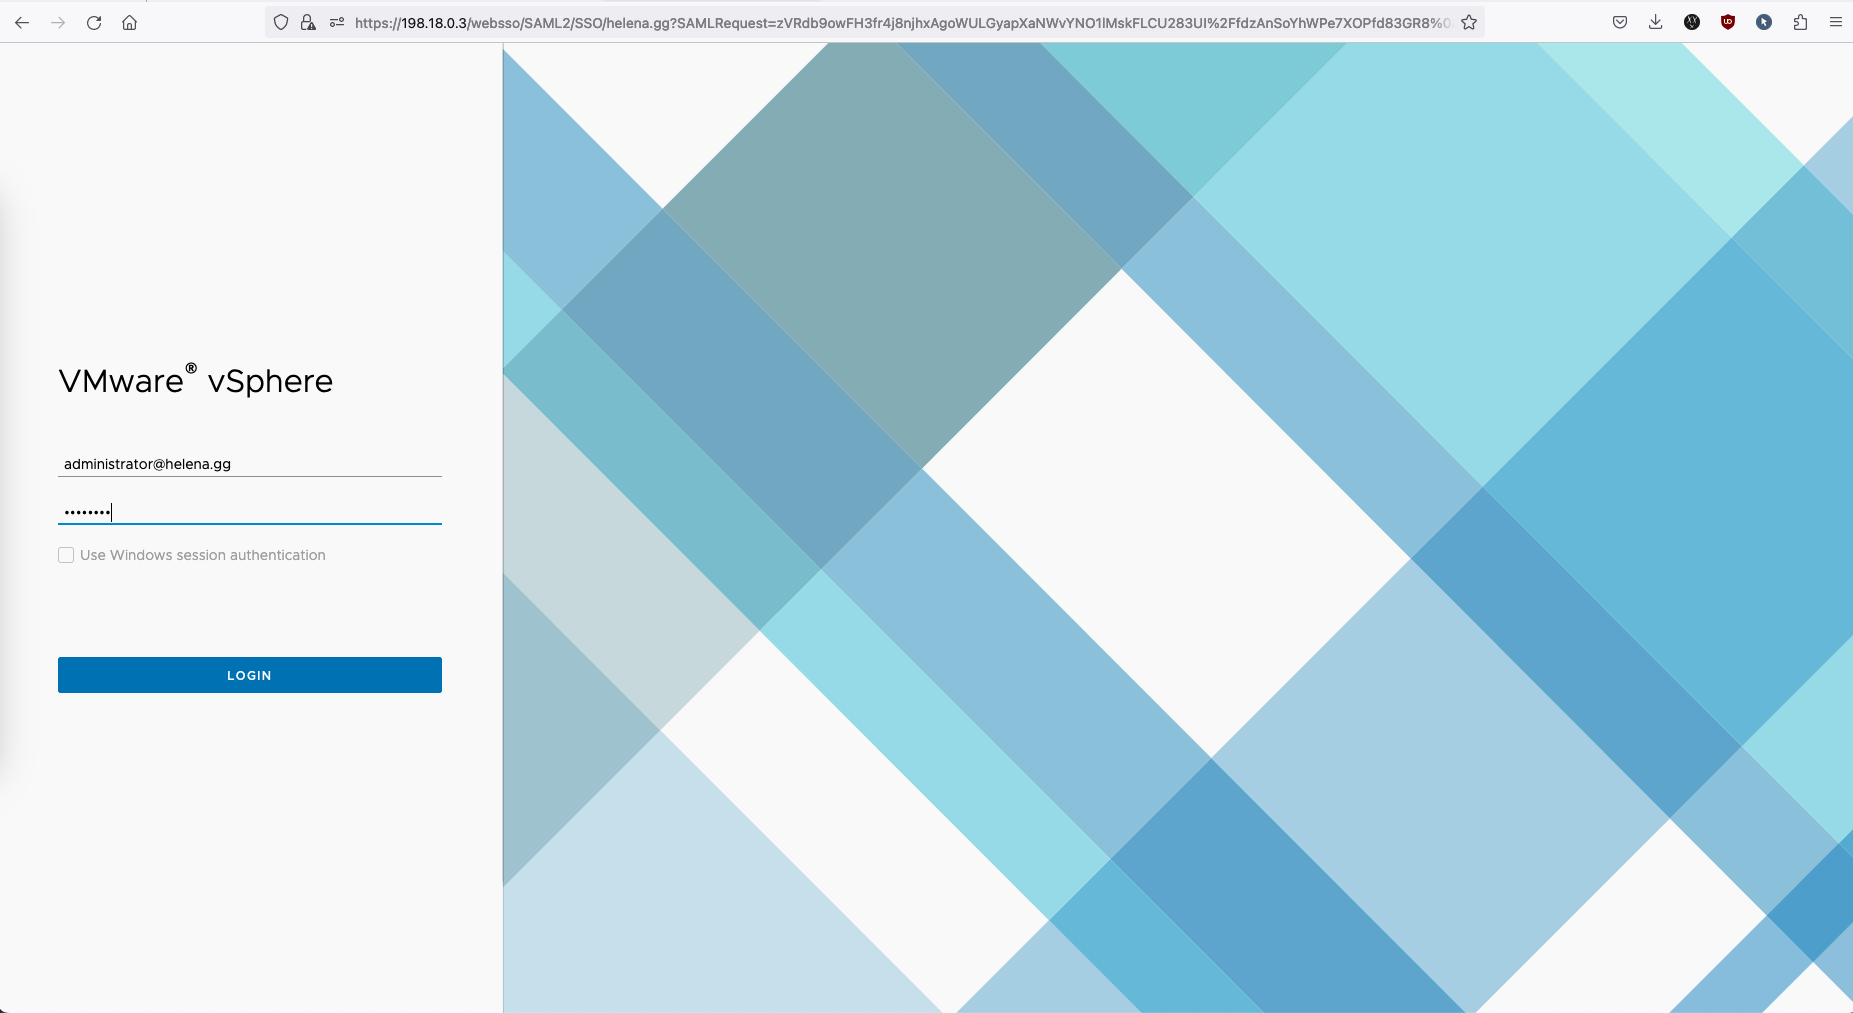
And the vCenter is up and running
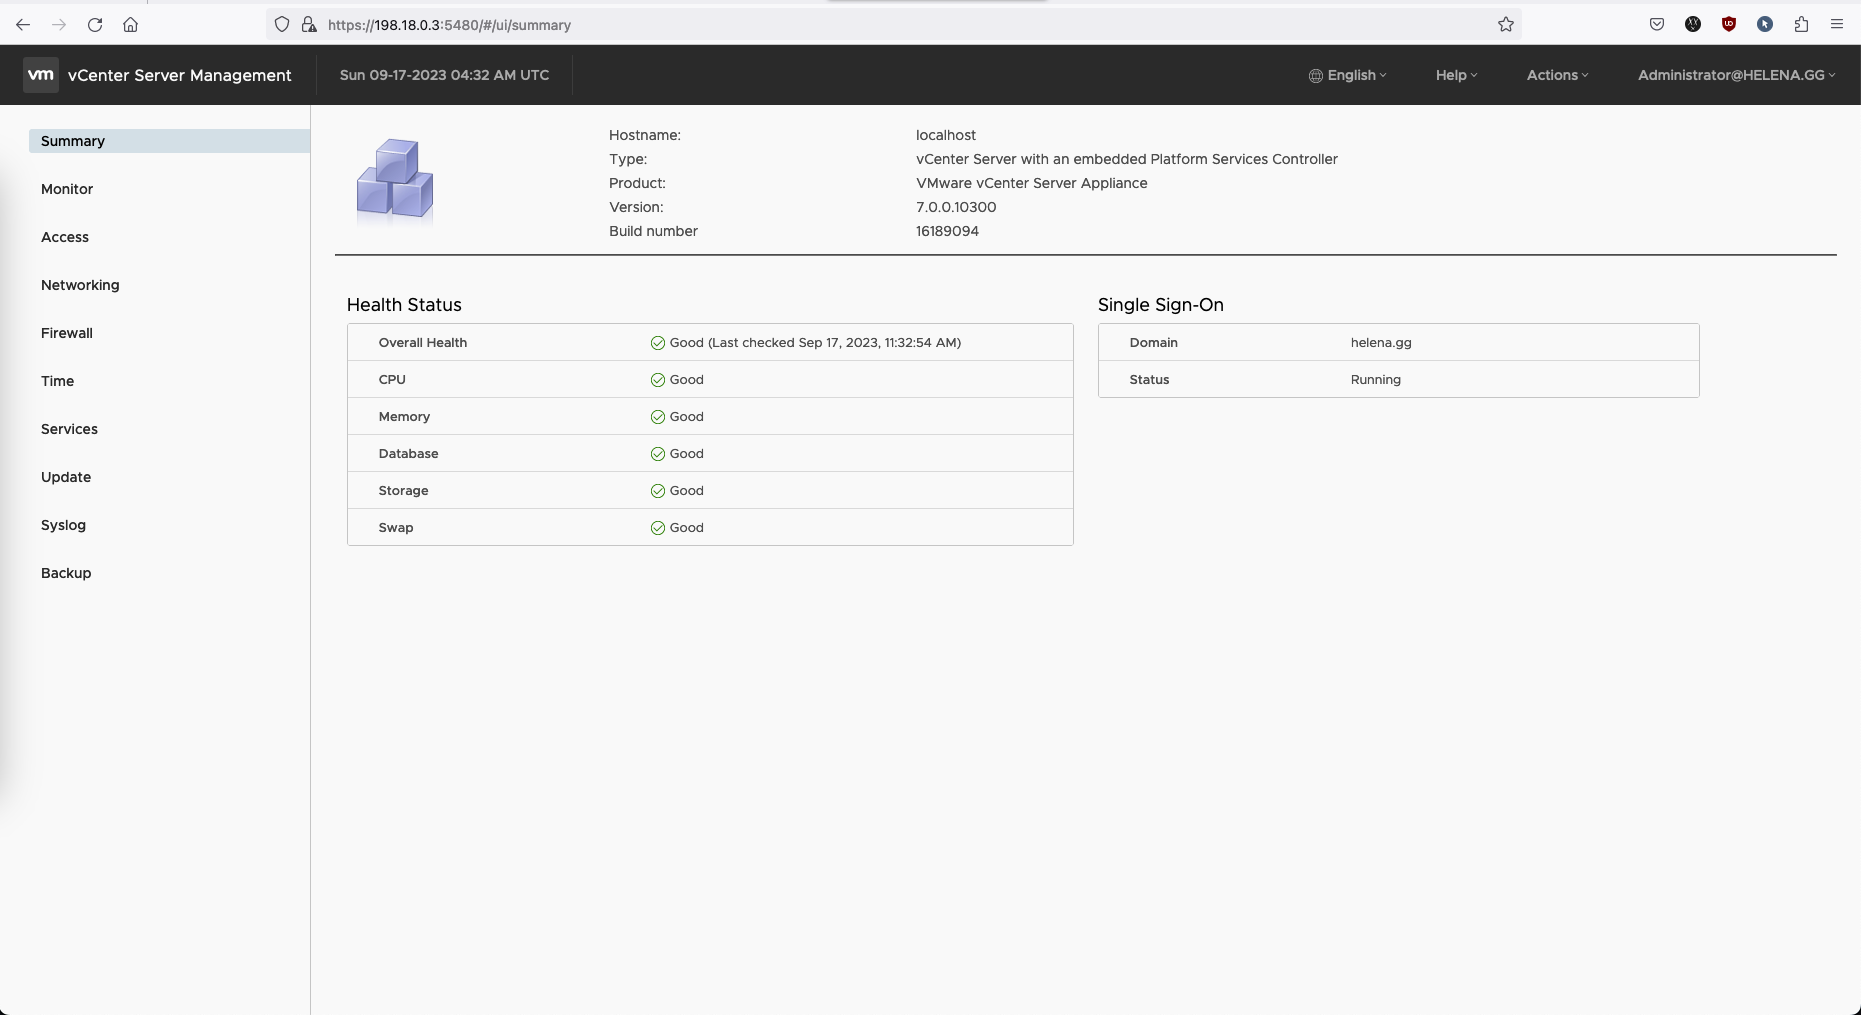
We can also access the management page on port 5480

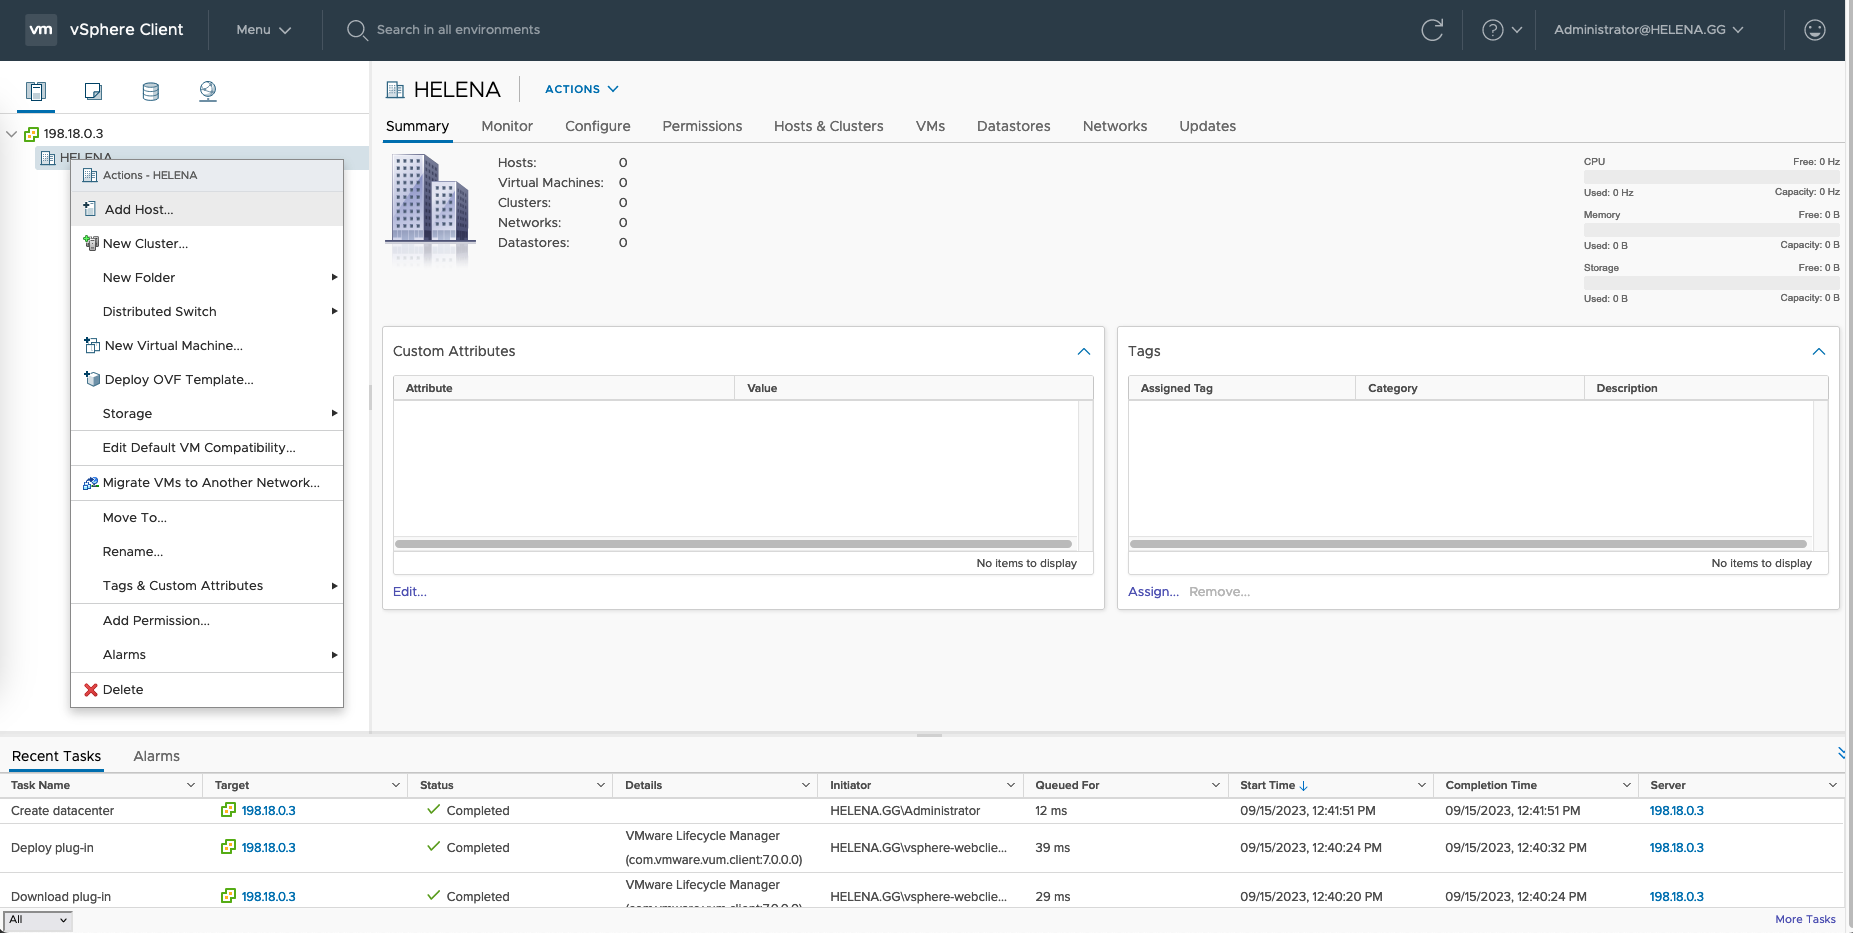
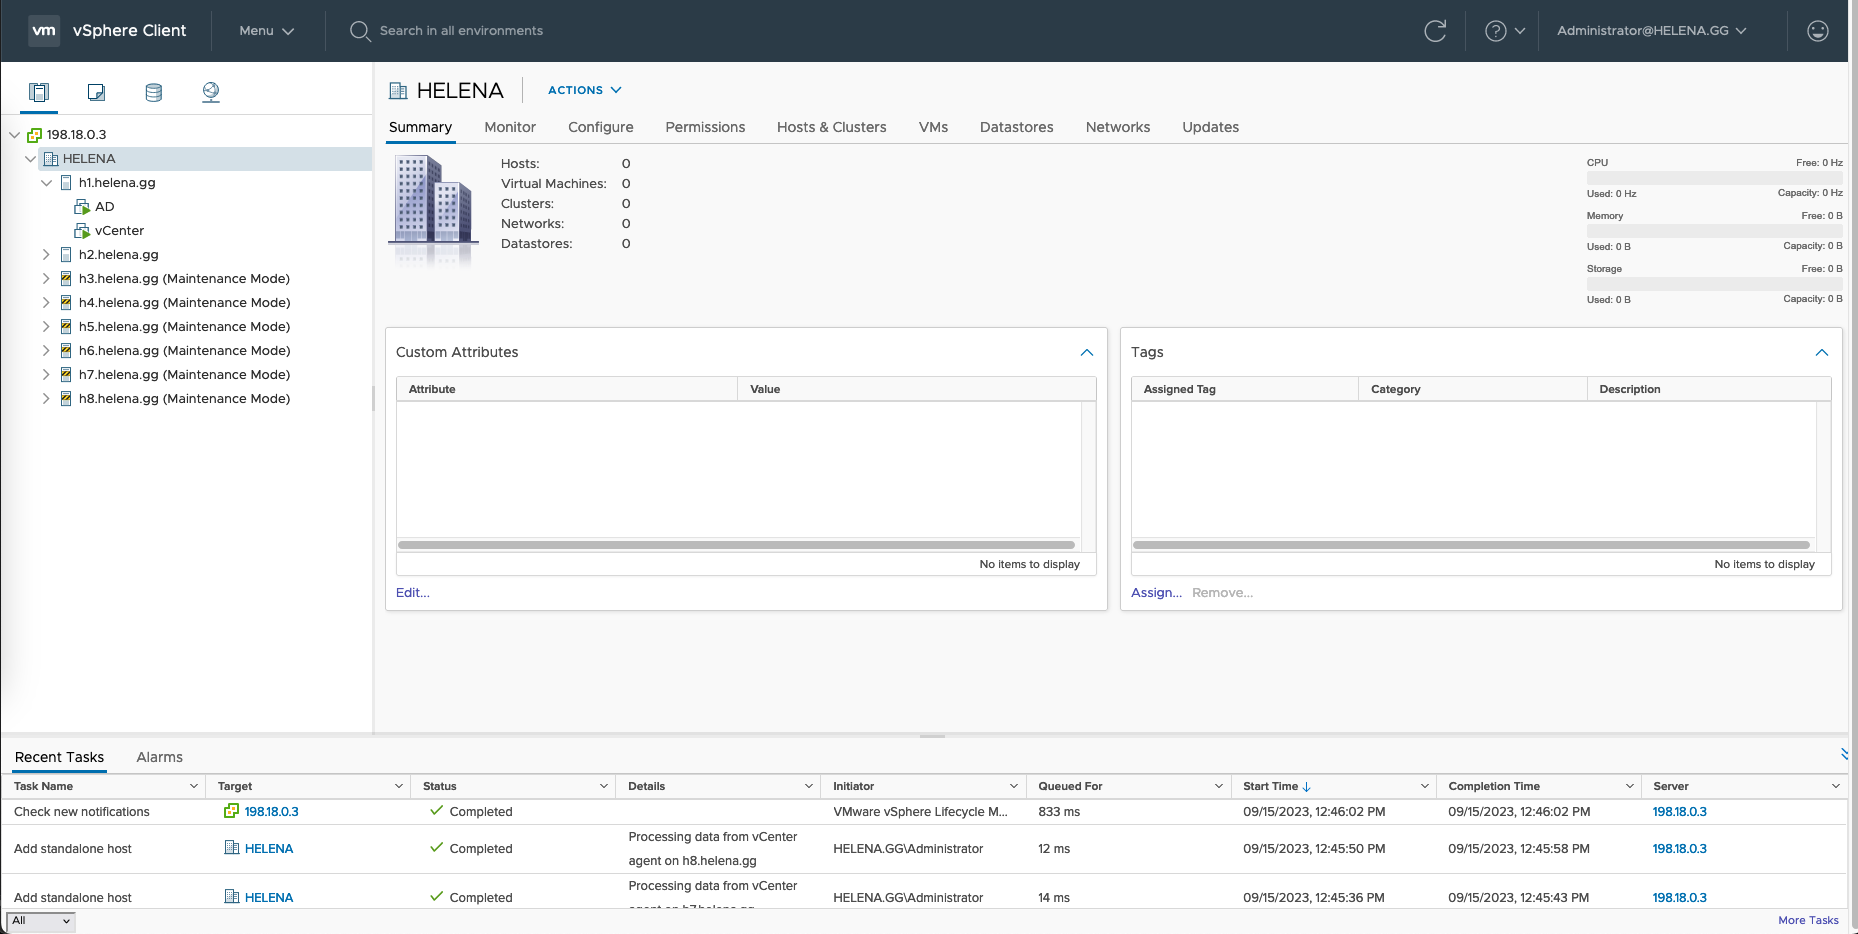
Adding Hosts to vCenter
To add hosts, first Add new Datacenter
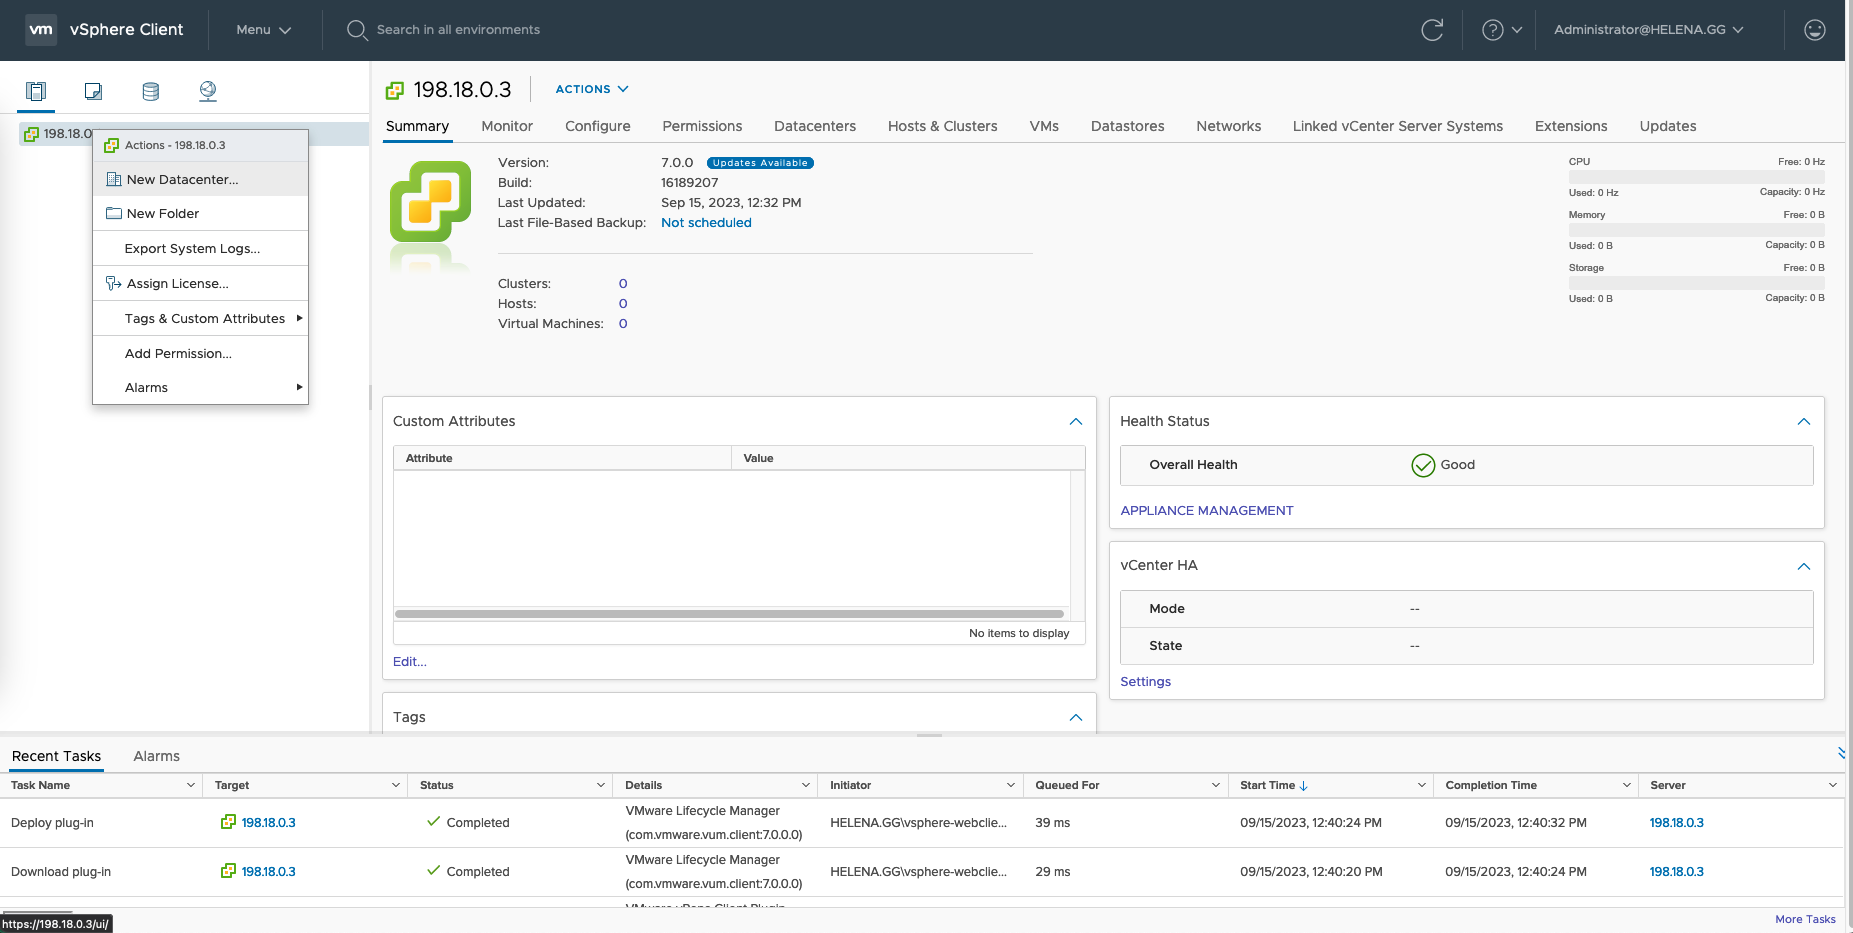
After that, right click on the Datacenter and select add host
Enter hosts’s FQDN or IP and the credentials
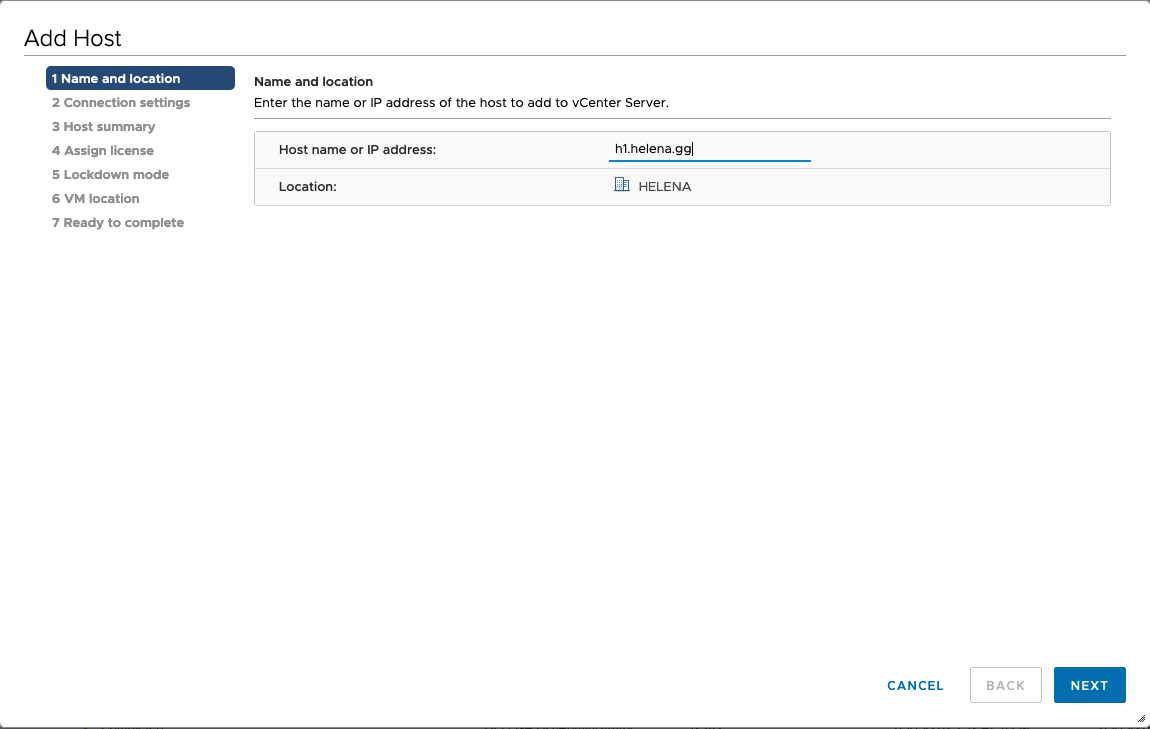
Rinse and repeat for the rest of the hosts
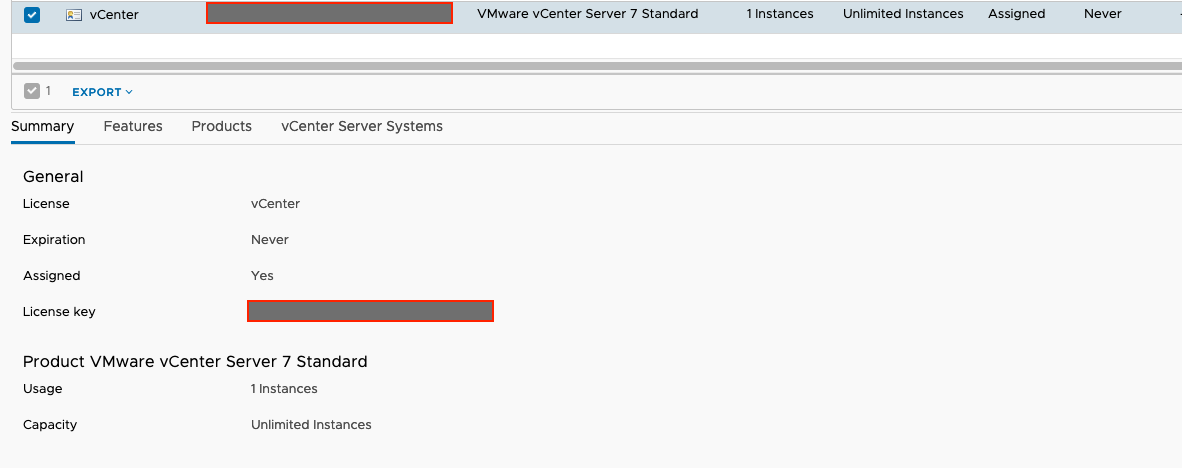
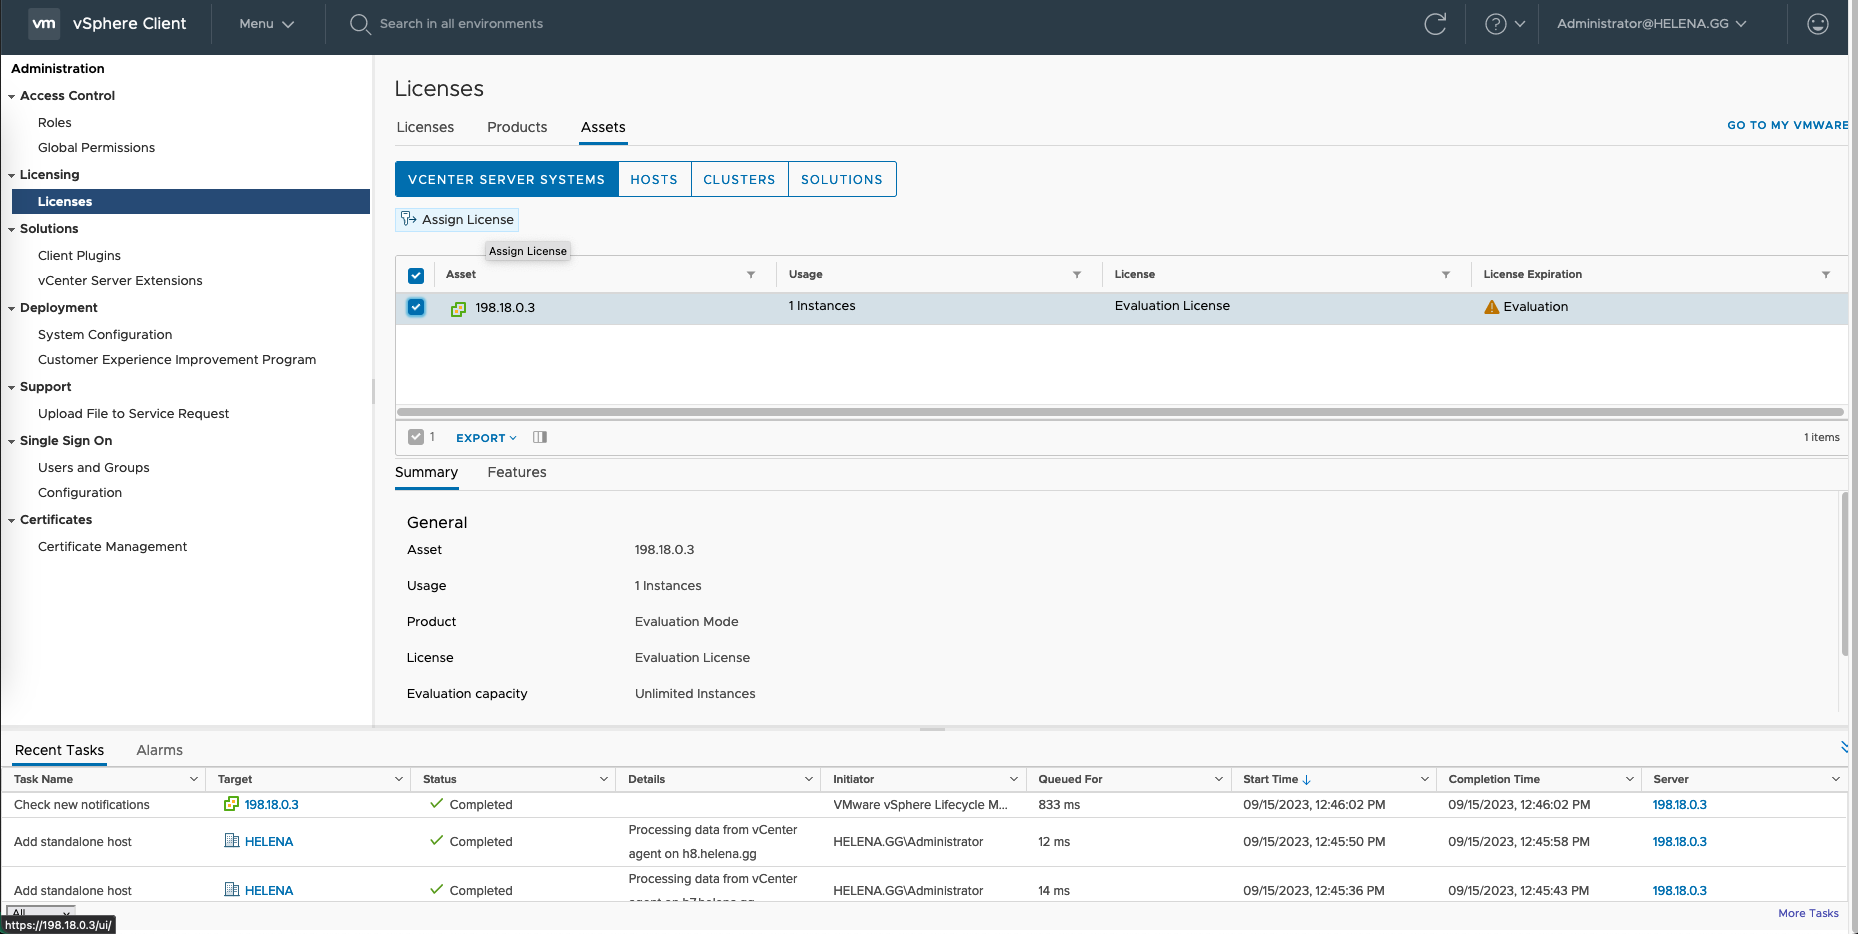
Assigning Licenses
Go to Administration » Lincese » Add new license
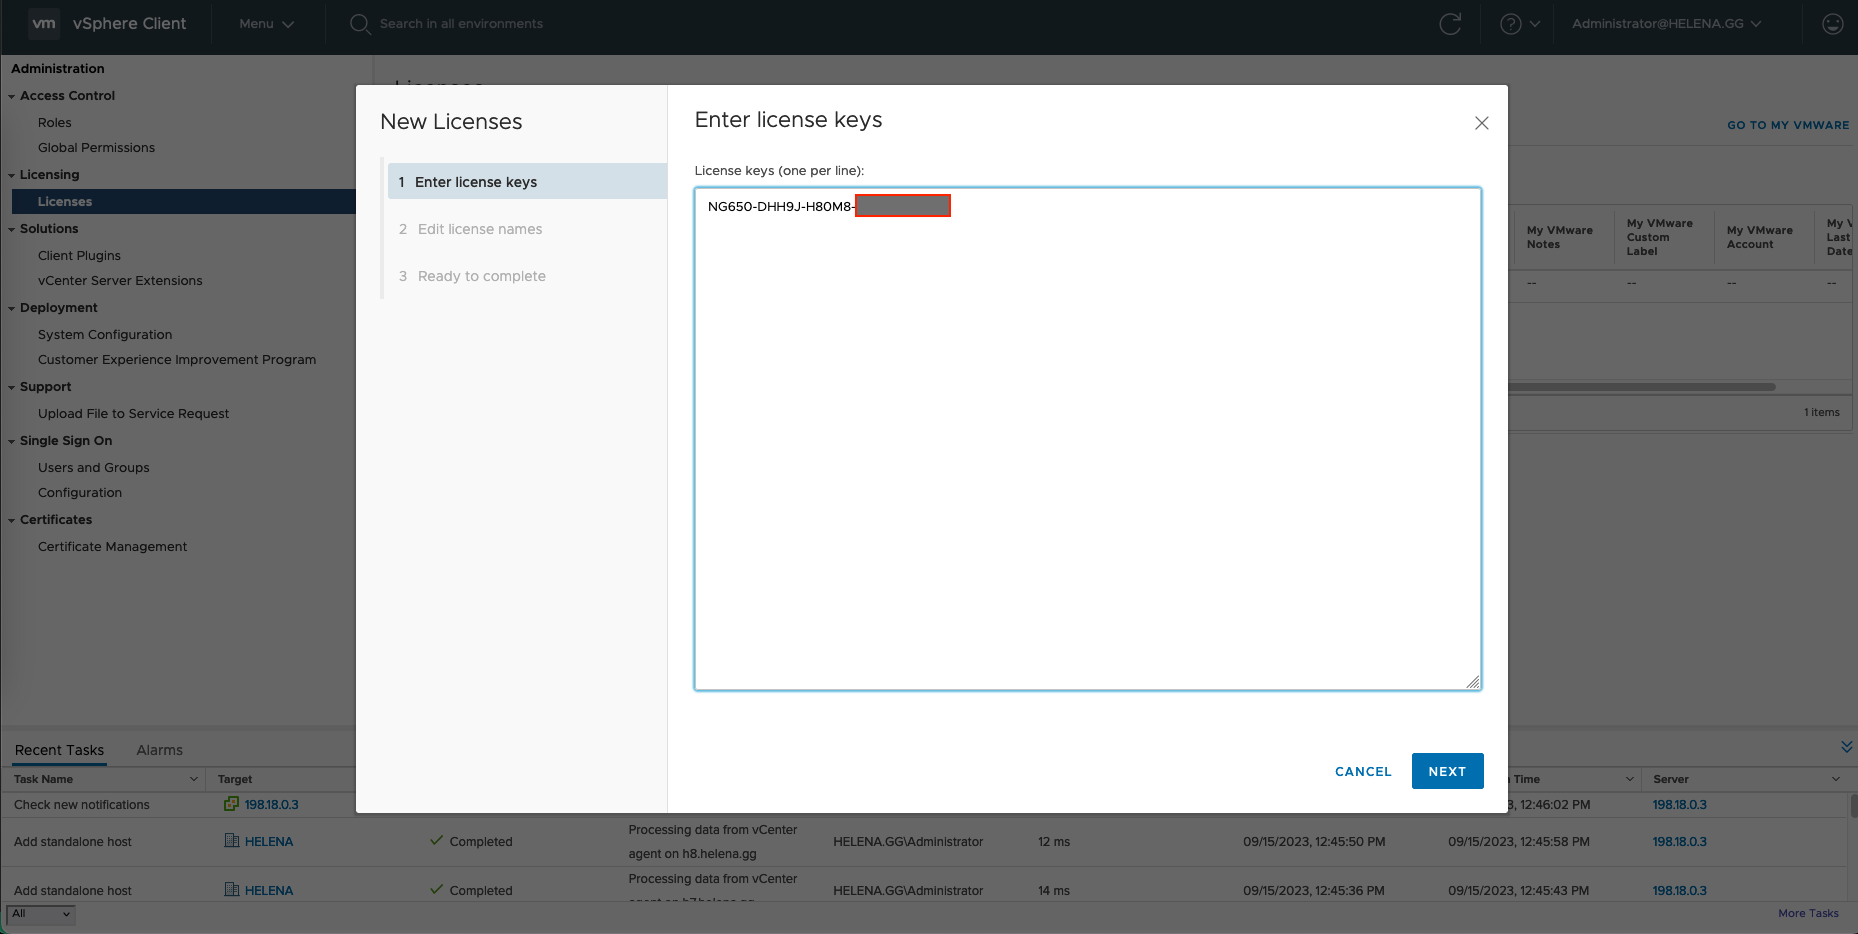
Give it a name and finish

Go to assets, select the vCenter and click assign license
Select the newly added license
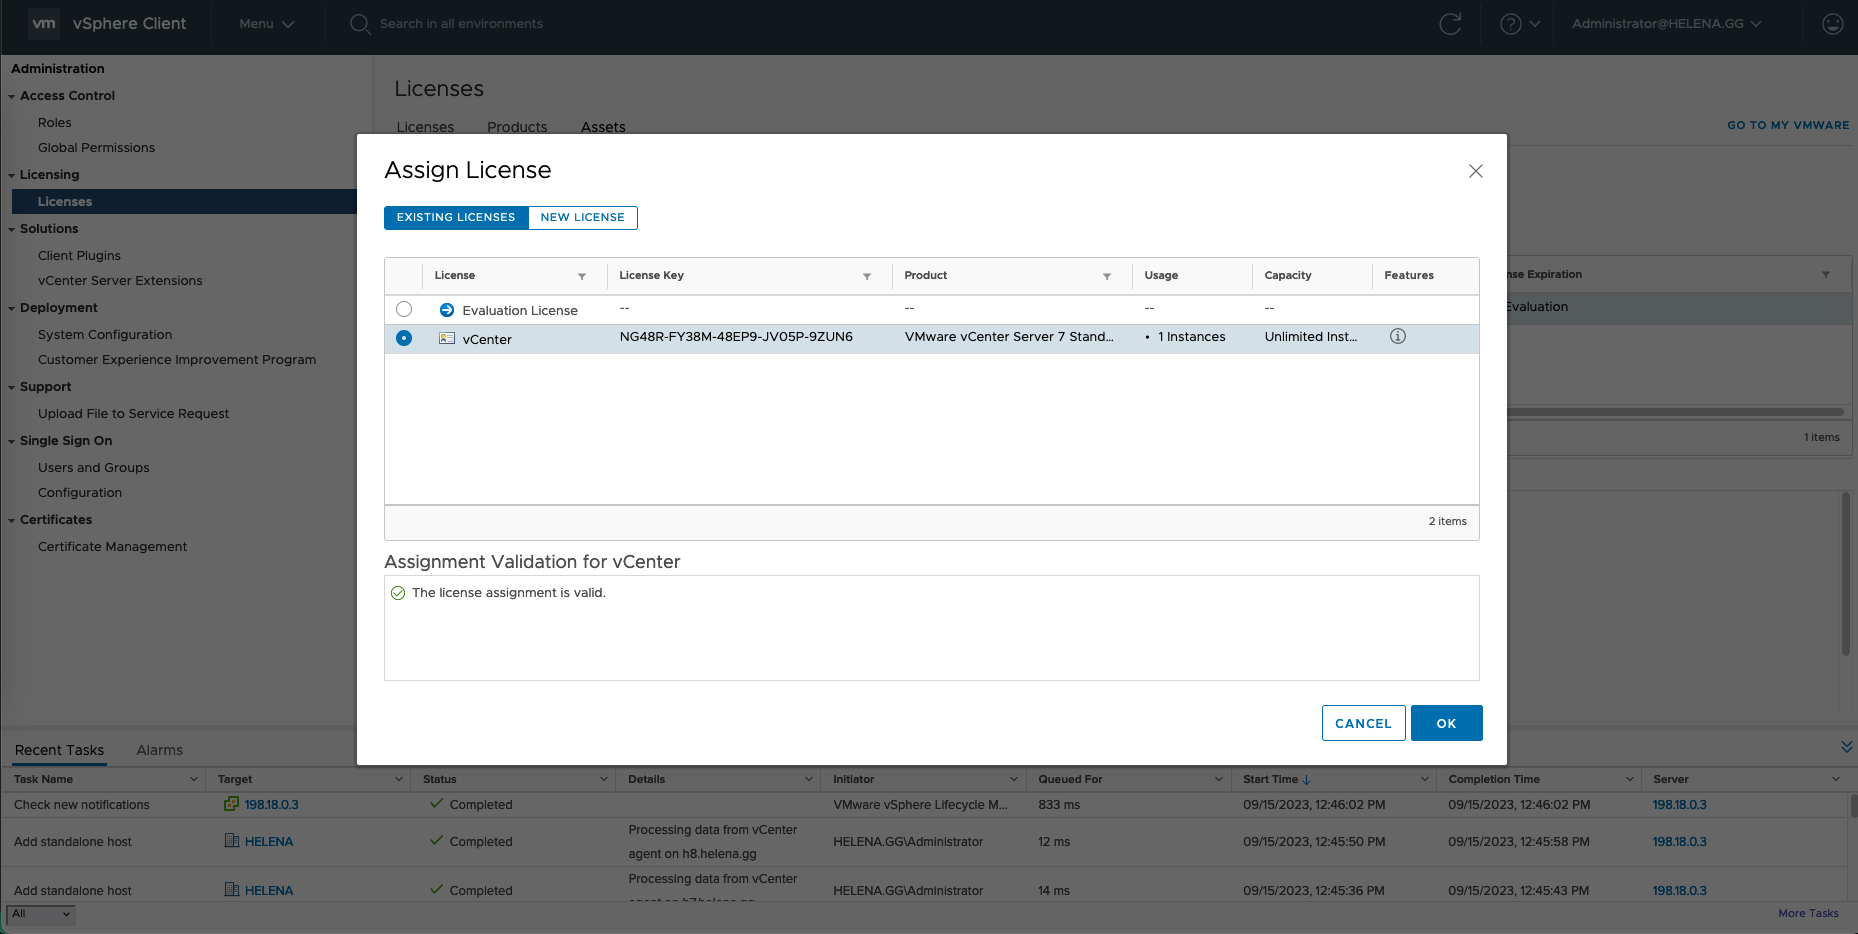
Now the vCenter should be licensed